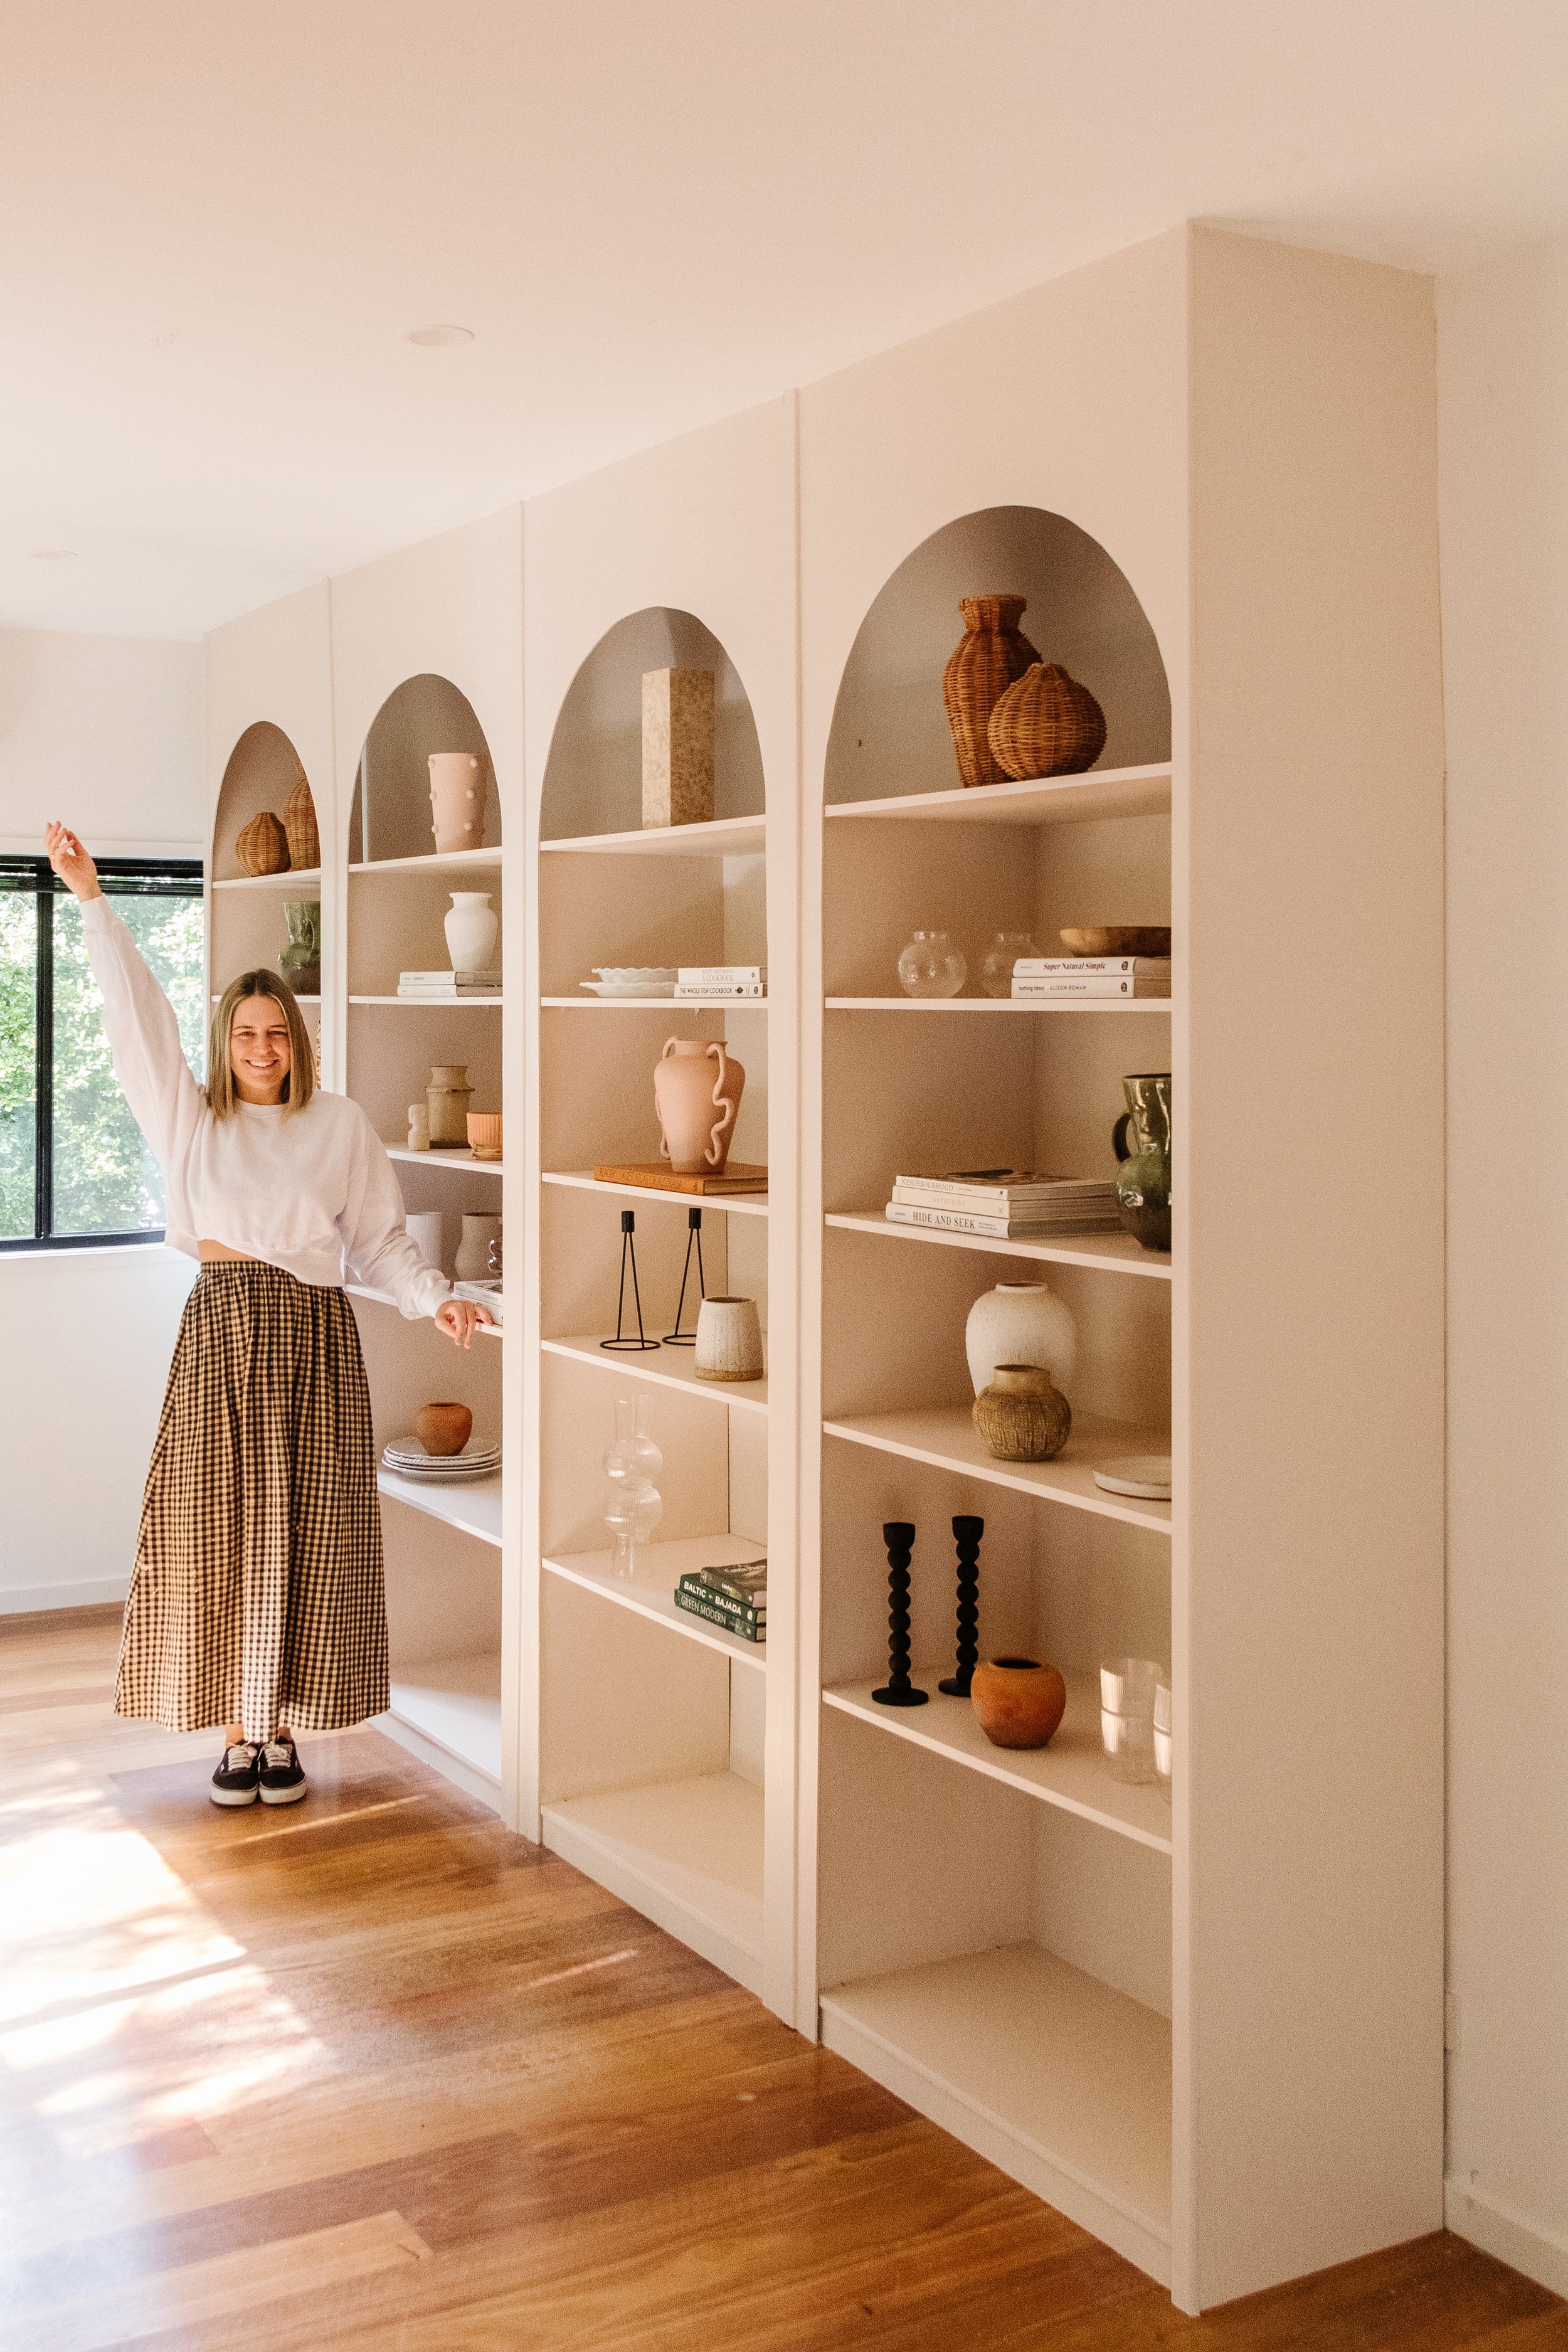
Are you looking to add a unique touch to your living space? An arched bookshelf is not just a place to store your books—it’s a stunning piece of art that draws attention and adds character to any room.
Imagine having a bookshelf that stands out with its graceful curve, making your collection look even more inviting. In this guide, you’ll discover simple, step-by-step instructions to create your own arched bookshelf, even if you’re new to woodworking. Ready to transform your space and showcase your style?
Let’s get started!
Materials And Tools Needed
Building an arched bookshelf requires specific materials and tools. Choosing the right wood and having the essential tools ready makes the process smooth. Gather all items before starting to save time. This section explains what you need for a successful project.
Choosing The Right Wood
Select wood that is strong and easy to work with. Pine, oak, or birch are popular choices. Pine is affordable and lightweight. Oak offers durability and a nice finish. Birch has a smooth surface and good strength. Avoid wood with knots or cracks. Proper wood ensures your bookshelf lasts long and looks good.
Essential Tools For The Project
Prepare tools for cutting, shaping, and assembling the wood. A jigsaw or band saw is needed for cutting curved arches. A drill helps make holes for screws. Sandpaper smooths rough edges and surfaces. Use clamps to hold pieces while gluing or screwing. Measuring tape and pencil help mark precise cuts. These tools make building easier and safer.
Credit: www.smorhome.com
Planning Your Bookshelf
Planning your arched bookshelf is the first step toward a beautiful project. It helps you avoid mistakes and saves time. Careful planning sets a clear path for building. It ensures the shelf fits your space and style perfectly.
Focus on details like size, shape, and materials before starting. Sketching your ideas on paper gives a good visual guide. Choosing the right arch style impacts the final look and feel. Thoughtful preparation makes the building process smooth and fun.
Measuring And Sketching The Design
Start by measuring the space for your bookshelf. Measure width, height, and depth carefully. Accurate measurements prevent fitting problems later. Use a pencil and ruler to sketch your design. Draw the basic shape first, then add shelves and the arch. Keep your sketch simple but clear. This plan will guide your cuts and assembly.
Deciding The Arch Style
Choose an arch style that fits your room and taste. A gentle curve adds softness to the design. A sharp arch creates a bold, modern look. Consider the strength and complexity of each style. Some arches need more skill and tools. Pick a style that matches your ability and tools. The right arch style makes your bookshelf unique.
Cutting The Wood
Cutting the wood is a key step in building an arched bookshelf. It shapes the main structure and defines the arch’s beauty. Careful cutting ensures the wood fits well and looks smooth.
Precision and safety matter most during this process. You need to mark the curve clearly and use the right tools to cut it safely. This part sets the foundation for the whole project.
Marking The Arch Curve
Start by drawing the arch on your wood piece. Use a flexible curve ruler or a string with a pencil tied to mark the curve. Make sure the curve is smooth and even on both sides.
Double-check measurements to keep the arch balanced. Marking clearly helps to avoid mistakes while cutting. Take your time to get the perfect shape.
Safe Cutting Techniques
Use a jigsaw or a bandsaw to cut along the marked curve. Keep your hands away from the blade. Wear safety glasses and ear protection during cutting.
Cut slowly and steadily for a smooth edge. Follow the line closely without rushing. After cutting, sand the edges to remove rough spots and splinters.
Credit: www.smorhome.com
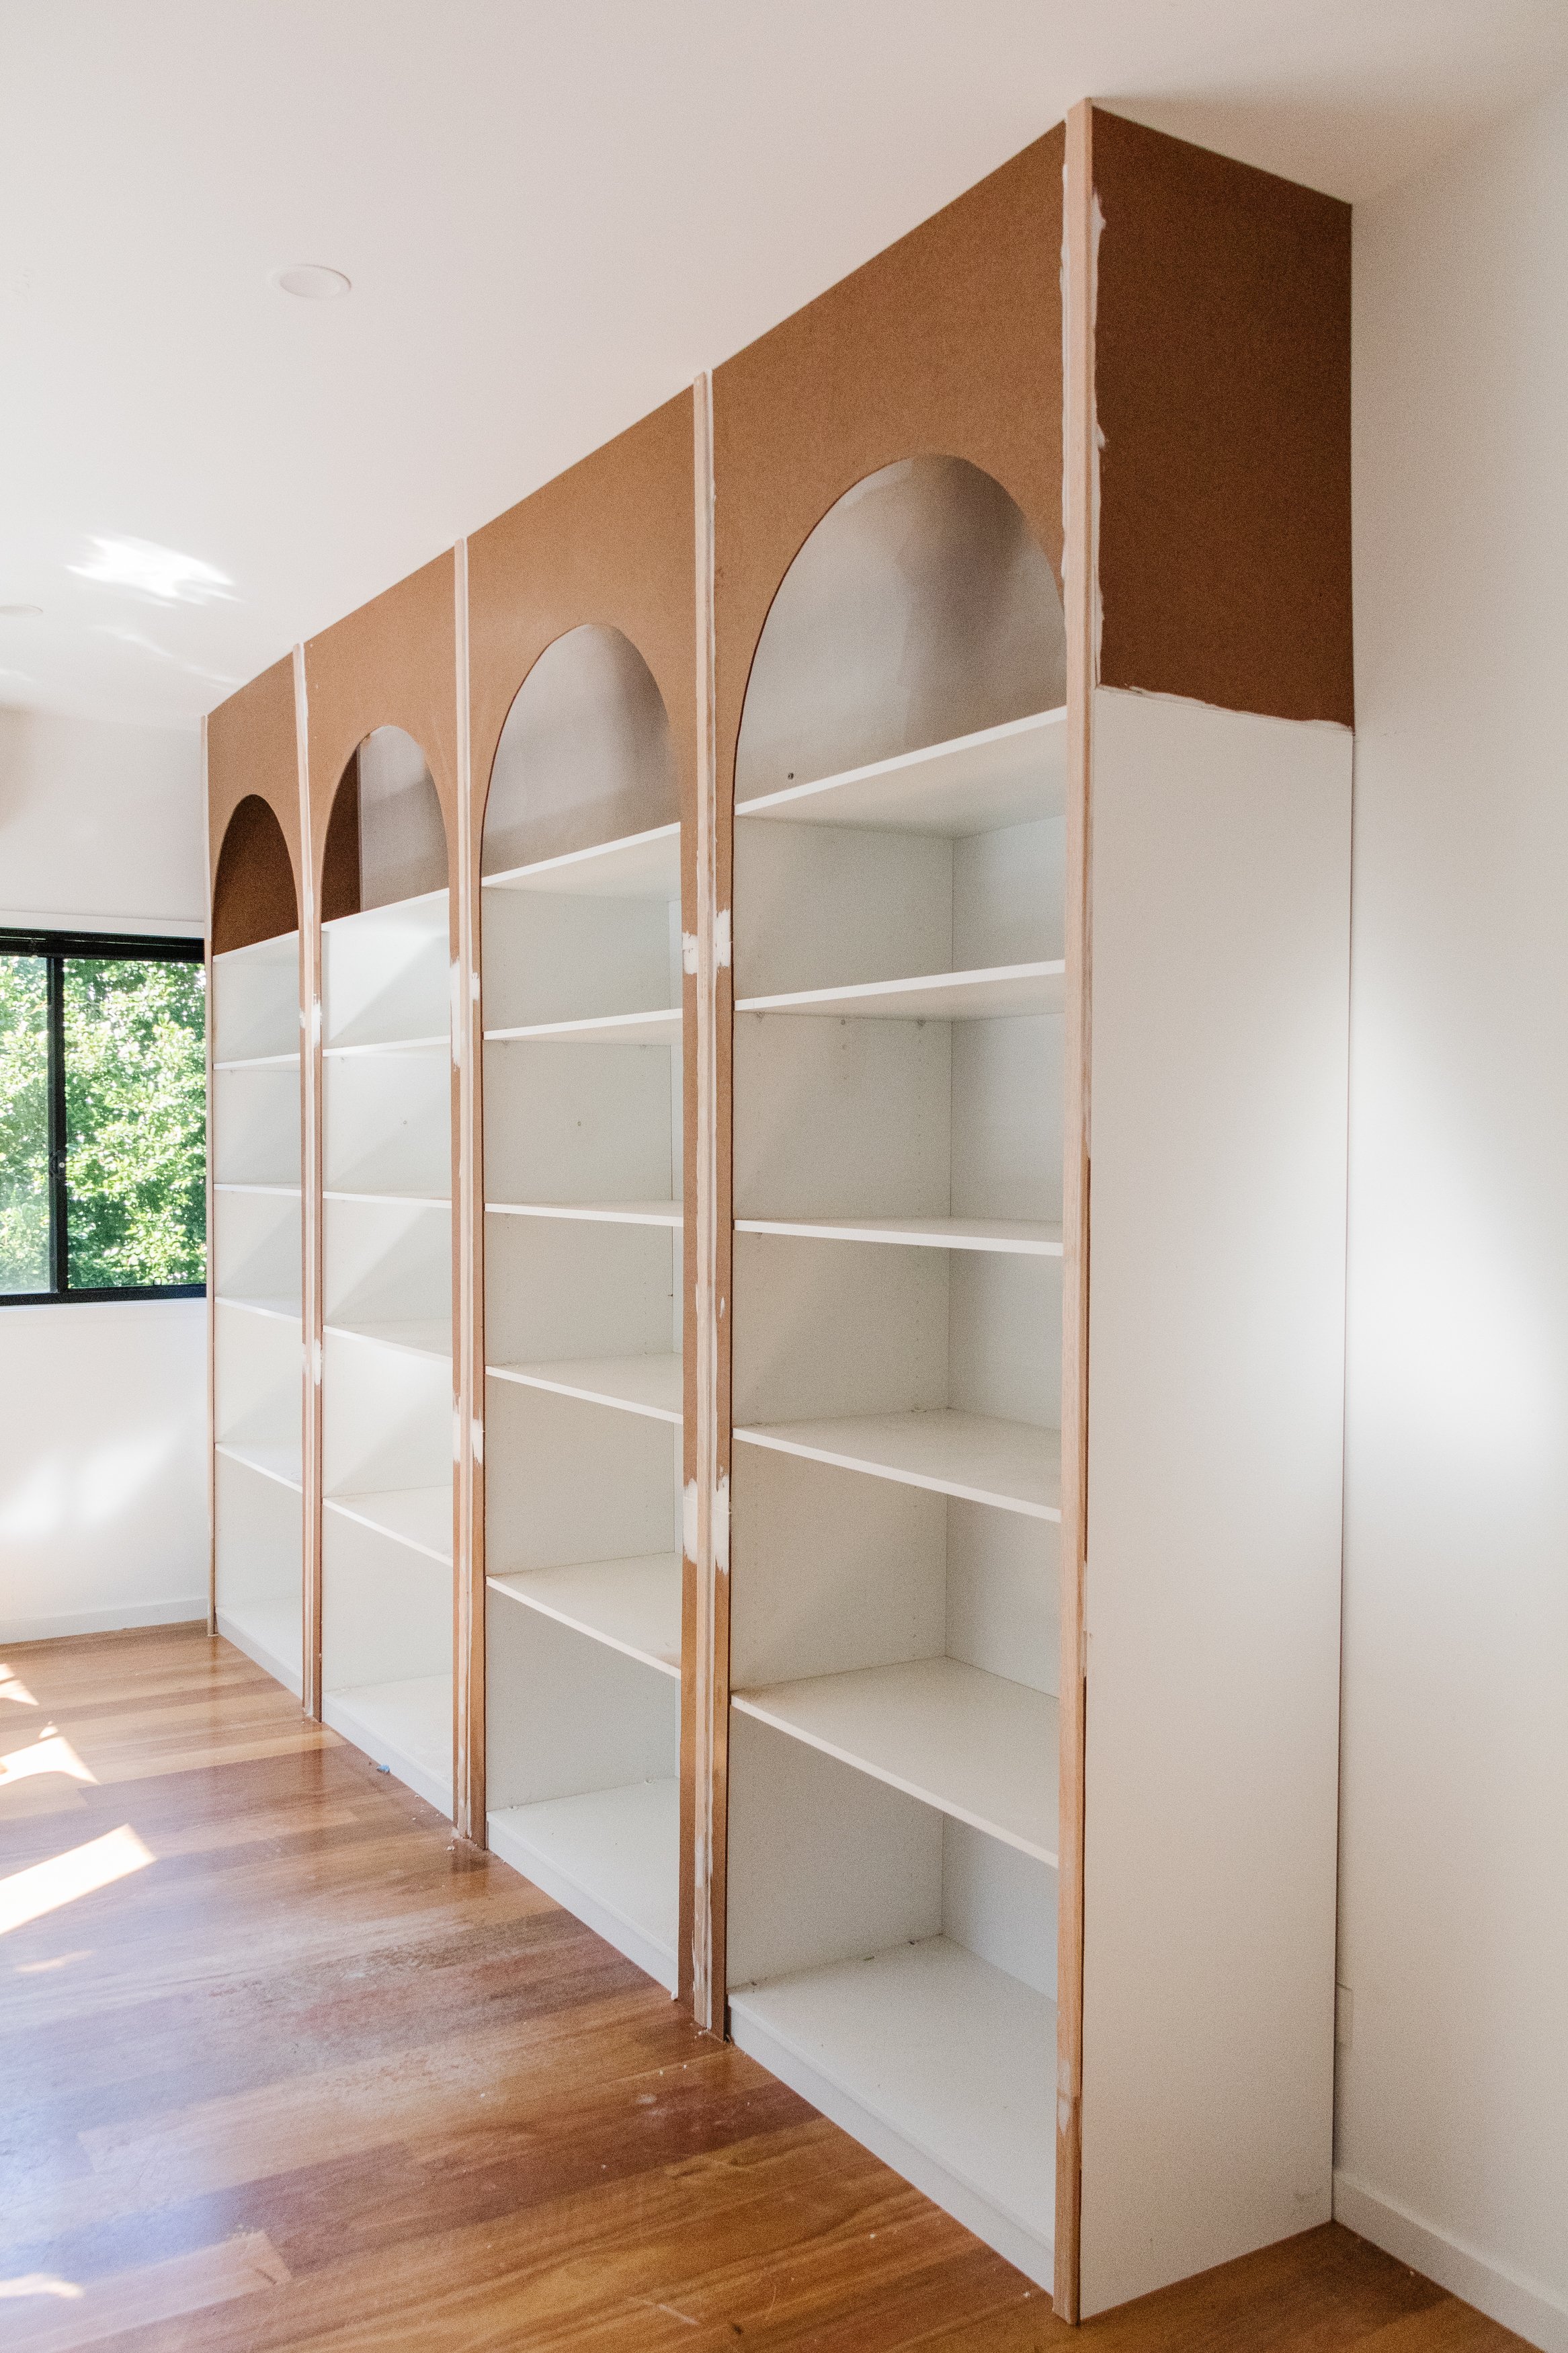
Assembling The Frame
Assembling the frame is the first step to build your arched bookshelf. It forms the base that supports the entire structure. A strong frame keeps the shelf steady and safe for your books.
Take your time to fit the pieces correctly. A well-assembled frame makes the rest of the project easier.
Joining The Pieces
Start by laying out all parts on a flat surface. Match each piece according to your plan. Use wood glue on the edges before joining.
Secure each joint with screws or nails for extra strength. Check that the arch shape is smooth and even. Avoid gaps between pieces to keep it strong.
Ensuring Stability And Alignment
Use a level tool to keep the frame straight. Align all corners at right angles. Tighten all screws firmly but don’t over-tighten.
Place clamps to hold the frame steady while drying. Let the glue set fully before moving the frame. This ensures a sturdy and balanced bookshelf.
Adding Shelves
Adding shelves to an arched bookshelf shapes its look and function. Shelves hold your books and decorative items. Careful planning helps your bookshelf stay strong and balanced. This section guides you through spacing and securing shelves correctly.
Spacing And Placement
Decide shelf height based on the items you want to store. Keep space between shelves enough for books or decor. Measure carefully and mark spots on the arch frame. Even spacing creates a neat, balanced look. Mix tall and short spaces for variety.
Securing The Shelves
Use strong brackets or supports to hold the shelves firmly. Attach brackets to the frame with screws for better strength. Check each shelf is level before fixing it fully. Tighten all screws to avoid wobbling. Test shelves by placing weight on them gently.
Finishing Touches
Finishing touches are the last steps to make your arched bookshelf look great. They protect the wood and give it a polished look. Taking time here improves both beauty and durability. A smooth, clean surface helps paint or stain stick better. These steps make your project stand out and last longer.
Sanding And Smoothing
Start by sanding all wood surfaces. Use medium-grit sandpaper to remove rough spots. Then switch to fine-grit paper for a soft finish. Sand in the direction of the wood grain. This prevents scratches and makes the surface even. Pay special attention to edges and curves. Wipe dust away with a damp cloth before moving on.
Painting Or Staining Options
Choose paint or stain based on your style. Paint gives bright colors and hides wood grain. Stain shows the natural wood pattern and adds warmth. Apply thin, even coats for the best look. Let each layer dry fully before the next. Use a brush or cloth for smooth coverage. Finish with a clear sealant to protect the surface.
Tips For Maintenance
Keeping your arched bookshelf in great shape needs regular care and smart habits. Good maintenance helps the wood stay strong and the arch keep its shape. Small efforts every week can stop big problems later.
Simple cleaning and avoiding damage protect the beauty and function of your shelf. Follow these tips to enjoy your arched bookshelf for many years.
Cleaning And Care
Dust your bookshelf often using a soft cloth. This stops dust from building up and scratching the wood. Use a damp cloth for sticky spots, but never soak the wood. Dry the surface right after cleaning to avoid water marks.
Use wood polish or wax once a month. This keeps the wood shiny and helps protect it from drying out. Avoid harsh chemicals that can damage the finish or wood surface.
Preventing Damage
Place the bookshelf away from direct sunlight. Sunlight can fade the wood and weaken glue joints. Keep it away from heat sources like radiators or vents to stop warping or cracking.
Do not overload the shelves. Heavy weight can bend the arch or break supports. Distribute books evenly and avoid stacking too many items in one spot.
Use felt pads under decorative items to stop scratches. Be gentle when placing or moving objects to protect the wood surface. Regular checks help catch small problems early before they grow worse.

Credit: www.youtube.com
Frequently Asked Questions
What Materials Are Needed To Build An Arched Bookshelf?
You need plywood, wood glue, screws, clamps, sandpaper, and paint. Also, use a jigsaw for cutting curves and a drill for assembly. Quality wood ensures durability and a smooth finish for your arched bookshelf project.
How Do You Create The Arch Shape On A Bookshelf?
Draw the arch on plywood using a compass or string and pencil. Cut carefully along the lines with a jigsaw. Sand edges smooth for a clean, professional look. This step defines the bookshelf’s unique arched design.
How Long Does It Take To Make An Arched Bookshelf?
Building an arched bookshelf typically takes 1 to 3 days. Time depends on skill level, drying times for glue or paint, and complexity of the arch. Planning and preparation can speed up the process.
Can I Customize The Size Of The Arched Bookshelf?
Yes, customize the height, width, and depth to fit your space. Adjust shelf spacing to hold different book sizes. Customization allows the bookshelf to match your room and storage needs perfectly.
Conclusion
Building an arched bookshelf adds charm to any room. The steps are clear and easy to follow. You only need basic tools and some patience. Taking your time ensures a sturdy, beautiful shelf. This project fits well with your home style.
Enjoy placing your favorite books and decorations. Try this DIY to brighten your space today.