Are you tired of clutter piling up at your door? Imagine having a simple, stylish coat rack that fits perfectly in your space—and you made it yourself.
Learning how to make coat rack hooks on U-Tube is easier than you think. In this guide, you’ll discover step-by-step tips that anyone can follow, even if you’re new to DIY projects. By the end, you’ll have a custom rack that keeps your home organized and looks great.
Ready to turn your clutter into calm? Let’s dive in!
Materials Needed
To make coat rack hooks using YouTube tutorials, gather the right materials first. Having the proper tools and supplies ensures smooth progress and good results. This section lists all essentials you need to complete the project easily.
Tools Required
Basic tools include a drill, screwdriver, and measuring tape. A saw helps cut wood to the right size. Sandpaper smooths rough edges for a clean finish. A pencil marks positions for hooks. You may also need a level to keep hooks straight.
Types Of Hooks
Choose hooks based on style and strength. Metal hooks offer durability and a modern look. Wooden hooks blend well with natural wood racks. Coat hooks with multiple prongs hold more items. Pick hooks that suit your space and use.
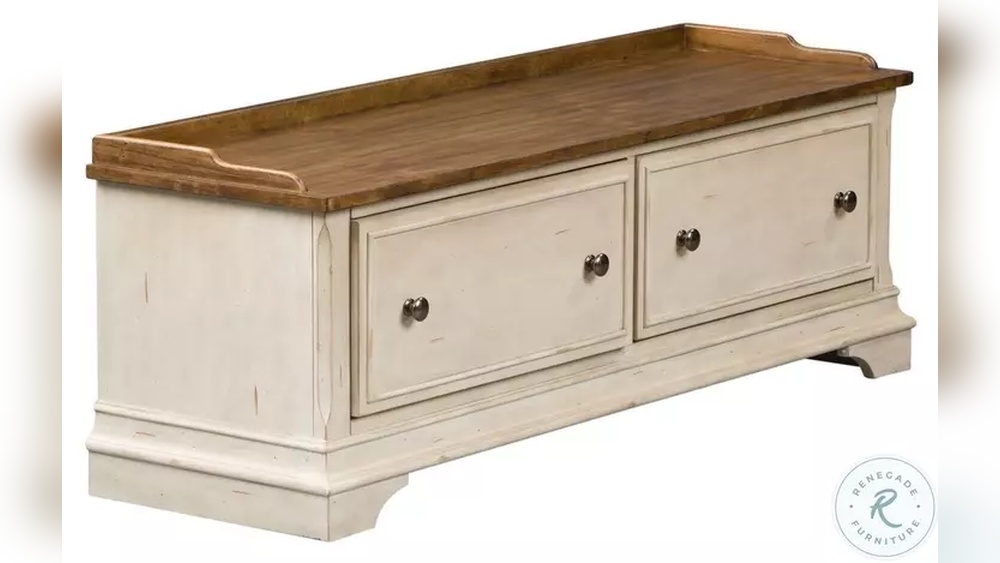
Wood And Finishes
Use sturdy wood like pine, oak, or cedar for the rack. These woods resist wear and support weight well. Sand the wood smooth to avoid splinters. Apply paint, stain, or clear varnish for protection. Finishes also enhance the wood’s color and texture.
Credit: www.etsy.com
Preparing The Wood
Preparing the wood is the first step to make coat rack hooks. Good preparation helps the wood last longer and look better. It also makes sure the hooks hold tight and work well. The wood should be cut to the right size and then smoothed out. This makes the project easier and safer.
Measuring And Cutting
Start by measuring the wood pieces carefully. Use a tape measure and mark the length with a pencil. Measure twice to avoid mistakes. Cut the wood using a saw. Follow the lines you marked. Cut straight to keep the wood even. This step sets the base for your coat rack hooks.
Sanding And Smoothing
After cutting, sand the wood edges and surfaces. Use sandpaper with medium grit first. Sand in the direction of the wood grain. This removes rough spots and splinters. Then, use fine grit sandpaper to make the wood smooth. Smooth wood looks nice and feels safe to touch. Take your time to get a good finish.
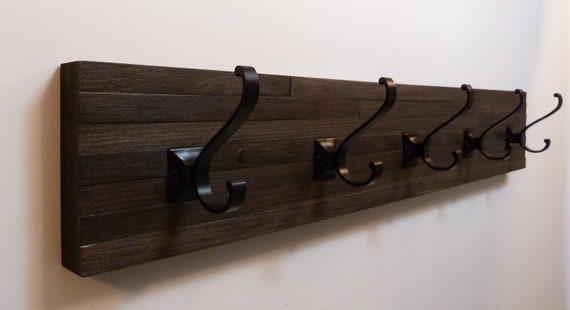
Attaching The Hooks
Attaching the hooks is a key step in making your coat rack sturdy and useful. Proper placement and secure fixing keep the hooks strong. This part ensures your rack holds coats without falling.
Marking Hook Positions
Start by deciding where each hook will go. Use a pencil to mark spots evenly along the rack. Measure the distance between marks for balance. Make sure the hooks are at a comfortable height. Marking first helps avoid mistakes later.
Securing Hooks Properly
Choose screws that fit the hooks well. Use a drill or screwdriver to fix each hook firmly. Tighten screws but avoid splitting the wood. Check each hook’s stability by pulling gently. Secure hooks hold coats safely without wobbling.

Credit: www.youtube.com
Finishing Touches
Finishing touches give your coat rack hooks a professional look. They protect the wood and make it last longer. These steps add beauty and strength to your project.
Painting Or Staining
Choose paint or stain based on your style. Paint covers the wood completely and adds color. Stain soaks into the wood and shows the grain. Apply thin, even coats for best results. Let each coat dry before adding another. Use a brush or cloth for smooth application.
Sealing For Durability
Sealing protects your coat rack from water and wear. Use clear sealers like polyurethane or varnish. Apply with a clean brush in light coats. Allow drying time between layers. This makes the hooks strong and easy to clean. Sealing helps maintain the finish for years.
Mounting The Rack
Mounting the coat rack hooks properly is key to a strong and lasting installation. The rack needs to hold weight without falling or damaging your walls. This part of the project requires care and the right tools.
Follow clear steps to mount your rack securely. Knowing the wall type and using the right anchors ensures stability. It also protects your wall from damage.
Choosing The Right Wall
Pick a wall that can hold the rack’s weight. Drywall alone may not be strong enough. Stud walls offer better support for heavy items.
Use a stud finder to locate studs behind the wall. Mark the spots where you want to install the hooks. Avoid plaster or hollow walls for heavy racks.
Installing Wall Anchors
Wall anchors provide extra strength for screws in drywall. Choose anchors based on the rack’s weight and wall type. Plastic anchors work for light racks; metal anchors suit heavier racks.
Drill holes at marked points carefully. Insert the wall anchors fully into the holes. Screw the rack hooks into the anchors firmly for a secure fit.
Tips For Customization
Customizing your coat rack hooks makes them unique and fits your style. Small changes can change the look and feel of the rack. Personal touches help your coat rack stand out and match your room decor. Use simple ideas to make your hooks more appealing and useful.
Try different ways to add personality and function. The right details make your coat rack both pretty and practical. Focus on easy steps that anyone can do at home.
Adding Decorative Elements
Add color by painting the hooks with bright or soft shades. Use stencils or patterns for interesting designs. Attach small items like beads or buttons for texture and charm. Wrap hooks with twine or fabric strips for a rustic look. These small decorations give your rack a fresh, new style.
Using Different Hook Styles
Choose hooks in various shapes and sizes to create a fun mix. Try vintage hooks for a classic feel or modern styles for a sleek look. Mix metal, wood, or plastic hooks to add texture and contrast. Different hooks can hold heavier coats or small accessories. This variety helps make your coat rack both useful and attractive.

Credit: www.amazon.com
Frequently Asked Questions
How Do I Make Coat Rack Hooks On U-tube?
To make coat rack hooks on U-Tube, cut and bend metal or wood into hook shapes. Attach them securely to a base. Use strong materials for durability. Follow step-by-step tutorials for precise measurements and safe assembly.
What Materials Are Best For Diy Coat Rack Hooks?
Strong metals like steel or aluminum, and hardwoods like oak, are best. These materials ensure durability and hold weight well. Choose rust-resistant metals for longevity. Avoid soft woods or flimsy materials to prevent bending or breaking.
Can Beginners Easily Make Coat Rack Hooks?
Yes, beginners can make coat rack hooks with basic tools. Start with simple designs and follow clear tutorials. Practice bending and attaching hooks safely. Using pre-cut materials can simplify the process and improve results.
How Do I Attach Coat Rack Hooks Securely?
Use screws or strong adhesives to attach hooks to a sturdy base. Pre-drill holes to avoid wood splitting. Make sure hooks are evenly spaced for balanced weight distribution. Check stability by gently pulling each hook after installation.
Conclusion
Making coat rack hooks on YouTube is simple and fun. You can find clear videos that show each step. Choose materials you like and follow instructions closely. This helps create hooks that fit your space and style. Try making your own hooks to save money and add a personal touch.
Crafting small projects like this boosts your skills and confidence. Keep practicing, and soon you’ll enjoy making more home items by yourself. Give it a try today!