Are you ready to create a bunk bed that fits your space perfectly and matches your style? Making your own bunk bed is easier than you think, and it can save you money while giving you exactly what you want.
Imagine having a sturdy, custom bed that’s built just for your home. In this guide, you’ll discover simple steps and handy tips to build a safe and stylish bunk bed from scratch. Keep reading, and you’ll soon have the confidence and know-how to bring your project to life.
Planning Your Bunk Bed
Planning your bunk bed is the first step to a successful build. Careful planning saves time and prevents mistakes. Think about who will use the bed and the room layout. This helps create a safe and comfortable design.
Choosing The Right Design
Select a design that fits your needs and style. Consider a classic bunk bed or a loft bed with a desk. Think about safety features like guardrails and sturdy ladders. Simple designs often work best for beginners.
Selecting Materials
Pick materials that are strong and easy to work with. Wood is a popular choice for bunk beds. Pine and oak are durable and affordable. Use screws and brackets for extra support. Avoid materials that can splinter or break easily.
Measuring Your Space
Measure the room carefully before building. Check the height, width, and length of the available space. Leave enough room for walking and other furniture. Measure doorways and stairs to ensure the bed fits through. Accurate measurements make the build smoother and safer.
Credit: nestingwithgrace.com
Gathering Tools And Supplies
Gathering the right tools and supplies is the first step in building a sturdy bunk bed. Having everything ready makes the process smoother and safer. You will save time and avoid frustration by preparing in advance.
Essential Tools List
You need a few key tools to build a bunk bed. A saw helps cut the wood to size. A drill makes holes and drives screws quickly. Measuring tape ensures accurate dimensions. Sandpaper smooths rough edges. A screwdriver is useful for tightening screws. A level checks that parts are straight. Clamps hold pieces firmly while you work.
Wood And Hardware Choices
Choose strong wood like pine or oak for the bed frame. These woods support weight well and last longer. Select screws that are long and sturdy enough to hold parts together. Use bolts and washers for extra strength at joints. Pick wood glue to add extra hold. Avoid nails; screws give better safety and durability.
Cutting And Preparing Wood
Cutting and preparing wood is a key step in building your own bunk bed. It shapes the wood pieces to fit perfectly. Precise cutting ensures the bed will be strong and safe. Taking time at this stage saves effort later.
Measuring And Marking
Start by measuring the wood carefully. Use a tape measure to get exact lengths. Mark the wood with a pencil for clear guidelines. Double-check each mark before cutting. Accurate measuring helps avoid mistakes and wasted wood.
Safe Cutting Techniques
Always wear safety glasses and gloves before cutting. Use a sharp saw for clean cuts. Cut along the pencil marks slowly and steadily. Keep your fingers away from the blade. Use clamps to hold the wood steady for safety.
Sanding And Finishing
Sand all cut edges to make them smooth. Use fine-grit sandpaper for a soft finish. Smooth wood prevents splinters and improves the bed’s look. Wipe the dust off before assembling the pieces. Ready wood makes assembly easier and safer.

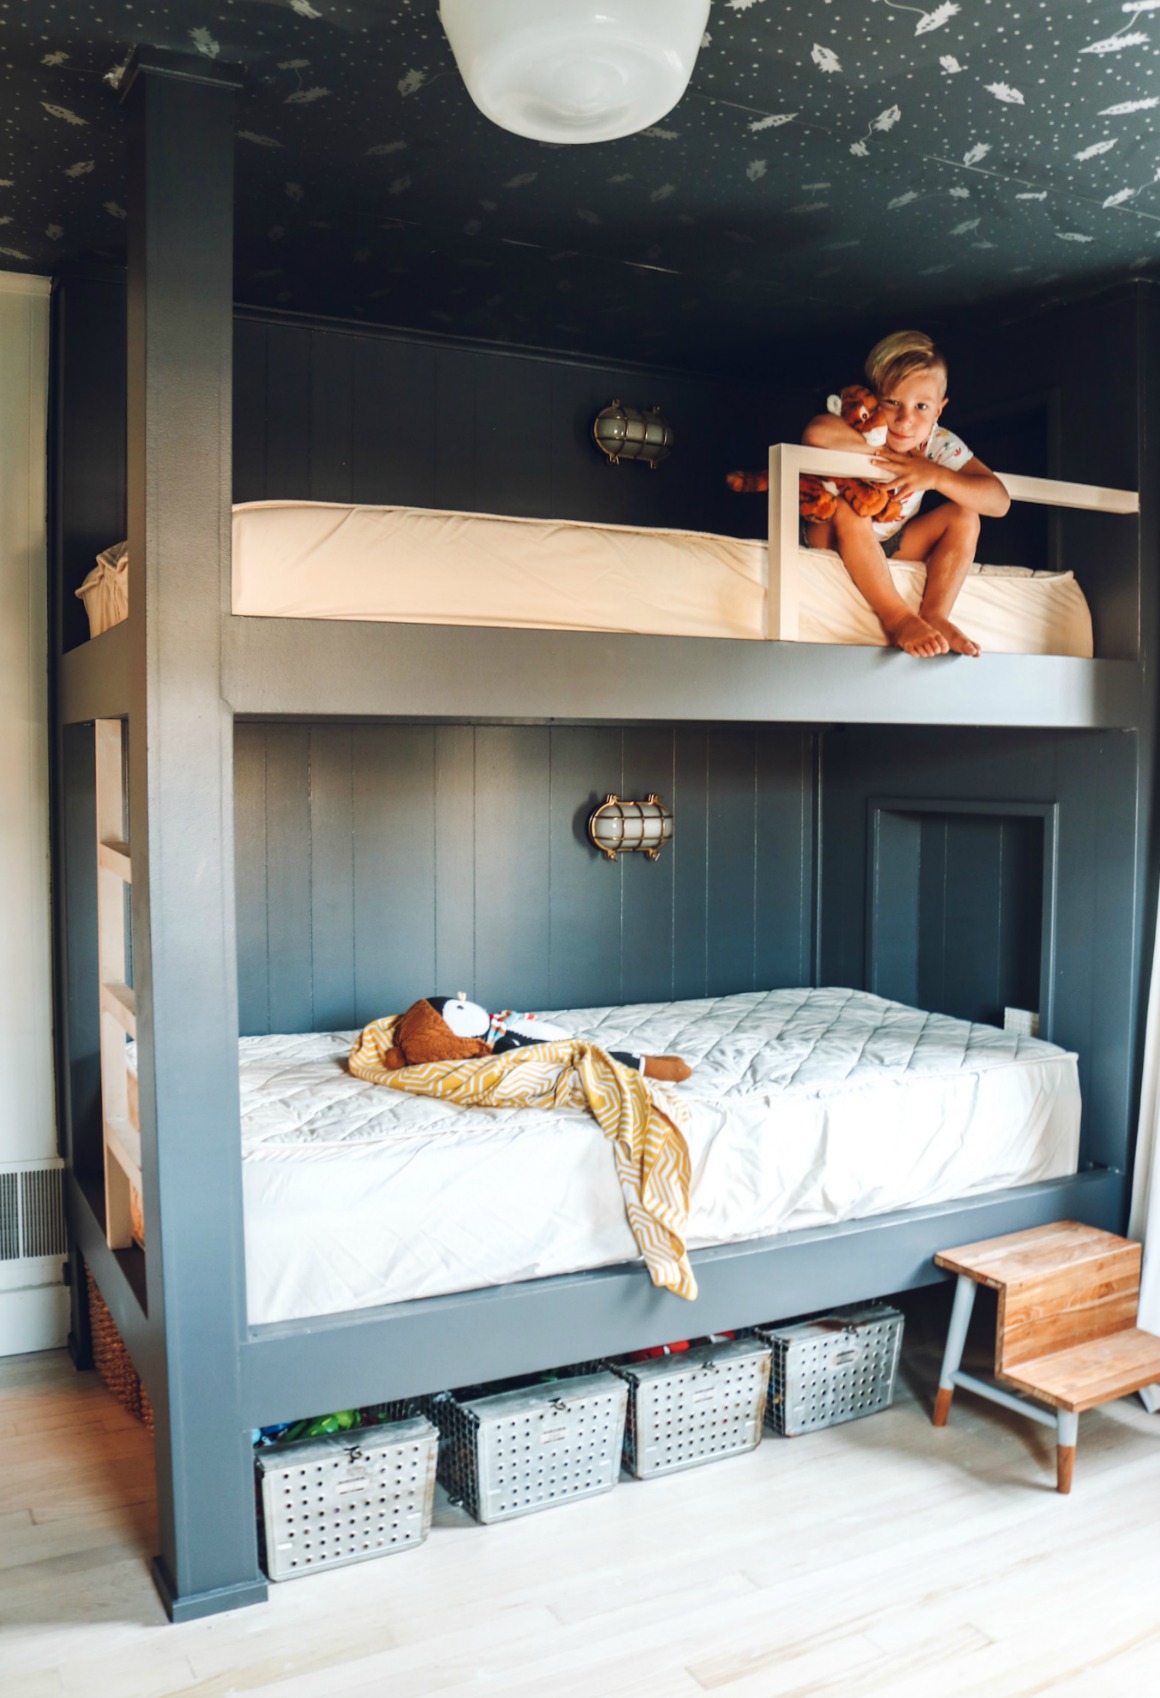
Credit: www.simplifiedbuilding.com
Assembling The Frame
Assembling the frame is the first big step in making your own bunk bed. This part builds the strong skeleton that holds everything together. It needs careful work to make sure the bed is safe and sturdy. Follow simple steps to get the frame ready for the mattress and ladder.
Building The Bedposts
Start with the bedposts. These are the four tall pieces at each corner. Use strong wood that can hold weight without bending. Cut the posts to the right height for your bunk bed design. Sand the edges smooth to avoid splinters. Drill holes in each post to connect the side rails later. Make sure the holes line up perfectly on all posts.
Constructing The Side Rails
The side rails connect the bedposts on the longer sides. Cut two rails for each level of the bunk bed. Check that their length fits the mattress size. Attach metal brackets on the ends for extra strength. Use screws to fix the rails into the holes on the bedposts. This frame part keeps the mattress from falling out.
Attaching Support Slats
Support slats go across the bed frame, under the mattress. They hold the mattress evenly and add strength. Cut several slats from sturdy wood, spacing them about 3 inches apart. Screw each slat securely to the side rails. Make sure the slats do not move or bend. Strong slats help the bed last many years.
Adding Safety Features
Adding safety features is key when making a bunk bed. Safety keeps kids secure and parents calm. Simple, strong safety parts make a big difference.
Installing Guardrails
Guardrails stop kids from falling out of the bed. Use solid wood or metal for guardrails. Make sure they are high enough to hold a sleeping child. Attach guardrails tightly to the bed frame. Check for gaps where a child’s head or limbs could get stuck. Smooth all edges to avoid splinters or cuts. Test the rails by pushing on them firmly.
Building A Sturdy Ladder
A strong ladder helps kids climb safely to the top bunk. Use thick wood for the ladder steps and sides. Space steps evenly for easy climbing. Fix the ladder securely to the bed frame at top and bottom. Make the ladder wide enough for good footing. Sand the steps smooth to prevent slipping. Add non-slip tape or pads for extra grip. Confirm the ladder holds weight without wobbling.
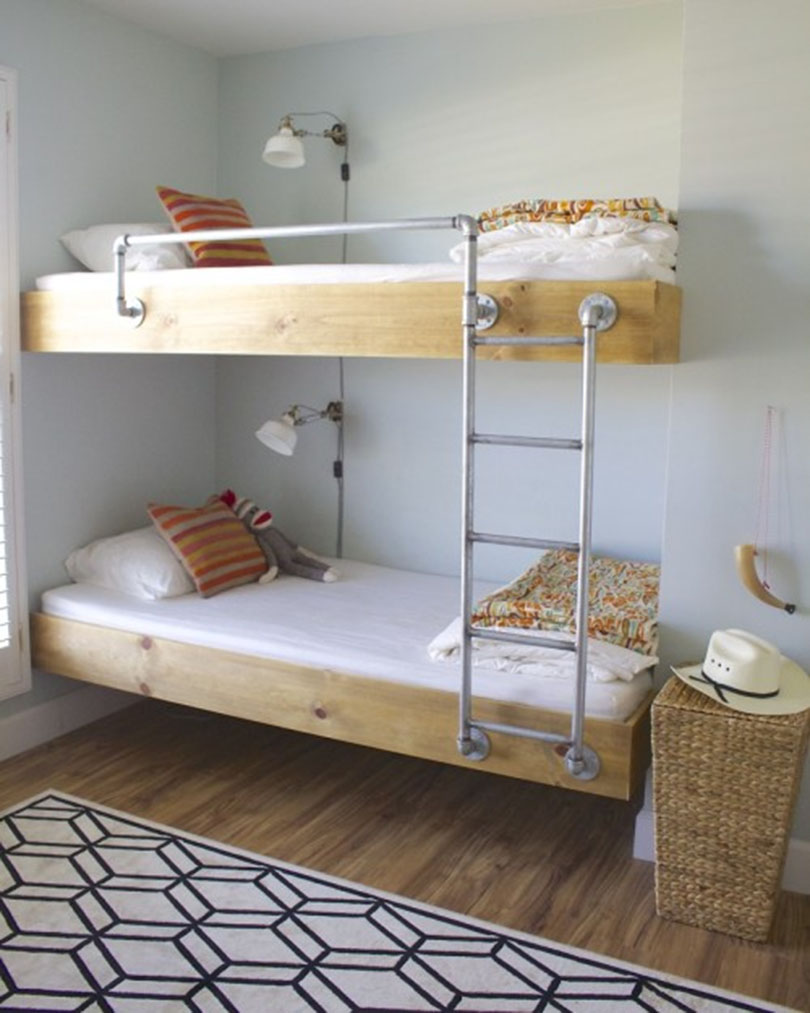
Credit: www.simplifiedbuilding.com
Finishing Touches
Finishing touches make your bunk bed look complete and safe. These final steps add beauty and ensure durability. Take time to choose the right paint, decorations, and safety checks. Small details can change the whole look. Let’s explore how to perfect your bunk bed.
Painting And Staining Options
Choose paint or stain that suits your room style. Paint gives bright colors and protects wood. Use non-toxic paint for children’s safety. Stain shows natural wood grain and feels warm. Apply a clear sealant to protect from scratches. Let each coat dry fully before adding another. Smooth sanding between coats helps a clean finish.
Decorative Elements
Decorate with fun but safe items. Add soft cushions or themed bedding. Use stickers or decals for a playful look. Attach small shelves for books or toys. Avoid sharp or heavy decorations that can fall. Keep decorations simple to keep the bed sturdy. Personal touches make the bed cozy and unique.
Final Inspection And Safety Check
Check all screws and bolts are tight. Test the ladder for firm support and grip. Look for splinters or sharp edges and sand them down. Ensure guardrails are secure and high enough. Verify the mattress fits well without gaps. Safety is key for peace of mind. Do a final walk-around before use.
Maintenance Tips
Maintaining your bunk bed keeps it safe and strong for years. Small efforts prevent big problems. Follow these simple tips to care for your bunk bed.
Regular Tightening Of Screws
Check all screws and bolts every few months. Tighten loose screws with a screwdriver. Loose screws make the bed wobbly and unsafe. Do not use too much force. Just make sure everything fits snugly.
Cleaning And Upkeep
Dust your bunk bed weekly to keep it clean. Use a soft cloth or duster. Avoid harsh chemicals that damage the wood or metal. Clean spills immediately to prevent stains. Check for splinters or rough spots. Sand smooth areas to avoid injuries.
Frequently Asked Questions
What Materials Do I Need To Build A Bunk Bed?
You need sturdy wood, screws, a drill, measuring tape, sandpaper, and safety gear. Quality wood like pine or oak ensures durability and safety.
How Long Does It Take To Build A Bunk Bed?
Building a bunk bed typically takes 6 to 10 hours, depending on skill level. Preparation and precise measurements speed up the process.
How Can I Ensure My Bunk Bed Is Safe?
Use strong materials, secure joints tightly, and add guardrails on the top bunk. Regularly check for loose screws to maintain safety.
What Tools Are Essential For Bunk Bed Construction?
Essential tools include a saw, drill, screwdriver, level, measuring tape, and sander. These tools help create precise cuts and secure assembly.
Conclusion
Building your own bunk bed saves money and adds a personal touch. Follow each step carefully for safety and strength. Choose good materials and measure twice before cutting. Take your time and enjoy the process. Soon, you will have a sturdy bed ready for use.
This project brings fun and pride to your home. Try it yourself and see the difference it makes.