Are you ready to transform your bathroom with a sleek, modern floating vanity cabinet? Mounting one might seem tricky, but with the right steps, you can do it yourself—and enjoy the clean, open look it brings.
This guide will walk you through every detail, making the process clear and manageable. By the end, you’ll have the confidence and know-how to install your floating vanity securely and beautifully. Keep reading, and let’s get started on upgrading your space today!

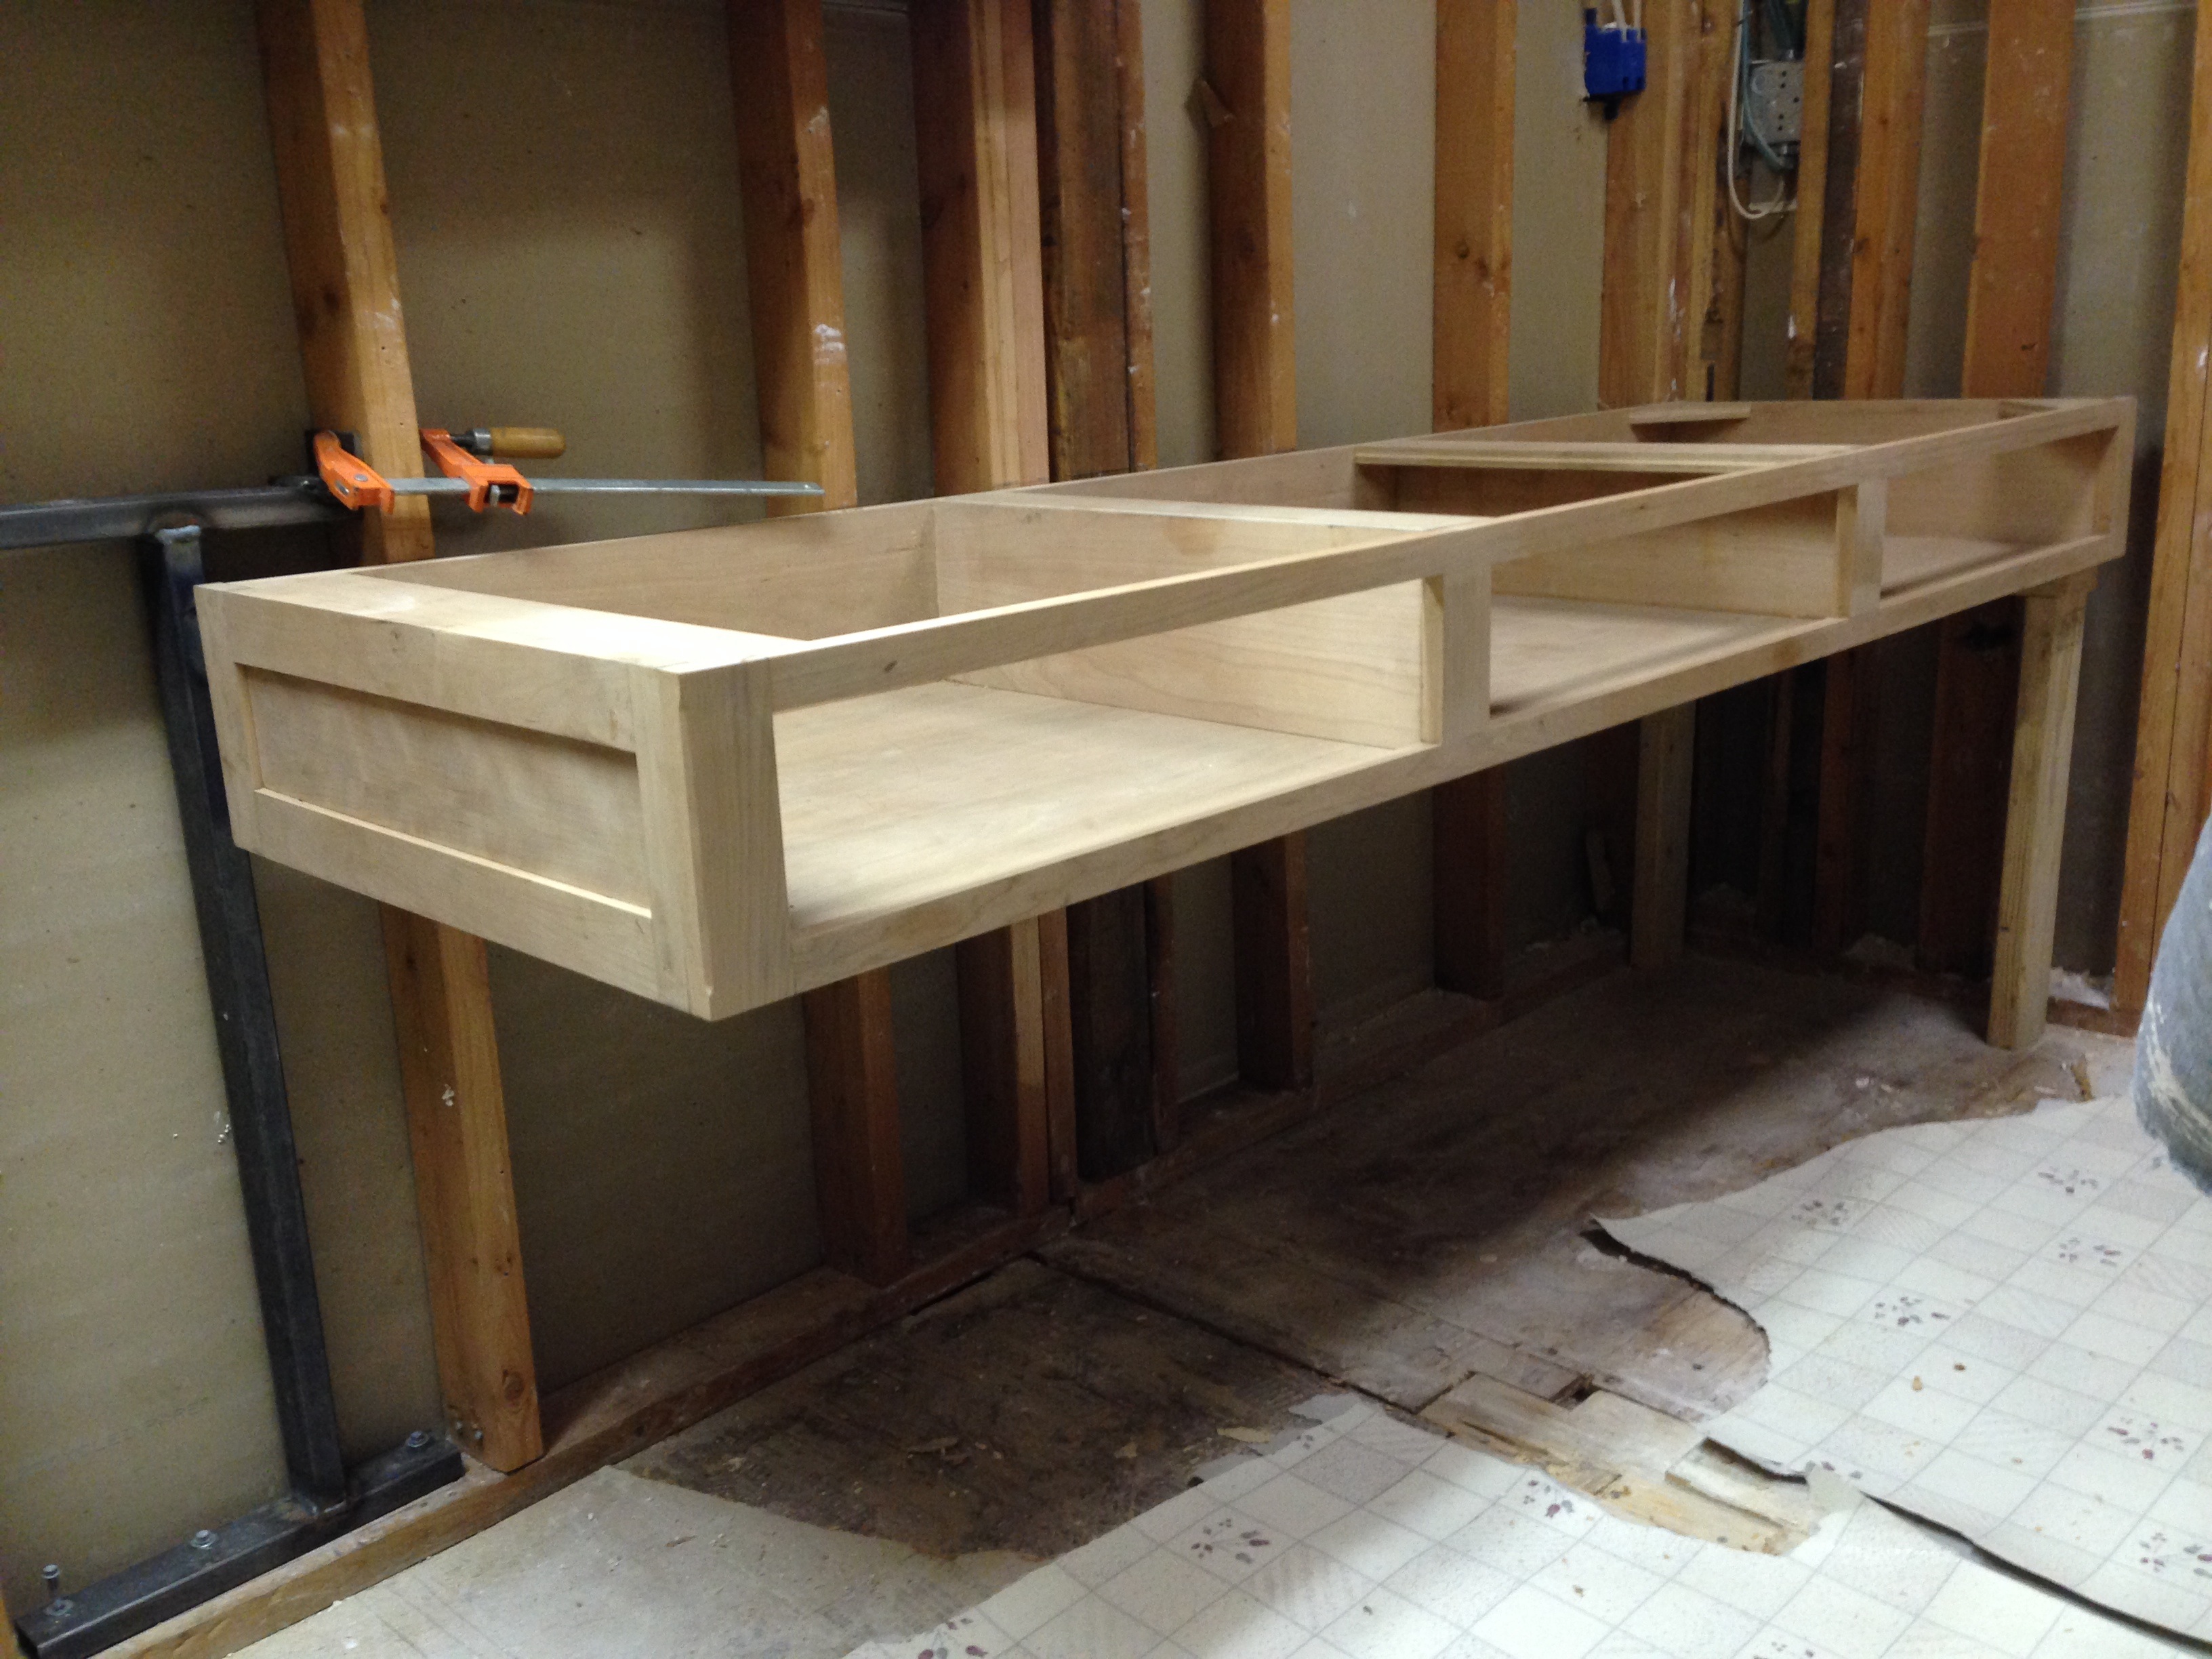
Credit: www.youtube.com
Choosing The Right Vanity
Choosing the right vanity is a key step before mounting your floating cabinet. The right choice ensures your bathroom looks great and stays functional. Consider size, style, material, and support needs carefully. These factors help you find a vanity that fits your space and holds up well.
Size And Style Options
Measure your bathroom space accurately before buying. Choose a size that fits well and leaves room to move. Styles range from modern and sleek to classic and ornate. Pick one that matches your bathroom’s look and your personal taste. Keep the scale balanced to avoid crowding or empty space.
Material Considerations
Materials affect durability and appearance. Wood is warm and traditional but needs sealing. MDF is budget-friendly and smooth but less water-resistant. Metal and laminate resist moisture well and are easy to clean. Choose a material that suits your bathroom’s humidity and your maintenance preferences.
Weight And Support Needs
Floating vanities hang on walls, so weight matters. Check the vanity’s weight before purchase. Heavier vanities need stronger wall support and anchors. Confirm your wall type can hold the load safely. Proper support keeps your vanity secure and prevents damage over time.
Gathering Tools And Materials
Before starting to mount your floating vanity cabinet, gather all necessary tools and materials. This helps the process go smoothly. Having everything ready saves time and avoids frustration. Preparation makes the installation safer and more efficient.
Essential Tools List
You need a drill with drill bits suitable for your wall type. A stud finder helps locate the best mounting spots. A level ensures the cabinet hangs straight. A tape measure is necessary for precise measurements. Screwdrivers, a pencil, and a wrench complete the basic toolkit.
Mounting Hardware Types
Choose hardware based on your wall material. For drywall, use heavy-duty anchors or toggle bolts. Masonry walls require masonry screws or anchors. Wood studs allow direct screwing of lag bolts. Check the cabinet’s weight to pick strong enough hardware.
Safety Gear
Wear safety goggles to protect your eyes. Gloves protect your hands from sharp edges. Use ear protection if drilling loud holes. A dust mask keeps particles from entering your lungs. Safety gear keeps you safe during installation.
Preparing The Wall
Preparing the wall is the first step in mounting a floating vanity cabinet. A strong and stable wall ensures your vanity stays secure. Taking time to prepare the wall correctly will save you trouble later. Follow these simple steps to get ready.
Locating Wall Studs
Find the wall studs behind the drywall. Use a stud finder for accuracy. Studs are usually 16 or 24 inches apart. Mark each stud location with a pencil. Mounting the vanity to studs keeps it sturdy and safe.
Wall Surface Inspection
Check the wall surface for damage or weakness. Look for cracks, holes, or soft spots. Repair any damage before mounting the vanity. A solid surface prevents the cabinet from falling off.
Marking Mounting Points
Measure the height and width for your vanity placement. Use a level to draw straight lines on the wall. Mark the exact points where the vanity brackets will go. Accurate marking helps in easy and precise installation.
Credit: www.corbinstreehouse.com
Installing The Mounting Bracket
Installing the mounting bracket is a key step to fix a floating vanity cabinet. The bracket holds the cabinet firmly on the wall. Proper installation ensures safety and long-lasting support.
Start by preparing the wall and tools. The bracket needs to be level and strong. Follow clear steps to align, secure, and check the bracket before hanging the cabinet.
Aligning The Bracket
Place the mounting bracket on the wall at the desired height. Use a level to make sure it is perfectly horizontal. Mark the screw holes on the wall with a pencil. Aligning the bracket correctly prevents a tilted cabinet.
Securing With Screws
Choose screws that fit the wall type. Drill pilot holes at the marked spots for easier screwing. Attach the bracket tightly using a drill or screwdriver. Secure screws firmly to hold the weight of the cabinet.
Checking Stability
After securing the bracket, test its strength by applying pressure. It should not move or wobble. If loose, tighten screws or adjust the bracket. A stable bracket is essential for a safe floating vanity.
Mounting The Vanity Cabinet
Mounting the vanity cabinet is a key step in installing a floating vanity. It gives the cabinet strength and keeps it stable. A well-mounted cabinet looks neat and lasts long. Follow clear steps to place it safely on the wall.
Lifting And Positioning
Start by lifting the cabinet carefully. Get help if the cabinet is heavy. Hold it close to the wall where you marked the spot. Move slowly to avoid scratching or hitting anything. Align the cabinet with the wall bracket or mounting points.
Securing To Bracket
Use screws that match the bracket size. Insert the screws through the cabinet into the bracket. Tighten the screws with a drill or screwdriver. Check that the cabinet feels firm and does not wobble. Secure all points evenly to spread the weight.
Leveling The Cabinet
Place a level on top of the cabinet. Adjust the cabinet until the bubble is centered. Use shims behind the cabinet if needed. Tighten the screws more after leveling. Double-check the level to confirm the cabinet is straight.

Credit: www.youtube.com
Connecting Plumbing
Connecting the plumbing is a key step in mounting a floating vanity cabinet. It ensures water flows correctly and prevents leaks. Proper plumbing connection keeps your bathroom functional and safe. Follow clear steps for a smooth setup.
Installing Faucet And Drain
Start by placing the faucet on the vanity top. Tighten nuts underneath to secure it firmly. Attach the drain assembly to the sink’s drain hole. Use plumber’s putty around the drain flange to stop leaks. Tighten the drain parts carefully but avoid over-tightening.
Attaching Water Lines
Connect hot and cold water lines to the faucet valves. Use flexible supply tubes for easy attachment. Hand-tighten the connections first, then use a wrench for a snug fit. Avoid twisting or bending the pipes. Check that all connections are straight and secure.
Testing For Leaks
Turn on the water supply slowly. Watch all connections for drips or moisture. Check under the sink and around the drain. Tighten any loose fittings if you spot leaks. Run water for a few minutes to confirm the setup is leak-free.
Finishing Touches
Finishing touches bring your floating vanity cabinet to life. These final steps protect your work and enhance the look. Simple actions can keep your cabinet safe and stylish for years. Pay attention to detail for a polished bathroom space.
Sealing Edges
Seal all edges where the cabinet meets the wall. Use waterproof caulk to stop water from entering gaps. Smooth the caulk with a wet finger or tool. Let it dry completely before using the sink. This prevents water damage and mold growth.
Adding Backsplash
A backsplash shields the wall behind the vanity from splashes. Choose tile, glass, or waterproof panels. Attach the backsplash with strong adhesive or screws. Keep it level and aligned with the cabinet edges. It adds style and keeps walls clean and dry.
Cleaning And Maintenance Tips
Clean your floating vanity regularly to keep it looking fresh. Use a soft cloth and mild soap. Avoid harsh chemicals that can damage the finish. Check seals and caulk every few months. Fix any cracks or peeling to protect your cabinet.
Troubleshooting Common Issues
Mounting a floating vanity cabinet can present challenges. Problems may arise during or after installation. Knowing how to solve common issues saves time and effort. This section covers key troubles and clear fixes. You will learn to handle uneven walls, fix loose cabinets, and deal with water damage.
Handling Uneven Walls
Uneven walls make mounting tricky. The cabinet may not sit flush. Use a level to check wall flatness first. Shim the cabinet with thin wooden pieces. Place shims behind the mounting brackets. Tighten screws slowly to adjust the cabinet position. Check with a level again. Repeat until the cabinet is even and secure.
Fixing Loose Cabinets
Loose cabinets feel unsafe and unstable. Check if screws hold firmly in the wall. Use longer or thicker screws for better grip. Find wall studs for strong support. If studs are missing, use heavy-duty anchors. Tighten all screws evenly. Test stability by gently shaking the cabinet. Tighten or adjust as needed.
Dealing With Water Damage
Water damage can weaken the cabinet and wall. Inspect for soft spots or discoloration. Remove damaged materials carefully. Dry the area completely before reinstalling. Use water-resistant sealant around edges. Choose a vanity cabinet made of moisture-resistant materials. Regularly check for leaks to prevent future damage.
Frequently Asked Questions
How Do You Prepare The Wall For A Floating Vanity?
To prepare, locate studs and mark their positions. Ensure the wall is clean, dry, and sturdy. Use a stud finder to find solid support. Reinforce drywall if necessary to hold the vanity’s weight safely.
What Tools Are Needed To Mount A Floating Vanity?
You need a stud finder, drill, level, screws, anchors, and a measuring tape. A pencil helps mark positions. Safety gear like gloves and goggles is also recommended. These tools ensure precise, secure mounting of the vanity.
How High Should A Floating Vanity Be Mounted?
Mount the vanity so the countertop is 32 to 36 inches above the floor. This height suits most users and fits standard sink plumbing. Adjust slightly for personal comfort or bathroom design.
Can I Mount A Floating Vanity On Drywall Alone?
No, drywall alone cannot support a floating vanity’s weight. Secure the vanity directly to wall studs or use a reinforced mounting board. Proper support prevents damage and ensures safety.
Conclusion
Mounting a floating vanity cabinet can change your bathroom’s look. Follow the steps carefully for a secure fit. Use the right tools and anchors for strong support. Check measurements twice to avoid mistakes. Take your time and work safely. A well-mounted cabinet adds style and saves space.
Enjoy the fresh, clean look of your new vanity!


