Are you looking to give your wooden bookshelf a fresh new look? Painting your bookshelf is a simple way to transform your space and add a personal touch to your home.
Whether your shelf is old and worn or just needs a style update, this guide will walk you through every step. By the end, you’ll know exactly how to paint your wooden bookshelf like a pro, saving money and making your room feel brand new.
Ready to bring color and life to your shelves? Let’s get started!

Credit: girlinthegarage.net
Choosing The Right Paint
Choosing the right paint for your wooden bookshelf is important for a smooth and lasting finish. The type of paint affects how well it sticks and how it looks. Color choice and finish also change the final style. This guide helps you pick the best paint for your project.
Types Of Paint For Wood
Latex paint is water-based and easy to clean. It dries quickly and resists cracking. Oil-based paint is stronger and lasts longer. It takes more time to dry and needs special thinner for cleanup. Chalk paint gives a matte look and is simple to use. It needs sealing with wax or varnish for protection.
Selecting Colors
Choose colors that match your room’s style. Light colors make the space feel bigger and brighter. Dark colors add a bold, rich look. Neutral tones work well with most decor. Pick a color that you enjoy seeing every day.
Paint Finishes Explained
Matte finish hides imperfections but can be hard to clean. Satin finish offers a soft shine and cleans easily. Semi-gloss finish is shiny and very durable. It works well for shelves that get touched often. Glossy finish is very shiny and highlights details. It can show scratches more easily.
Gathering Supplies
Gathering the right supplies is the first step to painting a wooden bookshelf successfully. Having everything ready keeps the process smooth and helps you avoid interruptions. Knowing what tools, safety gear, and workspace setup you need saves time and effort.
Essential Tools
Start with basic painting tools. You will need sandpaper to smooth the wood surface. Choose medium and fine grit for best results. A paintbrush or foam brush works well for detailed areas. Use a paint roller for larger flat surfaces. Select paint suitable for wood, like acrylic or latex. A primer helps the paint stick better and last longer. Have a clean cloth or tack cloth to wipe dust off the shelf before painting.
Safety Equipment
Protect yourself during the project. Wear gloves to keep paint off your skin. Use a mask to avoid breathing in dust and fumes. Safety goggles protect your eyes from splashes and dust. Dress in old clothes or a painting apron. Keep a first aid kit nearby, just in case.
Preparing Your Workspace
Choose a well-ventilated area to paint. Open windows or use a fan to keep air flowing. Cover the floor with a drop cloth or old newspapers. This prevents paint spills from damaging surfaces. Arrange all your supplies within easy reach. Good lighting helps you see small details clearly. Clear the area of anything that could get in your way.
Preparing The Bookshelf
Preparing your wooden bookshelf before painting is very important. It helps the paint stick well and last longer. Taking time to prepare makes your bookshelf look smooth and fresh. Follow these simple steps to get the best results.
Cleaning The Surface
Start by removing dust and dirt from the bookshelf. Use a soft cloth or sponge with mild soap and water. Wipe every corner and edge carefully. Let the surface dry completely before moving on.
Sanding Techniques
Sanding helps the paint grip the wood better. Use fine-grit sandpaper to rub the surface gently. Sand in the direction of the wood grain. This removes old finish and smooths rough spots. After sanding, wipe away dust with a clean cloth.
Repairing Imperfections
Check the bookshelf for cracks, holes, or dents. Fill small holes with wood filler using a putty knife. Allow it to dry fully. Sand the filled areas smooth to match the surface. This step makes the bookshelf look flawless after painting.
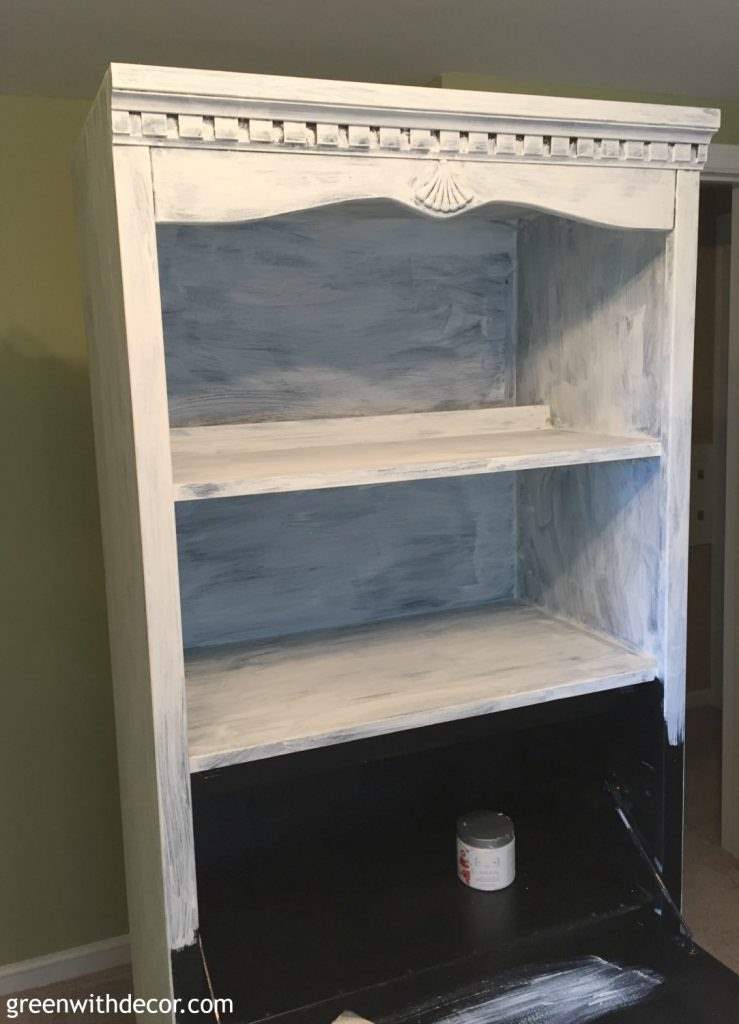
Credit: greenwithdecor.com
Priming The Wood
Priming the wood is a key step before painting your wooden bookshelf. It prepares the surface and helps the paint stick better. Priming also protects the wood from moisture and stains. This step makes your paint job last longer and look smoother.
Benefits Of Priming
Priming seals the wood and covers imperfections. It stops stains and knots from showing through the paint. The primer creates a smooth, even base for the paint. This helps the paint dry evenly and prevents peeling. Overall, priming saves time and effort in the long run.
Choosing The Right Primer
Pick a primer made for wood surfaces. Oil-based primers work well for covering knots and stains. Water-based primers dry faster and have less smell. Use a primer that matches your paint type. Check the label to ensure good adhesion and durability.
Applying Primer Correctly
Start by sanding the wood lightly to smooth rough spots. Clean the surface from dust and dirt. Use a brush or roller to apply a thin, even coat of primer. Let it dry completely before adding another coat if needed. Avoid thick layers to prevent drips and uneven drying.
Painting Techniques
Painting a wooden bookshelf needs the right techniques. These techniques help you get smooth and even results. They also make the paint last longer. Below are some important tips on how to paint with care.
Brush Vs. Roller
A brush works best for small areas and corners. It helps reach tight spots easily. Brushes give you more control over the paint.
A roller covers large flat surfaces quickly. It creates a smooth finish without brush marks. Choose a small roller for shelves to avoid drips.
Applying Thin Coats
Thin coats dry faster and look better. Thick paint can drip and take longer to dry. Apply several thin layers instead of one thick layer.
Let each coat dry fully before applying the next. This builds a strong, even paint surface on the wood.
Avoiding Drips And Streaks
Load your brush or roller with a moderate amount of paint. Too much paint causes drips and streaks.
Paint in long, even strokes. Avoid going over the same area too many times. This keeps the finish smooth and clean.
Drying And Curing
Drying and curing are key steps after painting a wooden bookshelf. This process lets the paint harden and stick well. Proper drying improves the finish and prevents damage later. Understanding drying and curing helps you get the best look and durability.
Optimal Drying Times
Paint drying times vary by type and environment. Most paints need at least 1 to 2 hours to dry on the surface. Wait longer in cool or humid rooms. Avoid rushing to touch or move the bookshelf. Full curing can take days to weeks. Patience ensures a strong, lasting finish.
Preventing Dust And Debris
Keep the bookshelf in a clean, dust-free area while drying. Cover it loosely with a cloth or cardboard to block dust. Avoid painting near open windows or vents. Dust or dirt on wet paint causes rough spots. A smooth finish needs a clean drying space.
When To Apply Additional Coats
Apply extra coats only after the paint is dry to touch. Check the paint feels dry and not sticky. Usually, wait at least 4 to 6 hours between coats. Thin layers dry faster and look better. Multiple coats create a stronger, richer color.
Adding Finishing Touches
Adding finishing touches to your painted wooden bookshelf makes a big difference. These final steps protect your work and add style. They help your bookshelf look neat and last longer. Take your time to complete these details well.
Sealing The Paint
Sealing the paint protects it from scratches and stains. Use a clear sealer like polyurethane or a water-based topcoat. Apply a thin, even layer with a brush or spray. Let it dry completely before adding a second coat. This step keeps the paint fresh and shiny for years.
Decorative Details
Decorative details add personality to your bookshelf. Use stencils, painter’s tape, or small brushes to create patterns. Try stripes, dots, or floral designs. You can also add new knobs or trim for more style. These small touches make your shelf unique and eye-catching.
Maintaining The Finish
Keep your painted bookshelf looking great with simple care. Clean dust and dirt regularly with a soft cloth. Avoid harsh chemicals that can damage the paint or sealer. Fix small chips or scratches quickly to prevent bigger problems. Proper care helps your bookshelf stay beautiful for a long time.

Credit: www.benjaminmoore.com
Troubleshooting Common Issues
Painting a wooden bookshelf can bring new life to your space. Yet, some common problems may appear during the process. Fixing these issues quickly keeps your shelf looking great. This section helps you solve common painting problems with simple steps.
Fixing Uneven Paint
Uneven paint shows as streaks or blotches on the wood. It happens when paint dries too fast or is applied too thickly. Use light, even strokes to smooth the surface. Sand rough spots gently with fine-grit sandpaper. Apply a thin second coat for better coverage. Wait for each layer to dry fully before adding more paint.
Handling Peeling Or Chipping
Peeling or chipping occurs when paint does not stick well. This happens if the surface was dirty or not sanded. Remove loose paint with a scraper or brush. Clean the bookshelf thoroughly to remove dust and grease. Sand the wood lightly to create a good base. Apply a primer before painting to help paint stick better.
Dealing With Brush Marks
Brush marks appear as visible lines in the paint. They happen when paint is too thick or the brush is rough. Use a high-quality, soft brush for smooth results. Dip the brush lightly and remove extra paint on the edge. Paint with long, even strokes along the wood grain. Lightly sand between coats to reduce marks and get a smooth finish.
Frequently Asked Questions
How Do I Prepare A Wooden Bookshelf For Painting?
Start by cleaning the surface to remove dust and dirt. Sand the bookshelf with fine-grit sandpaper. Wipe off sanding dust with a damp cloth. Apply a primer to ensure better paint adhesion and durability.
What Type Of Paint Is Best For Wooden Bookshelves?
Use acrylic latex or enamel paint for wooden bookshelves. These paints provide a smooth finish and are durable. They resist chipping and are easy to clean. Choose a paint suitable for indoor furniture for long-lasting results.
How Many Coats Of Paint Should I Apply?
Apply two to three thin coats for an even finish. Allow each coat to dry completely before applying the next. Thin coats prevent drips and uneven texture. This method ensures a professional-looking painted bookshelf.
Can I Paint A Bookshelf Without Sanding It?
Sanding is recommended but not always necessary. If the surface is glossy, lightly sanding helps paint adhere better. Skip sanding only if the shelf is raw wood or previously primed. Proper prep improves paint durability and appearance.
Conclusion
Painting a wooden bookshelf can brighten any room quickly. Choose the right paint and tools for smooth results. Take your time sanding and cleaning before you start. Apply paint in thin, even coats for best coverage. Let each layer dry fully to avoid smudges.
The final look will feel fresh and new. Enjoy the satisfaction of a project done well. Your bookshelf will stand out and hold your favorite books proudly. Simple steps make a big difference in home decor. Try this easy project to refresh your space today.