Putting together your new Ikea bunk bed might seem tricky at first, but you’re closer to creating a cozy, space-saving spot than you think. Imagine the excitement of your kids climbing into their new bed or having extra room for guests—all thanks to your hard work.
This guide will walk you through each step clearly and simply, so you won’t feel overwhelmed or stuck. Stick with me, and you’ll have your bunk bed ready in no time, turning your space into something special. Ready to get started?
Let’s make it happen!

Credit: www.youtube.com
Preparing Your Workspace
Preparing your workspace is the first step to building your Ikea bunk bed smoothly. A tidy, organized area helps you avoid mistakes and saves time. It also keeps all parts safe and easy to find. Taking time to prepare makes the assembly less stressful and more efficient.
Clear The Area
Remove furniture and items from the room where you will build the bunk bed. A large, empty space helps you move parts around freely. It also prevents damage to your belongings. Make sure the floor is clean and flat. This keeps small pieces from getting lost or damaged.
Gather Necessary Tools
Collect all tools needed for the assembly before starting. Ikea bunk beds often need a screwdriver, hammer, and Allen key. Check if the Allen key comes with the bed. Having tools ready stops delays during building. Keep them close to your workspace for easy access.
Check The Parts List
Open the instruction manual and find the parts list. Compare each part with the list to make sure nothing is missing. Count the screws, bolts, and wooden pieces carefully. Missing parts can cause problems later. Contact Ikea for replacements if needed before starting assembly.
Assembling The Bed Frame
Assembling the bed frame is the first step to building your Ikea bunk bed. This part sets the base for the entire structure. Doing it right ensures the bed is stable and safe. Follow each step carefully and take your time. Use the instructions and parts that come with your bed set.
Lay Out The Side Panels
Start by placing the two side panels flat on the floor. Check each panel for any damage or missing holes. Align them parallel and make sure the labels match the instructions. This will help avoid confusion later. Keep the panels close enough to work on easily.
Attach The Head And Foot Boards
Next, connect the headboard and footboard to the side panels. Hold each board upright and fit the edges into the side panels’ slots. Push gently but firmly to secure. Use clamps or have a helper hold the pieces if needed. Double-check the fit before moving on.
Secure The Frame With Screws
Use the screws provided to lock the frame parts together. Insert screws into the pre-drilled holes on the panels and boards. Tighten each screw with a screwdriver, but do not over-tighten. Tight screws keep the frame strong and steady. Check every joint to make sure nothing is loose.
Installing The Safety Rails
Installing the safety rails is an important step when assembling your Ikea bunk bed. These rails keep the upper bed secure and prevent falls. Take your time to install them correctly for a safe sleeping space.
Position The Upper Bed Rails
First, find the safety rails that go on the upper bunk. These usually come with the bed frame parts. Place each rail along the side of the top bed. Make sure the rails cover the full length of the mattress area. Check that the rails are straight and even on both sides. Proper positioning ensures the rails will protect the sleeper effectively.
Fix Rails With Provided Hardware
Use the screws, bolts, or brackets included in your Ikea kit to attach the rails. Match each piece of hardware to the holes on the rail and bed frame. Tighten all screws firmly but avoid over-tightening to prevent damage. Check that each rail feels solid and does not move. Secure rails keep the bunk bed safe for children and adults alike.
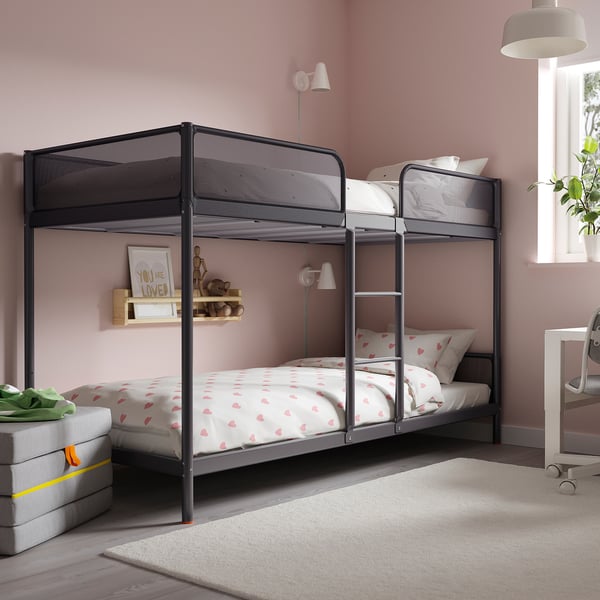
Credit: www.ikea.com
Adding The Ladder
Adding the ladder to your Ikea bunk bed is an important step. It gives safe and easy access to the top bunk. A well-placed and sturdy ladder makes the bed both functional and secure. Follow the simple steps below to add the ladder correctly.
Choose Ladder Placement
Decide where the ladder fits best on the bunk bed. Most Ikea beds allow the ladder on either side. Consider the room space and how the ladder will affect movement. Pick a side where the ladder will not block doors or windows. Make sure the ladder is easy to reach from the floor.
Attach Ladder Securely
Use the screws and brackets that come with your bed. Attach the ladder firmly to the frame or side rails. Check the instructions for exact screw placements. Tighten all screws with a screwdriver to avoid wobbling. Test the ladder by gently pulling and stepping on it. A secure ladder keeps everyone safe.
Placing The Slats And Mattresses
Placing the slats and mattresses is an important step in assembling your Ikea bunk bed. This step ensures the bed feels stable and safe for sleeping. Proper placement helps the mattress fit well and supports weight evenly.
Lay Down The Slats
Start by laying the wooden slats across the bed frame. The slats should fit snugly in the frame’s grooves or holders. Make sure they are evenly spaced to support the mattress properly. Press each slat down gently to secure it. Check that no slat moves or feels loose before moving on.
Position Mattresses Safely
Place each mattress carefully on top of the slats. Align the mattress with the edges of the bed frame. Avoid letting the mattress hang over the sides. This keeps the mattress stable and safe for use. Double-check the mattress fits well without gaps or slips.

Credit: www.ikea.com
Final Checks And Tips
After assembling your Ikea bunk bed, take time for final checks and tips. These steps help ensure the bed is safe and strong. Small mistakes can cause problems later. Careful review keeps the bed secure for use.
Tighten All Screws
Go over every screw one more time. Use the right tool to make sure each screw is tight. Loose screws cause wobbling and risk collapse. Tight screws keep the bed solid and safe.
Inspect For Stability
Push gently on different parts of the bed. Check if it moves or feels weak anywhere. The bed should not rock or shake. Stability means the bed is ready to hold weight safely.
Safety Recommendations
Place the bunk bed away from windows and heaters. Add guardrails on the top bunk to prevent falls. Use a sturdy ladder and fix it well. Follow weight limits shown in the manual.
Frequently Asked Questions
How Long Does It Take To Assemble An Ikea Bunk Bed?
Assembling an Ikea bunk bed typically takes 1 to 2 hours. It depends on your experience and tools available. Following the instructions carefully speeds up the process. Having a helper can make assembly easier and faster.
What Tools Are Needed For Ikea Bunk Bed Assembly?
You usually need a screwdriver, Allen wrench, and a hammer for assembly. Ikea often includes the Allen wrench. A power drill can speed up the process but isn’t necessary. Always check the instruction manual for specific tool requirements.
How To Ensure Ikea Bunk Bed Safety During Assembly?
Tighten all screws and bolts securely to prevent wobbling. Follow the instruction manual step-by-step without skipping parts. Use the included safety rails and ladders correctly. Place the bed on a flat surface and check stability before use.
Can I Assemble An Ikea Bunk Bed Alone?
Yes, it’s possible but not recommended. Some parts are heavy and awkward to handle solo. Having a second person helps with lifting and aligning parts. Two people reduce assembly time and improve safety.
Conclusion
Building your Ikea bunk bed can be simple and quick. Follow each step carefully and use the right tools. Take your time to avoid mistakes and ensure safety. Double-check all screws and parts before finishing. A sturdy bunk bed gives your kids a fun and safe place to sleep.
Enjoy the extra space it creates in the room. With patience and care, you can assemble the bed without stress. Now, your Ikea bunk bed is ready to use and enjoy.