Do you have an old door lying around and wonder how to give it a new life? Turning a door into a coat rack is a simple and creative way to add style and function to your space.
Imagine saving money, reducing waste, and creating something unique that fits perfectly in your home. In this guide, you’ll discover easy steps and clever tips to transform that door into a practical, eye-catching coat rack. Ready to make your entryway more organized and inviting?
Let’s get started!

Credit: www.amazon.com
Choose The Right Door
Choosing the right door is the first step to create a great coat rack. The door must suit your space and style. It should be sturdy enough to hold coats and bags. Many doors can work, but some fit better than others. Think about the material, size, and condition. These factors help make a door functional and attractive as a rack.
Material Options
Wood doors are popular for coat racks. They feel warm and strong. You can paint or stain wood easily. Metal doors are tough and modern. They suit industrial or simple styles. Glass doors are less common. They look nice but need extra care. Choose a material that matches your room and can hold weight.
Size And Shape Considerations
The door size affects how many coats it holds. Tall doors offer more hanging space. Wide doors allow for more hooks. Narrow doors fit small spaces better. Rectangular shapes work best for most walls. Avoid doors that are too heavy or large to hang safely. Measure your wall space before picking a door.
Condition And Style
Check the door’s condition before using it. Look for cracks, warps, or loose parts. A solid door lasts longer and looks neat. Style matters too. Vintage doors add character. Plain doors fit simple rooms. Match the door style with your home décor. Fix any damage to keep the rack safe and pretty.
Credit: jennaburger.com
Gather Necessary Tools And Materials
Before turning a door into a coat rack, gather all tools and materials. This step helps make the project smooth and fast. Collecting everything in one place avoids interruptions during work.
Essential Tools
Start with basic tools. A drill is needed to make holes for hooks. Screwdrivers help fasten screws tightly. A measuring tape ensures hooks go in the right spots. Sandpaper smooths rough edges on the door. A pencil marks hook placements clearly.
Types Of Hooks And Hangers
Choose hooks that fit your style and needs. Single hooks are simple and space-saving. Double hooks hold more items and add convenience. Decorative hooks bring charm to the coat rack. Make sure hooks are strong enough for heavy coats.
Paints And Finishes
Paint protects the door and improves its look. Use water-based paint for easy cleaning. Chalk paint gives a vintage feel without much prep. Clear varnish adds shine and protects wood. Pick a finish that matches your room’s style.
Prepare The Door
Preparing the door is the first important step for creating a sturdy coat rack. A well-prepared door ensures the paint and hooks stick properly. It also makes the coat rack last longer. Follow these simple steps to get the door ready.
Cleaning And Sanding
Start by cleaning the door with a damp cloth. Remove all dirt, dust, and grease. This helps the paint stick better. Next, use sandpaper to smooth the door’s surface. Sand any rough spots or old paint chips. Sanding creates a good base for paint and hooks.
Removing Hardware
Take off all door hardware like knobs, locks, and hinges. Use a screwdriver to remove screws carefully. Removing hardware prevents damage during painting. It also makes the door easier to handle and work on.
Priming And Painting
Apply a coat of primer to the door’s surface. Primer helps paint stick and prevents peeling. Let the primer dry completely. Then, paint the door with your chosen color. Use smooth, even strokes for a clean finish. Allow the paint to dry well before adding hooks.

Credit: lehmanlane.net
Plan Hook Placement
Planning hook placement is an important step in turning a door into a coat rack. It ensures the hooks fit well and hold items securely. Good planning helps avoid overcrowding or empty spaces. It also keeps the coat rack looking neat and tidy.
Spacing For Functionality
Space hooks so coats hang without overlapping. Leave enough room for thick jackets and bags. Too close hooks cause items to bunch up. Too far apart wastes space on the door. Aim for about 6 to 8 inches between hooks for most uses.
Aesthetic Arrangements
Arrange hooks in a balanced pattern. Symmetry gives a clean and organized look. Try a straight line or a staggered pattern. Match hook height to the door size and user height. Visual appeal makes your coat rack pleasant to use and see.
Marking Positions
Use a pencil to mark hook spots before drilling. Measure carefully to keep spacing even. Check marks with a level to ensure straight lines. Marking saves time and avoids mistakes. It makes the installation process smooth and accurate.
Install Hooks And Hardware
Installing hooks and hardware transforms an old door into a practical coat rack. This step is key for making your project functional and durable. The right placement and secure fixing ensure your coat rack can hold jackets, hats, and bags without damage.
Drilling Pilot Holes
Start by marking where each hook will go. Use a pencil to make small dots on the door. Drill pilot holes at these points. Pilot holes prevent the wood from splitting when you insert screws. Choose a drill bit slightly smaller than the screw size. Drill straight and carefully. This makes hooking easier and keeps the door intact.
Securing Hooks
Align each hook with the pilot holes. Use screws that fit the hook’s holes perfectly. Screw in slowly to avoid stripping the wood. Tighten until the hook feels firm. Test the hook by pulling it gently. If it moves, tighten the screw more. Secure hooks provide a strong hold for your coats and bags.
Adding Additional Features
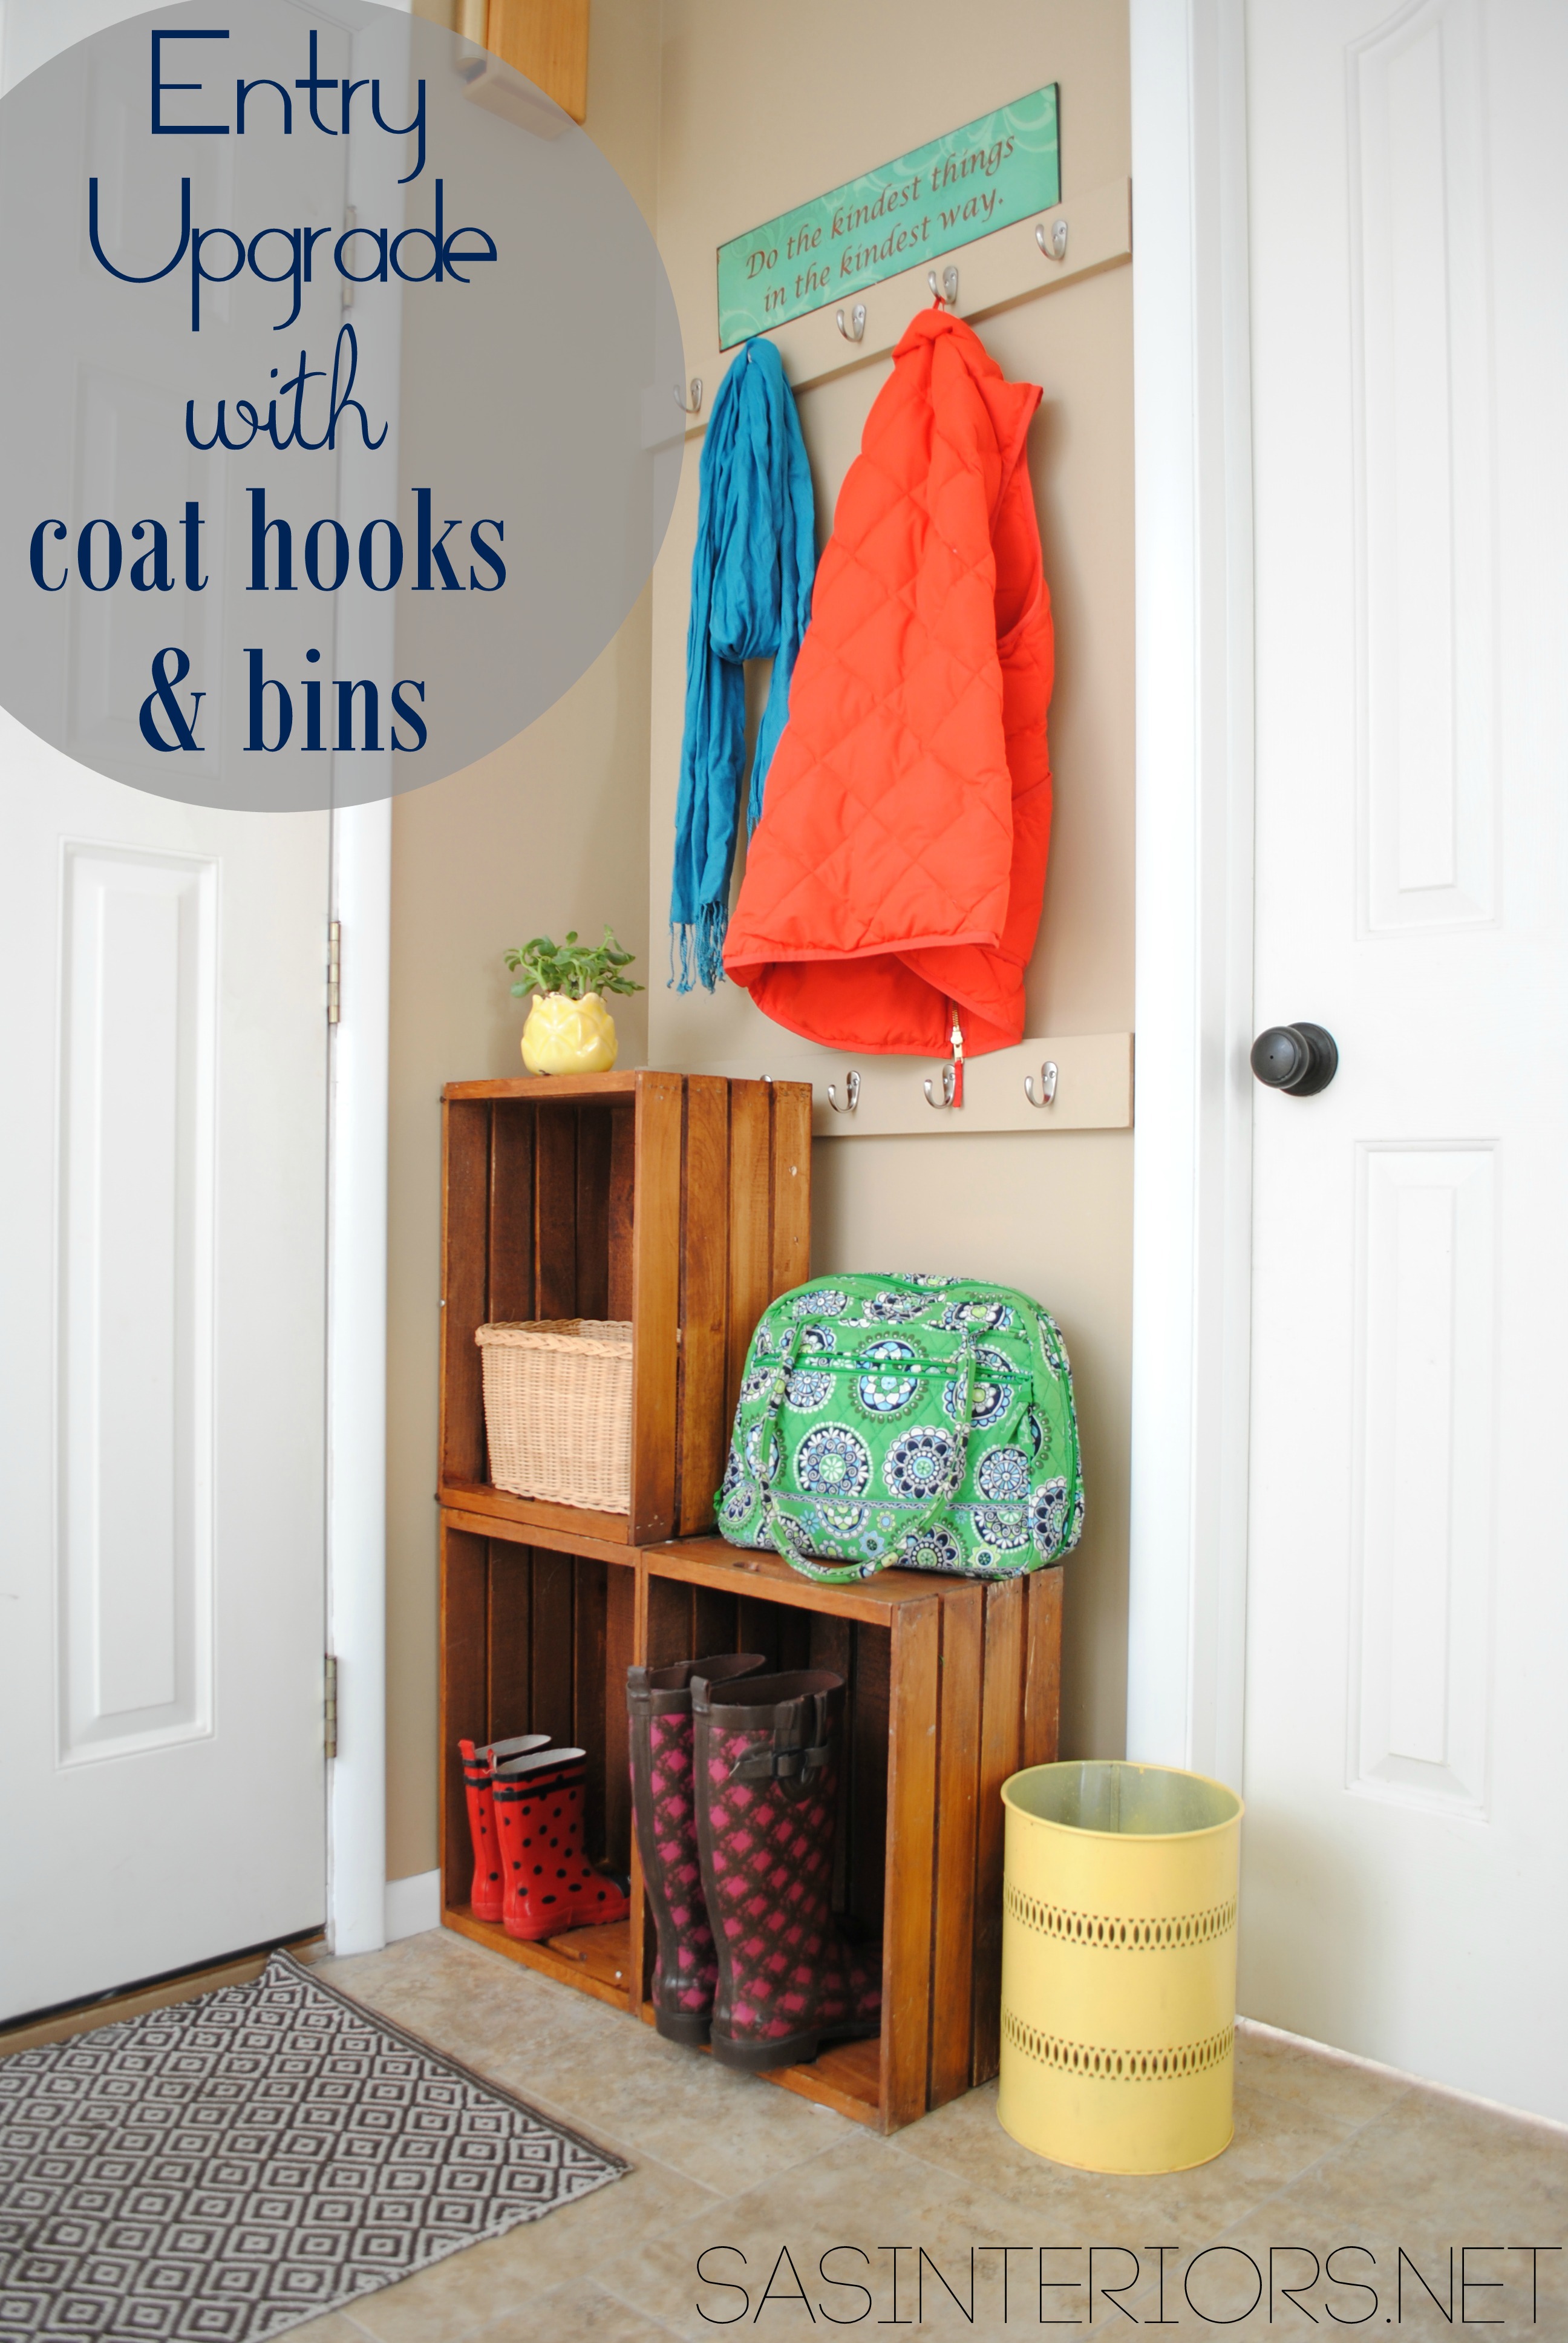
Consider adding a small shelf above the hooks. This shelf can hold keys or small items. Attach a mirror to one side of the door for convenience. Use decorative knobs for extra hanging space. Customize your coat rack to match your room’s style. These features make the rack more useful and attractive.
Mount The Door On The Wall
Mounting the door on the wall is the key step to turn it into a functional coat rack. It needs strong support to hold coats and bags without falling. Secure mounting also keeps the door stable and safe to use. Take time to pick the right spot and use proper tools. Follow simple steps to ensure your door rack stays firm and looks great.
Choosing Mounting Location
Find a wall space near your entry or hallway. Make sure it is easy to reach and has enough room for coats. Avoid spots with electrical outlets or switches. Check the wall type. Drywall, plaster, or brick require different mounting methods. Mark the area with a pencil before drilling holes.
Using Wall Anchors
Wall anchors help hold heavy weight securely. Choose anchors that fit your wall type and screw size. Drill holes slightly smaller than the anchors. Push anchors into the holes until flush with the wall. Screw the mounting brackets into the anchors firmly. This prevents the door from pulling out over time.
Ensuring Stability
Use a level to keep the door straight. Tighten all screws and brackets fully. Test the door by gently shaking it. Add extra brackets if needed for more support. Attach sturdy hooks or pegs to hold coats safely. Proper stability avoids accidents and extends the rack’s life.
Customize And Decorate
Customizing and decorating your door coat rack turns it into a unique piece. It makes the space functional and stylish. Simple touches can create a big impact. You can match it to your room’s look or add a personal twist. Here are easy ways to enhance your door coat rack.
Adding Shelves Or Baskets
Shelves or baskets add extra storage space. They hold hats, gloves, or small bags neatly. You can attach wooden shelves at different heights on the door. Baskets made of wicker or metal can hang below the hooks. This keeps everything organized and easy to find.
Incorporating Mirrors Or Chalkboards
Mirrors give a quick look before heading out. A small mirror fixed on the door brightens the area too. Chalkboards offer a spot for notes or reminders. You can write daily messages or shopping lists. Both add function and charm to your door coat rack.
Personalizing With Accessories
Accessories bring personality to your rack. Use colorful knobs or decorative hooks for a fun touch. Hang small plants or art pieces for a cozy feel. Name tags or labels help keep things in order. These details make the rack truly yours and inviting.
Maintenance Tips
Turning a door into a coat rack is a smart and creative idea. Keeping it in good shape needs some regular care. Maintenance helps your coat rack last longer and look better. Small efforts make a big difference.
Cleaning And Care
Dust the coat rack often to avoid dirt buildup. Use a soft cloth to wipe the surface gently. Mild soap and water work well for cleaning. Avoid harsh chemicals that can damage the finish. Dry the rack fully after cleaning to stop water damage.
Checking Hook Stability
Check the hooks regularly to ensure they stay tight. Loose hooks can fall and cause damage. Tighten screws with a screwdriver if needed. Replace any hooks that show signs of rust or wear. Secure hooks keep coats safe and the rack functional.
Repainting And Touch-ups
Look for chipped or faded paint on the door rack. Sand rough spots lightly before repainting. Choose paint that matches the original color and finish. Apply thin, even coats for the best result. Touch-ups keep the rack fresh and protected from damage.
Frequently Asked Questions
How Do I Choose The Right Door For A Coat Rack?
Select a sturdy, solid door that fits your space. Wood or metal doors work best for durability and support.
What Tools Are Needed To Turn A Door Into A Coat Rack?
You’ll need hooks, screws, a drill, a screwdriver, sandpaper, and paint or stain for finishing touches.
How Do I Install Hooks On A Door Coat Rack?
Mark hook positions evenly, pre-drill holes, and securely screw hooks in. Ensure hooks support the weight of coats.
Can I Customize The Door Coat Rack Design?
Yes, paint or stain the door, add decorative hooks, and personalize with stencils or decals to match your décor.
Conclusion
Turning an old door into a coat rack saves space and adds charm. It’s a simple project anyone can do with basic tools. You get a unique rack that fits your style perfectly. Plus, reusing doors helps the environment by reducing waste.
Try it yourself and enjoy a neat, organized entryway. Small changes make a big difference in your home. Give your door a new life today.