You want your pine outdoor furniture to look beautiful and last for years. Staining is the best way to protect your wood from weather damage while enhancing its natural charm.
But how do you stain pine properly to avoid blotches and uneven color? In this guide, you’ll learn simple steps that anyone can follow to achieve a smooth, rich finish. By the end, your furniture will not only stand out but also stay strong through every season.
Ready to transform your outdoor space? Let’s dive in!
Choosing The Right Stain
Choosing the right stain for your pine outdoor furniture is important. It protects the wood and improves its look. The right stain keeps your furniture strong against sun and rain. It also brings out the natural beauty of pine. This guide helps you pick the best stain for your outdoor pieces.
Types Of Stains For Pine
There are three main types of stains for pine wood. Oil-based stains soak deep into the wood. They protect well and last longer outside. Water-based stains dry faster and have less smell. They are easy to clean with soap and water. Gel stains are thick and stay on the surface. They work well on rough or uneven wood.
Color Selection Tips
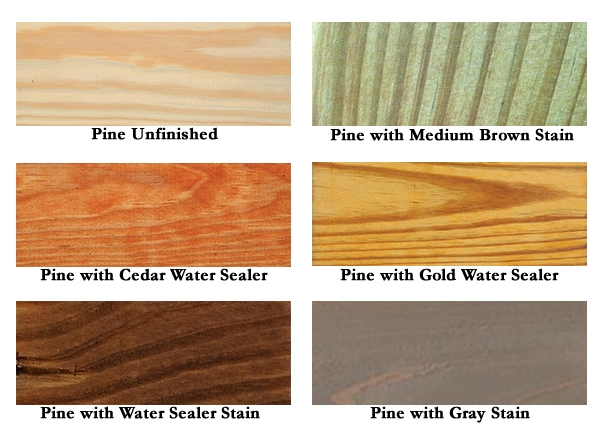
Choose a stain color that matches your style. Light colors show the wood’s grain and knots clearly. Dark colors hide wood marks but look richer. Test the stain on a small piece of wood first. This helps you see how the color changes in sunlight. Pick a color that fits your outdoor space and furniture design.
Consider Weather Resistance
Outdoor furniture faces sun, rain, and wind. Pick a stain with good weather resistance. Look for stains with UV protection to stop sun damage. Waterproof stains help prevent water from soaking in. This reduces wood swelling and cracking. Good weather resistance means your furniture stays beautiful longer.
Preparing The Furniture
Preparing pine outdoor furniture for staining is an important step. It helps the stain stick better and last longer. Proper preparation improves the wood’s look and protects it from weather damage. Take time to clean, sand, and repair the furniture before staining.
Cleaning The Surface
Remove dirt, dust, and old finishes from the wood. Use a soft brush or cloth to wipe the surface. A mix of mild soap and water works well for cleaning. Rinse the furniture with clean water and let it dry fully. Clean wood absorbs stain more evenly.
Sanding Techniques
Use fine-grit sandpaper to smooth the wood surface. Sand along the wood grain to avoid scratches. Sanding removes rough spots and opens wood pores for better stain absorption. Wipe away sanding dust with a clean cloth before staining.
Repairing Imperfections
Check for cracks, holes, or loose joints in the furniture. Fill small holes or cracks with wood filler and let it dry. Sand the filled areas smooth to match the wood surface. Tighten any loose screws or joints to keep the furniture sturdy.
Applying The Stain
Applying stain to pine outdoor furniture protects the wood and improves its look. It brings out the natural grain and adds color. Proper application ensures the stain lasts longer and guards against weather damage. Follow the right steps and use the right tools for the best results.
Tools And Materials Needed
- Quality wood stain suitable for outdoor use
- Clean paintbrush or foam brush
- Lint-free cloths or rags
- Sandpaper (120 to 150 grit)
- Protective gloves
- Drop cloth or plastic sheet
- Stir stick
- Bucket of clean water (for cleanup)
Step-by-step Application
Start by sanding the furniture to smooth rough spots. Wipe off all dust with a damp cloth.
Stir the stain thoroughly to mix pigments and oils. Do not shake the can.
Apply the stain along the wood grain using a brush or cloth. Use even, smooth strokes.
Allow the stain to soak in for 5 to 15 minutes, depending on color depth.
Wipe off excess stain with a clean cloth to avoid sticky patches. Work in sections.
Let the first coat dry before adding a second one for richer color and better protection.
Drying Times And Conditions
Stain usually dries to touch within 4 to 6 hours. Full curing takes 24 to 48 hours.
Drying time depends on temperature and humidity. Warm, dry weather is best.
Avoid staining outdoors if rain or heavy dew is expected within 24 hours.
Good airflow speeds drying but avoid direct sunlight during application to prevent uneven drying.
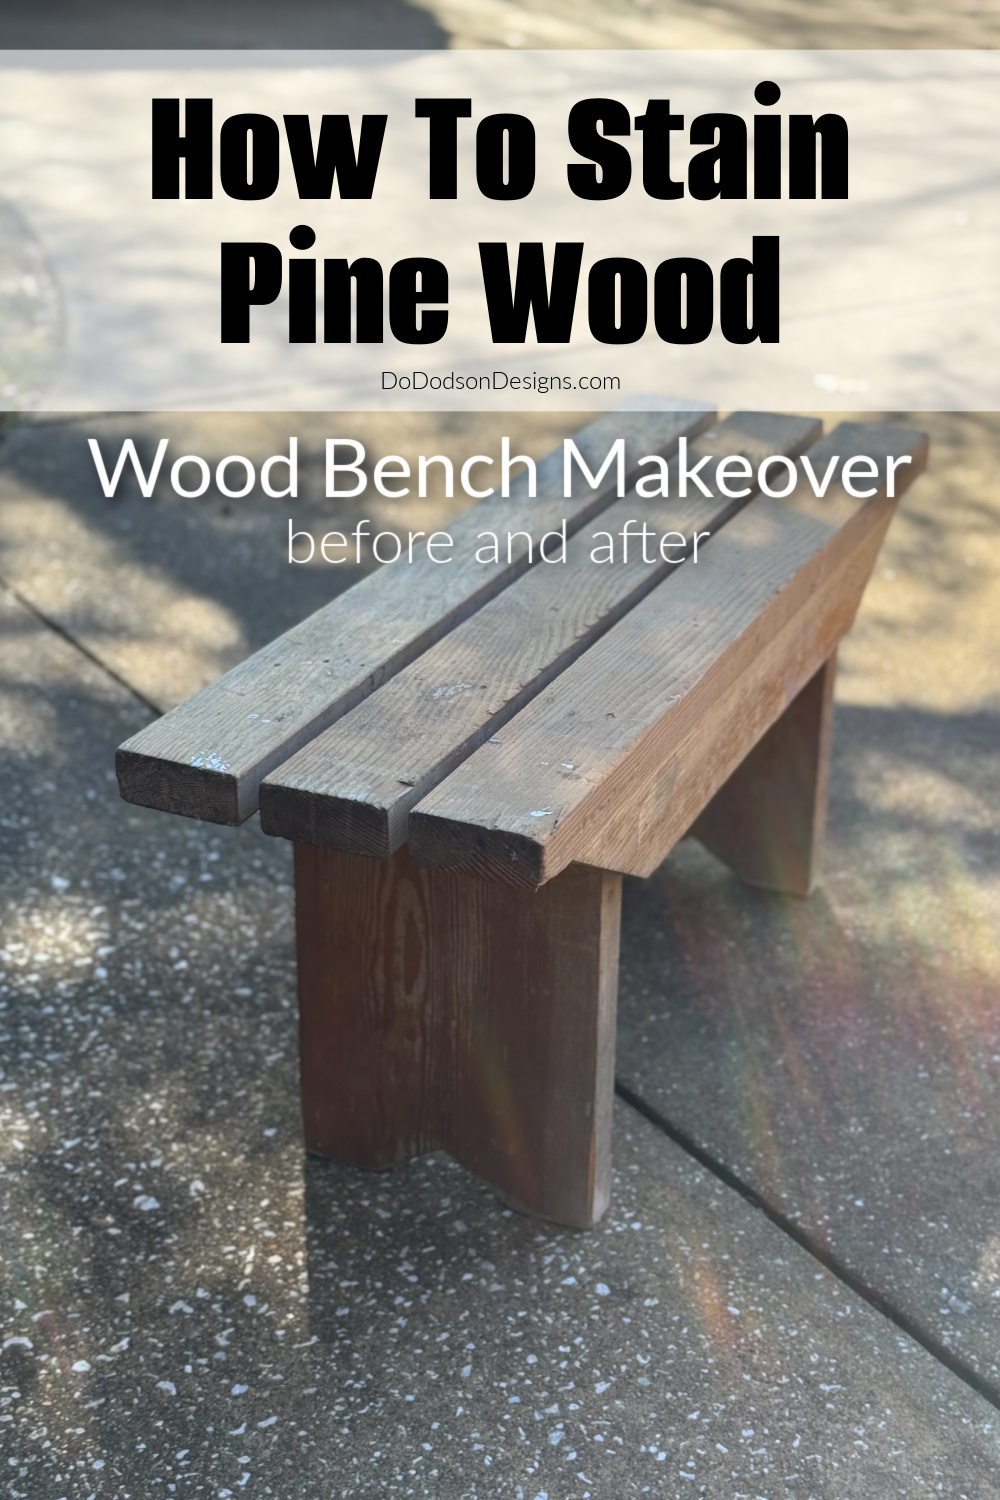
Credit: www.dododsondesigns.com
Sealing For Protection
Sealing pine outdoor furniture is key to keeping it safe from weather damage. The sealer creates a strong barrier that stops water, dirt, and sunlight from harming the wood. This protection helps the furniture last longer and look great over time.
Proper sealing also prevents the wood from cracking and fading. It keeps the stain color fresh and rich. Without sealing, the wood can absorb moisture and swell or warp. Sealing is an easy step that makes a big difference.
Choosing The Right Sealer
Pick a sealer made for outdoor wood. Look for water-resistant or waterproof types. A sealer with UV protection helps stop sun damage. Oil-based sealers soak into the wood deeply. Water-based sealers dry faster and have less smell. Choose one that fits your climate and how much use the furniture gets.
Applying The Sealer
Apply the sealer with a clean brush or cloth. Work in thin, even coats to avoid drips. Let the first coat dry fully before adding another. Usually, two coats give the best protection. Seal all sides, including the bottom and corners. This ensures no part of the wood is left exposed.
Maintenance Tips
Check your furniture every year for wear. Clean it with mild soap and water before resealing. Sand rough or peeling spots lightly to smooth the surface. Reapply the sealer as soon as the wood looks dry or faded. Regular maintenance keeps your pine furniture strong and beautiful.
Common Mistakes To Avoid
Staining pine outdoor furniture is a great way to protect and beautify it. Avoiding common mistakes ensures the best results. These errors can ruin your work or shorten the life of the stain. Understanding what to avoid helps you save time and money. Below are key mistakes to watch out for.
Overapplying Stain
Applying too much stain causes uneven color and sticky surfaces. Thick layers take longer to dry and may peel off. Use a thin, even coat for the best finish. Wipe off excess stain after application. This helps the wood absorb the stain properly.
Ignoring Weather Conditions
Staining in bad weather leads to poor results. Rain or high humidity slows drying and causes blotches. Extreme heat can make stain dry too fast, leaving streaks. Choose a dry, mild day for staining. Protect your furniture from direct sunlight while working.
Skipping Surface Preparation
Not cleaning or sanding the wood harms the stain’s adhesion. Dirt, dust, and old finishes block the stain from soaking in. Sand the surface smoothly and remove all debris before staining. Proper prep ensures a smooth, long-lasting finish.
Credit: www.dutchcrafters.com

Credit: maiamidwifery.com
Frequently Asked Questions
How Do I Prepare Pine Furniture For Staining?
Start by sanding the pine surface with fine-grit sandpaper. Clean off dust and debris thoroughly. Ensure the wood is dry before applying any stain for best results.
What Type Of Stain Works Best For Pine Wood?
Oil-based stains are ideal for pine as they penetrate well. They enhance the natural grain and provide long-lasting protection outdoors.
How Many Coats Of Stain Should I Apply On Pine?
Apply two thin coats of stain for even coverage. Allow the first coat to dry completely before applying the second.
Should I Seal Pine Furniture After Staining Outdoors?
Yes, sealing pine furniture protects it from moisture and UV damage. Use a clear exterior polyurethane or spar varnish for durability.
Conclusion
Staining pine outdoor furniture protects it from weather and wear. It also brings out the wood’s natural beauty. Clean and sand the wood before applying stain for best results. Use even strokes to avoid blotches. Let the stain dry fully between coats.
Regular care keeps your furniture looking fresh and strong. Enjoy your outdoor space with furniture that lasts longer and looks great. Simple steps make a big difference in wood care. Try it yourself and see the results!