Are your outdoor metal furniture legs scratching your deck or sliding around too much? Those small plastic pads at the bottom might seem unimportant, but they play a big role in protecting your floors and keeping your furniture steady.
If they’re worn out or missing, it’s time to replace them. In this guide, you’ll learn simple steps to swap out those plastic pads yourself—no special tools or skills needed. Keep reading to save your floors, extend the life of your furniture, and enjoy your outdoor space without worry.
Tools And Materials Needed
Replacing plastic pads on outdoor metal furniture requires a few simple tools and materials. Having the right items ready makes the task easier and faster. This section lists the types of plastic pads, essential tools, and safety gear needed for this job.
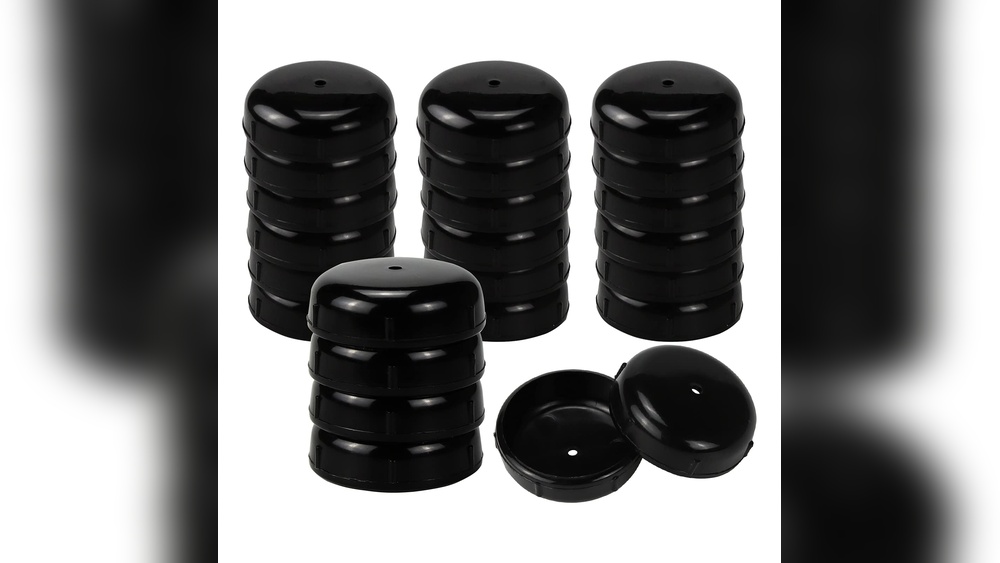
Types Of Plastic Pads
Plastic pads come in various shapes and sizes. Some are round, while others are square or rectangular. Choose pads that fit your furniture legs perfectly. Look for durable, weather-resistant plastic to last longer outdoors. Some pads have adhesive backs; others need screws or nails. Select the type that suits your furniture and installation method.
Essential Tools
You will need a screwdriver or drill to remove old pads. A measuring tape helps find the right pad size. Use pliers if old pads are stuck or rusty. A hammer may be necessary for nailing new pads. Keep a cloth handy to clean furniture legs before installation. These tools ensure smooth removal and fitting of new pads.
Safety Gear
Wear gloves to protect your hands from sharp edges. Safety glasses guard your eyes from dust or debris. Use a dust mask if sanding or scraping old pads. Proper safety gear prevents injuries and keeps you comfortable. Always work in a well-lit, open space for better visibility and safety.
Credit: www.homedepot.com
Removing Old Plastic Pads
Removing old plastic pads from outdoor metal furniture is the first step to a neat replacement. It ensures the new pads fit well and last longer. Old pads can be stuck tightly or worn out, so careful removal is key. Follow these steps to make the process easy and clean.
Checking The Attachment Method
Plastic pads attach to metal furniture in different ways. Some are glued, while others are screwed or snapped on. Look closely to see how your pads stay in place. This helps decide the best way to remove them without damage.
Removing Stubborn Pads
Stubborn pads need gentle force to come off. Use a flat tool like a putty knife to lift edges carefully. Avoid sharp tools that can scratch the metal. If glue holds the pad, try warming it with a hairdryer to soften the adhesive.
Cleaning The Surface
After removing pads, clean the metal surface well. Use mild soap and water to remove dirt and glue residue. Dry the area completely before adding new pads. A clean surface helps the new pads stick better and last longer.
Choosing Replacement Pads
Choosing the right replacement pads for your outdoor metal furniture matters. It helps protect floors and keeps furniture stable. The right pads also last longer under tough outdoor conditions. This section guides you on selecting the best pads for your needs.
Matching Size And Shape
First, measure the old pads carefully. Check the diameter and thickness. The new pads must fit snugly to avoid slipping. Match the shape too—round, square, or oval. Proper fit ensures better protection and comfort.
Selecting Durable Materials
Choose pads made from strong materials. Rubber and silicone are common choices. They resist wear and tear better than soft plastics. Durable pads save money by lasting longer. Avoid cheap, thin pads that break quickly.
Weather Resistance Factors
Outdoor furniture faces rain, sun, and cold. Pick pads that handle moisture without damage. UV-resistant pads do not crack or fade in sunlight. Water-resistant pads prevent mold and rotting. These features keep pads working well year-round.
Installing New Plastic Pads
Installing new plastic pads on outdoor metal furniture helps protect both the furniture and your floors. It also prevents noise and keeps the furniture stable. This process is simple with the right tools and steps.
Follow these steps carefully to ensure the pads fit well and stay in place.
Aligning The Pads
Start by placing each new pad at the bottom of the furniture legs. Match the shape of the pad with the leg’s end. Make sure the pad covers the entire contact surface. Proper alignment stops wobbling and uneven wear.
Securing Methods
Use strong adhesive or screws to fix the pads. For adhesive, clean the surface first and press the pad firmly. Hold it for a minute to stick well. When using screws, drill small holes in the pads and legs. Tighten screws until the pad feels tight but not damaged.
Testing Stability
After installation, place the furniture on a flat surface. Gently rock each leg to check movement. The furniture should feel steady and balanced. If any pad shifts, adjust or re-secure it. This step ensures safety and long-lasting use.
Maintenance Tips
Maintaining plastic pads on outdoor metal furniture helps keep your pieces sturdy and safe. Proper care extends the life of the pads and prevents damage to your floors and furniture legs. Simple steps can make a big difference.
Regular Inspection
Check plastic pads every few weeks. Look for cracks, wear, or loosening. Early spotting stops bigger problems later. Tighten or replace pads if they feel loose. Catching issues early saves money and effort.
Cleaning And Care
Clean pads with mild soap and water. Avoid harsh chemicals that can wear down plastic. Dry pads thoroughly to stop moisture damage. Keep furniture legs dry to prevent rust or mold.
When To Replace Again
Replace pads if cracks appear or if they no longer grip well. Worn pads can scratch floors or cause furniture to wobble. Changing pads on time keeps your furniture stable and your floors safe.

Credit: www.walmart.com

Credit: www.amazon.com
Frequently Asked Questions
What Tools Are Needed To Replace Plastic Pads On Metal Furniture?
You need a screwdriver, replacement plastic pads, pliers, and a cleaning cloth. These tools help remove old pads and secure new ones properly.
How Do I Remove Old Plastic Pads From Outdoor Furniture?
First, clean the area around the pad. Use pliers or a screwdriver to gently pry off the old plastic pads without damaging the metal.
Can I Replace Plastic Pads Myself Or Need A Professional?
Replacing plastic pads is a simple DIY task. It requires minimal tools and no special skills. Most people can do it easily.
How Often Should Plastic Pads On Outdoor Furniture Be Replaced?
Replace plastic pads every 1-2 years or when they show wear. This prevents furniture damage and keeps surfaces scratch-free.
Conclusion
Replacing plastic pads on outdoor metal furniture keeps it stable and safe. It stops scratches on floors and extends furniture life. Choose the right size and material for the best fit. Regular checks help spot wear early and avoid damage.
Simple steps can save money and improve comfort. Take care of your furniture to enjoy it longer outdoors. Small fixes make a big difference in the long run.