Are you looking to add a stylish and practical touch to your space? Building a leaning bookshelf might be exactly what you need.
It’s a simple project that can transform any empty wall into a beautiful spot for your books, plants, and favorite decor. Imagine having a unique piece that not only saves space but also makes your room feel cozy and organized.
In this guide, you’ll learn easy steps to create your own leaning bookshelf, even if you’ve never built anything before. Let’s get started and turn your ideas into a real, eye-catching shelf you’ll love!
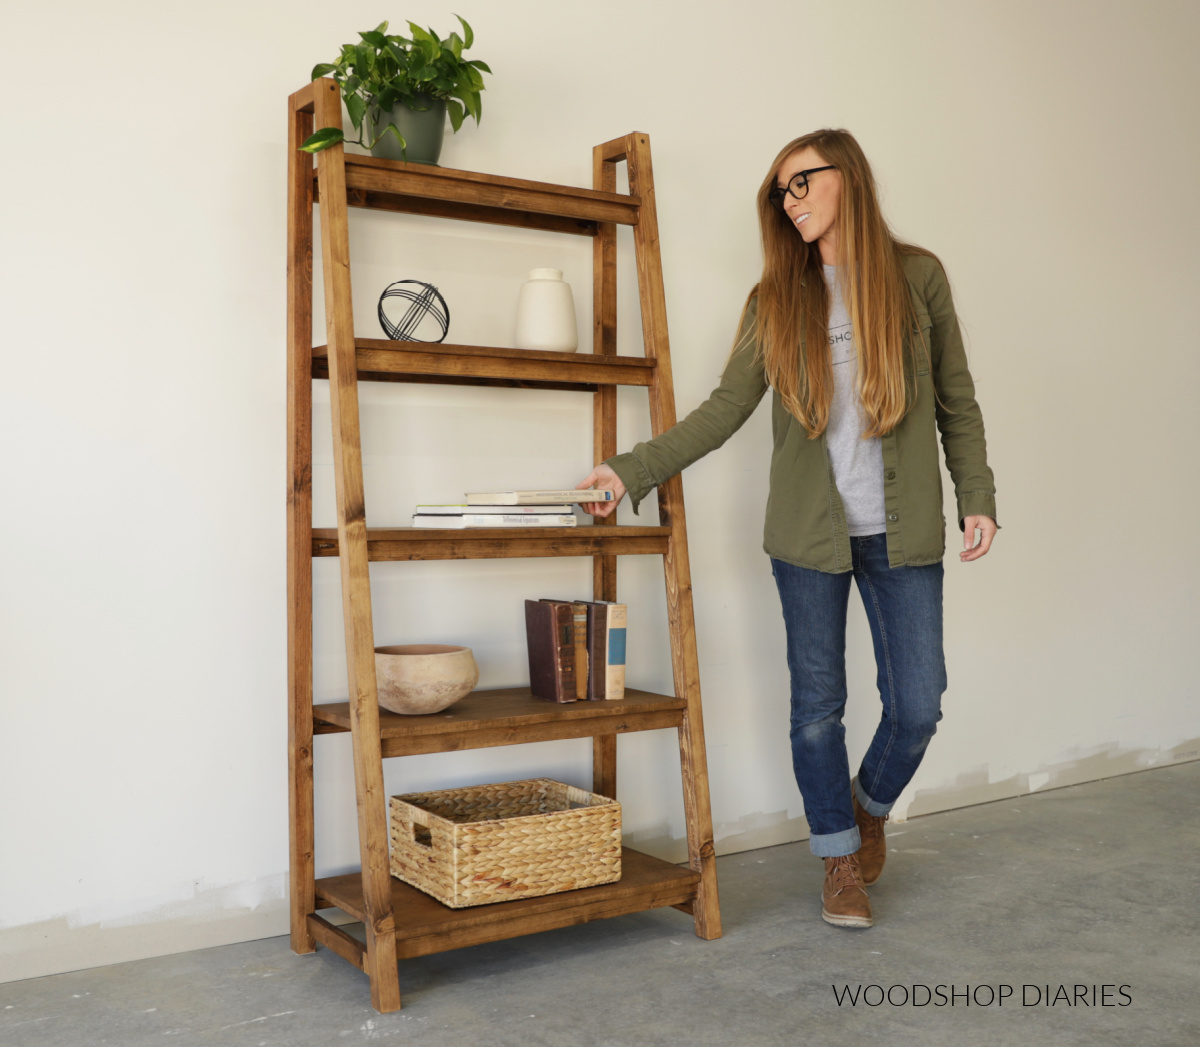
Credit: www.woodshopdiaries.com
Materials And Tools Needed
Building a leaning bookshelf needs the right materials and tools. Choosing good materials helps the shelf last long. Using the right tools makes the work easier and safer.
Choosing The Right Wood
Pick wood that is strong and smooth. Pine is cheap and easy to work with. Oak is tougher but costs more. Plywood can also work well for shelves. Avoid wood with many knots or cracks. The wood should be dry to stop warping. Measure and cut pieces carefully for good fit.
Essential Tools List
Gather these tools before starting your project. A saw is needed to cut the wood. A drill helps make holes for screws. Sandpaper smooths rough edges. A screwdriver is useful for fixing screws. A tape measure ensures exact cuts. A level keeps the shelf straight. Clamps hold pieces steady while you work.
Safety Gear Tips
Wear safety glasses to protect your eyes from dust. Use ear protection if you work with loud tools. Gloves protect your hands from splinters and cuts. Work in a clean, well-lit area. Keep your workspace clear to avoid accidents. Take breaks to stay focused and safe.
Credit: www.ana-white.com
Designing Your Leaning Bookshelf
Designing your leaning bookshelf is the first step to a useful and stylish piece. Careful planning helps fit the bookshelf perfectly in your space. It also makes sure the shelves hold your books safely and look good.
Focus on the size, style, and shelf layout. These details shape your bookshelf’s function and appearance. A well-designed leaning bookshelf adds charm and storage to any room.
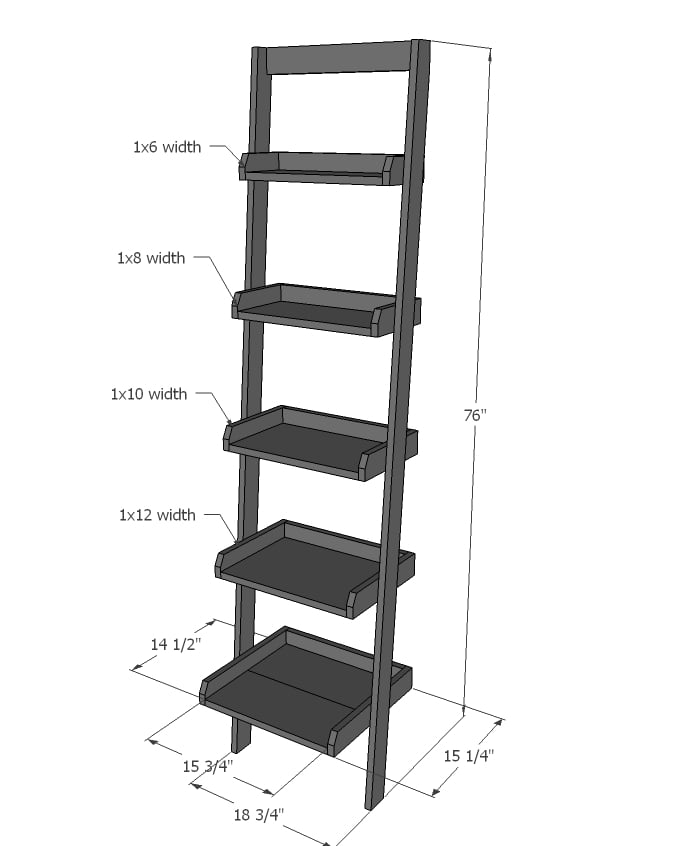
Measuring Space And Dimensions
Start by measuring the wall space where the bookshelf will stand. Note the height, width, and depth available. Consider any nearby furniture or obstacles. This helps avoid buying or cutting wood that does not fit.
Think about how much space the leaning angle needs. The base should be wider than the top for stability. Take extra room for opening doors or walking paths. Accurate measurements prevent problems during assembly.
Selecting Style And Finish
Choose a style that matches your room’s look. Simple, clean lines suit modern spaces. Rustic or natural wood fits cozy, traditional rooms. Decide if you want open shelves or some with backs.
Pick a finish that protects the wood and suits your taste. Paint can brighten a room and add color. Stain shows wood grain and gives a warm feel. A clear coat adds shine and durability.
Planning Shelf Placement
Think about what you want to store on the shelves. Books need different heights than decorative items. Space shelves evenly or adjust heights to fit tall or short objects.
Place heavier items on lower shelves for safety. Use the top shelves for light or rarely used things. Plan shelf depth to hold your largest books or items comfortably.
Preparing The Wood Pieces
Preparing the wood pieces is a key step in building a leaning bookshelf. It sets the foundation for a strong and beautiful piece. Taking time to measure, cut, and smooth the wood ensures all parts fit well. This process makes assembly easier and improves the final look of your shelf.
Cutting Wood To Size
Start by measuring each piece carefully. Use a tape measure and mark the wood with a pencil. Cut along the marks using a saw. Straight, precise cuts help the bookshelf stand stable. Take your time to get each piece the right length.
Sanding For Smoothness
After cutting, sand every wood surface. Use medium-grit sandpaper first, then fine-grit for a smooth finish. Sand edges and corners to avoid splinters. Smooth wood looks better and feels safe to touch. Clean off the dust before moving on.
Prepping For Assembly
Check each piece for any cracks or defects. Arrange the wood parts in order for easy access. Drill pilot holes if screws will be used. This prevents wood from splitting during assembly. Organize your tools and materials nearby to speed up the build.
Assembling The Frame
Assembling the frame is the most important step in building a leaning bookshelf. This step shapes the entire piece and gives it strength. A solid frame ensures the shelves hold weight safely and look good. Follow these steps carefully for a sturdy and neat bookshelf.
Building The Side Supports
Start by cutting two long wooden boards for the side supports. These boards will lean against the wall and hold the shelves. Cut them at an angle on one end to make sure the bookshelf leans properly. Sand the edges to avoid splinters and create a smooth finish. Drill pilot holes to prevent wood from splitting when attaching the shelves later.
Attaching The Shelves
Choose boards for the shelves that fit between the side supports. Begin attaching from the bottom shelf and move up. Use clamps to hold the shelves in place while screwing them to the side supports. Make sure each shelf is level before securing it. Space the shelves evenly or according to the items you plan to store.
Securing Joints And Stability
Reinforce the joints with wood glue for extra strength. Insert screws into all connection points to keep the frame solid. Add small corner braces behind each shelf for more stability. Check the frame for any wobbling and tighten screws as needed. The frame should feel strong and steady before moving to finish work.
Finishing Touches
Finishing touches make your leaning bookshelf look great and last longer. They protect the wood and keep the shelf steady. Take your time with these steps for a neat, safe result.
Applying Paint Or Stain
Choose paint or stain to match your room’s style. Paint covers the wood and adds color. Stain shows the wood’s natural grain and darkens it. Use a brush or cloth to apply evenly. Let each coat dry before adding another. Two or three coats work best for good coverage.
Adding Protective Coating
Seal your shelf with a clear protective coat. It stops scratches and water damage. Use polyurethane or varnish for strong protection. Apply thin layers with a clean brush. Let each layer dry fully before the next. This step keeps your shelf looking new for years.
Installing Wall Anchors
Secure the shelf to the wall for safety. Wall anchors stop it from tipping over. Use a drill to make holes in the wall. Insert anchors, then screw the shelf bracket to them. Check if the shelf feels steady. This step is important, especially in homes with kids or pets.
Styling And Organizing
Styling and organizing your leaning bookshelf can turn it into a beautiful, functional piece. It is more than just placing books. Thoughtful arrangement and decoration make your space inviting and neat.
Arranging Books Creatively
Place books both vertically and horizontally. Stack some books to create different heights. Mix colors and sizes to add interest. Use bookends to keep books in place. Group books by theme or color for a clean look.
Incorporating Decorative Items
Add small plants for freshness and color. Use picture frames or art pieces to personalize the shelf. Place candles or small sculptures to add charm. Keep decorations balanced but not crowded. Let the shelf breathe with empty spaces.
Maintenance Tips For Longevity
Dust the shelf and books regularly. Avoid placing it in direct sunlight to prevent fading. Check screws and joints for stability. Clean spills immediately to avoid damage. Rotate books and decorations to keep the shelf looking fresh.
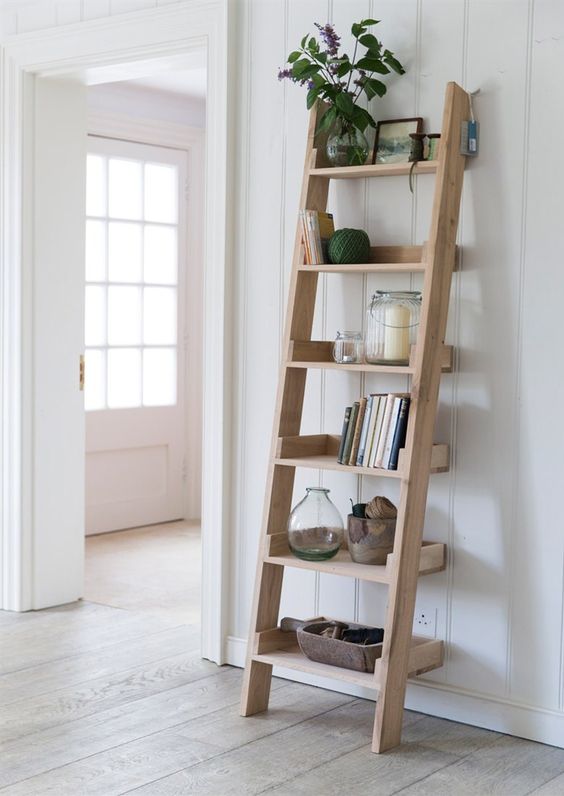
Credit: www.brepurposed.com
Frequently Asked Questions
What Materials Are Needed To Build A Leaning Bookshelf?
You need wood planks, screws, wood glue, sandpaper, paint, and brackets. Choose sturdy wood like pine or oak for durability. Ensure all tools like a drill and saw are ready before starting your project.
How Do I Ensure The Leaning Bookshelf Is Stable?
Use angled brackets to secure the shelf to the wall. Make sure the base is wider than the top for balance. Tighten all screws firmly and check for wobbling before placing items on it.
What Are The Best Wood Types For A Leaning Bookshelf?
Pine, oak, and maple are excellent choices. Pine is affordable and easy to work with. Oak and maple offer strength and a beautiful finish. Select wood based on your budget and desired look.
Can I Customize The Size Of My Leaning Bookshelf?
Yes, you can adjust height, width, and shelf spacing. Measure your available wall space beforehand. Custom sizes help fit different room layouts and storage needs perfectly.
Conclusion
Building a leaning bookshelf is simple and rewarding. You need just a few materials and some basic tools. Follow clear steps to make your shelf strong and stylish. This project adds charm and function to any room. Enjoy placing your favorite books or decorations on it.
Try making one yourself and see how easy it can be. A leaning bookshelf fits well in many spaces and styles. Start your project today and create something useful and nice.