Are you looking for a fun and affordable way to create a cozy bunk bed for your doll? Making a doll bunk bed out of cardboard is easier than you think, and it’s a great way to bring your child’s imagination to life.
Imagine the joy on your child’s face when they see a sturdy, handmade bed ready for their favorite dolls. In this guide, you’ll discover simple steps and clever tips to turn plain cardboard into a charming bunk bed that’s both sturdy and stylish.
Keep reading, and you’ll have your own mini masterpiece in no time!
Materials Needed
Gathering the right materials is the first step to create a sturdy doll bunk bed. Using simple items makes the project easy and fun. Most materials are easy to find at home or local stores.
Choose strong cardboard for the bed frame. Thick cardboard holds the structure well. Thin cardboard may bend or break quickly.
Cardboard Sheets
Select large, flat pieces of cardboard. Look for corrugated cardboard for extra strength. Avoid any damaged or wet pieces.
Cutting Tools
A sharp craft knife or box cutter works best. Use scissors for smaller cuts. Always handle blades carefully to avoid injury.
Measuring Tools
A ruler or measuring tape helps create accurate pieces. Mark lines with a pencil before cutting. This ensures all parts fit perfectly.
Adhesive Materials
Use strong glue like hot glue or craft glue. Tape can hold parts temporarily but glue is better for lasting results. Keep glue sticks or bottles ready.
Decorative Supplies
Paint, markers, or colored paper add color and style. Fabric scraps can make tiny mattresses or pillows. Choose simple decorations to keep the bed neat.
Preparing The Cardboard
Preparing the cardboard is the first step in making a doll bunk bed. It sets the base for a strong and neat project. This stage needs care and attention. Choosing the right cardboard and measuring it correctly makes the whole process easier. Good preparation saves time and effort later.
Selecting The Right Cardboard
Choose thick, sturdy cardboard for the bed. Thin cardboard bends and breaks easily. Look for boxes that held heavy items. Avoid wet or soft pieces. Check the surface for smoothness. Smooth cardboard is easier to cut and paint. Larger sheets reduce the number of joins. This helps make the bed stronger and cleaner.
Measuring And Marking
Use a ruler and pencil to mark the cardboard. Measure twice to avoid mistakes. Mark all parts clearly before cutting. Include pieces for the bed frame, ladder, and slats. Keep the measurements simple and even. Straight lines help make neat cuts. Take your time to be accurate. Clear marks guide you through the next steps well.
Cutting The Pieces
Cutting the pieces is the first big step in making your doll bunk bed. You need to cut the cardboard carefully. Each piece must fit well for the bed to be strong and look nice. This part needs focus and patience. The right tools and clear guidelines make cutting easier and safer.
Tools For Cutting
Use a sharp craft knife or box cutter. These tools cut cardboard smoothly. A metal ruler helps you make straight lines. Cutting on a thick cutting mat protects your table. Keep extra blades ready. Dull blades tear the cardboard and cause mistakes. Use gloves for safety if needed.
Cutting Guidelines
Measure twice, cut once. Mark your lines clearly with a pencil. Cut slowly and follow the lines exactly. Start with larger pieces like the bed base and sides. Cut smaller pieces like rails and ladders next. Keep your hand steady. Use the ruler as a guide to avoid crooked cuts. Smooth rough edges with sandpaper if necessary.
Assembling The Frame
Assembling the frame is the first big step in making your doll bunk bed. This part gives the bed its shape and strength. A solid frame keeps the bed steady for playtime. Use strong cardboard pieces and take your time. Cut carefully and fit parts together like a puzzle. Follow each step to build a frame that lasts.
Building The Bed Base
Start by cutting a large rectangle from thick cardboard. This will be the bed base where the doll mattress sits. Make sure the size fits your doll perfectly. Cut smaller strips for extra support under the base. Glue or tape these strips evenly spaced. This stops the base from bending or breaking. Let the glue dry well before moving on.
Constructing The Side Rails
Side rails keep your doll safe from falling off the bed. Cut two long strips from cardboard for each bed level. The height should be enough to stop dolls from rolling off. Attach the rails to the sides of the bed base with glue or tape. Reinforce corners by adding small cardboard blocks inside joints. This step adds strength and keeps the rails firm.
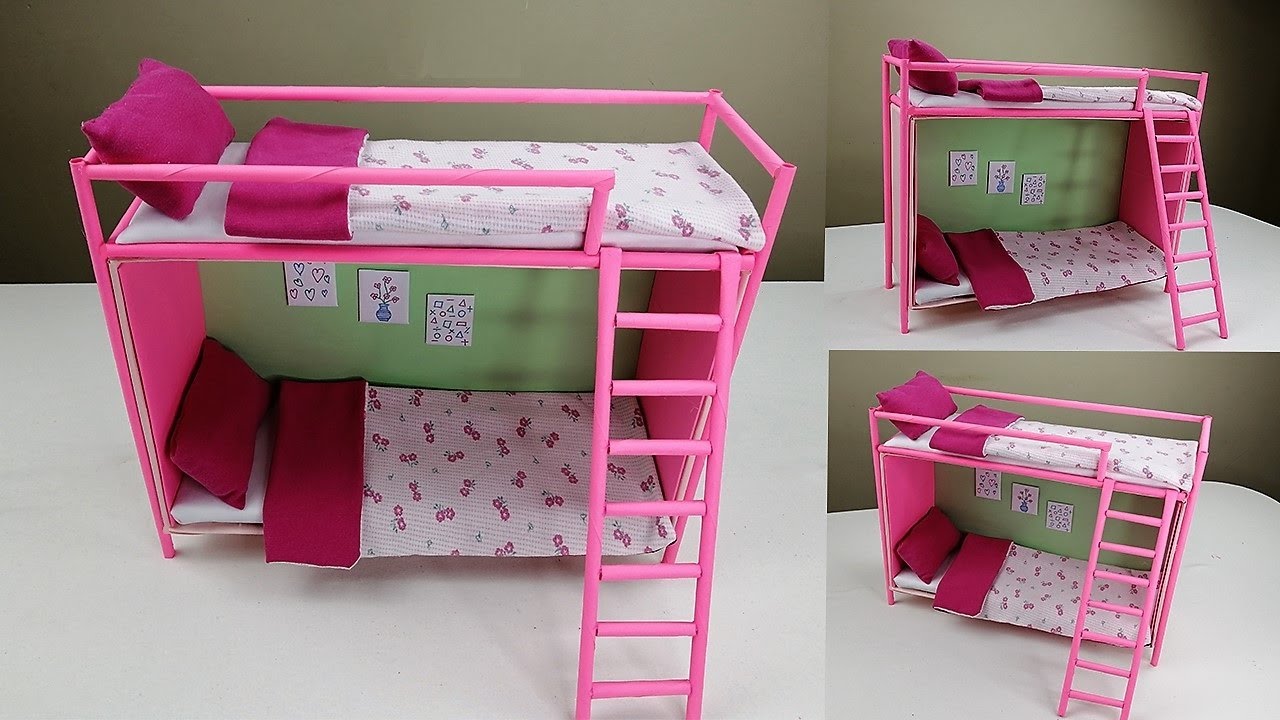
Creating The Bunk Structure
Creating the bunk structure is the key step in building a doll bunk bed out of cardboard. This stage gives the bed its shape and strength. The frame must be sturdy enough to hold both bunks safely.
Start by making sure all pieces fit well. Take your time to measure and cut carefully. A strong structure means a longer-lasting bunk bed for your dolls.
Adding The Support Posts
Support posts hold up the top bunk. Cut four equal cardboard strips for the posts. Each strip should be thick and firm.
Glue the posts at each corner of the bottom bunk base. Press firmly and wait for the glue to dry. These posts keep the upper bunk stable and safe.
Securing The Upper Bunk
The upper bunk sits on top of the support posts. Cut the upper bunk base the same size as the bottom one. Place it carefully on the posts.
Use extra glue along the edges where the posts meet the upper base. Hold the parts together until the glue sets. This step ensures the top bunk will not move or fall.

Credit: www.ikatbag.com
Finishing Touches
After building the doll bunk bed, the final steps bring it to life. Finishing touches make the bed safe and pretty. These small details improve how the bed looks and feels. Take your time to make sure the edges are smooth and the paint is neat. This part is fun and lets your creativity shine.
Sanding Edges
Use fine sandpaper to smooth rough edges. Sand every corner carefully to avoid sharp spots. This step protects little hands from getting hurt. Light sanding also helps paint stick better. Check all sides and edges to ensure smoothness. Take your time for the best results.
Painting And Decorating
Choose bright or soft paint colors for the bed. Use non-toxic paint safe for kids’ toys. Paint the bed evenly for a clean look. Add patterns like stripes, dots, or flowers for extra charm. Stickers or small decorations can make it unique. Let the paint dry fully before use.
Tips For Stability And Safety
Making a doll bunk bed out of cardboard is fun and creative. Safety and stability are very important. A strong bed keeps dolls safe and lasts longer. Follow these simple tips to build a solid and safe doll bunk bed.
Choose Thick Cardboard
Use thick and sturdy cardboard. Thin cardboard bends and breaks easily. Double layers add strength. Test the cardboard by pressing it with your hand. It should feel firm and not bend much.
Use Strong Glue
Pick a glue that holds cardboard well. White craft glue or hot glue works best. Apply glue evenly on all joints. Press pieces together until dry. This helps keep the bed stable and safe.
Reinforce Corners And Joints
Add extra pieces of cardboard to corners. These pieces act like braces. They stop the bed from wobbling. Glue these reinforcements firmly. Check all joints for gaps and fix them.
Keep Weight In Mind
Do not make the bed too big. Heavy dolls can break weak parts. Test the bed by placing dolls on it. If it feels shaky, add more supports. Balance size and strength carefully.
Smooth Sharp Edges
Cut cardboard edges cleanly to avoid rough spots. Use sandpaper or a nail file to smooth edges. This prevents paper cuts and keeps play safe. Cover edges with tape for extra safety.
Credit: www.youtube.com
Customizing Your Doll Bunk Bed
Customizing your doll bunk bed makes it unique and fun. It turns a simple cardboard structure into a special play item. Small details can add charm and personality. It also encourages creativity and imagination in children. There are easy ways to decorate and personalize your doll bunk bed.
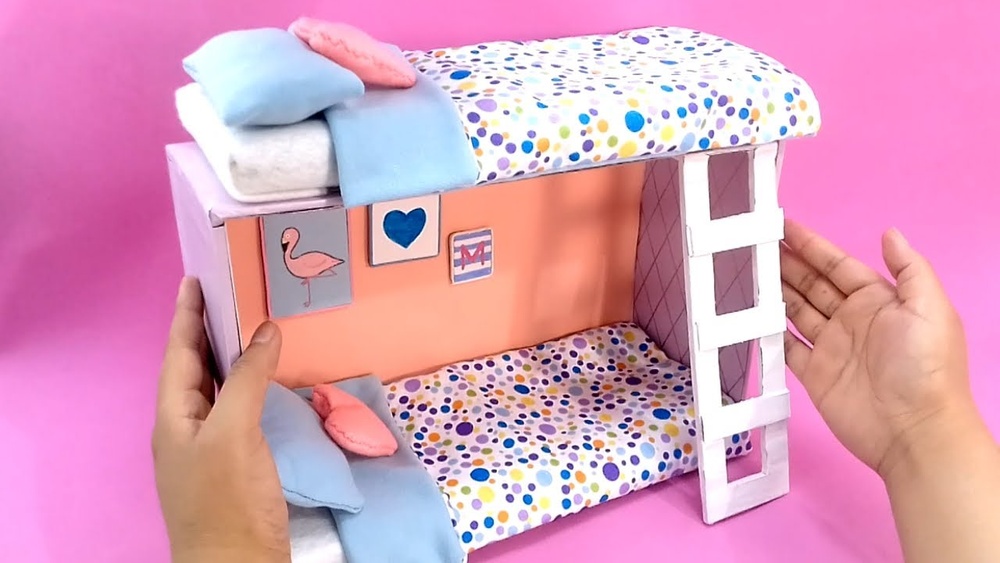
Adding Bedding And Accessories
Start with small bedding pieces like tiny blankets and pillows. Use fabric scraps or old clothes for soft beds. Cut them to fit each bunk perfectly. Add miniature pillows with cotton or stuffing. Small rugs or mats can go under the bed. These items make the bed look cozy and inviting.
Accessories like little lamps, books, or toys add extra fun. Use beads, buttons, or paper to create tiny objects. These small touches make playtime more exciting. Changing bedding colors and styles keeps the look fresh. It also helps kids learn about design and color matching.
Personalizing With Stickers And Decals
Stickers and decals are easy ways to decorate cardboard. Choose fun themes like stars, animals, or flowers. Place stickers on the bed frame or sides for a colorful look. Use removable stickers for easy changes later. This allows kids to update their bed’s style often.
Decals can add patterns or pictures to plain cardboard. They make the bunk bed look more detailed and lively. Personal names or initials can be added with letter stickers. This creates a sense of ownership and pride. Simple decorations transform the bed into a special space.

Credit: www.ikatbag.com
Frequently Asked Questions
How Do I Start Making A Cardboard Doll Bunk Bed?
Begin by gathering sturdy cardboard, a ruler, scissors, and glue. Measure and cut pieces for the bed’s frame and supports. Assemble the base first, then add the upper bunk. Ensure all parts fit securely for stability.
What Materials Are Best For A Doll Bunk Bed?
Use thick, corrugated cardboard for strength and durability. Craft glue or hot glue works best for joining pieces. Optional materials include paint, markers, or fabric for decoration. Avoid flimsy cardboard to ensure the bed holds its shape.
How Can I Make The Doll Bunk Bed Stable?
Reinforce joints with extra glue or tape inside corners. Use cross braces made from cardboard strips for added support. Ensure the base is flat and all pieces align properly. Stability prevents wobbling or collapsing during play.
Can I Customize The Doll Bunk Bed Design?
Yes, personalize it by painting or decorating with stickers. Add fabric for bedding or curtains for realism. Modify dimensions to fit different doll sizes. Customization makes the bed unique and fun to play with.
Conclusion
Creating a doll bunk bed from cardboard is fun and simple. It saves money and lets you be creative. You only need a few materials and some patience. Kids enjoy playing with something made by you. It also helps reduce waste by reusing cardboard.
Try different designs and colors to make it unique. This project is great for family time and learning. Give it a try and see how much fun crafting can be!