Looking for a simple way to organize your entryway and add extra storage? Making a coat rack with a shelf might be the perfect solution for you.
Imagine having a handy spot to hang your coats, hats, and bags, while also having a shelf to store keys, mail, or decorative items—all in one stylish piece. This project isn’t just practical; it’s a chance to create something unique that fits your space and style.
Keep reading, and you’ll discover easy steps to build your own coat rack with a shelf, even if you don’t have much experience with tools. Ready to transform your cluttered hallway into a neat and inviting area? Let’s get started!
Materials Needed
Starting a coat rack with a shelf requires gathering the right materials. These materials ensure your project is sturdy and looks good. Careful selection makes the building process smooth and enjoyable.
Wood Selection
Choose wood that is strong and easy to work with. Pine is affordable and light. Oak is durable and has a nice grain. Plywood can work for the shelf part. Make sure the wood is smooth or sand it before use.
Hardware And Tools
You will need hooks to hang coats. Metal hooks are strong and last long. Screws and wall anchors keep the rack steady on the wall. Use a drill for making holes. A screwdriver helps to attach hooks and screws.
Finishing Supplies
Finish your coat rack with paint or wood stain. Paint adds color and protects wood. Stain shows the wood’s natural beauty. Use a brush or cloth to apply. A clear sealant protects against water and dirt.
Design Planning
Design planning is the first step in making a coat rack with a shelf. It helps you create a clear idea before starting the project. Careful planning saves time and materials.
Think about the function and look you want. This guides your choices in style, size, and materials. A good plan makes the building process smooth and enjoyable.
Choosing The Style
Pick a style that fits your room’s decor. It can be modern, rustic, or classic. Simple designs work well in small spaces.
Consider the number of hooks and shelf size. Make sure the style matches your needs and taste. A well-chosen style adds charm to your home.
Measuring Space
Measure the wall space where you want to place the rack. Note the height, width, and depth available. This prevents buying too large or too small materials.
Check for obstacles like switches or windows. Leave enough space for coats and hats to hang freely. Accurate measurements ensure a perfect fit.
Sketching The Layout
Draw a simple sketch of your coat rack with shelf. Include hooks, shelf, and mounting points. This visual helps to see the final design clearly.
Label dimensions and materials on your sketch. Adjust the layout to improve balance and usability. A good sketch guides you during building.
Cutting The Wood
Cutting the wood is the first big step to make your coat rack with shelf. This step needs care and precision. Good cuts ensure your rack fits together well. Measure twice and cut once. Follow safety rules to avoid accidents. Prepare all pieces before assembly to save time.
Measuring And Marking
Start with measuring the wood pieces carefully. Use a tape measure for accuracy. Mark the cutting lines clearly with a pencil. Check the marks twice to avoid mistakes. Mark both sides of the wood for better guidance. Straight lines help to make clean cuts.
Safe Cutting Techniques
Wear safety goggles and gloves before cutting. Use a stable surface to support the wood. Choose the right saw for your wood type. Cut slowly along the marked lines. Keep your fingers away from the blade. Stop if the saw feels stuck or uneven.
Preparing Pieces
After cutting, check each piece for rough edges. Sand the edges smooth with sandpaper. Clean off sawdust before assembling. Organize the pieces by size and shape. This makes the building process easier and faster. Ready pieces make your coat rack strong and neat.

Credit: www.woodshopdiaries.com
Assembling The Frame
Assembling the frame is the key step to build your coat rack with a shelf. This process creates the structure that holds everything together. Strong and steady framing ensures your rack stays safe and functional. Follow clear steps to join the pieces, secure the shelf, and add extra support.
Joining Techniques
Start by connecting the main wood pieces for the frame. Use wood screws or nails to join the vertical and horizontal parts. Pre-drill holes to avoid splitting the wood. Apply wood glue at joints for extra strength. Clamp the pieces until the glue dries. Check all corners to keep the frame square and even.
Securing The Shelf
Place the shelf on top of the assembled frame. Align it so the edges match perfectly. Fix the shelf using screws from underneath. This keeps the top smooth and neat. Use enough screws to prevent wobbling. Double-check the shelf sits flat and does not tilt.
Adding Support Brackets
Support brackets add extra strength to the shelf. Attach metal or wooden brackets under the shelf edges. Secure each bracket firmly with screws into the frame. Space brackets evenly for balanced weight support. This step helps the shelf hold heavy items without sagging.
Attaching Hooks
Attaching hooks to your coat rack with shelf is a crucial step. Hooks hold coats, bags, and hats securely. Proper attachment ensures durability and ease of use. This section guides you through choosing, spacing, and mounting hooks correctly.
Selecting Hook Types
Choose hooks that fit your style and needs. Single hooks work well for light items like hats. Double hooks hold heavier coats or bags. Metal hooks offer strength and last longer. Wooden hooks match a rustic or classic look. Pick hooks that complement your shelf design.
Spacing And Placement
Space hooks evenly for a neat appearance. Measure the length of the shelf first. Mark spots where each hook will go. Leave about 6 to 8 inches between hooks. This spacing prevents items from overlapping. Place hooks at a height easy to reach. Consider the size of coats and bags.
Mounting Hooks Securely
Use a drill to make pilot holes in the shelf. Pilot holes keep wood from splitting. Align each hook with its marked spot. Screw hooks tightly into the pilot holes. Use screws that fit the hook holes well. Check that hooks hold firm by pulling gently. Secure hooks prevent accidents and damage.
Finishing Touches
Finishing touches make your coat rack with shelf look complete and polished. These steps improve its feel and durability. They also protect your wood from wear and tear. Take time with these small details for a great final result.
Sanding For Smoothness
Start by sanding all surfaces with fine-grit sandpaper. Sanding removes rough spots and splinters. It helps the paint or stain stick better. Move the sandpaper in the direction of the wood grain. Wipe away dust with a clean cloth after sanding.
Painting Or Staining
Choose paint or stain based on your style. Paint adds color and hides wood grain. Stain shows the natural wood look and texture. Apply thin, even coats using a brush or cloth. Let each coat dry fully before adding another. This prevents drips and uneven color.
Sealing And Protecting
Seal your coat rack to guard against moisture and dirt. Use clear varnish, polyurethane, or wax. Apply a thin layer and let it dry well. Sealing keeps your wood strong and shiny longer. It also makes cleaning easier over time.
Mounting The Rack
Mounting the coat rack with a shelf is a key step. It keeps the rack secure and safe to use. Proper mounting stops the rack from falling or tilting. Follow simple steps to mount it right and strong.
Finding Wall Studs
Wall studs are wooden beams behind drywall. They hold heavy items better than drywall alone. Use a stud finder to locate these studs. Mark the stud spots lightly with a pencil. Mounting on studs gives the rack strong support. Avoid mounting only on drywall, as it can fail.
Using Proper Anchors
Choose anchors based on your wall type. Drywall anchors work for light racks without studs. Use heavy-duty anchors for heavier racks or shelves. Insert anchors correctly to avoid wall damage. Proper anchors keep the rack steady and safe. Do not skip anchors if studs are not found.
Ensuring Stability
Check the rack’s level with a spirit level. Tighten all screws firmly but do not over-tighten. Test the rack by gently pulling on it. Ensure the rack does not wobble or move. Add extra screws if needed for more strength. Stability keeps your coats and items safe every day.
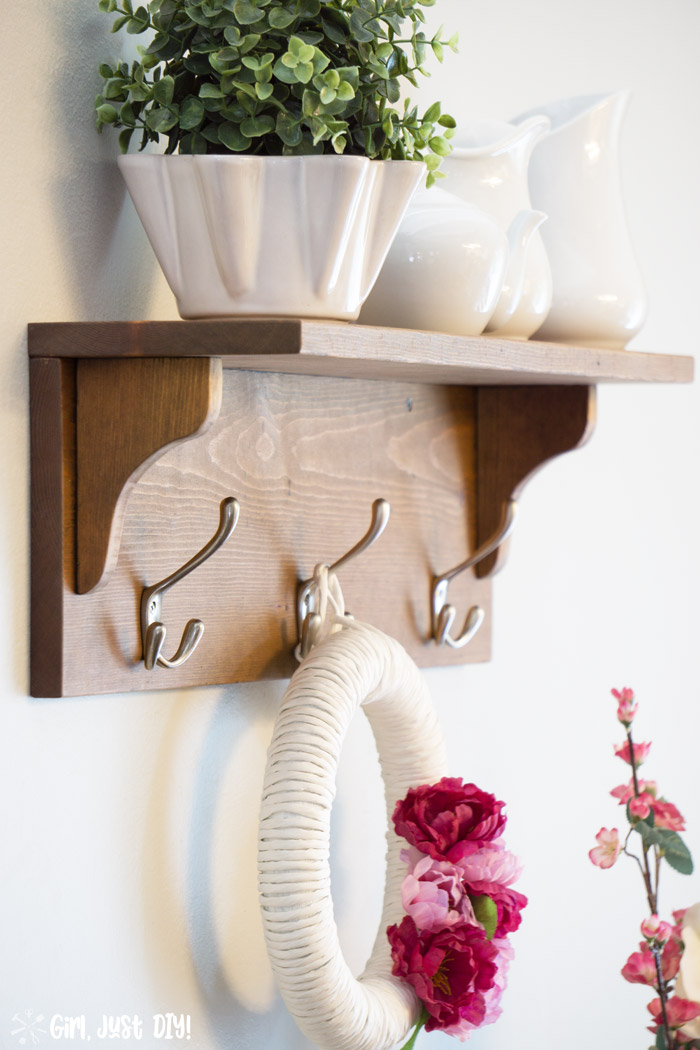
Credit: www.girljustdiy.com
Maintenance Tips
Keeping your coat rack with shelf in good shape takes some care. Regular maintenance helps it look nice and last longer. Simple steps can protect your rack from wear and tear. Follow easy tips to clean, fix, and refresh your rack.
Cleaning Advice
Dust the coat rack often with a soft cloth. Use a damp cloth for sticky spots. Avoid harsh cleaners that can damage the wood or finish. Dry the surface well after cleaning. Clean hooks and shelf edges carefully to avoid buildup.
Repairing Damage
Check for loose screws or hooks regularly. Tighten them with a screwdriver to keep the rack stable. Fill small cracks or dents with wood filler. Sand lightly after the filler dries for a smooth surface. Replace broken parts quickly to prevent further damage.
Refreshing Finish
Apply a fresh coat of paint or varnish if the finish looks dull. Light sanding before applying helps new finish stick better. Use a brush or cloth to spread evenly. Let it dry fully before using the rack again. This protects the wood and keeps it looking new.
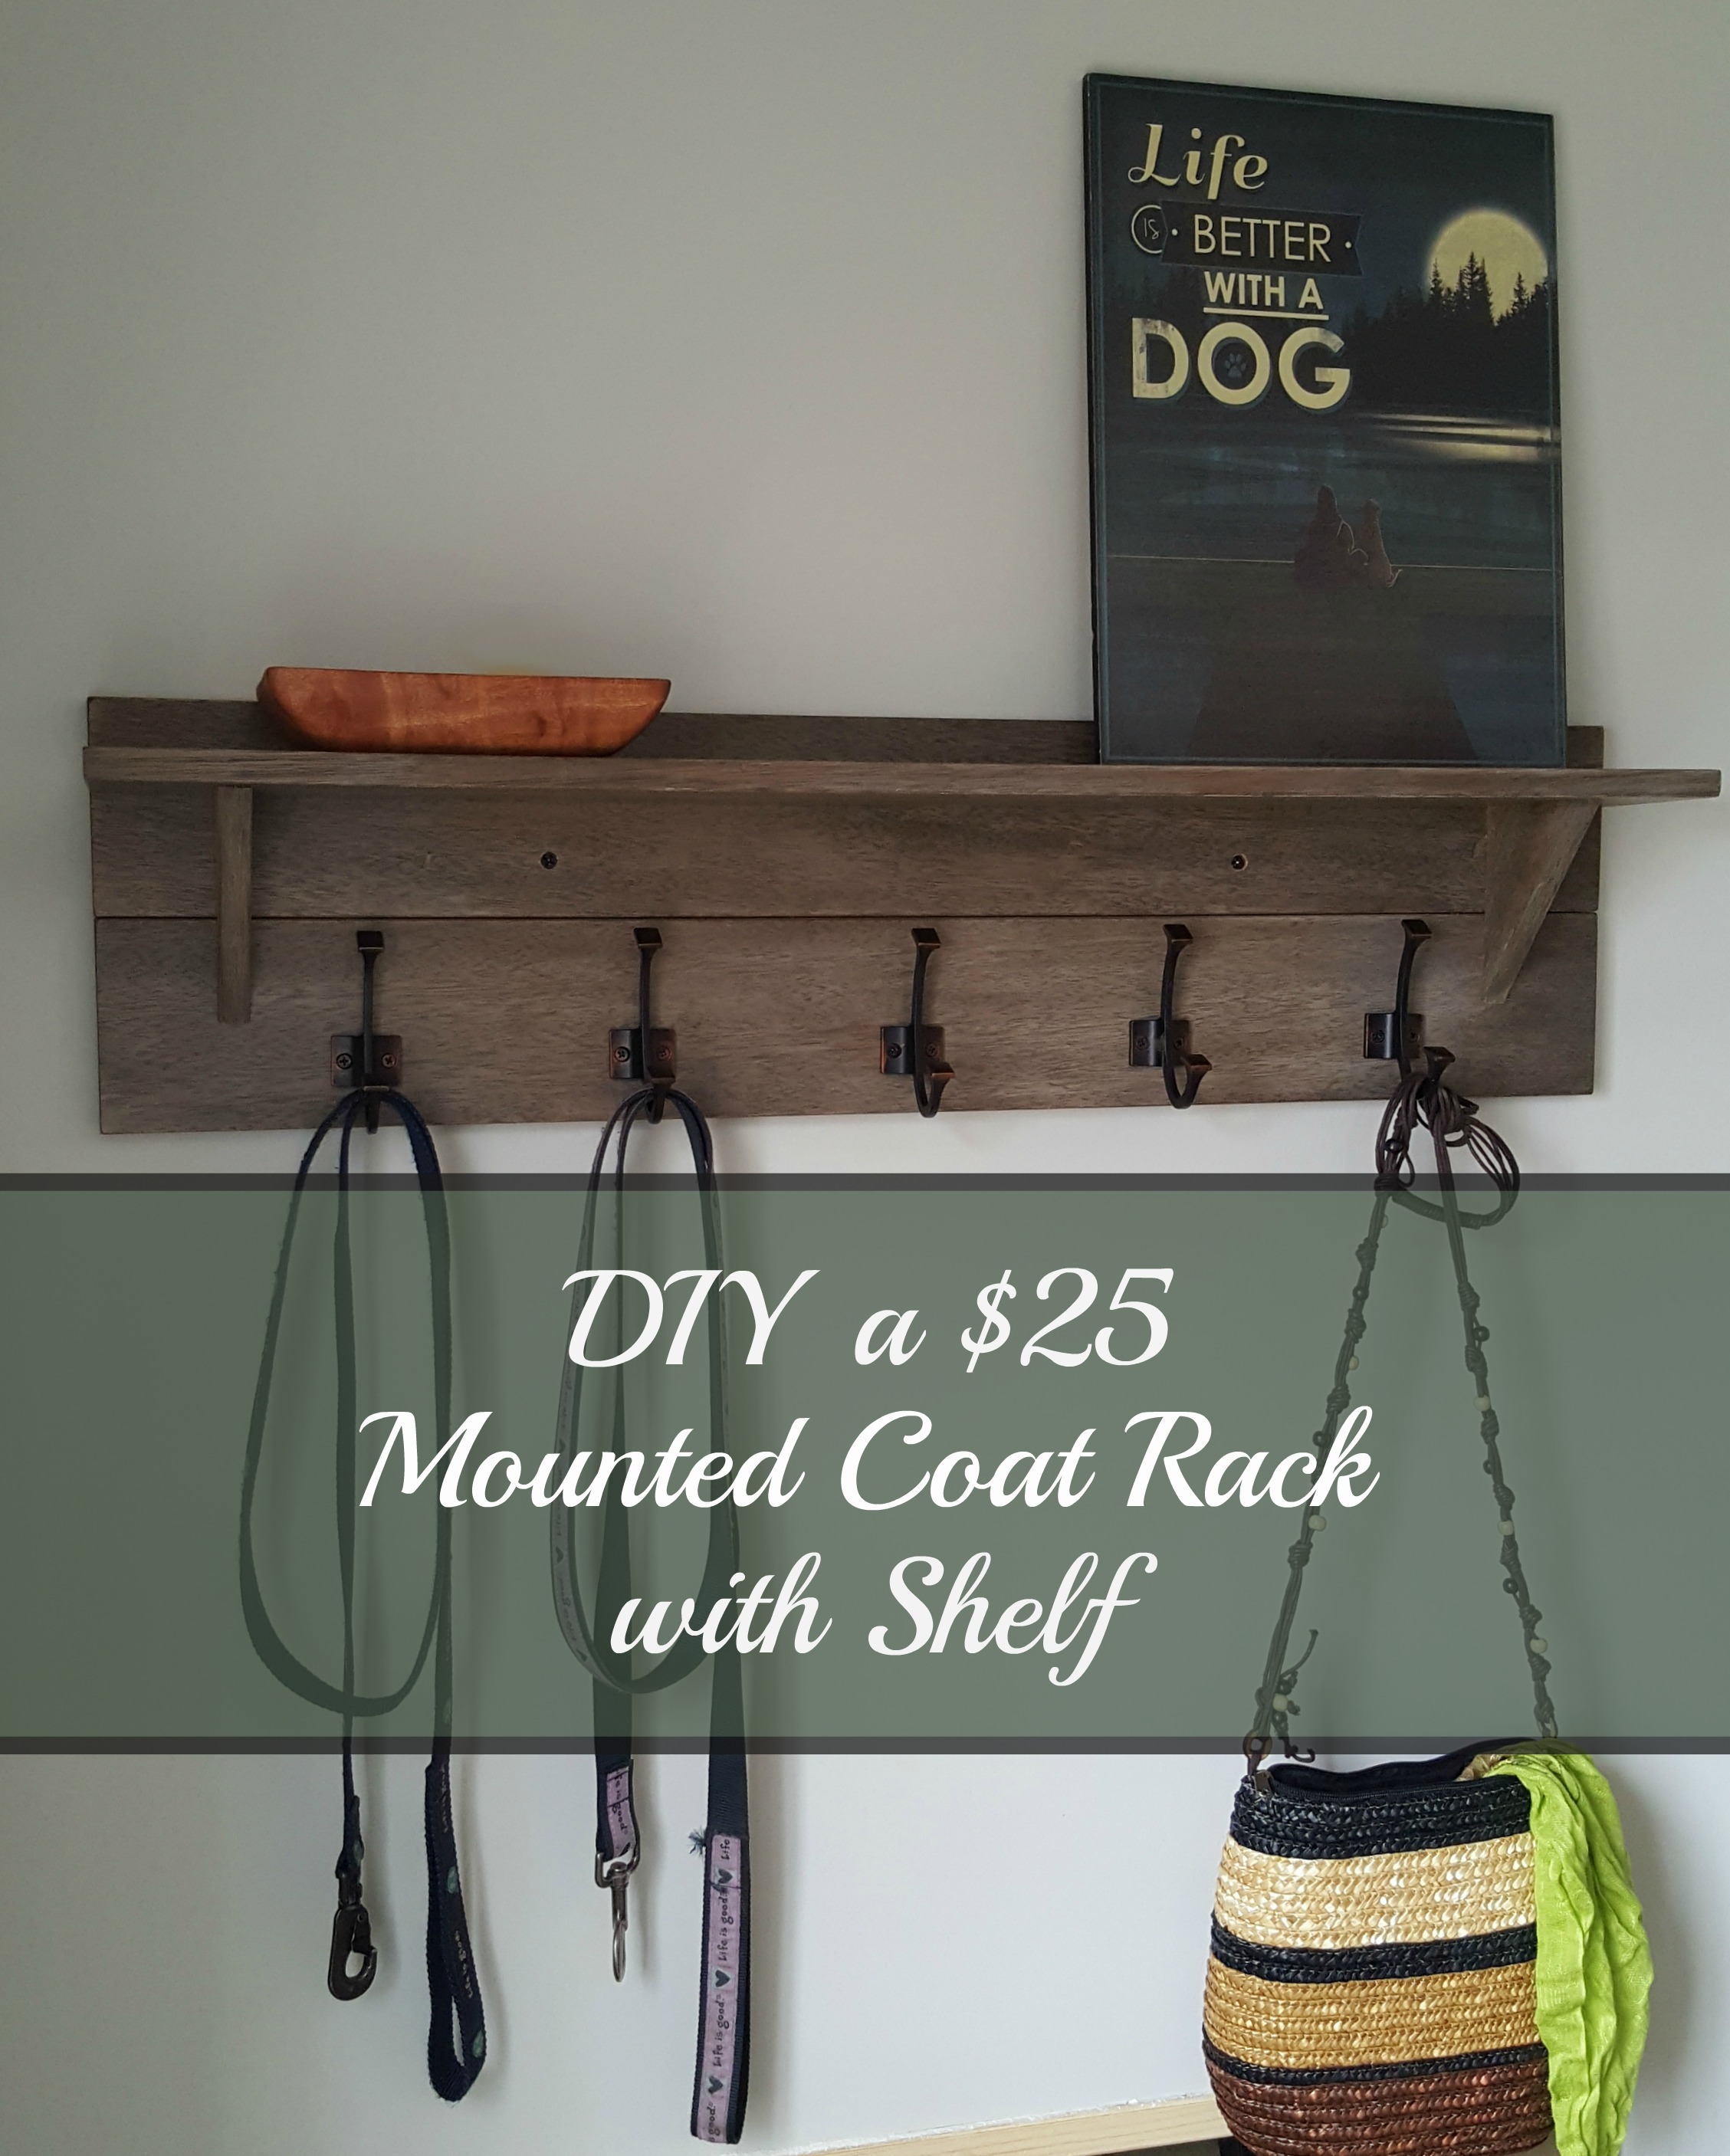
Credit: turtlesandtails.blogspot.com
Frequently Asked Questions
What Materials Do I Need For A Coat Rack With Shelf?
You need wood planks, hooks, screws, brackets, sandpaper, paint or stain, and mounting hardware. Choose sturdy wood for durability.
How Do I Attach Hooks To The Coat Rack?
Mark hook positions evenly on the wood. Use a drill to make pilot holes. Secure hooks tightly with screws.
Can I Customize The Shelf Size On The Coat Rack?
Yes, measure your space and cut the shelf wood accordingly. Customize height and length to fit your needs.
How Do I Mount The Coat Rack With Shelf On The Wall?
Find wall studs using a stud finder. Use appropriate screws and anchors to secure the rack firmly to the wall.
Conclusion
Creating a coat rack with a shelf adds both style and function. It keeps your space tidy and organized. You can choose the materials and design that fit your home. This project is simple and fun to do. Enjoy the satisfaction of making something useful with your own hands.
A neat entryway starts with a good coat rack. Try building one today and see the difference it makes.
