Imagine turning your ordinary bunk bed into an exciting hideaway where you can relax, read, or play. Making a tent out of your bunk bed is easier than you think, and it can transform your room instantly.
If you want to create a cozy, fun space without spending a lot of money or time, this guide is just for you. Keep reading, and you’ll discover simple steps and clever tips that will help you build the perfect bunk bed tent—one that you’ll love to hang out in every day.
Ready to get started? Let’s dive in!
Choosing The Right Bunk Bed
Choosing the right bunk bed is the first step to make a tent. Not all bunk beds suit this fun project. Some beds work better because of their shape, size, and strength. Picking the right one makes the tent safe and cozy.
Material And Design Considerations
Wooden bunk beds are strong and easy to work with. They hold fabric well for the tent walls. Metal beds can also work but check for sharp edges. Beds with a simple frame are best. Avoid beds with too many bars or odd shapes. A flat top bunk frame helps to hang the tent cover easily.
Safety And Stability Checks
Check if the bunk bed is sturdy and does not wobble. Tighten all screws and bolts before starting. The bed should support extra weight from the tent fabric. Avoid beds with loose parts or cracks. Make sure the ladder and guardrails are secure. Safety comes first for a fun tent experience.
Gathering Materials
Gathering materials is the first step in making a tent out of a bunk bed. You need the right items to create a safe and cozy space. Planning ahead saves time and effort. Collect everything before starting the project. This way, you avoid interruptions and keep your work smooth.
Choose fabrics that are easy to handle and clean. Pick tools that help you secure the tent well. Small accessories make the tent more comfortable and fun. Each material plays an important role in building your bunk bed tent.
Fabric Options For The Tent
Pick fabric that is soft and breathable. Cotton sheets are a great choice. They are light and allow air flow. You can also use old curtains or blankets. These materials add privacy and warmth. Avoid heavy fabrics that block light and air. Bright colors make the tent cheerful. Plain colors work well for a calm space.
Essential Tools And Accessories
Gather clips or clothespins to hold the fabric. Command hooks help attach fabric without damage. A tape measure ensures the fabric fits well. Scissors are needed for cutting the fabric. String or bungee cords help keep the tent tight. Small pillows and fairy lights add comfort and charm. These simple tools make your tent sturdy and inviting.
Measuring And Planning
Measuring and planning are the first steps to make a tent out of a bunk bed. These steps help create a safe and fun space. Careful measurements ensure the tent fits well and looks good. Planning prevents mistakes and saves time during building.
Determining Tent Size
Start by measuring the bunk bed’s length, width, and height. Use a tape measure for accuracy. Note these dimensions on paper. Think about how much space you want inside the tent. Leave some extra room for comfort and movement. Consider the height so the tent does not feel cramped.
Sketching The Tent Layout
Draw a simple sketch of the tent on paper. Include the bunk bed shape and size. Mark where the tent fabric will attach. Plan openings like doors or windows. This helps visualize the final tent. Adjust the sketch if the tent looks too small or big.
Constructing The Tent Frame
Constructing the tent frame is the first step to transform a bunk bed into a fun hideout. The frame gives the tent its shape and holds everything steady. This part needs some care to make sure the tent stands firm and looks inviting.
Using The Bunk Bed Structure
The bunk bed itself acts as the main skeleton of the tent. Use the top and bottom bed frames as the base. The vertical posts can be the tent’s corners. Drape fabric over the top rail to form the roof. Secure the cloth with clips or ties to keep it tight. Make sure the fabric does not block the bed’s safety rails.
Adding Support Elements
Extra support helps the tent stay strong and neat. Use lightweight poles or sticks to hold up loose fabric parts. Attach these supports with string or Velcro for easy removal. You can also add tension ropes between the bed posts for more stability. Check all ties and knots so they do not slip or loosen over time.
Attaching The Fabric
Attaching the fabric to your bunk bed tent is an important step. It turns a simple bed into a cozy hideout. The fabric needs to stay in place without slipping or sagging. Using the right methods helps keep the tent neat and safe. This section shows how to secure the fabric and make openings for light and air.
Securing The Tent Cover
Start by choosing soft, lightweight fabric. It should be easy to handle and clean. Drape the fabric evenly over the bunk bed frame. Use strong clips or clothespins to hold the edges tightly. Tie strings or ribbons around the bedposts for extra support. Make sure the fabric does not touch the floor. This keeps the tent clean and free from tripping hazards.
Check all corners and sides. Adjust the fabric to avoid wrinkles or gaps. Use small weights if needed to keep fabric taut. Avoid sharp objects that can tear the fabric. This step creates a smooth, safe tent cover that lasts.
Creating Openings And Windows
Openings let light and air enter the tent. They also make it easier to get in and out. Cut simple shapes like rectangles or squares in the fabric. Use scissors carefully to avoid fraying. You can leave the edges raw or sew a hem for strength.
Attach fabric flaps above openings. These flaps can be tied up or down. Use Velcro or buttons for easy closing. Windows help keep the tent bright and fresh. They make the space feel larger and more inviting.
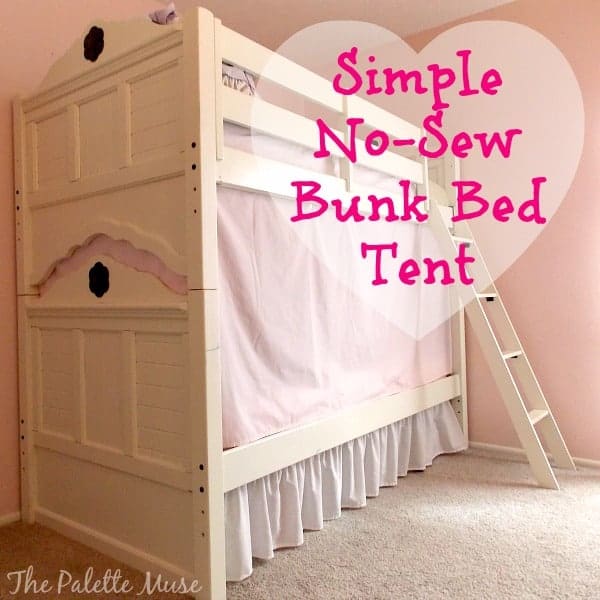
Credit: thepalettemuse.com
Decorating The Tent
Decorating the tent made from a bunk bed turns it into a cozy, fun space. It invites creativity and makes the tent feel special. Simple touches can change the whole look. Bright lights or soft pillows add comfort. Themes bring personality and fun. This section shows easy ways to decorate and personalize your bunk bed tent.
Adding Lights And Accessories
Lights create a warm and inviting glow inside the tent. String fairy lights along the edges of the bunk bed frame. Battery-operated LED lights work well and are safe for kids. Small lamps or clip-on lights add focused light for reading or playing. Accessories like colorful cushions, rugs, and blankets make the space cozy. Soft fabrics add warmth and texture. Use storage bins or baskets to keep toys and books neat. Decorations make the tent feel like a real hideout.
Personalizing With Themes
Choose a theme to give your tent a unique style. A pirate ship, castle, or space station can spark imagination. Use themed bedding, wall decals, or fabric to match the idea. Add small props like flags, stars, or treasure chests. Let kids join in picking decorations to reflect their interests. Personal themes make the tent more exciting and fun. It becomes a special place to play or relax.
Maintaining And Safety Tips
Creating a tent out of a bunk bed is fun and exciting. Keeping it safe and well-maintained is very important. This section guides you on how to keep the tent safe and in good shape.
Regular Inspection
Check the tent structure often. Look for loose fabric or parts. Tighten screws and fix any damage fast. This keeps the tent strong and stable. Inspect the bunk bed frame for cracks or sharp edges. Replace broken parts immediately. Clean the fabric regularly to avoid dust buildup. A clean tent is a healthy space for kids.
Ensuring Child Safety
Use soft materials inside the tent to prevent injuries. Avoid heavy or hard objects inside the tent. Make sure the tent does not block air flow. Keep the area around the bunk bed clear. Teach kids to use the tent gently. Always supervise young children during playtime. Install guard rails on the bunk bed for extra safety. These steps reduce risks and create a safe play zone.
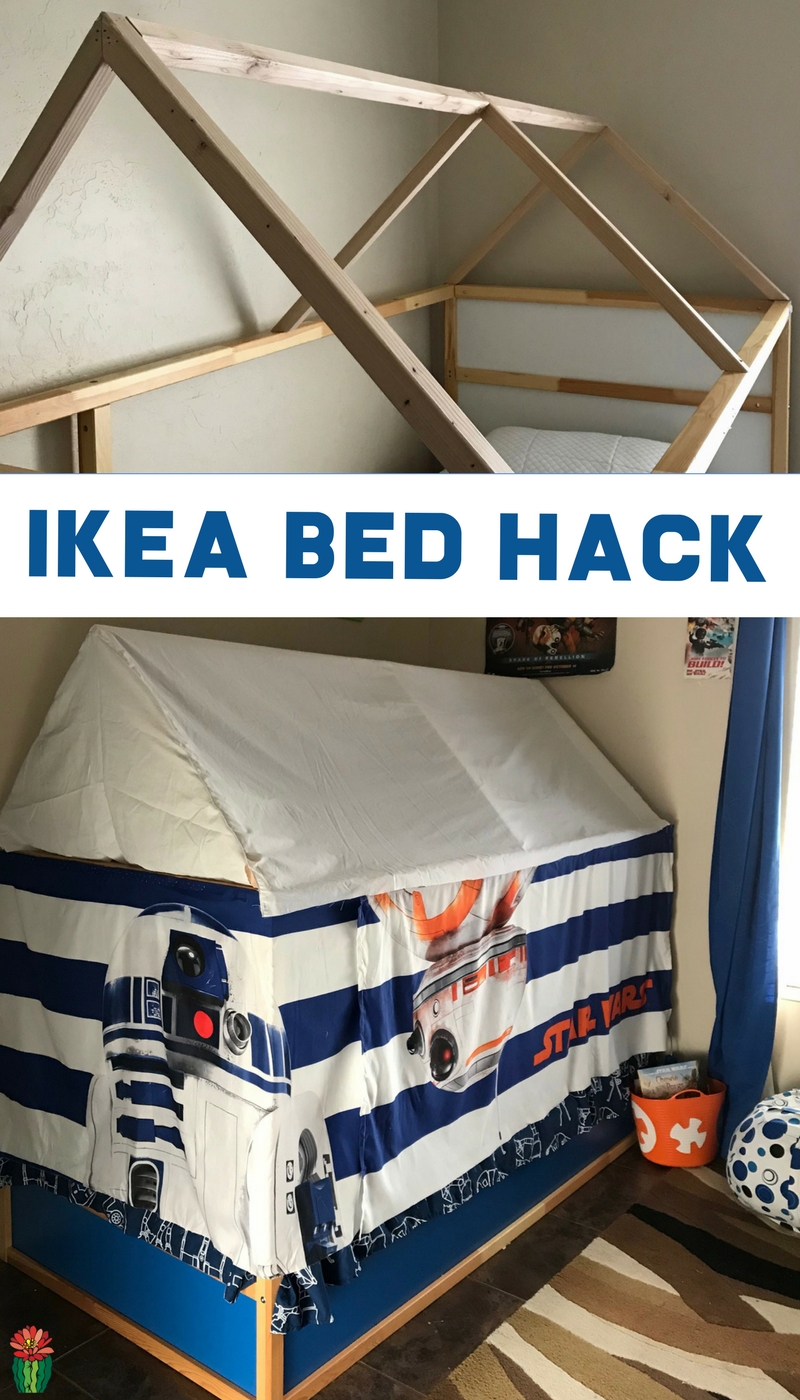
Credit: desertchica.com

Credit: tillyandtheboys.wordpress.com
Frequently Asked Questions
How Do I Start Making A Tent From A Bunk Bed?
Begin by clearing the bunk bed area. Use lightweight sheets or fabric to drape over the top and sides. Secure edges with clips or ties for stability and create an enclosed cozy space underneath.
What Materials Work Best For A Bunk Bed Tent?
Lightweight fabrics like cotton or fleece work best. Use sheets, blankets, or curtains. Avoid heavy materials that may sag or block airflow. Add clips or clothespins for easy attachment and removal.
How Can I Make The Tent Safe For Kids?
Ensure fabrics are securely fastened to prevent falls. Avoid heavy or sharp objects inside. Keep the tent well-ventilated and check regularly for loose parts to maintain a safe play area.
Can I Add Lighting Inside A Bunk Bed Tent?
Yes, use battery-operated string lights or small LED lamps. Avoid candles or anything that produces heat. Battery lights create a cozy ambiance while keeping the tent safe and child-friendly.
Conclusion
Building a tent from a bunk bed brings fun and comfort indoors. It uses simple items you already have. Kids love the cozy space it creates. It also encourages creativity and play. Try different fabrics and lights to change the look.
This project is quick and easy to do. Everyone can enjoy a special hideaway at home. Give it a try and see the smiles grow. A bunk bed tent makes any room more exciting.