Do you want a creative way to organize your favorite books without spending a lot of money or space? Imagine having a unique bookshelf made entirely from paper—light, stylish, and perfect for small rooms or desks.
In this guide, you’ll learn how to make a paper origami bookshelf step by step. It’s easier than you think, and the result will surprise you. Ready to turn simple paper into a functional piece of art? Keep reading, and you’ll discover how to bring this clever idea to life with your own hands.
Materials Needed
Gathering the right materials is the first step to create a paper origami bookshelf. Using good supplies makes folding easier and the final product stronger. This section helps you know what to prepare before starting.
Choosing The Right Paper
Pick paper that holds creases well. Origami paper or lightweight cardstock works best. Avoid thick or very thin sheets. Colored paper adds style to your shelf. Plain white paper also looks clean and simple. Square sheets fit traditional origami patterns. Make sure your paper is smooth and not wrinkled.
Additional Tools And Supplies
Use a ruler to measure and fold precisely. A bone folder or similar tool helps create sharp creases. Keep scissors handy to cut paper if needed. Glue can add extra strength to hold parts together. Have a clean, flat surface to work on. These tools help make your project neat and sturdy.

Credit: www.youtube.com
Basic Origami Folds
Basic origami folds form the foundation of every paper project. They shape the paper and create the structure needed. Knowing these folds helps you follow instructions easily and make neat models. The two essential folds are the valley and mountain folds. Before starting, making preliminary creases guides the paper for accurate folds.
Valley And Mountain Folds
The valley fold creates a dip in the paper, like a valley between hills. Fold the paper inward, bringing edges together. This fold looks like a “V” from the side.
The mountain fold is the opposite. Fold the paper outward, forming a peak. It looks like an upside-down “V.” Both folds work together to give shape and volume.
Preliminary Creases
Preliminary creases are light folds made before the final ones. They act as guides for precise folding later. Start by folding the paper in half horizontally and vertically. Unfold each time to leave a crease mark.
These creases help you align edges and corners perfectly. They make the folding process smoother and the model cleaner. Always make sharp creases for the best results.
Step-by-step Folding Instructions
Building a paper origami bookshelf is fun, but stability is key. Without it, your shelf may collapse or bend. This section shares simple tips to keep your bookshelf strong and steady.
Reinforcing The Structure
Use thicker paper for better strength. Fold edges carefully to make sharp creases. Double up sheets on weak areas. Glue layers together for extra support. Reinforce corners and joints with small strips of paper. These steps help your shelf hold weight without falling apart.
Weight Distribution
Place heavier items at the bottom shelves. Spread out books evenly to avoid pressure points. Avoid overloading one side to prevent tipping. Balance the load from left to right. This keeps your bookshelf upright and stable during use.
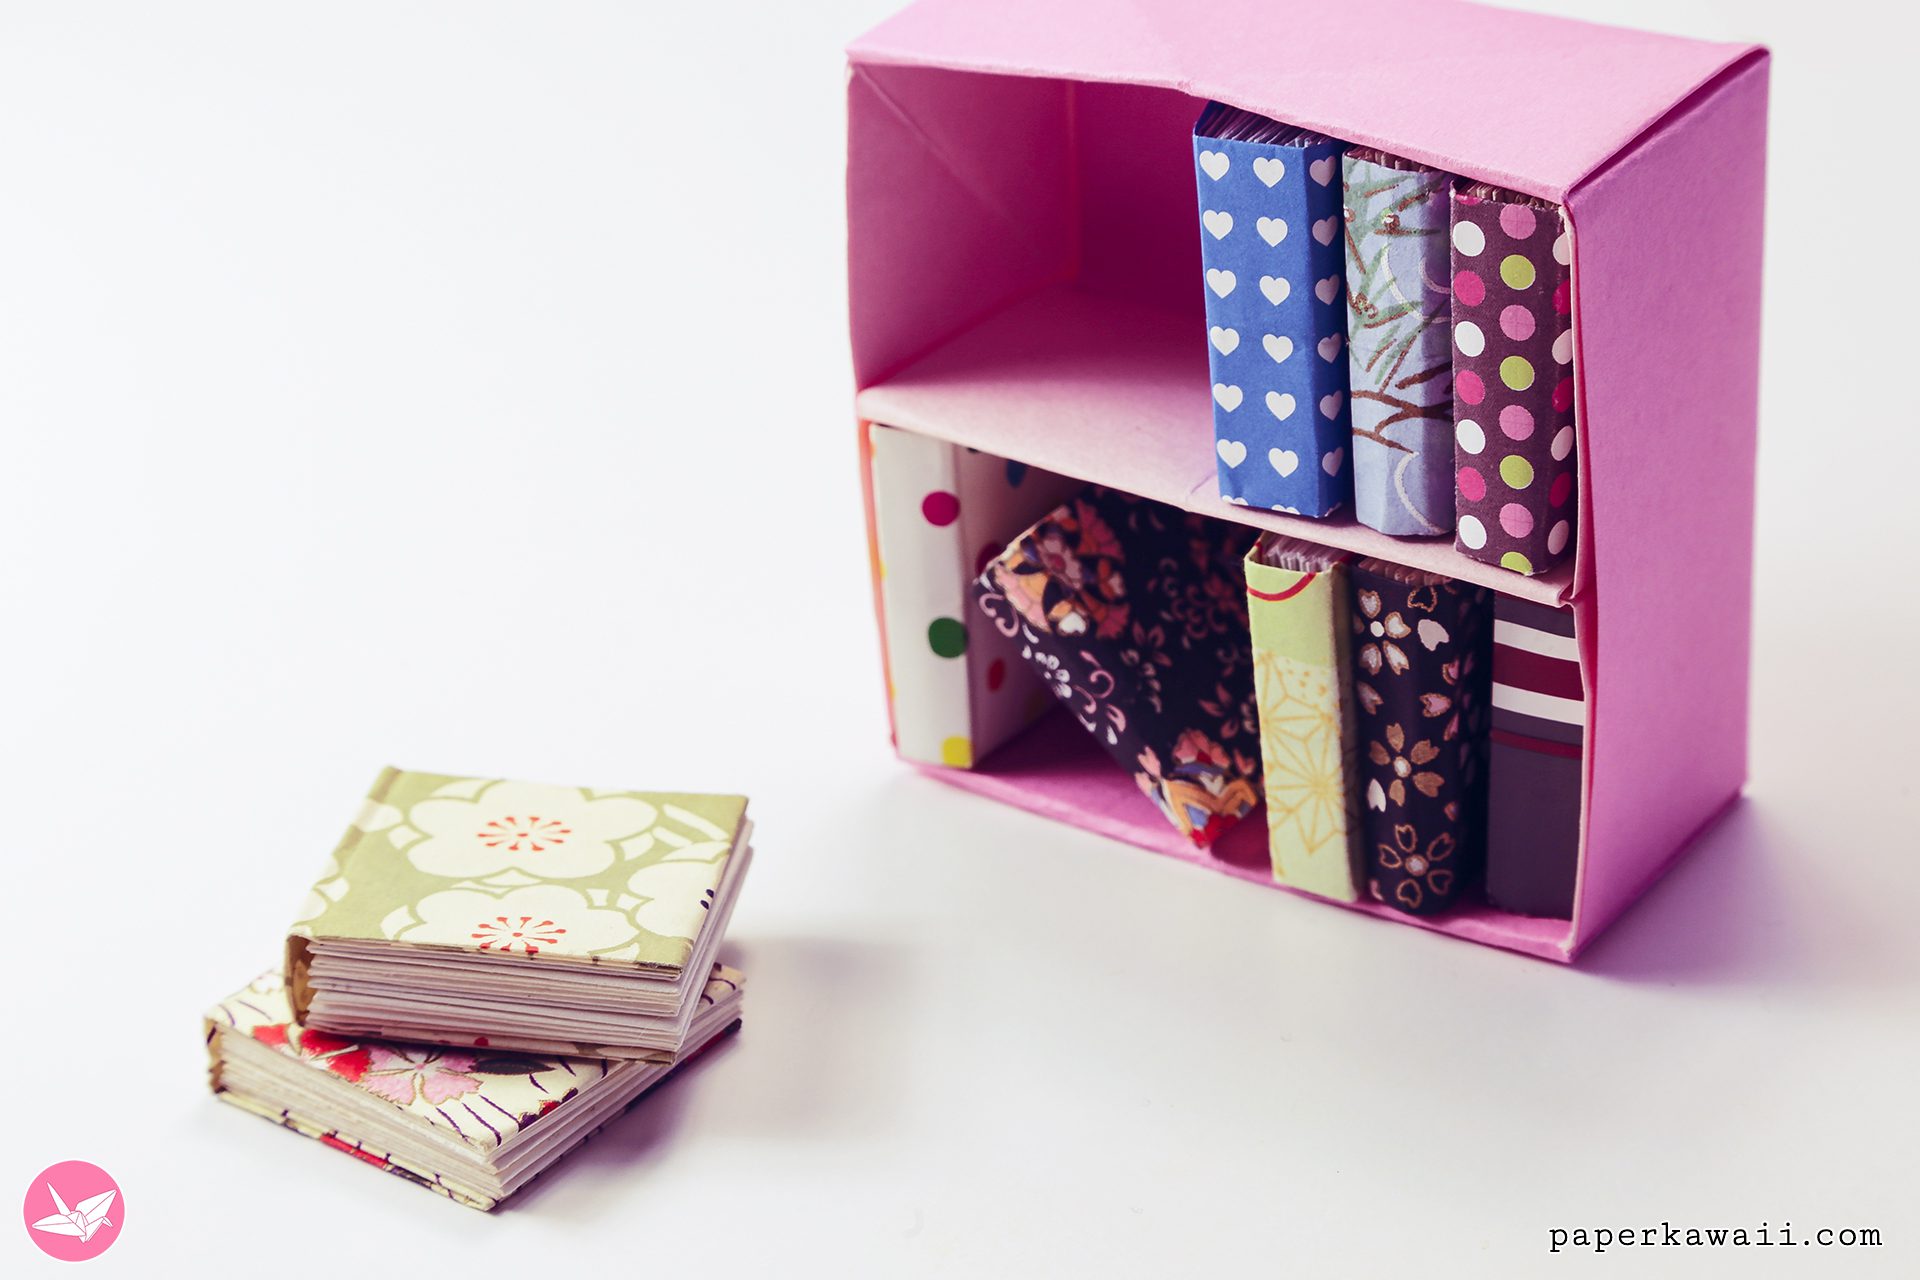
Credit: www.paperkawaii.com
Tips For Stability
Decorating your paper origami bookshelf makes it unique and fun. It adds style and personality to your craft. Simple touches can turn your plain shelf into a charming display. Use colors and decorations to match your room or taste. This part lets creativity shine.
Painting And Coloring
Painting your bookshelf gives it a fresh, bright look. Use acrylic or water-based paints for best results. Apply thin coats to avoid paper warping. Let each coat dry fully before adding the next. Choose colors that suit your space or favorite themes. Patterns like stripes or dots add playful detail. Color pencils or markers work well for small designs. Protect your paint with a clear sealant to keep it safe.
Adding Decorative Elements
Decorative elements bring texture and interest to your shelf. Stick on small gems, beads, or buttons for a fun effect. Use washi tape or stickers to create borders or shapes. Glue on dried flowers or leaves for a natural touch. Ribbons or lace add softness and charm. Keep decorations light to avoid bending the paper. Arrange elements neatly for a balanced look. These details make your bookshelf truly yours.
Decorating Your Bookshelf
Making a paper origami bookshelf can be fun and rewarding. Sometimes, small problems happen during folding. These issues can stop the bookshelf from looking perfect or holding its shape. Fixing these common problems helps the project look neat and last longer. Here are easy ways to solve the most usual troubles.
Fixing Weak Folds
Weak folds make the bookshelf look floppy and unstable. Press down firmly on each fold. Use a flat tool like a ruler or the back of a spoon to sharpen the crease. Make sure to fold on a hard surface. Repeating the fold along the same line strengthens it. Strong folds help the bookshelf hold its shape well.
Correcting Misalignments
Misaligned edges cause the bookshelf to look crooked. Gently unfold the paper back to the mistake point. Line up the edges carefully before folding again. Take your time to match corners perfectly. Precise folds create a clean and straight bookshelf. This step improves both the look and stability of the final product.

Credit: www.amazon.com
Troubleshooting Common Issues
Customizing your paper origami bookshelf makes it truly yours. It allows you to fit your style and space perfectly. Small changes can make a big difference in appearance and function. Here are some easy ideas to personalize your bookshelf.
Different Sizes And Shapes
Create shelves in various sizes to hold different items. Small shelves work well for tiny books or decorations. Larger shelves can fit thick books or magazines. Try making triangular or hexagonal shapes for a unique look. Mixing shapes adds interest and creativity to your design.
Using Patterned Paper
Choose patterned paper to add color and texture. Floral, geometric, or abstract designs brighten the space. Use paper that matches your room’s theme for harmony. You can also combine different patterns for a fun, eclectic style. Patterned paper helps your bookshelf stand out and feel special.
Frequently Asked Questions
What Materials Are Needed For A Paper Origami Bookshelf?
You need sturdy paper, a ruler, scissors, and glue. Choose thick paper for better durability. Optional tools include a bone folder for crisp folds. These materials ensure your bookshelf holds shape and supports light items effectively.
How Long Does It Take To Make A Paper Origami Bookshelf?
It typically takes 30 to 60 minutes. Time varies based on complexity and skill level. Beginners may take longer to fold accurately. Practice improves speed and precision for future projects.
Can A Paper Origami Bookshelf Hold Heavy Books?
No, paper origami bookshelves are best for lightweight items. Heavy books may cause bending or collapse. Use it for small books, magazines, or decorative items. Reinforcing with additional layers can slightly increase strength.
Is Paper Origami Bookshelf Eco-friendly And Reusable?
Yes, it’s eco-friendly as it uses recyclable paper. You can reuse or recycle the bookshelf easily. It reduces plastic or wood usage. This craft supports sustainable and creative storage solutions.
Conclusion
Creating a paper origami bookshelf is fun and simple. It adds a unique touch to any room. You can use it to store small books or decorations. This project needs only paper and basic folding skills. Practice a few times to get better results.
Enjoy making your own bookshelf step by step. It is a great way to be creative and save space. Try different paper colors to match your style. Start folding today and see what you can create!
