Are you tired of cluttered spaces and looking for a simple way to organize your favorite books? Making a small bookshelf yourself is easier than you think.
With just a few tools and some basic materials, you can create a stylish and functional piece that fits perfectly in your room. Imagine having a bookshelf designed exactly to your taste and size needs, saving you money and adding a personal touch to your space.
Keep reading, and you’ll discover step-by-step how to build your own small bookshelf quickly and easily. Your perfect bookshelf is just a DIY project away!
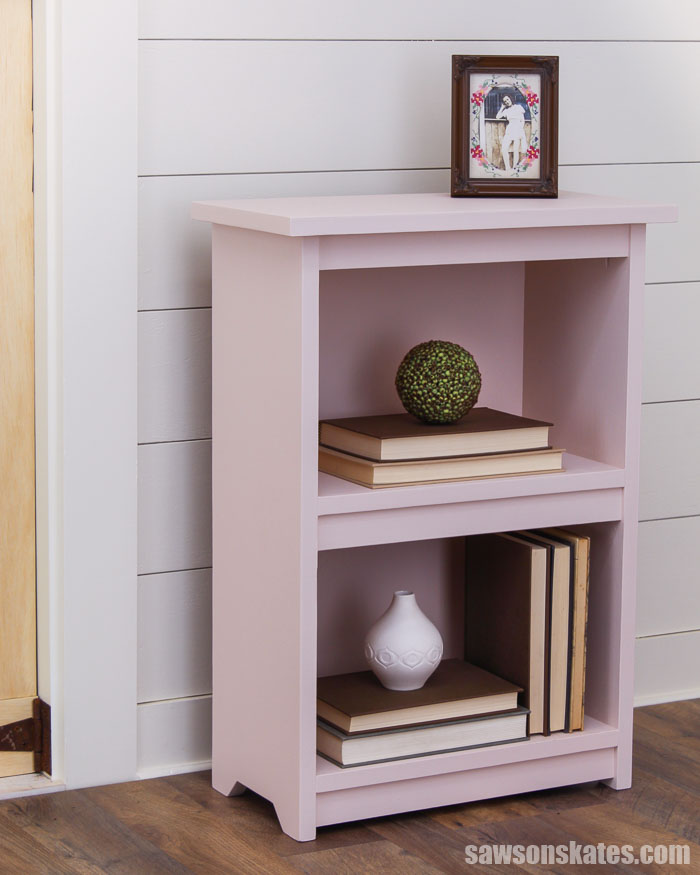
Credit: sawsonskates.com
Materials And Tools Needed
Building a small bookshelf yourself is a rewarding project. Having the right materials and tools makes the process easier and faster. This section lists everything you need to start your DIY bookshelf.
Wood Materials
Choose wood that fits your budget and style. Pine boards are affordable and easy to work with. Plywood sheets provide strength and smooth surfaces. Decide on the size and thickness before buying.
Fasteners And Adhesives
Wood screws hold the parts tightly. Use screws that match the wood thickness. Wood glue adds extra strength to joints. Make sure to get a glue that dries clear.
Cutting Tools
A handsaw or circular saw cuts wood pieces accurately. A jigsaw helps with curved or detailed cuts. Keep blades sharp for clean cuts and safety.
Measuring And Marking Tools
A tape measure is essential for precise measurements. Use a pencil to mark cut lines clearly. A carpenter’s square ensures right angles for perfect assembly.
Finishing Supplies
Sandpaper smooths rough edges and surfaces. Start with coarse grit, then finish with fine grit. Paint or wood stain gives the bookshelf a polished look. Choose colors that match your room.
Safety Equipment
Wear safety glasses to protect your eyes. Use gloves to avoid splinters and cuts. Hearing protection keeps your ears safe from loud tools.
Choosing The Right Wood
Choosing the right wood is key to building a small bookshelf that lasts. The wood affects the shelf’s strength, look, and cost. Picking the best wood can make your DIY project easier and more fun.
Types Of Wood For Small Bookshelves
Softwoods like pine are easy to work with and affordable. They have a light color and smooth texture. Hardwoods like oak and maple are stronger. They offer a rich look but cost more. Choose wood that fits your budget and style.
Durability And Strength
Books add weight to shelves. Wood must hold this weight without bending. Hardwoods are best for heavy books. Softwoods suit light items or decorative shelves. Think about what you will place on the shelf.
Wood Grain And Appearance
Wood grain adds character to your shelf. Some grains are smooth and straight. Others have knots and patterns. Pine has a simple grain. Oak has a bold and attractive grain. Select wood grain that matches your room decor.
Wood Cost And Availability
Prices vary by wood type and location. Pine is cheap and easy to find. Hardwoods cost more and may need special orders. Check local stores for options and prices. Choose wood that fits your budget and is easy to get.
Workability And Tools Needed
Softwoods are easier to cut and sand. Hardwoods need sharper tools and more effort. Beginners benefit from softwoods. Experienced woodworkers can handle hardwoods. Consider your skill level before choosing wood.
Designing Your Bookshelf
Designing your small bookshelf is the first step to a successful DIY project. This stage shapes how your bookshelf will look and fit in your space. Thoughtful design ensures your bookshelf is both useful and attractive.
Start by planning the size and shape carefully. Then, create a clear sketch to guide your build. Good design saves time and materials later on.
Determining Size And Dimensions
Measure the space where the bookshelf will go. Note the height, width, and depth available. Think about what you want to store. Books, decorations, or both? Choose dimensions that fit your needs and room size.
Keep the bookshelf compact but functional. Leave some extra space for bigger books or items. Avoid making it too tall or wide for your room.
Sketching The Layout
Draw a simple plan on paper or use a digital tool. Mark the overall size and shelf positions. Decide how many shelves you want. Even spacing works well for most books.
Label each part and add measurements. This sketch helps you visualize the final product. It also guides cutting and assembly during building.
Cutting The Wood Pieces
Cutting the wood pieces is the first step to building a small bookshelf. It shapes the wood into parts that fit together perfectly. Accurate cutting helps the shelf look neat and stay strong. Take your time to measure and cut carefully. Use the right tools and stay safe while working with saws.
Measuring And Marking
Measure each piece of wood twice before cutting. Use a tape measure and a pencil for marking. Draw clear, straight lines where you will cut. Mark all pieces before starting to cut. This prevents mistakes and saves wood. Check the measurements against your design plan. Make sure the lines are easy to see and follow.
Using Saws Safely
Choose the right saw for your wood and cuts. Keep your hands away from the blade. Wear safety glasses to protect your eyes. Cut slowly and steadily along the marked lines. Use clamps to hold the wood still. Never rush the cutting process. Turn off the saw before moving or adjusting the wood. Good safety habits prevent accidents and make work easier.
Assembling The Frame
Assembling the frame is the key step in building your small bookshelf. This part gives the bookshelf its shape and strength. You will join the main pieces of wood together carefully. A sturdy frame holds shelves and books safely. Take your time and follow each step with care. Use proper tools and materials for the best results.
Joining Techniques
Choose the best method to join the wood pieces. Butt joints are simple and work well for beginners. Use wood glue to help hold parts together. Another option is a dado joint, which fits pieces snugly. This joint adds strength and looks clean. Clamps help keep the wood in place while glue dries. Pick a technique that matches your skill and tools.
Securing With Screws Or Nails
Screws and nails add extra strength to the frame. Screws hold better and can be removed if needed. Drill pilot holes before screwing to avoid splitting wood. Nails are faster but less strong than screws. Use a hammer carefully to avoid damaging the wood. Countersink screws for a neat finish. Secure each corner tightly to keep the frame stable.
Adding Shelves
Adding shelves is a key step in building your small bookshelf. Shelves hold your books and display items. Proper shelf placement makes your bookshelf useful and neat. Think about how tall your books are. Plan the shelf spaces accordingly. This planning helps you avoid redoing the shelves later.
Spacing And Placement
Measure the height of your tallest books first. Leave some extra space above each shelf. This space helps you easily take out and put back books. Keep equal distance between shelves for a clean look. You can vary shelf heights if you want to store different items. Mark the spots clearly on the side panels. Use a level to keep shelves straight. Straight shelves look better and hold books safely.
Ensuring Stability
Use strong brackets or supports for each shelf. Secure them firmly with screws or nails. Check that the shelf does not wobble. Add a back panel or braces for more support. A stable shelf holds heavy books without bending. Test the shelf by placing some weight on it. Fix any loose parts before adding more shelves. Stability keeps your bookshelf safe and durable.
Sanding And Finishing
Sanding and finishing your small bookshelf is an important step. It makes the wood smooth and prepares it for paint or stain. A well-finished bookshelf looks nice and lasts longer. This process also protects the wood from damage and dirt.
Smoothing Surfaces
Start by sanding all wood parts with medium-grit sandpaper. Sand in the direction of the wood grain to avoid scratches. Use light pressure to smooth rough spots and edges. After that, switch to fine-grit sandpaper for a softer finish. Wipe away dust with a clean cloth before moving on.
Applying Paint Or Stain
Choose paint or stain based on your style and the wood type. Use a brush or cloth to apply thin, even coats. Let each coat dry fully before adding the next. For paint, light sanding between coats helps the finish stick better. For stain, apply a clear sealant to protect the wood after it dries.
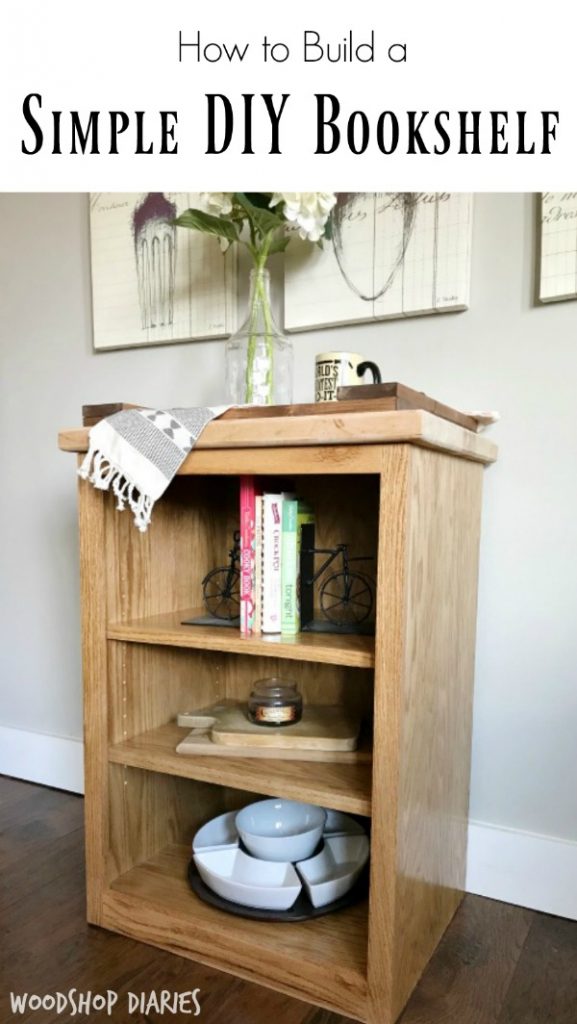
Credit: www.woodshopdiaries.com
Installing The Bookshelf
Installing the bookshelf is a key step in your DIY project. Proper placement and secure mounting keep your books safe and the shelf steady. This part requires care and simple tools. Follow clear steps for a strong setup.
Choosing Location
Select a spot with enough space for your bookshelf size. Pick a wall that is flat and free from obstacles. Avoid areas near heaters or damp places. Check the height for easy reach. Good lighting helps you see your books clearly.
Wall Mounting Tips
Use a stud finder to locate strong wall studs. Mark these points lightly with a pencil. Use screws that fit your shelf brackets and wall type. Drill pilot holes to avoid splitting the wood. Tighten screws firmly but do not over-tighten. Check the shelf level with a spirit level. Adjust if needed before final tightening.
Maintenance And Care
Maintaining your small DIY bookshelf keeps it looking fresh and sturdy. Regular care protects the wood and extends its life. A clean bookshelf also showcases your books beautifully.
Cleaning The Bookshelf
Dust the shelves often using a soft cloth. Avoid using wet cloths on untreated wood. For painted or finished wood, a damp cloth works well. Dry the surface after cleaning to avoid damage.
Preventing Moisture Damage
Keep the bookshelf away from damp areas. Moisture can cause wood to warp or swell. Use a dehumidifier if the room is humid. Place coasters under plants or drinks near the shelf.
Protecting The Wood Surface
Apply wood polish or wax every few months. This keeps the wood shiny and protected. Use products made for your wood type. Test polish on a small spot first to avoid damage.
Checking For Loose Screws And Joints
Inspect screws and joints regularly. Tighten any loose screws to keep the shelf stable. Loose parts can cause the shelf to wobble or break. Fix issues early to avoid bigger repairs.
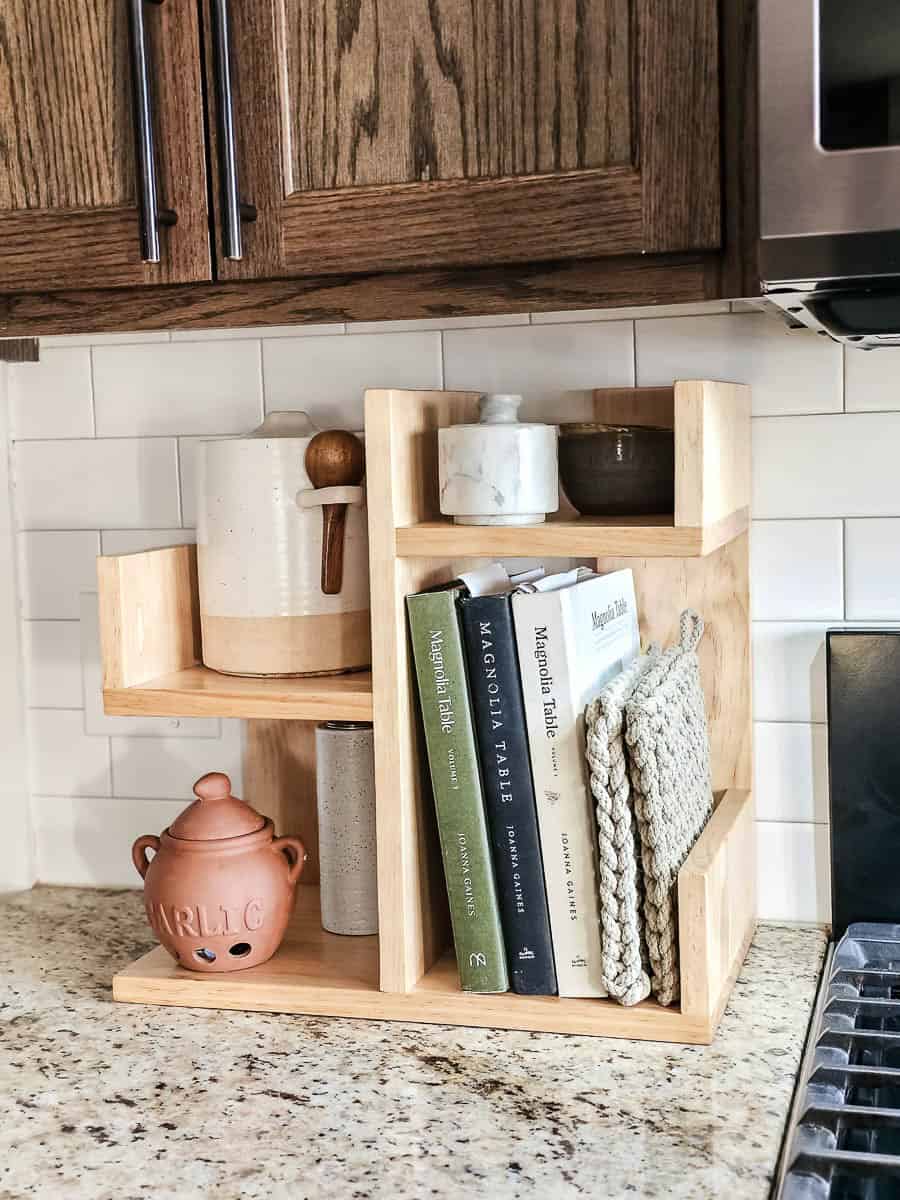
Credit: www.makingmanzanita.com
Frequently Asked Questions
What Materials Are Needed To Make A Small Bookshelf Diy?
You need wood planks, screws, a drill, sandpaper, wood glue, and paint or stain. These materials ensure sturdy construction and a polished finish for your small bookshelf.
How Long Does It Take To Build A Small Bookshelf?
Building a small bookshelf typically takes 2 to 4 hours. This depends on your skill level and the complexity of the design you choose.
Can I Customize The Size Of My Diy Bookshelf?
Yes, you can easily customize the size. Measure your space first, then adjust the wood dimensions to fit your needs perfectly.
What Tools Are Essential For Making A Small Bookshelf?
Essential tools include a saw, drill, screwdriver, measuring tape, and sander. These tools help you cut, assemble, and finish the bookshelf efficiently.
Conclusion
Building a small bookshelf yourself saves money and adds charm to your space. You only need a few tools and simple steps to start. This project fits well in any room and holds your favorite books. Feel proud every time you see your handmade shelf.
Try this DIY and enjoy a neat, organized home. Simple, fun, and useful—what could be better?
