Have you ever wanted a unique, stylish mini bookshelf that fits perfectly in your space? Making one out of wood is easier than you might think, and it gives you a chance to create something truly your own.
Imagine having a custom shelf that holds your favorite books, displays your treasures, and adds warmth to your room—all made by your own hands. In this guide, you’ll find simple, step-by-step instructions to build a mini wooden bookshelf, even if you’re new to woodworking.
Ready to turn a few pieces of wood into a beautiful, functional piece? Let’s get started!
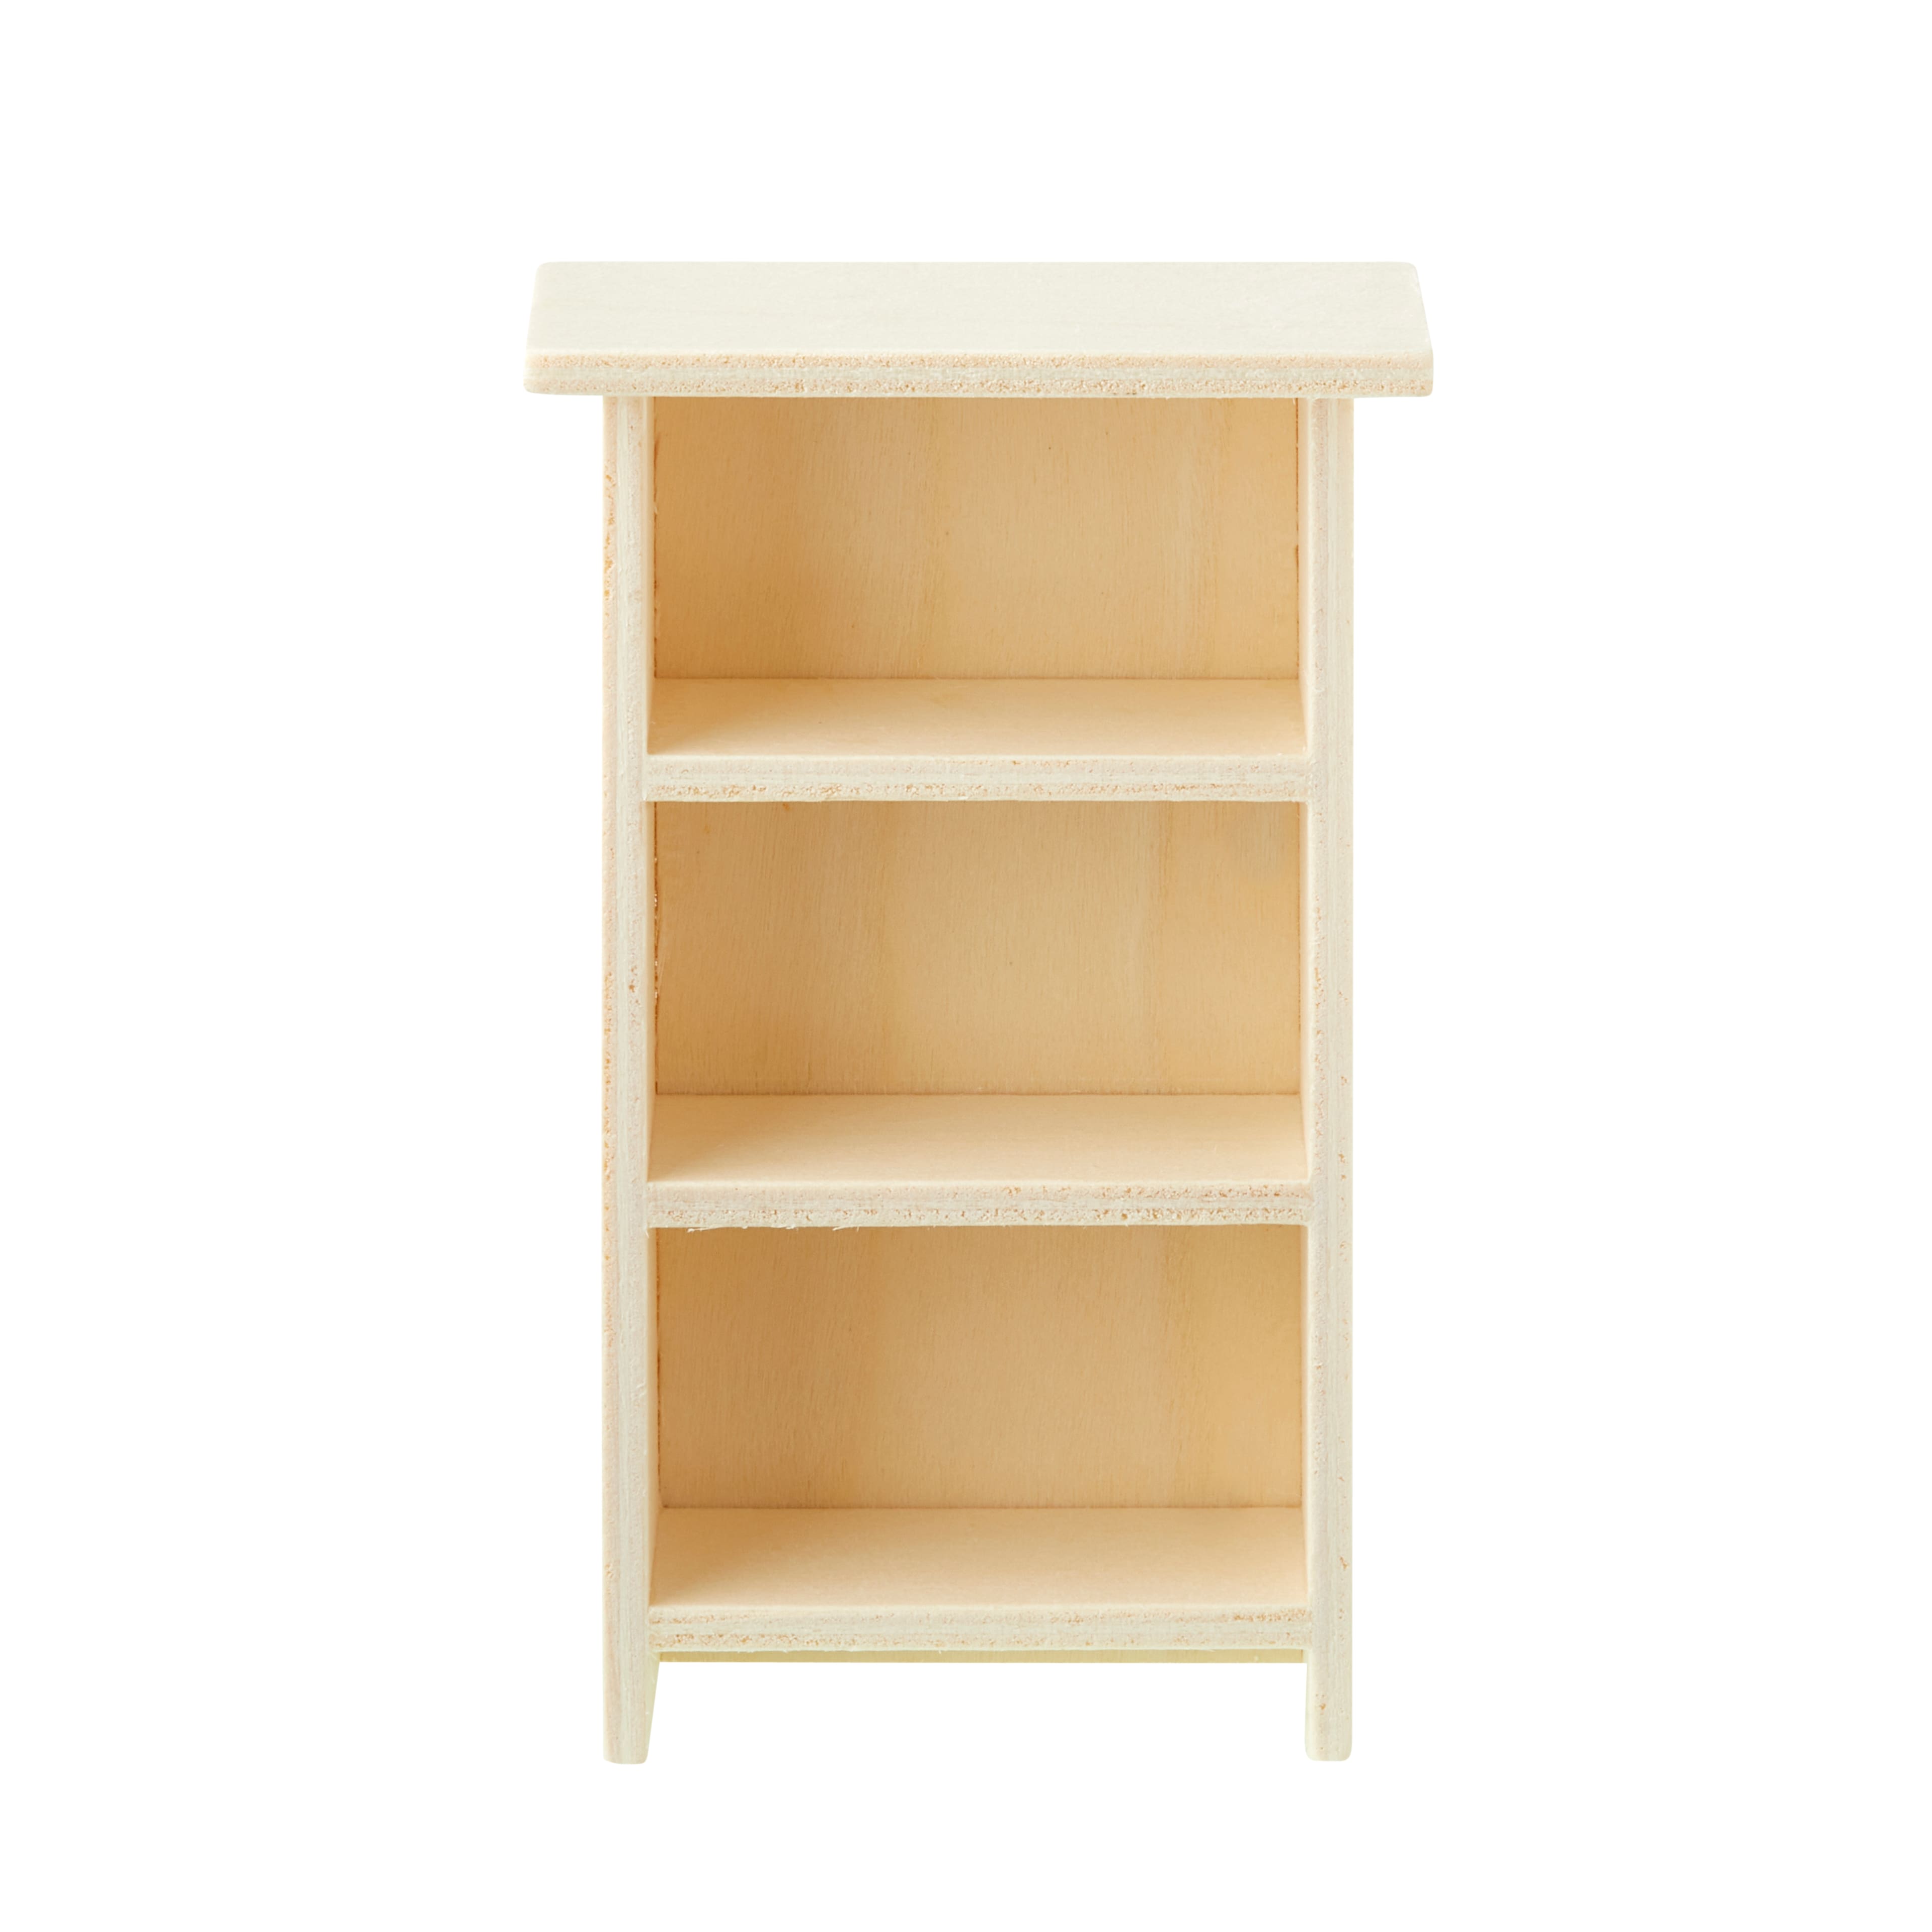
Credit: canada.michaels.com
Choosing The Right Wood
Choosing the right wood is important for making a sturdy mini bookshelf. The wood affects how strong and beautiful the shelf will be. Picking the right type and quality of wood can make your project easier and last longer.
Think about the wood’s look and how it will hold weight. Also, consider if the wood is good for the environment. These points help you pick the best wood for your mini bookshelf.
Types Of Wood For Bookshelves
Softwoods like pine are easy to cut and affordable. They work well for light shelves. Hardwoods like oak and maple are stronger and last longer. They have a nice grain and look great.
Choose hardwood if you want a durable shelf. Softwood suits quick projects or light use. Birch and walnut are also nice choices with good strength.
Wood Quality And Thickness
High-quality wood has fewer knots and cracks. It looks better and holds weight well. Avoid wood with many defects. Thickness is key for strength.
Use wood that is at least ¾ inch thick. Thicker wood supports more weight. Thin wood can bend or break easily. Check the wood’s surface is smooth for easy painting or staining.
Sustainable Wood Options
Choose wood from forests that are well managed. Look for FSC-certified wood. This means the wood comes from responsible sources. Bamboo is a fast-growing, eco-friendly option.
Using sustainable wood helps protect nature. It keeps forests healthy for the future. You can build your shelf with a clear conscience by picking green wood.
Gathering Tools And Materials
Before building a mini bookshelf, gather all tools and materials. Having everything ready saves time and avoids frustration. This step ensures a smooth building process and better results.
Essential Tools List
Start with basic woodworking tools. A saw is necessary to cut wood pieces to size. A drill helps create holes for screws. Screwdrivers tighten screws securely. Sandpaper smooths rough edges. A measuring tape measures wood accurately. A pencil marks cutting lines. Clamps hold wood pieces steady during assembly.
Additional Supplies Needed
Choose the right wood for your shelf. Pine or plywood works well for small projects. Wood glue strengthens joints. Wood screws hold pieces firmly together. Paint or stain finishes the shelf and protects wood. Brushes or rags apply paint or stain evenly. Safety gear like gloves and goggles protects during work.
Measuring And Planning
Measuring and planning are the first important steps to build a mini bookshelf. Careful measurements ensure the shelf fits your space and holds your books well. Planning helps avoid mistakes and saves materials. It also makes the building process smoother and faster.
Determining Bookshelf Dimensions
Start by deciding the size of your bookshelf. Measure the space where you want to place it. Think about the height, width, and depth. Choose dimensions that fit the area and your book collection. Write down these numbers clearly.
Sketching The Design
Draw a simple picture of your bookshelf on paper. Show the front, side, and top views. Mark the dimensions on your sketch. This helps you see the shape and size before cutting the wood. It also guides you during assembly.
Planning Shelf Spacing
Decide how many shelves you want. Measure the height of your tallest books. Leave extra space above each shelf for easy access. Keep shelves evenly spaced for a neat look. Proper spacing keeps books upright and organized.
Cutting The Wood Pieces
Cutting the wood pieces is a key step in building your mini bookshelf. Accurate cuts ensure the pieces fit well. This process sets the foundation for a sturdy shelf. Take your time and prepare carefully.
Marking Cut Lines
Start by measuring each wood piece. Use a pencil to mark clear cut lines. Measure twice to avoid mistakes. Draw straight lines with a ruler or square. These lines guide your saw for precise cuts. Clear marks help keep the pieces uniform.
Safe Cutting Techniques
Wear safety glasses and gloves before cutting. Secure the wood firmly with clamps. Use a saw suitable for your wood type. Cut slowly along the marked lines. Keep your hands away from the blade. A steady pace prevents splintering and mistakes. Always work in a well-lit area for better control.
Assembling The Bookshelf Frame
Assembling the bookshelf frame is the key step to bring your mini bookshelf to life. This part involves putting together the main pieces carefully. You will join the side panels, fix the shelves, and secure everything with screws or nails. Take your time and follow each step to ensure a sturdy and neat frame.
Joining The Side Panels
Start by placing the two side panels upright and parallel. Align their edges so they stand straight and steady. Use wood glue on the edges for extra strength. Press the panels together firmly. Let the glue set for a few minutes before moving on.
Attaching The Shelves
Next, position the shelves between the side panels. Measure the spaces to keep shelves even and balanced. Hold each shelf in place and check for levelness. Apply wood glue on the ends of the shelves. Press them into the side panels carefully.
Securing With Screws Or Nails
Secure the frame by driving screws or nails through the side panels into the shelves. Use a drill or hammer for this step. Place screws or nails evenly along the shelves. This will hold the pieces tightly together. Make sure all screws or nails are flush with the wood.

Credit: www.youtube.com
Sanding And Finishing
Sanding and finishing are key steps in making your mini bookshelf look great. They help smooth the wood and protect it. These steps give your project a clean, polished look. Also, they make the bookshelf last longer. Follow these tips to get the best results.
Smoothing Rough Edges
Start by sanding all wood surfaces with medium-grit sandpaper. This removes splinters and rough spots. Next, switch to fine-grit sandpaper for a smooth finish. Sand edges and corners carefully to avoid sharp areas. Wipe dust off with a dry cloth before moving on.
Applying Stain Or Paint
Choose a stain or paint that fits your style. Use a brush or cloth to apply a thin, even coat. Let it dry completely before adding more layers. Multiple coats improve color depth and coverage. Always work in a well-ventilated space for safety.
Sealing For Durability
Seal your bookshelf with a clear finish like polyurethane or varnish. This protects against scratches and water damage. Apply two or three thin coats, allowing each to dry fully. Lightly sand between coats for a smooth surface. Sealing keeps your mini bookshelf looking new longer.
Adding Final Touches
Adding final touches to your mini bookshelf makes it sturdy and stylish. These steps give your project a clean, finished look. They also ensure your bookshelf stays safe on the wall. Let’s explore how to install the back panel, attach wall brackets, and decorate your mini bookshelf.
Installing Back Panel
The back panel adds strength and support to the shelf. Cut a thin piece of wood to fit the back perfectly. Use wood glue along the edges for a strong hold. Then, secure it with small nails or screws. This step keeps books from falling behind the shelf. It also helps keep the shelf square.
Attaching Wall Brackets
Wall brackets hold your mini bookshelf safely on the wall. Choose brackets that match the shelf size and weight. Mark bracket positions on the shelf’s back edges. Drill pilot holes to avoid splitting the wood. Screw brackets firmly to the shelf and wall. Check the shelf is level before tightening screws fully.
Decorating Your Mini Bookshelf
Decorate the mini bookshelf to match your room style. Paint or stain the wood for color and protection. Use painter’s tape for neat edges. Add decorative knobs or trim for a personal touch. Place small plants or bookends to enhance its look. Keep decorations light to avoid extra weight.
Tips For Maintenance
Maintaining your mini wooden bookshelf is key to its long life. Regular care keeps the wood looking fresh and strong. Follow these simple tips to protect your bookshelf from wear and tear. Small efforts help keep your project beautiful for years.
Cleaning Your Bookshelf
Dust the shelf often with a soft cloth. Avoid using wet cloths that can damage the wood. For sticky spots, use a damp cloth and dry immediately. Use mild soap if needed, but rinse well and dry. Regular cleaning stops dirt build-up and keeps the wood healthy.
Preventing Damage
Place the bookshelf away from direct sunlight to avoid fading. Keep it in a dry area to prevent warping or mold. Use coasters or pads under heavy items to stop scratches. Avoid placing very heavy objects that can bend the shelves. Check screws and joints regularly to keep it sturdy and safe.
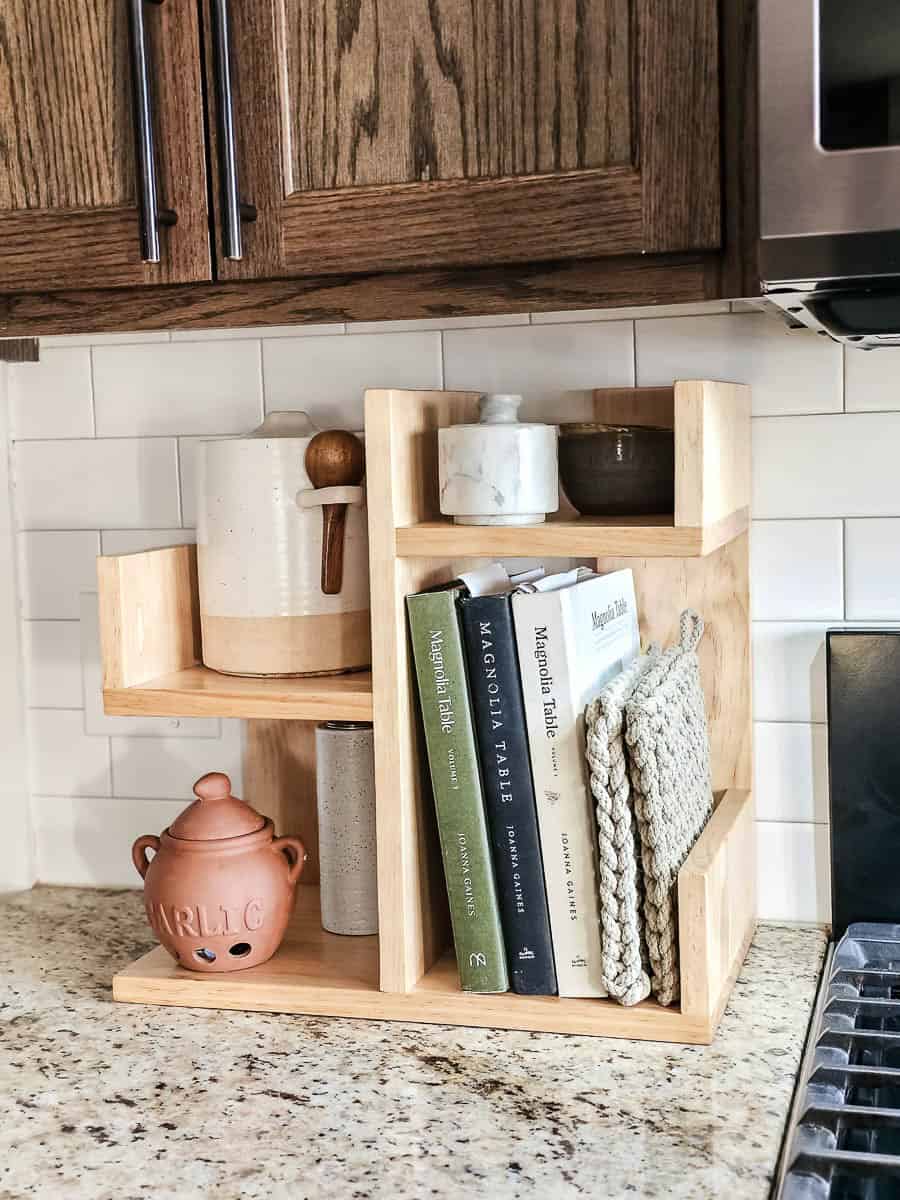
Credit: www.makingmanzanita.com
Frequently Asked Questions
What Materials Do I Need To Make A Mini Wooden Bookshelf?
You need wood boards, screws, wood glue, sandpaper, a saw, and a drill. Optionally, paint or stain enhances the finish. Choose wood types like pine for easy cutting and durability.
How Long Does It Take To Build A Mini Bookshelf?
Building a mini bookshelf typically takes 2 to 4 hours. Time varies by skill level and design complexity. Preparation and drying time for glue or paint may add extra hours.
What Tools Are Essential For A Diy Mini Bookshelf?
Essential tools include a saw, drill, screwdriver, measuring tape, and clamps. Sandpaper smooths edges, and a level ensures shelves are straight. These tools guarantee precise cuts and secure assembly.
Can I Customize The Size Of My Mini Bookshelf?
Yes, you can customize the bookshelf size to fit your space. Adjust the length, width, and shelf height as needed. Custom sizing allows for better organization and aesthetic appeal.
Conclusion
Building a mini bookshelf from wood is simple and fun. You only need a few tools and some basic steps. This project saves money and adds charm to any room. It also lets you create something useful with your own hands.
Enjoy the process and feel proud of your work. Keep practicing, and soon you will make even better pieces. Try different designs to fit your style and space. Wooden bookshelves last long and hold many books. Start today and bring your small wooden shelf to life.