Are you looking to build a beautiful acacia bookshelf without stress or confusion? Imagine having a sturdy, stylish piece of furniture that you made yourself—one that brings calm and satisfaction every time you see it.
This guide will walk you through the steps to create your acacia bookshelf with confidence and ease. You don’t need to be an expert or spend hours figuring things out. By the end of this article, you’ll have the knowledge and tips to craft your bookshelf with peace of mind, turning your space into a cozy, organized haven.
Ready to get started? Let’s dive in.

Credit: hekman.com
Choosing Acacia Wood
Choosing the right wood is key to building a sturdy and beautiful bookshelf. Acacia wood stands out for its strength and natural beauty. This wood type offers durability and style, perfect for a bookshelf that lasts.
Understanding the benefits and how to select quality acacia wood helps create your project with peace of mind.
Benefits Of Acacia
Acacia wood is tough and resists scratches and dents. It has a smooth grain and rich color that adds warmth to any room. This wood handles moisture better than many other woods. It also ages nicely, developing a unique patina over time. These qualities make acacia ideal for furniture that needs to look good and stay strong.
Selecting Quality Wood
Choose wood that feels heavy and solid. Avoid pieces with cracks, knots, or soft spots. Look for a consistent color and tight grain pattern. Check the wood for any signs of pests or mold. Properly dried acacia wood reduces the risk of warping later. Buy from trusted suppliers who offer fresh, well-stored wood.
Tools And Materials Needed
Building an acacia bookshelf requires some basic tools and materials. Having the right equipment makes the process smooth and safe. This section lists what you need to get started.
Essential Tools
- Measuring tape to get exact dimensions
- Hand saw or circular saw to cut wood
- Power drill for making holes and driving screws
- Screwdriver set for tightening screws
- Sandpaper or electric sander to smooth surfaces
- Clamps to hold pieces together while working
- Carpenter’s square for accurate right angles
- Safety goggles and gloves for protection
Additional Supplies
- Acacia wood planks for the shelves and frame
- Wood screws of various sizes
- Wood glue for extra strength
- Wood stain or finish to protect and enhance the wood
- Paintbrush or cloth for applying stain
- Wood filler to cover holes or gaps
- Drop cloth to protect your work area
Designing Your Bookshelf
Designing your acacia bookshelf starts with clear planning. This step helps you create a piece that fits your space and style. Taking time to design ensures your bookshelf looks good and works well.
Focus on the space you have and how you want to use the bookshelf. This makes the building process smoother and more enjoyable.
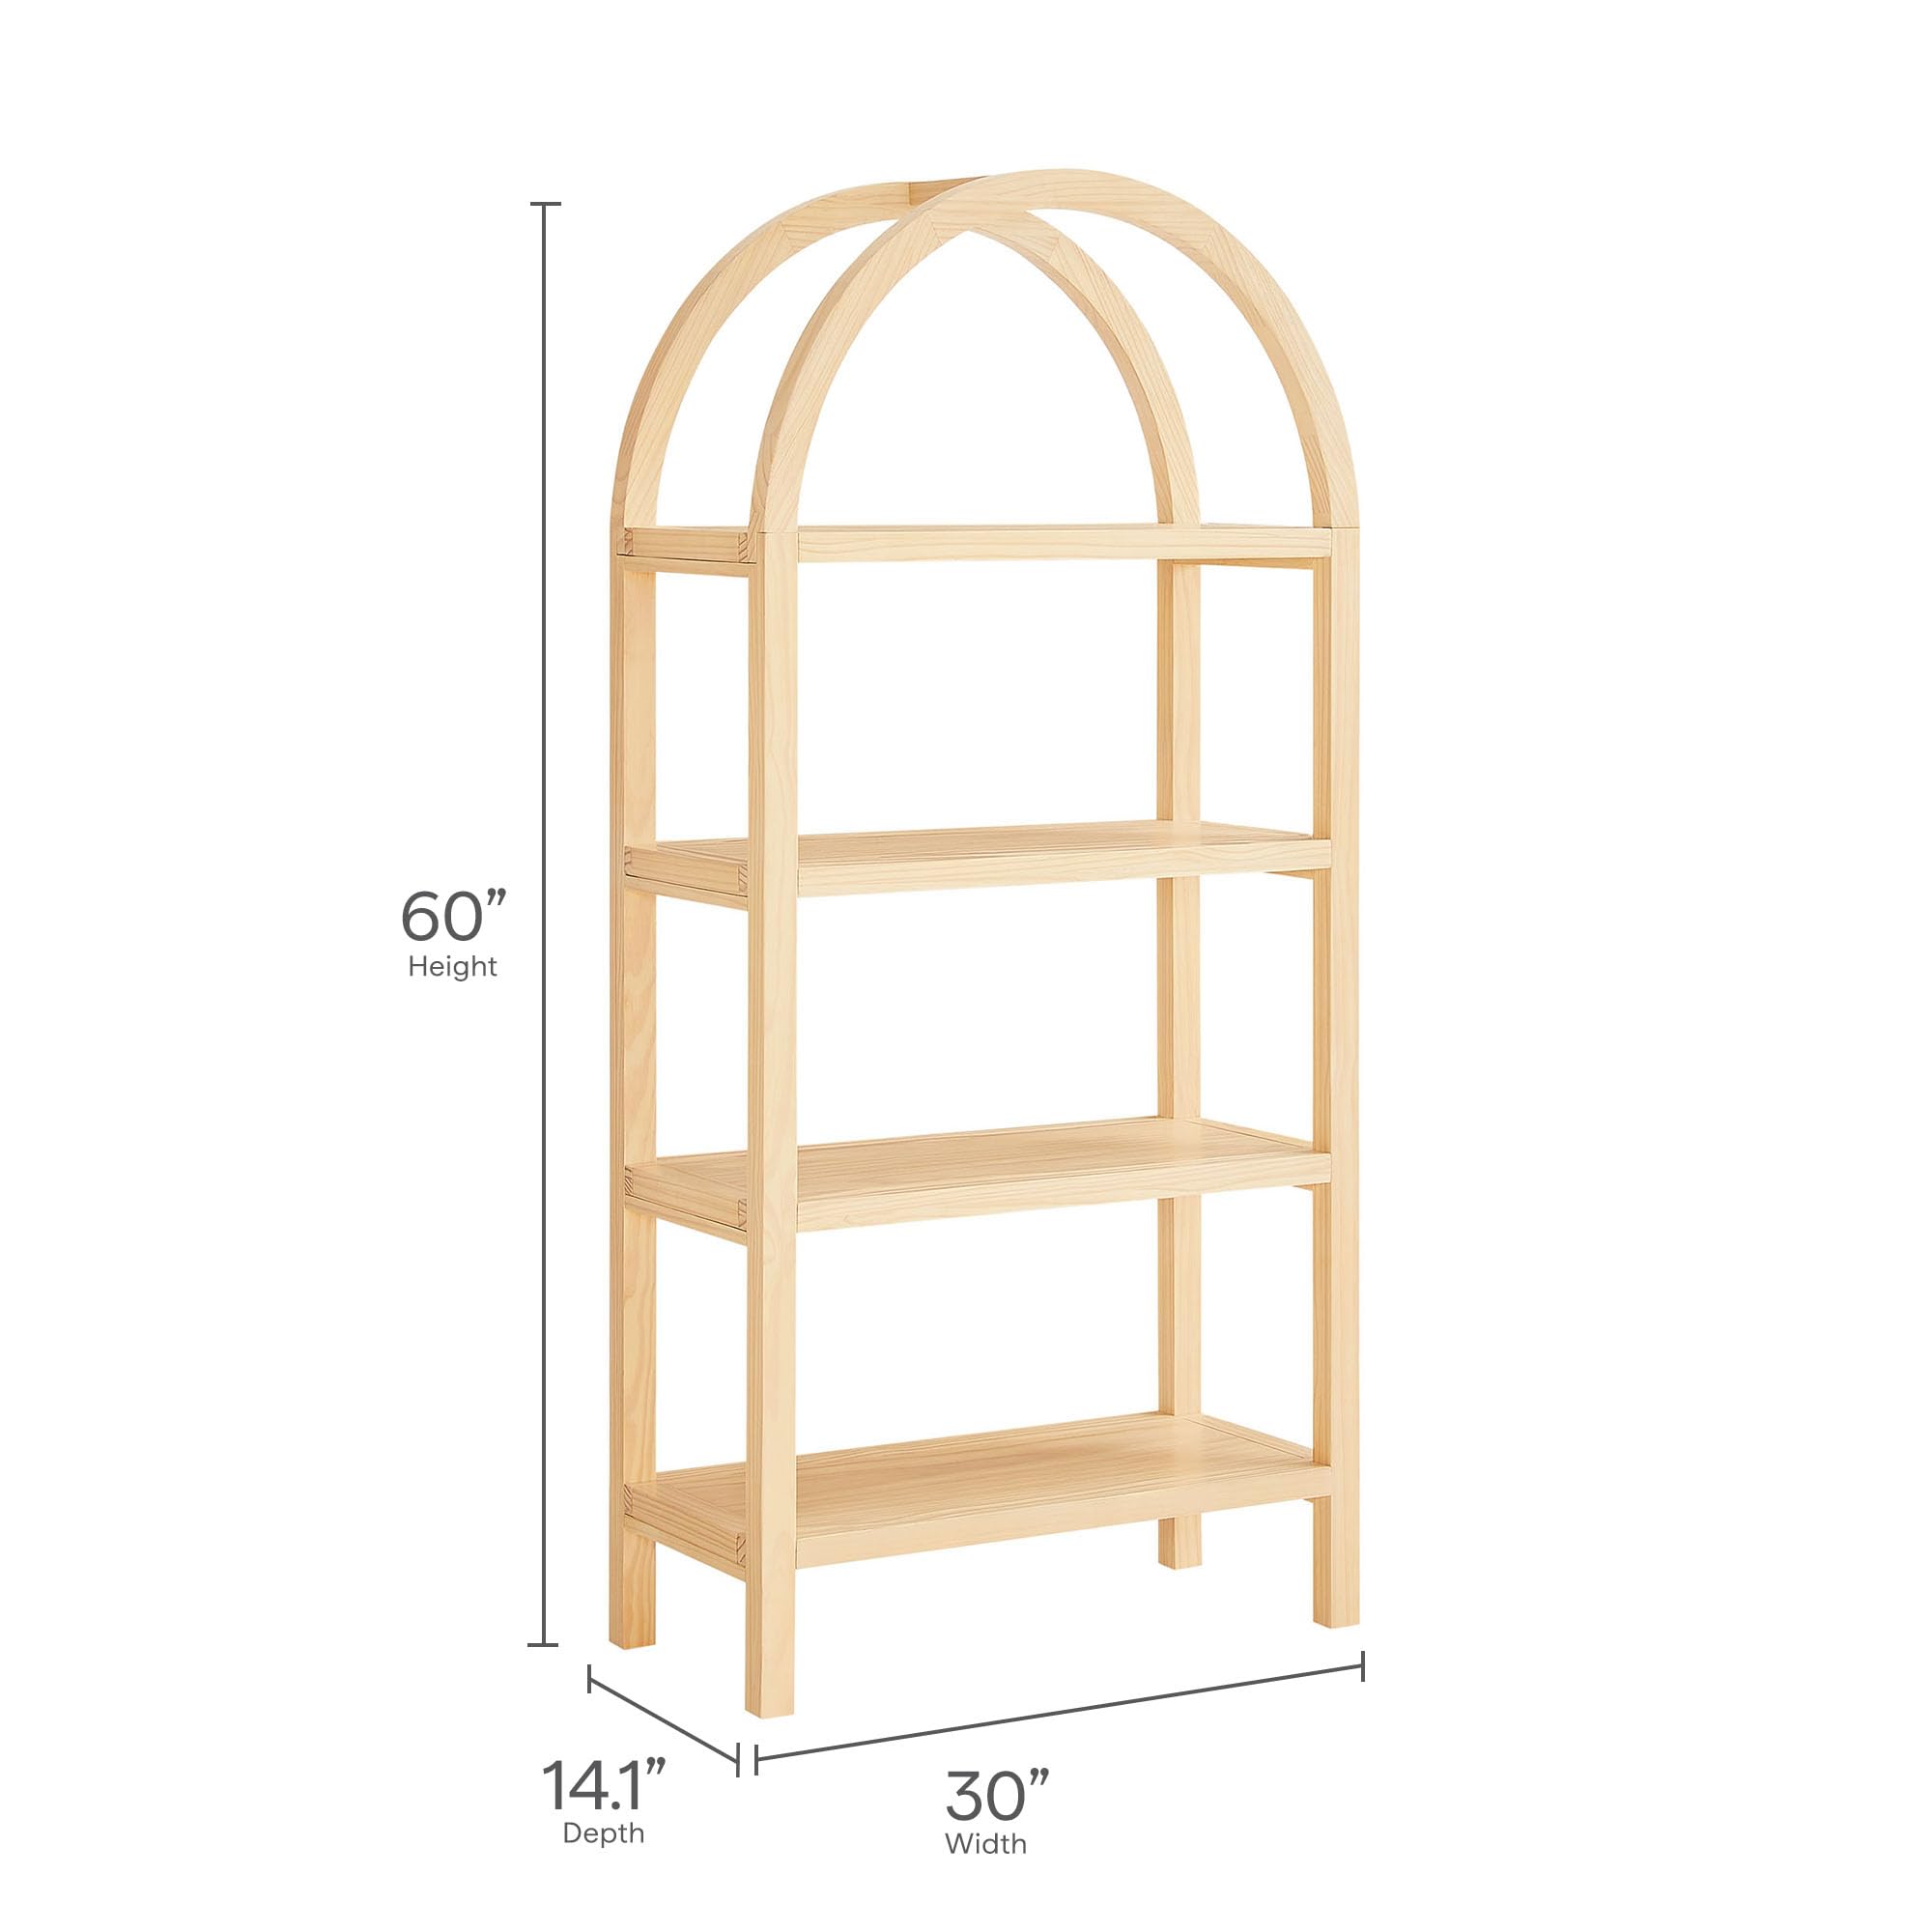
Measuring Space
Measure the area where you want to place the bookshelf. Use a tape measure for accuracy. Write down the height, width, and depth of the space. Check for any obstacles like vents or power outlets. These can affect the size of your bookshelf.
Think about the room’s flow. Make sure the bookshelf does not block doors or walkways. Leave some extra space for air circulation. Proper measurements help avoid mistakes later.
Sketching The Layout
Draw a simple sketch of your bookshelf design. Start with the overall shape and size. Add shelves and dividers based on what you want to store. Use graph paper or a drawing app for neat lines.
Keep proportions in mind. Make shelves tall enough for books or decorations. Plan for adjustable shelves if you want flexibility. Label each part clearly in your sketch.
This visual plan guides your woodworking steps. It saves time and reduces errors during construction. A good layout makes your bookshelf both beautiful and practical.
Cutting The Wood
Cutting the wood is an important step in building your acacia bookshelf. It shapes the pieces that come together to make the final product. Taking your time here helps avoid mistakes and saves wood. Careful cutting also makes the assembly process easier and more precise.
Safe Cutting Techniques
Always wear safety goggles and gloves before cutting. Keep your fingers away from the blade. Use clamps to hold wood steady. Cut slowly and steadily for control. Check your tools before starting to ensure they work well. A clean, sharp blade makes cutting safer and smoother.
Accurate Measurements
Measure twice, cut once is a good rule. Use a tape measure and a pencil for marking. Draw clear, straight lines on the wood. Double-check each measurement before cutting. Cutting wood to the right size helps the bookshelf fit together perfectly. Small errors here can cause bigger problems later.
Assembling The Frame
Assembling the frame is the first important step in making your acacia bookshelf. It creates the strong base for the whole structure. Taking time here ensures your shelf stands firm and looks great. Follow simple steps to join the pieces correctly and check for stability as you build.
Joining Methods
Start by choosing the best joining method for your frame. Screws work well and hold pieces tightly. Wood glue adds extra strength at the joints. Use clamps to keep parts steady while glue dries. Make sure corners fit snugly and square. Drill pilot holes before screwing to avoid wood splitting. These steps make the frame solid and long-lasting.
Ensuring Stability
Check the frame for any wobbling or gaps. Use a level to keep shelves even. Tighten screws and add corner braces if needed. The frame should not move when pressed gently. Sand rough edges to avoid splinters. A steady frame supports heavy books and lasts for years. Stability is key to a safe, reliable bookshelf.

Credit: us.amazon.com
Sanding And Finishing
Sanding and finishing are key steps in making an acacia bookshelf. They bring out the wood’s natural beauty. These steps also protect the wood from damage. Taking time to sand and finish well gives the bookshelf a smooth, polished look. It helps the wood last longer and resist scratches and stains.
Sanding Tips
Start sanding with coarse sandpaper. Use 80-grit to remove rough spots and marks. Sand along the wood grain to avoid scratches. Move to finer sandpaper like 120-grit for a smoother surface. Finish with 220-grit for a soft, even feel. Wipe dust with a clean cloth between sanding steps. Use a sanding block or electric sander for even pressure. Take your time. Smooth sanding makes a big difference in the final look.
Applying Finish
Choose a finish that fits your style and use. Oil finishes bring warmth and deepen wood color. Polyurethane offers strong protection against scratches and water. Apply finish with a clean brush or cloth. Use thin, even coats to avoid drips. Let each coat dry fully before adding another. Lightly sand between coats with fine sandpaper for smoothness. Finish edges and corners carefully. This step seals the wood and highlights its grain. A good finish keeps your bookshelf looking great for years.
Installing Shelves
Installing shelves in your acacia bookshelf is a key step. It shapes the look and function of your bookshelf. Careful placement and strong support keep your shelves steady and safe.
Shelf Placement
Decide the height of each shelf based on what you plan to store. Leave enough space for tall books or decor. Use a tape measure and mark spots with a pencil. Keep shelves level to avoid items sliding off. Try spacing shelves evenly for a clean look.
Securing Shelves
Use sturdy brackets or shelf pins to hold the shelves. Drill holes carefully to avoid splitting the wood. Check the brackets fit snugly and hold weight well. Tighten screws fully for strong support. Test each shelf by pressing gently before loading items.
Credit: www.amazon.com
Final Touches
Final touches bring your acacia bookshelf to life. This stage ensures your project looks neat and lasts long. Taking time here gives you peace of mind. Small details make a big difference in the end result.
Inspecting For Flaws
Look closely at every part of the bookshelf. Check for rough edges or uneven surfaces. Sand any spots that feel rough or sharp. Make sure all screws and nails are tight. Fix any loose parts to keep the shelf strong. A careful inspection helps avoid problems later.
Cleaning Up
Remove dust and wood chips with a soft cloth. Wipe the surface gently to keep the wood smooth. Avoid using harsh chemicals that may damage the wood. Clean shelves make the wood grain stand out. A clean finish adds beauty and protects your work.
Maintaining Your Bookshelf
Maintaining your acacia bookshelf keeps it looking fresh and lasting longer. A well-cared bookshelf holds its charm and strength over time. Simple care steps protect the wood and keep dust away.
Regular Cleaning
Dust your bookshelf often with a soft cloth. Avoid harsh chemicals that can damage the wood. A dry or slightly damp cloth works best. Clean spills quickly to stop stains and warping. Regular cleaning keeps the wood smooth and bright.
Protecting The Wood
Use wood polish or natural oils to nourish your shelf. Apply a thin layer every few months to protect the surface. Keep your bookshelf away from direct sunlight and moisture. These can cause cracks or fading. Position it in a stable, dry spot for best results.
Frequently Asked Questions
What Materials Are Needed For An Acacia Bookshelf?
You need Acacia wood planks, wood glue, screws, sandpaper, wood finish, and basic woodworking tools for the bookshelf.
How Long Does It Take To Build An Acacia Bookshelf?
Building an Acacia bookshelf typically takes 4 to 6 hours, depending on your skill level and design complexity.
Is Acacia Wood Durable For Bookshelves?
Yes, Acacia wood is strong, durable, and resistant to wear, making it ideal for sturdy bookshelves.
How To Finish An Acacia Bookshelf For Peace Of Mind?
Use a non-toxic, eco-friendly wood finish to protect the wood and ensure a safe, healthy environment.
Conclusion
Building an Acacia bookshelf brings calm and satisfaction. Step-by-step, you create a strong, beautiful piece. Use the right tools and follow safety tips. Enjoy the smooth wood and simple design. This project fits well in any home. Take your time and work with care.
The result is a bookshelf you can trust. It holds your books and adds warmth. A peaceful project that feels rewarding. Try it and enjoy making something lasting.