
Are you ready to create the perfect bookshelf that fits your space and style? Building a bookshelf from Home Depot materials is easier than you think.
Imagine having a custom piece where you can display your favorite books, decor, and memories—all made by your own hands. In this guide, you’ll discover simple steps, smart tips, and must-know tricks to help you build a sturdy, beautiful bookshelf without any guesswork.
Keep reading, and soon you’ll have a project that not only saves you money but also gives your room a fresh, personal touch.

Credit: www.homedepot.com
Materials And Tools Needed
Building a bookshelf requires the right materials and tools. Choosing good wood and the right tools makes the project easier. Home Depot offers many options for both wood and tools. This section covers what you need to get started.
Selecting Wood At Home Depot
Home Depot has many types of wood for bookshelves. Pine is soft and easy to cut. It is good for beginners. Oak is harder and lasts longer. It looks great but costs more. Plywood is also popular for shelves. It is strong and comes in large sheets. Choose wood that fits your budget and style.
Essential Tools For Assembly
You need some basic tools to build a bookshelf. A drill is important for making holes and driving screws. A saw helps cut wood to size. A tape measure keeps your cuts accurate. Use a level to make sure shelves are straight. Sandpaper smooths rough edges. These tools help you build a sturdy shelf.
Optional Supplies For Finishing
Finishing supplies make your bookshelf look nice. Wood stain adds color and protects the wood. Clear varnish gives a shiny, smooth surface. Wood filler hides holes or gaps. Brushes or rags help apply stain and varnish. Masking tape protects areas you don’t want to stain. These supplies give your bookshelf a polished look.
Credit: www.homedepot.com
Planning Your Bookshelf
Planning your bookshelf is the first step to a successful project. Taking time to plan saves effort later. It helps you create a shelf that fits your needs and space perfectly.
Choosing The Right Size
Start by deciding how big your bookshelf should be. Think about what you will store on it. Books, decorations, or other items? Choose a size that holds everything comfortably. Avoid making it too tall or too wide for your room.
Design And Style Options
Pick a design that matches your room’s look. Simple shelves fit most rooms well. Open shelves show off items nicely. Closed shelves hide clutter and dust. Think about the material too. Wood offers a classic feel. Metal feels modern and strong.
Measuring Your Space
Measure the wall space where the bookshelf will stand. Write down height, width, and depth. Check for any obstacles like outlets or vents. Make sure the shelf will fit without blocking anything. Accurate measurements help you avoid mistakes.
Cutting And Preparing Wood
Cutting and preparing wood is a key step in building a sturdy bookshelf. Precise cuts ensure the shelves fit together well. Proper preparation makes assembly easier and improves the final look. Taking time here saves effort later.
Using Home Depot’s Cutting Services
Home Depot offers wood cutting services for many wood types. Bring your measurements and they cut wood to size. This saves time and gives you accurate pieces. Use this service especially if you lack cutting tools or skills.
Sanding And Smoothing Edges
After cutting, wood edges can be rough or splintered. Sanding smooths these edges for safety and a clean finish. Use sandpaper or a sanding block to remove rough spots. Smooth edges also help paint or stain stick better.
Organizing Pieces For Assembly
Sort all cut and sanded wood pieces by size and shape. Organize them in the order you will use them. This makes assembly faster and reduces mistakes. Keep screws and hardware nearby for easy access.
Assembling The Frame
Assembling the frame is the first important step in building your bookshelf. This step sets the base for the entire structure. A strong frame keeps the shelves stable and safe for books. Follow each part carefully to create a solid frame.
Building The Side Panels
Start by cutting the wood for the side panels. These panels support the shelves and hold the frame together. Use sturdy wood like pine or oak for strength. Drill holes for screws, keeping them even and straight. Sand the edges to avoid splinters. This makes the panels smooth and safe to handle.
Constructing The Shelves
Next, cut the shelves to fit between the side panels. Measure twice, cut once for accuracy. Sand the shelves to smooth rough spots. You can paint or stain them now, or after assembly. Make sure the shelves are strong enough to hold books without bending.
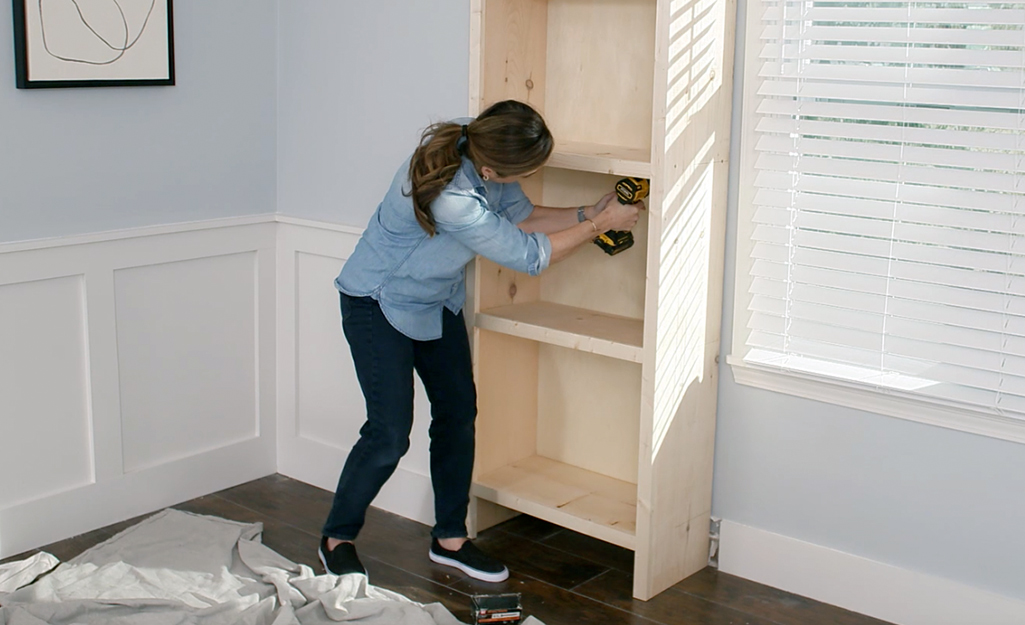
Joining The Parts Together
Attach the shelves to the side panels using screws or brackets. Start from the bottom shelf and move upward. Check with a level to keep shelves straight. Tighten all screws but do not overtighten. This avoids cracking the wood. Secure the frame with corner braces for extra support.
Securing And Reinforcing
Securing and reinforcing your bookshelf is key to making it strong and safe. A well-built shelf holds heavy books without wobbling or falling apart. This part of the project ensures your work lasts for years. Focus on solid joints and extra support for stability.
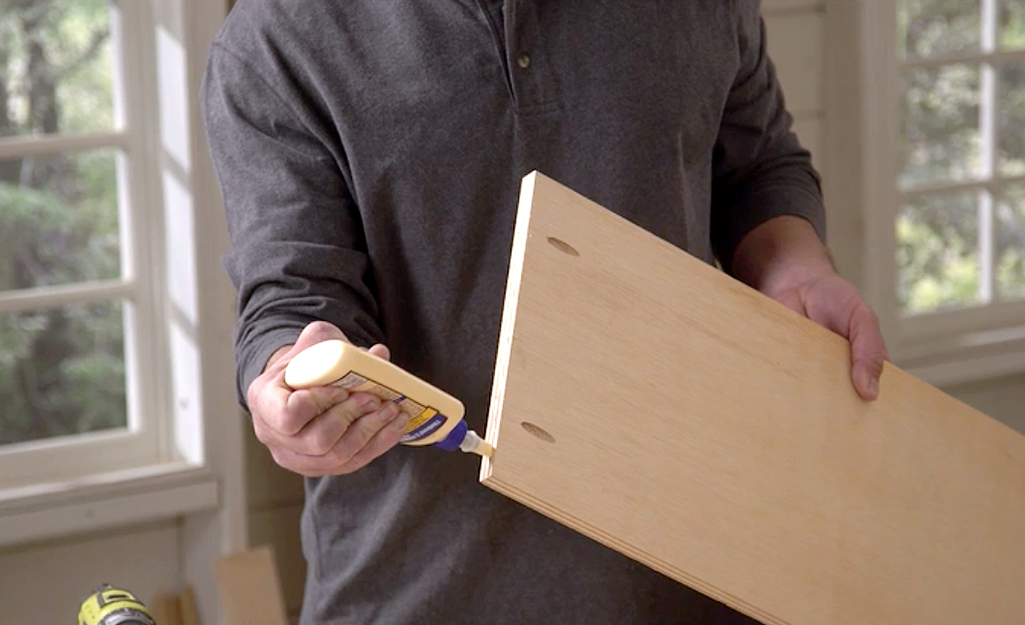
Using Screws And Brackets
Screws hold the pieces of wood tightly together. Use wood screws, not nails, for better grip. Drill pilot holes first to prevent wood from splitting. Metal brackets add extra strength at corners and joints. Attach brackets with screws for a firm hold. This method stops the shelf from moving or shaking.
Ensuring Stability
Place the bookshelf on a flat surface to avoid rocking. Use a level to check if it stands straight. Secure the shelf to the wall with anchors or brackets. This prevents tipping, especially if children or pets are nearby. Stability makes your shelf safer and more durable.
Adding Back Panels
Back panels add strength and keep shelves square. Use thin plywood or hardboard for the panel. Attach it with screws or nails along the edges. The panel stops the shelf from twisting or leaning. It also helps keep books from falling behind.
Finishing Touches
Finishing touches bring your bookshelf to life. They protect the wood and improve its look. Simple steps make a big difference in style and durability. Take your time to choose the right finish and decorations. These small details give your project a personal touch.
Painting And Staining Tips
Choose paint or stain that fits your room’s style. Use a brush or roller for smooth coverage. Paint in thin layers to avoid drips and uneven spots. Let each layer dry before adding another. Stains soak into the wood and show its natural texture. Test colors on a scrap wood piece first. Light sanding between coats helps the finish stick better.
Sealing For Durability
Seal your bookshelf to protect against scratches and moisture. Clear polyurethane is a popular choice for strong protection. Apply it evenly with a clean brush. Allow plenty of drying time between coats. Sand lightly after each coat for a smooth surface. Sealing keeps your bookshelf looking new for years. It also makes cleaning easier and prevents damage.
Adding Decorative Elements
Decorative touches personalize your bookshelf. Add trim or molding for a classic look. Use stencils or decals to create patterns. Install small hooks or brackets for extra function. Choose hardware that matches your room style. Keep decorations simple to avoid clutter. These details make your bookshelf unique and special.
Safety And Maintenance
Building a bookshelf at Home Depot is a rewarding project. Safety and maintenance are key to keep your bookshelf strong and long-lasting. Follow simple steps to protect yourself and your work. Maintain your bookshelf to avoid damage and keep it looking good.
Proper Handling Of Tools
Always wear safety glasses to protect your eyes. Use gloves to avoid splinters or cuts. Hold tools firmly and keep your hands clear of blades. Work in a well-lit area to see clearly. Store tools safely after use to prevent accidents.
Keeping Your Bookshelf Stable
Place the bookshelf on a flat, even surface. Use wall anchors or brackets to secure tall shelves. Check joints and screws regularly for tightness. Avoid overloading shelves with heavy items. Balance weight evenly across all shelves.
Cleaning And Care Advice
Dust your bookshelf often with a soft cloth. Use mild soap and water for deeper cleaning. Avoid harsh chemicals that can damage wood or paint. Dry surfaces completely to prevent warping. Treat scratches with wood polish or touch-up markers.
Credit: www.homedepot.com
Frequently Asked Questions
What Materials Do I Need To Build A Bookshelf From Home Depot?
You need wood boards, screws, brackets, wood glue, sandpaper, and paint or stain. Home Depot offers all these materials. Choose quality wood like pine or plywood for durability. Proper tools like a drill and level are also essential for assembly.
How Long Does It Take To Build A Bookshelf From Home Depot?
Building a bookshelf typically takes 3 to 5 hours. Time depends on size, complexity, and your experience. Preparing materials and finishing adds extra time. Planning and following step-by-step instructions can speed up the process.
Can I Customize The Bookshelf Design From Home Depot Materials?
Yes, Home Depot materials allow full customization. You can adjust size, shape, and finish. Choose different wood types or paint colors to match your décor. Adding shelves or decorative trims is also easy with standard supplies.
What Is The Average Cost Of Building A Home Depot Bookshelf?
Costs vary, but expect $50 to $150 for materials. Prices depend on wood type, size, and hardware. Using affordable pine or plywood reduces expenses. Planning your design helps manage the budget effectively.
Conclusion
Building a bookshelf from Home Depot materials is simple and fun. Follow each step carefully for best results. Choose the right wood and tools for your project. Take your time to measure and cut pieces accurately. Assemble parts steadily, and check for stability often.
A homemade bookshelf adds charm and storage to any room. You can customize it to fit your style and space. Enjoy the satisfaction of creating something useful with your own hands. Start your project today and watch your room transform.