Are you looking to add a warm, charming touch to your home? A rustic console table is the perfect piece to bring character and function to any space.
Imagine having a beautiful, handcrafted table that not only looks great but also tells a story through its unique, weathered wood. In this guide, you’ll discover simple steps to create your very own rustic console table, even if you’ve never built furniture before.
By the end, you’ll have the confidence and know-how to craft a piece that’s truly yours—something that stands out and welcomes everyone who visits your home. Ready to get started? Let’s dive in!
Materials And Tools
Gathering the right materials and tools is key to building a rustic console table. Each item plays a role in shaping the final piece. Prepare well to make the process smooth and enjoyable.
Wood Selection
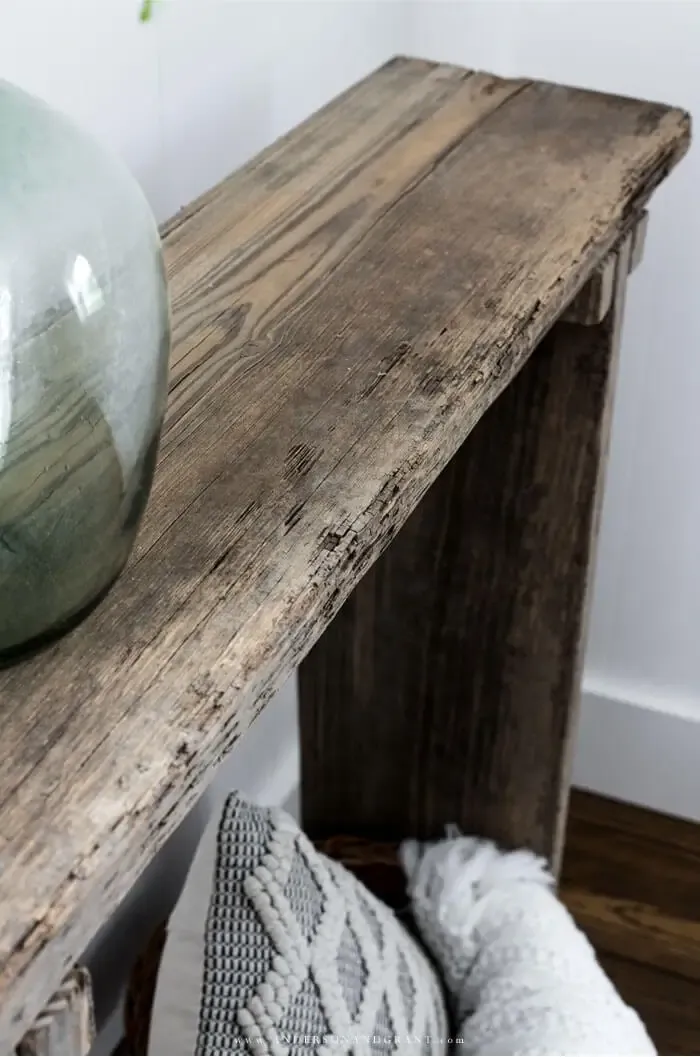
Choose wood that fits the rustic style. Pine, oak, or reclaimed wood work well. These woods show natural grain and knots. They add character and charm to the table. Pick pieces that are straight and free of major cracks. This ensures strength and stability.
Essential Tools
Basic woodworking tools make the build easier. A saw is necessary for cutting wood to size. Use a drill for making holes and driving screws. Sandpaper or a sander smooths rough edges. A tape measure helps keep your cuts accurate. Clamps hold pieces steady while you work.
Additional Supplies
Besides wood and tools, gather screws and wood glue. Screws hold parts together firmly. Wood glue strengthens joints. Finish with wood stain or paint for color and protection. A brush or cloth applies the finish evenly. Safety gear like goggles and gloves protects you during work.

Credit: stonehavenlife.com
Design And Measurements
Design and measurements are key steps in building a rustic console table. They help you create a piece that fits your space and style perfectly. Careful planning saves time and materials during construction.
Start with a clear idea of the design. Then decide the size based on where the table will go. Finally, sketch your plan to guide your work and avoid mistakes.
Choosing A Style
Rustic style means natural, simple, and sturdy. Think about rough wood, visible grains, and a raw finish. You can pick a farmhouse look or something more modern rustic. Decide if you want open shelves or drawers. Choose a style that matches your home decor.
Determining Dimensions
Measure the wall or space for the table. Typical console tables are 30 to 36 inches tall. Width can range from 36 to 60 inches. Depth usually stays between 12 to 18 inches. Keep enough space around for easy movement. Adjust sizes to fit your needs and room size.
Sketching The Plan
Draw the table from different angles: front, side, and top views. Mark all measurements clearly on the sketch. Include details like leg thickness and shelf height. A good plan helps you cut wood pieces accurately. Use simple lines and notes. This step reduces errors and speeds up building.
Preparing The Wood
Preparing the wood is a key step in making a rustic console table. This stage ensures the wood pieces fit well and look good. Proper preparation also helps the table last longer and feel sturdy. Follow these simple steps to get the wood ready for your project.
Cutting To Size
Start by measuring the wood according to your design. Use a saw to cut the pieces cleanly and accurately. Cut each piece slightly larger if you want to sand edges later. Keep safety in mind and wear protective gear while cutting. Precise cuts make the assembly easier and the table more stable.
Sanding For Smoothness
Use sandpaper to smooth all surfaces of the wood. Begin with rough grit to remove splinters and uneven parts. Then, switch to finer grit for a soft, smooth finish. Sand edges carefully to avoid sharp corners. Proper sanding gives the table a polished, rustic look.
Treating The Wood
Apply a wood conditioner or sealant to protect the wood from moisture. This step helps prevent cracking and warping over time. Choose a finish that matches your rustic style, like a matte or satin sealant. Let the treatment dry completely before assembling the table.
Credit: www.andersonandgrant.com
Assembly Steps
Building a rustic console table is a rewarding project. The assembly steps are simple and clear. Follow each part carefully for the best result. This guide breaks down the process into three main steps.
Constructing The Frame
Start by cutting the wood pieces for the frame. Use sturdy wood like pine or oak. Join the pieces using wood glue and screws. Make sure the frame is square by measuring diagonals. Let the glue dry before moving on. A strong frame supports the entire table.
Attaching The Legs
Choose thick legs that match the rustic style. Attach each leg to the frame corners with screws. Drill pilot holes first to avoid splitting the wood. Check the legs for even height and stability. Tighten all screws firmly to prevent wobbling.
Adding The Tabletop
Select a thick, solid wood plank for the tabletop. Sand the edges to smooth any rough spots. Secure the tabletop to the frame with screws from underneath. Avoid visible screws on the top surface for a clean look. Finish by sanding and staining the table as desired.
Finishing Touches
Finishing touches bring your rustic console table to life. They protect the wood and enhance its natural charm. These final steps ensure your table looks great and lasts long. Focus on stain or paint, sealing, and decorative details. Each step shapes your table’s unique style and durability.
Applying Stain Or Paint
Choose a stain to highlight the wood’s grain. Stains add warmth and depth to the table’s surface. Use a brush or cloth to apply evenly. Let the stain soak for a few minutes, then wipe off extra. For a bolder look, pick a paint color that suits your space. Use smooth, even strokes to avoid drips. Allow the paint or stain to dry fully before moving on.
Sealing For Durability
Sealing locks in the stain or paint. It protects the wood from scratches and moisture. Pick a clear polyurethane or wax finish. Apply thin coats with a clean brush. Let each coat dry before adding another. Two or three coats work best for strong protection. This step keeps your table looking fresh and sturdy for years.
Decorative Enhancements
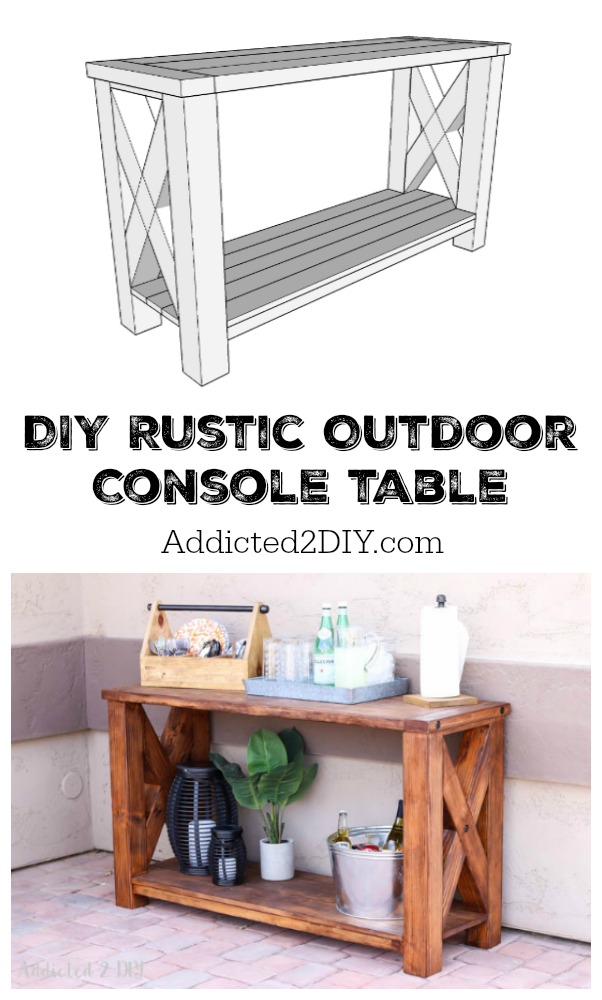
Small details add character to your table. Consider adding metal brackets or corner accents. These give an authentic rustic feel. You can also use stencils to paint simple patterns. Or attach vintage handles for a unique touch. Choose items that match your style and the room’s decor. These extras make your table truly one of a kind.
Credit: addicted2diy.com
Maintenance Tips
Maintaining a rustic console table keeps it beautiful for years. Simple care protects the wood and finish. Regular upkeep prevents damage and keeps the table sturdy. Follow these maintenance tips to enjoy your table longer.
Cleaning Guidelines
Dust the table often with a soft cloth. Use a damp cloth for sticky spots. Avoid harsh chemicals that can damage the wood. Dry the table immediately after cleaning. Clean spills quickly to stop stains from setting.
Repairing Minor Damage
Small scratches can be fixed with wood markers or crayons. Fill tiny cracks with wood filler matching the table’s color. Sand lightly after the filler dries. Use a soft cloth to apply a matching stain or finish. Regular checks help catch damage early.
Extending Table Life
Keep the table away from direct sunlight to avoid fading. Use coasters and mats to protect the surface. Avoid placing heavy objects that may cause dents. Tighten screws and bolts every few months. Reapply wood finish or oil to nourish the wood and keep it strong.
Frequently Asked Questions
What Materials Are Needed For A Rustic Console Table?
You need reclaimed wood, screws, wood glue, sandpaper, stain, and a saw. These materials create a sturdy and authentic rustic look.
How Long Does It Take To Build A Rustic Console Table?
Building a rustic console table typically takes 4 to 6 hours. Time varies based on experience and drying time for stains or finishes.
Can I Customize The Size Of The Rustic Console Table?
Yes, you can adjust the dimensions to fit your space. Measure your area and cut wood accordingly for a perfect fit.
What Type Of Wood Is Best For A Rustic Table?
Reclaimed pine, oak, or cedar are excellent choices. These woods offer durability and enhance the rustic aesthetic with natural textures.
Conclusion
Creating a rustic console table is a fun and rewarding project. You only need simple tools and some basic skills. Each step brings you closer to a unique piece for your home. The natural wood look adds warmth and charm to any space.
Enjoy personalizing your table with finishes and decorations. This project shows how easy DIY furniture can be. Try it yourself and see the difference it makes. A handmade table always feels special and inviting.
