Imagine stepping into your bedroom and seeing furniture that you crafted with your own hands—pieces perfectly tailored to your style and space. Building your own bedroom furniture might sound challenging, but with the right guidance, it’s something you can definitely achieve.
Whether you want a simple nightstand or a complete bed frame, this process lets you bring creativity and personal touch into your home. You’ll discover clear, easy steps and tips to help you build beautiful, functional bedroom furniture. Ready to turn your ideas into real, lasting pieces?
Let’s dive in and make your bedroom truly yours.
Choosing Your Project
Choosing the right bedroom furniture project sets the stage for your success. The project you pick affects the time, tools, and skills you will need. It also shapes how much you will enjoy the process and the final result.
Taking time to select a suitable project helps you build confidence and improve your abilities. This section guides you through picking a project that fits your needs and skills.
Simple Vs Complex Furniture
Simple furniture usually involves fewer parts and basic shapes. Examples include nightstands, shelves, or small benches. These projects help you learn basic cutting and joining techniques.
Complex furniture features detailed designs and many components. Examples include dressers, beds, or wardrobes. These projects require more skill, time, and tools.
Starting with simple pieces allows you to gain experience. You can then move on to more complex builds as your skills grow.
Matching Skill Level To Project
Assess your current woodworking skills honestly. Basic skills include measuring, cutting, and assembling parts. Intermediate skills involve joinery and finishing techniques.
Choose a project that matches what you can do now. This avoids frustration and wasted materials. It also helps you build skills step-by-step.
Gradually try harder projects as your confidence and abilities increase. This steady approach leads to better results and more satisfaction.
Setting Realistic Goals
Set clear and achievable goals for your furniture project. Consider how much time you can spend and what tools you have. Think about the size and style of the furniture you want.
Break down the project into small, manageable steps. This helps you track progress and stay motivated. Realistic goals prevent overwhelm and keep you focused.
Be patient with yourself. Learning takes time, and mistakes are part of the process. Celebrate small wins and keep moving forward.
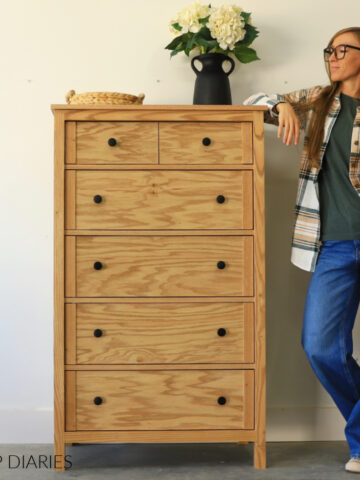
Credit: www.woodshopdiaries.com
Gathering Tools And Materials
Gathering the right tools and materials is the first step to building your bedroom furniture. This stage sets the foundation for your project. Having the correct tools and quality materials makes the process smoother. Planning this well helps you avoid delays and mistakes. The workspace you choose also impacts your work quality and safety. Prepare everything before starting to build. This preparation ensures you work efficiently and enjoy the process.
Essential Basic Tools
Start with a basic set of tools. A measuring tape and pencil help mark cuts precisely. A saw is necessary to cut wood to size. A hammer and nails or screws fasten parts together. Screwdrivers work well for tightening screws. Sandpaper smooths rough edges and surfaces. A drill speeds up hole making and screw driving. Clamps hold pieces steady while you work. These tools cover most beginner furniture projects.
Selecting Quality Materials
Choose wood that fits your project and budget. Solid wood is strong but can be costly. Plywood is affordable and easy to work with. Check for smooth, clean surfaces without cracks. Buy enough material to cover mistakes or changes. Consider wood types like pine, oak, or maple for durability. Pick screws and nails that match your wood type. Good materials improve the look and lifespan of furniture.
Creating A Dedicated Workspace
Set up a clean, well-lit area for building. A flat, stable workbench or table is best. Make sure there is enough space to move around freely. Good ventilation is important when sanding or painting. Keep tools organized and within reach. Avoid distractions to focus on your work. A dedicated workspace helps you stay safe and work faster.
Planning Your Design
Planning your design is the first key step in building bedroom furniture. It sets the foundation for a smooth build process. Clear planning helps avoid mistakes and wasted materials. Spend time thinking about your space, style, and needs. This stage shapes how your furniture will look and fit. Careful planning also saves time during construction.
Drafting Dimensions And Layout
Start by measuring your bedroom carefully. Note the exact size of the area where the furniture will go. Sketch a layout showing the position of each piece. Use graph paper or digital tools to keep scale accurate. Include important details like doorways and windows. Decide on the height, width, and depth of each furniture item. Precise dimensions ensure the pieces fit well and function properly. This step guides your cutting and assembly later.
Choosing Joinery Techniques
Joinery is how you connect wood parts together. Select joinery methods that match your skill level and tools. Simple joints like butt joints or pocket screws work well for beginners. More advanced options include dovetail or mortise and tenon joints. Strong joints increase the durability of your furniture. Consider the look and strength each joinery type offers. Test a few joints on scrap wood before starting the final build.
Selecting Finishes And Hardware
Pick finishes that protect the wood and match your style. Options include paint, stain, varnish, or oil. Each finish changes the color and texture of the wood. Hardware like handles, knobs, and hinges add function and flair. Choose hardware that fits your design theme and is easy to install. Plan the finish and hardware early to buy the right materials. Proper finishing keeps your furniture looking great for years.

Credit: www.thisoldhouse.com
Starting The Build
Starting the build of bedroom furniture is an exciting step. It sets the tone for the entire project. Proper preparation ensures smooth progress and better results. Focus on accuracy and organization to avoid mistakes and wasted materials.
Gather all tools and materials before you begin. Clear your workspace to have enough room for cutting and assembling. Follow your design plan carefully at every stage. Now, let’s dive into the first tasks in building your furniture.
Cutting And Preparing Wood
Begin by measuring wood pieces according to your design. Use a tape measure and mark cutting lines clearly. Cut wood using a saw that fits your skill level. Make straight, clean cuts for better fitting parts.
After cutting, smooth edges with sandpaper or a sanding block. Remove splinters and rough spots to prevent injuries. Check each piece for any defects or warping. Proper preparation ensures strong and neat furniture.
Assembling Components
Start assembling by arranging wood pieces in order. Dry-fit parts to check alignment and fit before gluing or screwing. This step helps spot errors early and saves time.
Apply wood glue to joints for extra strength. Join pieces carefully and hold them in place. Follow your plan for the order of assembly. A solid frame is key to durable furniture.
Using Clamps And Fasteners
Use clamps to hold parts tightly while glue dries. Position clamps evenly to avoid shifting or gaps. Do not overtighten, as this can damage wood.
Fasten parts with screws or nails for added support. Pre-drill holes to prevent splitting the wood. Choose the right fasteners for the wood type and weight.
Double-check all joints for stability before moving to finishing touches. Proper clamping and fastening create long-lasting furniture.
Mastering Joinery
Joinery is the heart of building strong, lasting bedroom furniture. It connects pieces of wood securely. Good joinery ensures stability and beauty in your furniture. Learning joinery skills helps avoid weak joints and wobbly furniture.
Starting with simple joints builds confidence. As skills grow, you can try advanced options. Each joint type fits different parts of a piece. Strong connections depend on proper technique and tools.
Simple Joints For Beginners
Butt joints are the easiest to make. They join two boards by simply gluing or nailing the ends. They work well for basic frames but need reinforcement for strength.
Dado joints create a slot in one piece of wood. The other piece fits into this slot. Dado joints add strength for shelves and drawer dividers. They are easy to cut with a saw or router.
Rabbet joints cut a step-like recess along the edge. This joint improves glue surface area. It is common in cabinet backs and drawer boxes. Simple tools like a saw and chisel can make rabbets.
Advanced Joinery Options
Mortise and tenon joints provide great strength. One piece has a hole (mortise), the other has a matching tongue (tenon). They fit tightly and are perfect for bed frames and chairs.
Dovetail joints lock pieces together with interlocking ‘tails’ and ‘pins.’ This joint is strong and decorative. It is often used in drawer corners and fine furniture.
Box joints are similar to dovetails but simpler. They form a square-toothed pattern. Box joints are strong and easier to cut with a jig or router.
Tips For Strong Connections
Always use quality wood glue suited for furniture. Apply glue evenly on all joint surfaces. Clamp joints firmly until glue dries fully.
Pre-drill holes when using screws to prevent wood splitting. Use screws or nails only as reinforcement for glued joints.
Check joints for tight fit before gluing. Sand or trim edges for a snug connection. Loose joints weaken furniture over time.
Practice on scrap wood to improve accuracy. Good joinery takes patience and careful work. Strong joints make your bedroom furniture last for years.
Sanding And Finishing
Sanding and finishing are essential steps in building bedroom furniture. They smooth the wood surface and enhance its appearance. Proper sanding removes rough spots and prepares the wood for staining or painting. Finishing protects the furniture from wear and damage. These steps make your furniture durable and beautiful.
Preparing Surfaces
Start sanding with coarse grit sandpaper to remove uneven areas. Move gradually to finer grits for a smooth finish. Always sand in the direction of the wood grain. This prevents scratches and gives a clean surface. Clean dust off the wood with a brush or cloth before finishing.
Applying Stains And Paints
Choose a stain or paint color that matches your room decor. Apply the stain evenly with a brush or cloth. Let it soak in for a few minutes before wiping off excess. For paint, use thin coats to avoid drips. Allow each coat to dry fully before adding another.
Sealing For Durability
Seal the wood with a clear finish like polyurethane or varnish. This protects against moisture, scratches, and fading. Apply thin, even coats using a brush or spray. Lightly sand between coats for a smooth result. Let the final coat dry completely before use.
Troubleshooting Common Issues
Troubleshooting common issues is a vital part of building bedroom furniture. Small mistakes can cause big problems. Fixing these early saves time and ensures a better final result. Understanding how to solve typical problems helps improve your skills and confidence. Let’s explore some common issues and how to fix them.
Fixing Measurement Errors
Measurement errors happen often and can disrupt your project. Always double-check numbers before cutting. If a piece is too large, trim it carefully using a saw. For pieces that are too small, you might add wood filler or adjust other parts to fit. Use a tape measure and a square tool to ensure accuracy. Mark measurements clearly to avoid confusion.
Handling Wood Warping
Wood warping can occur due to moisture or improper storage. To fix warped wood, try clamping it flat and letting it dry. Use weights to press the wood down if clamps are unavailable. Sand warped edges to smooth out bends or curves. Prevent future warping by storing wood in a dry, stable environment. Seal the wood with varnish or paint to protect it from moisture.
Adjusting Fit And Alignment
Sometimes parts do not fit together as planned. Check for uneven edges or misaligned holes. Sand edges slightly to improve fit. Use a drill to adjust screw holes if needed. Tighten screws gradually to avoid shifting parts. Use clamps to hold pieces steady while assembling. Proper alignment ensures sturdy and safe furniture.
Incorporating Personal Style
Incorporating personal style into your bedroom furniture makes your space truly yours. It reflects your taste and adds comfort. Simple touches can turn basic pieces into unique treasures. Personal style creates a welcoming and inspiring environment. It helps your bedroom stand out and feel special.
Mixing And Matching Furniture
Combine different furniture styles for an interesting look. Blend modern with vintage pieces to add character. Use colors and shapes that complement each other. Mixing wood finishes can create a warm, inviting space. Balance bold pieces with simpler ones to avoid clutter.
Adding Decorative Elements
Decorative touches bring charm and personality to furniture. Add cushions or throws with patterns that reflect you. Use artwork or photos to personalize the room. Small plants or vases can brighten the space. Lighting choices, like lamps or fairy lights, add warmth and style.
Customizing Hardware
Hardware changes can refresh old furniture easily. Choose knobs and handles that match your theme. Brass, ceramic, or wood hardware adds unique flair. Swap standard pieces for vintage or handmade options. Hardware customization is a simple way to express your style.
Maintaining Your Furniture
Maintaining your bedroom furniture keeps it looking fresh and lasting longer. Proper care protects your investment and saves money. Regular upkeep prevents major damage and preserves the wood and finish. Simple habits make a big difference in furniture condition.
Regular Cleaning Tips
Dust furniture often with a soft cloth to avoid scratches. Use a damp cloth for sticky spots, then dry immediately. Avoid harsh chemicals that can damage wood or finish. Clean spills quickly to prevent stains or warping. Polishing wood occasionally restores shine and protects surfaces.
Repairing Wear And Tear
Fix loose screws or joints as soon as you notice them. Small scratches can be covered with wood markers or fillers. Sand rough edges gently to smooth them out. Replace broken parts like drawer handles or knobs promptly. Tighten any wobbly legs to keep furniture stable and safe.
Extending Furniture Life
Keep furniture away from direct sunlight to prevent fading. Control humidity levels to avoid wood swelling or cracking. Use coasters and mats to protect surfaces from heat and moisture. Rotate furniture placement to reduce uneven wear. Regularly inspect for damage and address issues early to extend lifespan.
Learning And Improving Skills
Building bedroom furniture requires ongoing learning and skill improvement. Each project teaches new techniques and sharpens your abilities. Developing skills helps you create stronger, more beautiful pieces. It also boosts confidence to try complex designs.
Consistent practice and learning keep your woodworking skills fresh. Exploring new methods broadens your craftsmanship. Using available resources makes learning easier and faster. Here are some ways to enhance your skills effectively.
Using Online Tutorials
Online tutorials provide step-by-step guidance for all skill levels. Many videos show detailed processes for building furniture. Watching experts work helps you understand tools and techniques better. You can pause and replay to learn at your own pace. Tutorials often include tips that save time and avoid mistakes.
Joining Woodworking Communities
Woodworking communities connect you with others who share your passion. Forums and social media groups offer advice and support. Members share project ideas, solutions, and tool recommendations. Asking questions here helps solve problems quickly. Feedback from others improves your work quality and creativity.
Practicing Advanced Techniques
Once basic skills are solid, try advanced woodworking techniques. Learn complex joinery like dovetails or mortise and tenon. Experiment with finishing methods to enhance wood beauty. Challenging yourself with new skills builds confidence. Practice regularly to make these techniques second nature.

Credit: ninawilliamsblog.com
Frequently Asked Questions
Is It Hard To Build Your Own Furniture?
Building your own furniture varies in difficulty based on project complexity and skill level. Start with simple designs and basic tools to gain confidence. Patience, planning, and practice make the process achievable and rewarding.
Is It Worth It To Diy Furniture?
DIY furniture can save money, offer customization, and provide satisfaction. It requires time, skill, and patience to achieve good results.
What Is The Best Layout For A Bedroom?
The best bedroom layout centers the bed with clear pathways and balanced furniture placement. Ensure natural light and easy access to storage. Keep the space uncluttered for comfort and flow. Choose a functional design that suits your room size and personal style.
What Is The Easiest Piece Of Furniture To Make?
The easiest furniture to make is a simple wooden stool or basic table. These require minimal tools and skills. Beginners can quickly complete them, gaining confidence for more complex projects.
Conclusion
Building your own bedroom furniture takes time and effort. Start with simple projects to build confidence. Plan carefully and gather basic tools before you begin. Expect mistakes and learn from each one. Use videos and guides to improve your skills.
With patience, you can create pieces you will enjoy. Making furniture yourself adds a personal touch to your room. Keep practicing, and your work will get better. Enjoy the process as much as the finished product.