Are you looking to turn your child’s bunk bed into a fun playground? Adding a slide to a bunk bed can transform bedtime into an exciting adventure.
Imagine your child waking up eager to slide down and start their day with a smile. It’s easier than you think, and you don’t need to be an expert to do it. In this guide, you’ll discover simple, step-by-step instructions to safely add a slide to your bunk bed.
Keep reading to unlock a world of fun and make your child’s room the place they’ll love the most.
Choosing The Right Bunk Bed
Choosing the right bunk bed is key to adding a slide safely and easily. Not all bunk beds fit slides well. Some designs work better than others. This section helps you pick a bunk bed that suits a slide attachment.
Assessing Bed Compatibility
Start by checking the bed’s frame and size. Solid wood frames usually hold slides better. Metal frames may need special connectors. Measure the height of the top bunk carefully. The slide needs enough space to attach securely. Look for bunk beds with flat sides or rails. These make it easier to fix a slide. Avoid beds with rounded or thin rails. They may not support the slide safely.
Safety Considerations
Safety is the top priority. Choose a bunk bed with guardrails on all sides. This prevents falls while climbing or sliding. Check the weight limit of both the bed and slide. Make sure the slide supports your child’s weight. The slide should have a smooth surface without sharp edges. Look for beds with a sturdy ladder next to the slide. Keep enough space around the bed for safe play. Avoid crowded rooms where the slide might hit furniture.

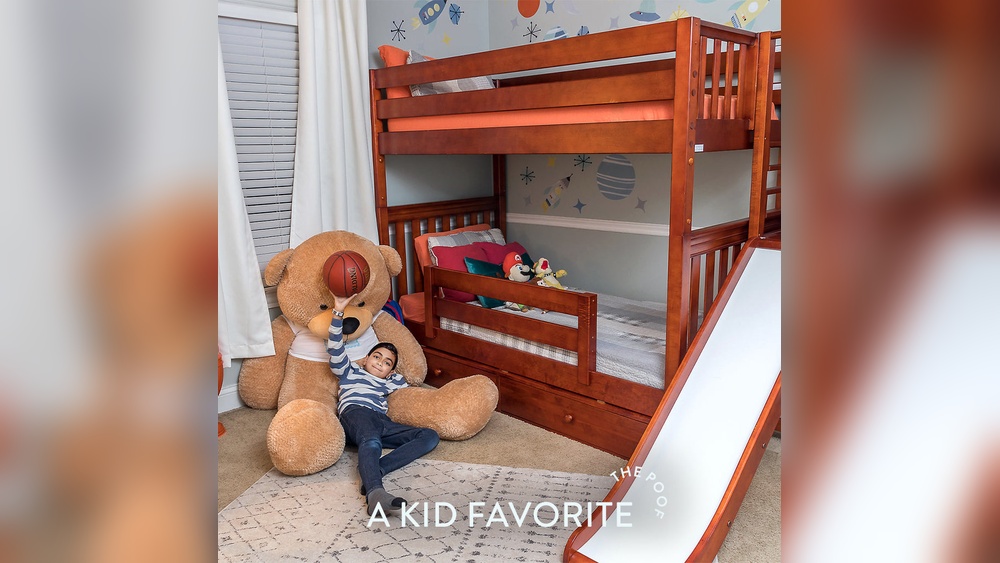
Credit: www.maxtrixkids.com
Selecting The Perfect Slide
Selecting the perfect slide for your bunk bed makes playtime safer and more fun. It adds excitement and a new way for kids to enjoy their space. Choosing the right slide involves understanding different types and materials. This helps you pick one that fits your bunk bed and lasts long.
Types Of Slides Available
There are several slide types for bunk beds. Straight slides are the most common and simple to install. Curved slides add a fun twist and take up more room. Spiral slides save space and give a unique look. Some slides come with extra features like safety rails or gentle slopes. Consider the space you have and the age of your child.
Materials And Durability
Slides come in plastic, wood, and metal. Plastic slides are lightweight and easy to clean. They are safe for younger children. Wooden slides look natural and match wooden bunk beds well. They are strong but heavier to install. Metal slides are very durable and smooth but can be cold to touch. Choose a material that fits your child’s needs and your bunk bed style.
Tools And Materials Needed
Adding a slide to a bunk bed needs the right tools and materials. These tools help you build a safe, fun slide for kids to enjoy. Gather everything before starting. It saves time and makes the work easier.
Essential Tools
- Measuring tape – for exact measurements
- Electric drill – to make holes and drive screws
- Screwdriver – to tighten screws by hand
- Handsaw or circular saw – to cut wood pieces
- Level – to ensure the slide is straight
- Clamps – to hold wood while working
- Sandpaper or power sander – to smooth edges
- Safety goggles – to protect your eyes
- Work gloves – to protect your hands
Additional Supplies
- Wood boards – for the slide surface and supports
- Screws and bolts – to join parts securely
- Wood glue – for extra strength
- Paint or wood finish – to protect and decorate
- Plastic slide panel (optional) – for a smoother slide
- Carpet or rubber mat – to soften the slide exit area
Preparing The Bunk Bed
Preparing the bunk bed is the first step to adding a slide. It helps ensure safety and a smooth installation. Proper preparation makes the process easier and faster.
Focus on clearing space and marking measurements carefully. These steps create a solid foundation for the slide.
Clearing The Area
Remove all bedding and toys from the bunk bed. Clear the floor space around the bed for easy movement. This prevents accidents and damage during installation. Make sure the area is clean and dry. Good lighting helps you see details clearly.
Measuring And Marking
Use a tape measure to find the right spot for the slide. Measure from the top bunk to the floor carefully. Mark the points where the slide will attach with a pencil. Double-check all measurements before drilling or cutting. Accurate marks keep the slide stable and safe.
Attaching The Slide
Attaching the slide to a bunk bed is the key step to making it fun and safe. This part needs care and patience. You want the slide to be steady and secure for every use. Follow clear steps to avoid mistakes and ensure safety.
Step-by-step Installation
First, gather all tools and parts. Check the slide and bed for damage. Place the slide next to the bunk bed. Align the top of the slide with the bed’s frame. Use the holes in the slide’s mounting bracket to mark where to drill. Drill holes carefully using a drill bit that matches the screws. Attach the slide bracket to the bed frame using screws. Tighten screws but do not overtighten. This keeps the slide stable and protects the bed frame.
Securing The Slide
Check the slide’s position to make sure it is straight. Add extra support brackets if needed. Use bolts and nuts to secure these supports tightly. Check all screws and bolts again for firmness. Test the slide by applying light pressure. Make sure it does not move or wobble. This step is vital for safety and fun. Keep the slide clean and check screws regularly for tightness.

Credit: www.ninjacart.com
Safety Checks And Testing
Adding a slide to a bunk bed can be fun and exciting. Safety must come first. Check everything carefully before use. Proper safety checks keep kids safe and avoid accidents.
Testing the slide helps find any issues early. Make sure the slide fits well and stays strong. Follow simple steps to inspect and test the slide properly.
Inspecting Stability
Check the bunk bed frame for tight screws and bolts. Make sure the slide is firmly attached to the bed. Look for any loose parts or cracks in the slide. The slide should not wobble or move when pushed. Stability ensures the slide will hold weight safely. If anything feels weak, fix it before use.
First Slide Trial
Try the slide yourself first. Sit and slide down slowly to test the speed. Check if the slide surface is smooth and safe. Listen for strange noises during the slide. Make sure the slide lands on a soft, clear area. Testing helps find problems before children use it. Repeat this step until the slide feels safe and steady.
Customizing The Playroom
Customizing the playroom around a bunk bed slide makes the space more fun and safe. It turns an ordinary room into a lively, playful area. Kids enjoy a personal space where they can play and relax. Simple touches can create a cozy and inviting atmosphere. Think about comfort and style together for a balanced look.
Adding Cushions And Mats
Place soft cushions at the bottom of the slide. They protect kids from hard landings. Choose mats that match the room’s color scheme. Foam mats add extra safety and comfort. Arrange cushions around the play area for resting spots. They create a warm and soft space to sit or lie down.
Decorative Ideas
Use bright colors to brighten the playroom. Paint the slide with cheerful tones. Add fun stickers or decals on the bunk bed frame. Hang string lights or fairy lights nearby for a magical feel. Use themed bedding to match the room’s style. Small rugs and wall art bring personality to the space.

Credit: www.maxtrixkids.com
Frequently Asked Questions
How Do I Attach A Slide To A Bunk Bed Safely?
To attach a slide safely, first measure the bed frame and slide dimensions. Use sturdy brackets and screws. Follow the manufacturer’s instructions. Secure the slide to a strong support beam. Always test stability before use to ensure safety.
What Tools Are Needed To Add A Slide To A Bunk Bed?
Common tools include a drill, screwdriver, measuring tape, level, and wrench. You may also need brackets or mounting hardware. Having these tools ready makes installation easier and safer. Always use proper safety gear during installation.
Can Any Bunk Bed Support A Slide Addition?
Not all bunk beds can support a slide. Check the bed’s weight capacity and frame strength. Metal or solid wood frames usually work best. Avoid adding a slide to lightweight or unstable beds to prevent accidents.
How Much Space Is Required For A Bunk Bed Slide?
Allow at least 6 feet of length and 3 feet of width for the slide. Ensure enough clearance around the slide for safe use. Measure the room carefully before installation to avoid space issues.
Conclusion
Adding a slide to a bunk bed can make bedtime more fun. Follow each step carefully for safety and stability. Choose the right materials to fit your bunk bed size. Take your time during installation to avoid mistakes. A slide adds excitement and saves space in small rooms.
Kids will enjoy the new way to get down. Keep checking the slide and bed for any loose parts. Enjoy your creative and practical bunk bed upgrade!