Looking to add a unique touch to your home while saving money? Building a bookshelf out of pallet wood is a smart and creative way to do just that.
You don’t need to be a woodworking expert or spend a fortune on materials. With just a few tools and some simple steps, you can create a sturdy, stylish bookshelf that fits perfectly in your space. Ready to turn old pallets into a beautiful piece of furniture?
Keep reading, and you’ll discover how easy and satisfying this project can be.
Choosing The Right Pallets
Choosing the right pallets is the first step to building a strong bookshelf. Pallets come in many types, and not all are good for woodworking. Picking safe and good quality pallets helps your bookshelf last longer and look better.
Types Of Pallet Wood
Pallets are made from hardwood or softwood. Hardwood pallets are strong and last longer. Softwood pallets are lighter but can be less durable. Common hardwoods include oak and maple. Pine is a popular softwood used for pallets. Some pallets have mixed wood types. Choose pallets with solid, thick boards for better support.
Checking For Safety And Quality
Inspect pallets for any signs of damage or rot. Avoid pallets with cracks, mold, or insect holes. Look for stamps on the wood that show how it was treated. Heat-treated pallets (marked HT) are safer than chemically treated ones. Avoid pallets with chemical or paint stains. These can be harmful indoors. Clean pallets well before starting your project. Smooth any rough edges or splinters for safety.
Gathering Tools And Materials
Building a bookshelf from pallet wood starts with gathering the right tools and materials. Having everything ready makes the process smoother. It saves time and helps avoid interruptions. Knowing what you need is the first step to success.
Essential Tools
You need a saw to cut the wood. A hand saw or circular saw works well. A drill is important for making holes and driving screws. Sandpaper or a sander smooths rough edges. A measuring tape helps get accurate cuts. A screwdriver or a power driver is useful for assembling. Clamps hold the wood pieces in place while working.
Additional Supplies
Gather screws and nails for assembly. Wood glue adds extra strength to joints. Wood filler covers small holes or cracks. Paint or wood stain improves the shelf’s look. Brushes or rags help apply finishes. Safety gear like gloves and goggles protect you during work. A dust mask keeps you safe from sawdust.
Preparing The Pallet Wood
Preparing the pallet wood is the first step in building a sturdy bookshelf. Clean wood lasts longer and looks better. Taking time to prepare the wood saves work later. It also helps avoid problems while assembling the bookshelf.
Cleaning And Sanding
Start by cleaning the pallet wood thoroughly. Use a stiff brush to remove dirt and dust. Washing the wood with soapy water helps remove stains and grime. Let the wood dry completely before moving to the next step.
Sanding smooths out rough surfaces and splinters. Use medium-grit sandpaper first to even out the wood. Then, switch to fine-grit sandpaper for a soft finish. Sanding also helps paint or stain stick better to the wood.
Removing Nails And Imperfections
Check the pallet wood for any nails or staples. Use a hammer or pliers to pull out nails carefully. Removing nails prevents damage to tools and keeps the shelf safe.
Look for cracks, holes, or broken pieces in the wood. Small cracks can be filled with wood filler. Replace wood pieces that are too damaged to use. Smooth out any rough spots after filling holes.
Designing Your Bookshelf
Designing your bookshelf is the first step in creating a sturdy and functional piece. It helps you understand what you need before cutting any wood. A clear design saves time and materials.
Think about where the bookshelf will go and what it will hold. This affects the size and shape. Take measurements of the space to avoid mistakes later.
Planning Dimensions
Measure the space where you want to place the bookshelf. Note the height, width, and depth available. Choose dimensions that fit your room and storage needs.
Decide on shelf height based on the books or items you plan to store. Standard bookshelves have shelves spaced 10 to 12 inches apart. Adjust spacing for larger items.
Keep the shelf depth between 8 and 12 inches for easy access. Make sure the overall width fits the wall or corner space well. Write down all measurements clearly.
Sketching The Layout
Draw a simple sketch of your bookshelf on paper. Use the measurements from your planning step. Show the number of shelves and the distance between them.
Mark where the pallet wood pieces will go. Think about the frame and support beams. Plan for strong joints to hold heavy books.
Label each part in your sketch to avoid confusion during building. You can use a ruler for straight lines. This sketch will guide your cutting and assembly.
Cutting And Assembling
Cutting and assembling pallet wood is a key step in building a sturdy bookshelf. This part shapes your wood and brings all pieces together. Proper measuring and cutting ensure the shelf fits perfectly. Careful joining makes the structure strong and stable. Follow simple steps for best results.
Measuring And Cutting Wood
Start by measuring each pallet plank carefully. Use a tape measure for exact length and width. Mark the wood with a pencil to guide your cuts. Use a saw to cut along the marks. Cut slowly to keep edges smooth and straight. Check each piece after cutting to avoid mistakes.
Joining The Pieces
Place the cut pieces in the shape of your bookshelf. Use wood glue on edges to hold parts together. Clamp them tightly until the glue dries. Add screws or nails to increase strength. Drill pilot holes before screwing to stop wood from splitting. Check the alignment often to keep the shelf even.
Credit: www.reddit.com
Finishing Touches
Finishing touches give your pallet wood bookshelf a polished look. They protect the wood and make the shelf last longer. These final steps also add color and style to match your room.
Applying Stain Or Paint
Choose a stain or paint that fits your style. Stain shows the wood grain and gives a natural look. Paint covers the wood with solid color for a fresh, bold look. Use a brush or cloth to apply evenly. Let it dry completely before adding more coats. Light sanding between coats helps smooth the surface.
Sealing And Protecting The Wood
Seal the wood to protect against moisture and scratches. Use a clear polyurethane or varnish for strong protection. Apply with a clean brush in thin, even layers. Let each layer dry before adding the next. This step keeps your bookshelf looking good for years. It also makes cleaning easier and prevents damage.
Tips For Stability And Safety
Building a bookshelf from pallet wood is a fun project. Safety and stability are key. A sturdy bookshelf lasts long and holds your books safely. Follow these tips to keep your shelf strong and safe.
Securing The Bookshelf
Fasten the bookshelf to the wall using brackets or anchors. This stops it from tipping over. Use screws that fit the pallet wood thickness. Check that all joints are tight and secure. Use wood glue for extra hold. Avoid loose nails or screws that stick out.
Weight Distribution Advice
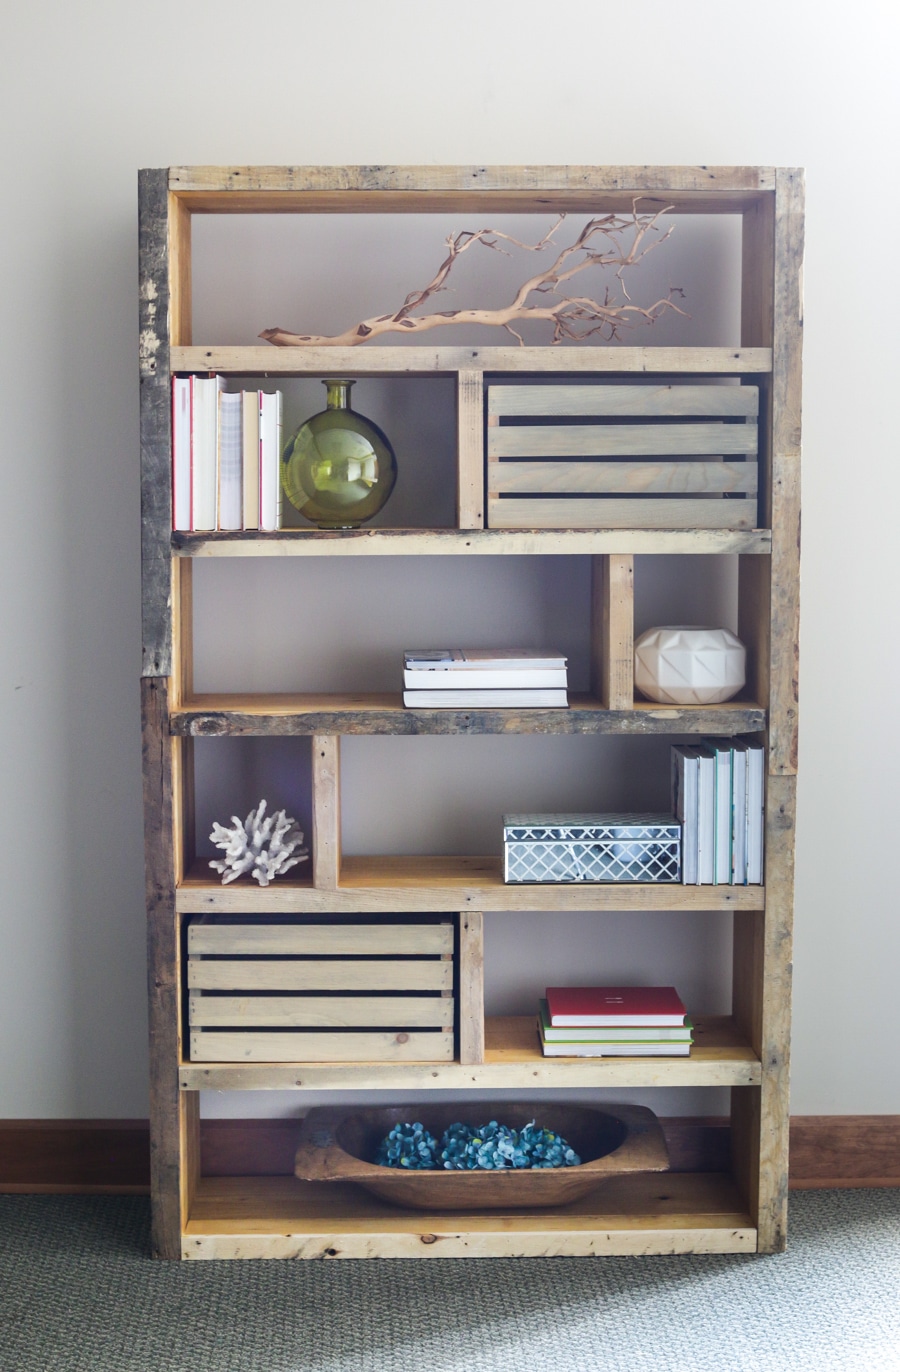
Place heavier books on the bottom shelves. This lowers the center of gravity. It helps the bookshelf stay balanced. Arrange lighter items on top shelves. Don’t overload any single shelf. Spread the weight evenly across all shelves. This prevents bowing or breaking of pallet wood boards.

Credit: notinggrace.com
Creative Customizations
Creative customizations make your pallet wood bookshelf unique. They let you fit the shelf to your needs and style. Custom touches add charm and function.
Adding Shelves Or Compartments
Extra shelves create more space for books and items. You can add small compartments for decorations or tools. Use leftover pallet wood to build these parts. Measure carefully to keep the shelf sturdy. Simple designs work best for easy building. Custom compartments help organize different things. They make your bookshelf more useful and neat.
Decorative Elements
Decorations bring personality to the bookshelf. Paint the wood in your favorite colors or patterns. Stencils or hand-painted designs add a personal touch. Attach small hooks or knobs for hanging items. Sand the wood smooth for a clean look. Leave some wood raw for a rustic feel. These small details make your shelf stand out. They turn a simple shelf into a work of art.
Credit: jenwoodhouse.com
Frequently Asked Questions
What Tools Are Needed To Build A Pallet Wood Bookshelf?
You need a saw, hammer, nails, sandpaper, drill, screws, measuring tape, and wood glue. Safety gear like gloves and goggles is essential for protection during the project.
How Do I Prepare Pallet Wood For Building?
Start by dismantling the pallet carefully. Then, sand the wood to remove rough edges and splinters. Clean the wood thoroughly before assembly to ensure a smooth finish.
How Long Does It Take To Build A Pallet Wood Bookshelf?
Building a basic pallet wood bookshelf usually takes 4 to 6 hours. This depends on your skill level and the complexity of the design you choose.
Can I Customize The Size Of My Pallet Bookshelf?
Yes, you can adjust the dimensions to fit your space. Measure your area first, then cut the pallet wood accordingly for a perfect fit.
Conclusion
Building a bookshelf from pallet wood is simple and fun. You save money and help the environment by reusing wood. With basic tools and steps, anyone can create a sturdy shelf. Personalize it with paint or stain for a unique look.
Enjoy your new bookshelf for books, plants, or decorations. Start your project today and see what you can make!
