Are you looking to save space and add a cool, functional feature to your room? Building a bunk bed in the wall might be exactly what you need.
Imagine having more floor space for play, work, or storage while giving your kids a cozy spot to sleep. This guide will walk you through simple steps to create a sturdy, stylish built-in bunk bed. By the end, you’ll have the confidence and know-how to transform your space and impress everyone who sees it.
Ready to get started? Let’s dive in!
Planning Your Wall Bunk Bed
Planning your wall bunk bed is the first step to a safe and sturdy build. Careful thought helps create a comfortable and space-saving design. This stage sets the foundation for a successful project. Focus on the space, size, and materials before starting construction.
Choosing The Right Location
Pick a spot with enough room for the bunk bed. Avoid areas with doors or windows that open inward. Check the wall for strong studs to hold the bed securely. The location should allow easy access to both beds. Consider lighting and ventilation for comfort.
Measuring Space And Dimensions
Measure the wall width and height carefully. Note the room’s ceiling height for the top bunk clearance. Decide the mattress size before measuring the frame. Leave space for ladders or stairs. Double-check all measurements to avoid mistakes.
Selecting Materials And Tools
Choose wood or metal that supports weight well. Use plywood or solid wood for durability. Pick screws and brackets designed for heavy loads. Gather tools like a drill, saw, level, and measuring tape. Quality materials and tools ensure a safe bunk bed.
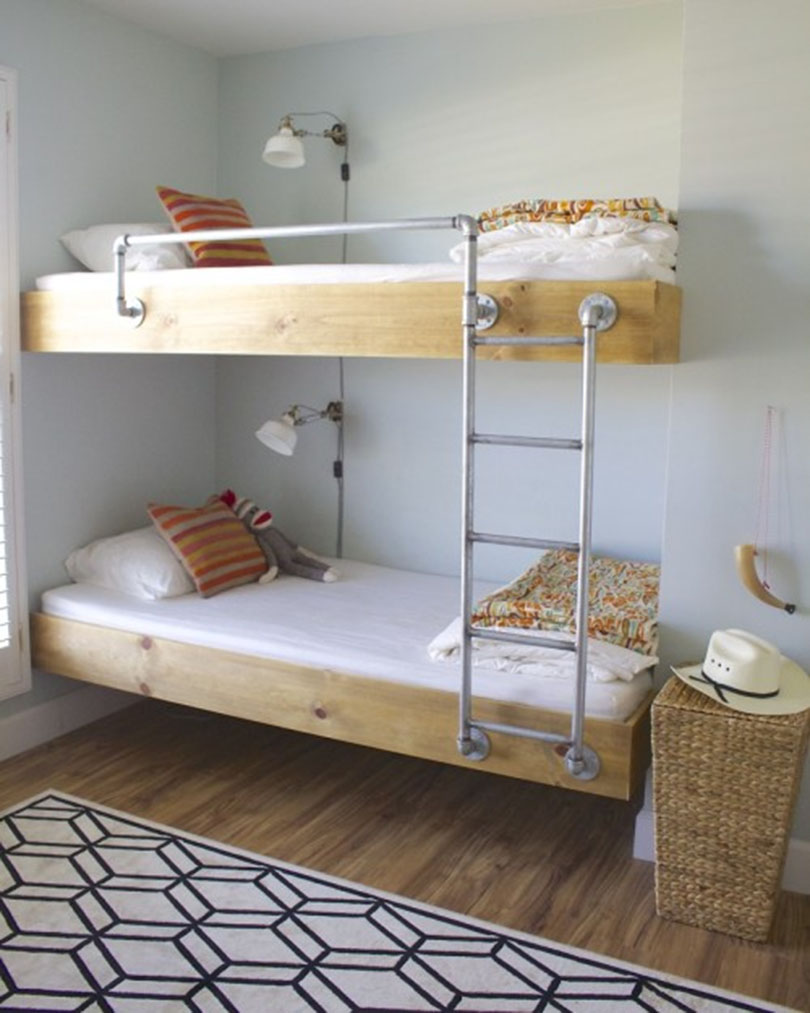
Credit: www.simplifiedbuilding.com
Designing The Bunk Bed Frame
Designing the bunk bed frame is the first big step in building a wall bunk bed. It sets the foundation for safety, comfort, and style. A well-planned design helps use space smartly and keeps the bed strong. Focus on how the frame fits the wall and meets your needs.
Think about the size of the room and the height of the ceiling. The frame should be sturdy but not take too much space. Plan for easy access and cozy sleeping areas. Keep the design simple but effective.
Sketching The Frame Structure
Start by drawing the frame on paper or a digital tool. Show the bed’s length, width, and height clearly. Mark where the bed will attach to the wall. Include the ladder or stairs in your sketch. This helps visualize the final look and find any problems early.
Use straight lines and right angles for easy cutting and assembly. Note the size of wooden boards and screws. Double-check measurements to avoid mistakes. A clear sketch guides the building process smoothly.
Incorporating Safety Features
Safety is key in a bunk bed design. Add guardrails on the top bunk to prevent falls. Make sure the ladder is strong and has wide steps. Avoid sharp edges by sanding all corners. Use sturdy materials that hold weight well.
Leave enough space between the top bunk and ceiling. This prevents bumping heads while sitting up. Test the frame’s stability before use. Safety keeps everyone comfortable and confident.
Maximizing Storage Options
Use space under the bottom bunk for storage drawers or shelves. Plan built-in cabinets or cubbies along the bed frame. These spots hold toys, clothes, or books. Keep storage easy to reach and organize.
Consider fold-out desks or pull-out beds if space allows. Storage options save room and keep the area tidy. Design smart storage to make the bunk bed practical and neat.
Preparing The Wall And Workspace
Preparing the wall and workspace is the first step in building a bunk bed in the wall. This stage ensures safety and accuracy. It helps the project go smoothly and reduces mistakes. A clean, organized area makes the work faster and easier.
Clearing And Protecting The Area
Start by removing all furniture and items near the wall. Clear space allows you to move freely and work safely. Cover the floor with a drop cloth or plastic sheet. This protects the floor from dust, paint, or scratches. Keep tools and materials organized nearby to avoid clutter.
Marking Wall Studs And Layout
Use a stud finder to locate the wall studs behind the drywall. Mark each stud with a pencil. Studs provide strong support for the bunk bed frame. Next, measure and mark the layout of the bed on the wall. Accurate marks guide your cuts and assembly. Double-check measurements to prevent errors.
Gathering Necessary Equipment
Collect all tools and materials before starting the build. Common tools include a drill, level, measuring tape, saw, and screwdriver. Also, prepare safety gear like gloves and goggles. Having everything ready avoids interruptions. It keeps your focus on building the bunk bed correctly.
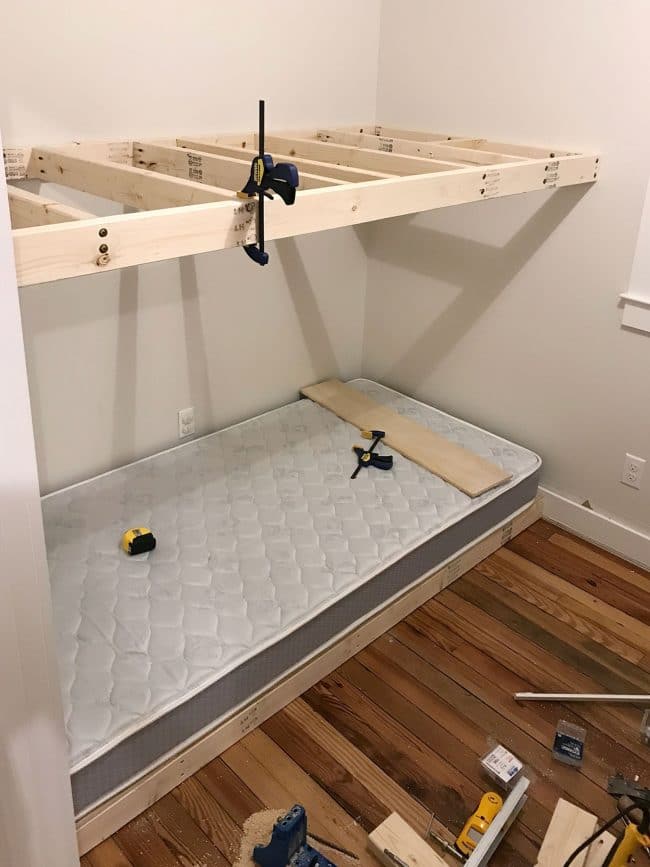
Credit: www.jennasuedesign.com
Building The Frame Step-by-step
Building the frame is the core part of creating a bunk bed in the wall. It sets the base for safety and comfort. Follow these clear steps to build a strong frame. Work carefully and measure twice before cutting. A solid frame lasts long and holds weight well.
Cutting And Assembling Lumber
Start by choosing good quality lumber. Pine or fir wood works well for bunk beds. Cut the wood to the correct lengths using a saw. Measure the bed size clearly before cutting. Assemble the cut pieces into the frame shape on a flat surface. Use wood glue and screws to join the parts tightly. Check the frame corners to keep them square and strong.
Securing The Frame To The Wall
Find the wall studs with a stud finder. Mark the stud locations on the wall. Hold the frame against the wall in the right position. Drill pilot holes through the frame into the studs. Use long wood screws to attach the frame firmly. Make sure the frame is level before tightening screws. This step is important for safety and stability.
Adding Support Beams And Slats
Support beams carry the mattress weight evenly. Cut beams to fit inside the frame width. Attach the beams under the mattress area using screws. Space the beams evenly for good support. Next, add slats across the beams for mattress support. Use sturdy wood slats and fix them with screws. Check all connections to avoid movement or noise.
Installing The Mattress And Accessories
Installing the mattress and accessories in your wall bunk bed completes the build. This step ensures comfort and safety for users. Proper choices here make the bunk bed practical and cozy.
Choosing The Right Mattress Size
Measure the bed frame carefully before buying a mattress. The mattress should fit snugly without gaps. Use a mattress with a thickness of 6 to 8 inches. Too thick can reduce safety; too thin may be uncomfortable. Opt for a firm mattress to support the body well.
Adding Guardrails And Ladder
Guardrails keep sleepers safe from falling out. Install sturdy guardrails on the open sides of the bunk bed. Secure the rails tightly to the frame. A ladder is essential for easy access. Choose a ladder with wide, flat steps for comfort. Attach the ladder firmly to the bed frame to prevent movement.
Incorporating Lighting And Decor
Lighting adds function and style to the bunk bed area. Use soft LED strip lights or small wall lamps. Place lights where they won’t bother the sleeper. Decorate with pillows, blankets, and small shelves. Personal touches make the space inviting and unique.
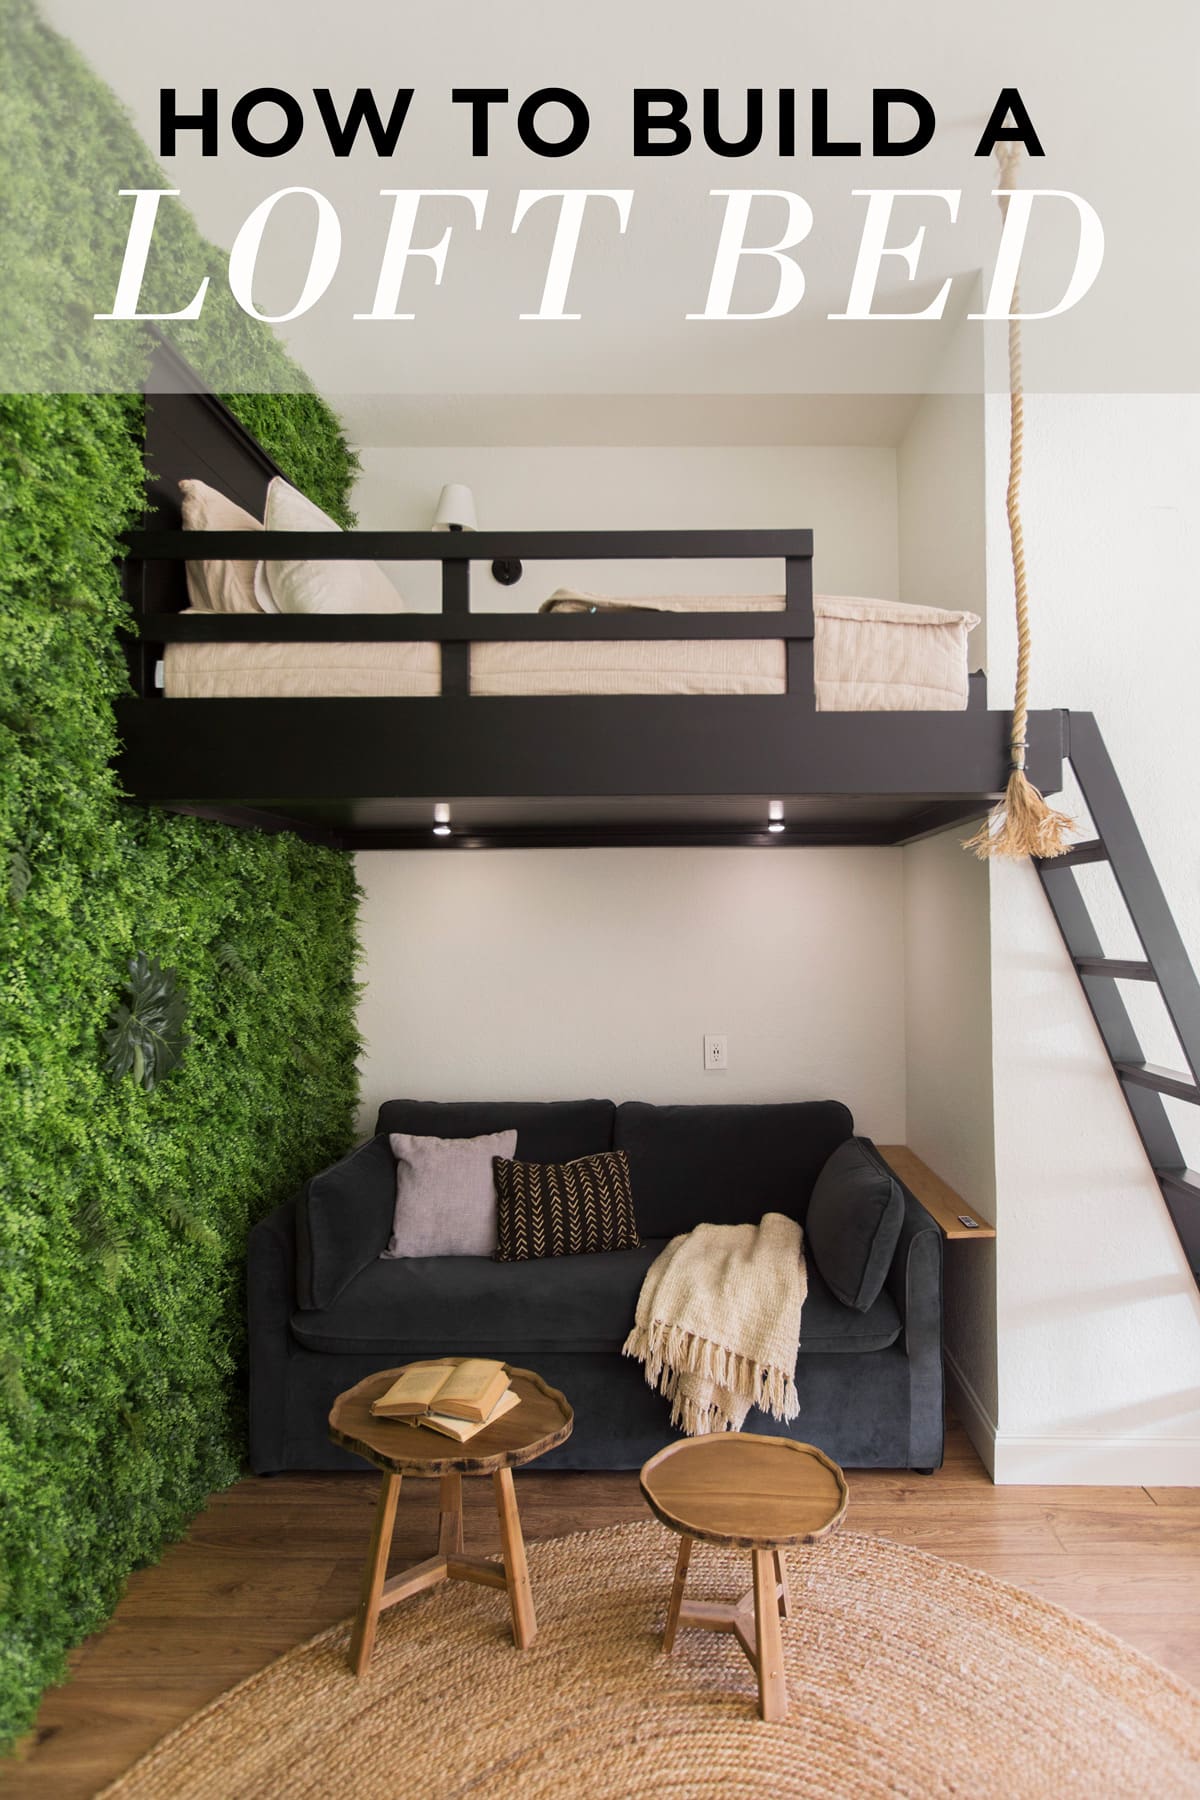
Credit: www.younghouselove.com
Finishing Touches And Safety Checks
Finishing touches and safety checks are important steps in building a bunk bed in the wall. These steps make the bed look good and keep it safe for use. Taking time to smooth the surfaces and check the bed’s strength helps prevent accidents. Proper care also keeps the bed lasting longer.
Sanding And Painting Or Staining
Start by sanding all wood surfaces with fine-grit sandpaper. This removes rough spots and splinters. Smooth surfaces help paint or stain stick better. Choose paint or stain that matches your room style. Use non-toxic, child-safe products for safety. Apply at least two coats for even coverage. Let each coat dry fully before adding the next. This improves the bed’s look and protects the wood from damage.
Inspecting Stability And Security
Check all screws, bolts, and brackets. Tighten any loose parts to keep the bed stable. Test the bed by gently shaking it. It should not wobble or creak. Make sure guardrails are firmly in place on the top bunk. Confirm the ladder is secure and easy to climb. Safety is key to prevent falls and injuries. Regular checks help keep the bed safe over time.
Maintaining Your Bunk Bed Over Time
Clean the bed regularly to remove dust and dirt. Wipe surfaces with a damp cloth and mild cleaner. Avoid harsh chemicals that can damage the finish. Check screws and joints every few months. Tighten anything that has become loose. Inspect the guardrails and ladder often for wear. Replace parts if they show signs of damage. Proper care keeps the bed safe and looking good for years.
Frequently Asked Questions
What Tools Do I Need To Build A Bunk Bed In The Wall?
You need a drill, saw, measuring tape, level, screws, and wood. Safety gear like gloves and goggles is essential. Accurate measuring tools help ensure a precise fit and sturdy structure.
How Much Space Is Required For A Wall Bunk Bed?
A minimum wall depth of 12 inches is recommended. The height should accommodate two mattresses stacked safely. Ensure enough room for access and safety rails for children.
What Materials Are Best For Building Wall Bunk Beds?
Use sturdy plywood or solid wood for durability. Choose moisture-resistant materials to prevent warping. Quality screws and brackets enhance the bed’s stability and safety.
How Do I Ensure The Bunk Bed Is Safe?
Securely anchor the bed frame to wall studs. Install guardrails on the top bunk. Use a strong ladder and ensure mattresses fit snugly to prevent slipping.
Conclusion
Building a bunk bed in the wall saves space and adds style. It takes careful measuring and good tools to do it right. Follow safety steps to keep the bed strong and steady. The project may take time, but the result feels great.
A built-in bunk bed makes any room feel bigger and cozier. Try it yourself and enjoy a neat, smart sleeping space. Simple planning leads to a solid, lasting bunk bed. Your kids will love their new cozy spot.