Imagine turning your child’s bedroom into a magical fortress where dreams come alive every night. A castle bunk bed isn’t just a place to sleep—it’s a kingdom waiting to be explored.
If you’ve ever thought about building one yourself, you’re in the right place. This guide will walk you through simple steps to create a sturdy, fun, and enchanting castle bunk bed that your kids will love. Ready to make your vision real and add a unique touch to your home?
Let’s get started!
Planning Your Castle Bunk Bed
Planning your castle bunk bed is the first step to a fun and safe project. Careful planning saves time and money. It helps you create a bed that fits your space and style. Think about your child’s needs and room size before starting. This way, you build a bunk bed that feels like a real castle.
Choosing The Right Design
Pick a design that matches the room’s theme and size. Simple castle shapes work well for small rooms. Larger designs can have towers, windows, or flags. Consider safety features like guardrails and sturdy ladders. A clear design plan makes building easier and faster.
Measuring The Space
Measure the room carefully before buying materials. Check ceiling height to avoid cramped space. Measure the floor area where the bed will go. Leave room for walking and other furniture. Accurate measurements prevent mistakes during construction.
Selecting Materials
Choose strong, durable wood like pine or oak for the frame. Use smooth wood to avoid splinters. Pick safe paint or stain that is non-toxic and kid-friendly. Avoid materials that can break or bend easily. Good materials make the bunk bed last longer.

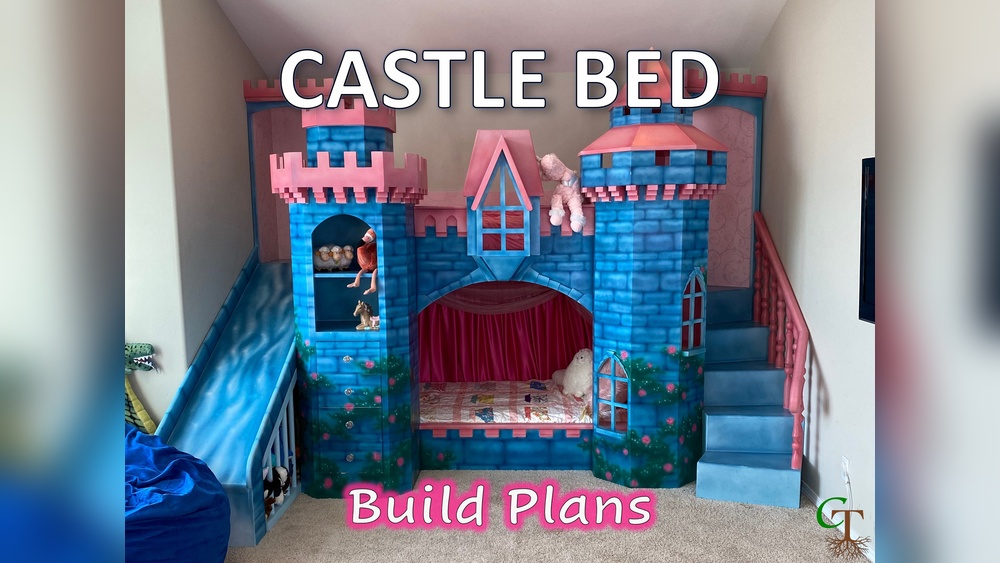
Credit: www.youtube.com
Gathering Tools And Supplies
Building a castle bunk bed is a fun project that needs careful planning. Gathering the right tools and supplies is the first step. It makes the process smoother and safer. Knowing what you need saves time and avoids mistakes.
Prepare your workspace well. Keep everything close to avoid interruptions. Organize tools and materials before starting to build. This helps you stay focused and efficient during the project.
Essential Tools List
Start with basic tools for woodwork. A measuring tape is crucial for accuracy. Use a saw to cut wood pieces to size. A drill helps make holes and attach screws. Sandpaper smooths edges to prevent splinters. A screwdriver tightens screws securely. Clamps hold pieces together while gluing. A level ensures your bed is straight and even.
Have extra nails and screws ready. Use a pencil to mark measurements. A hammer can be useful for nails. A square tool keeps corners perfect and tight.
Safety Equipment
Safety is very important. Protect your eyes with safety goggles. Wear gloves to avoid splinters and cuts. Use ear protection when cutting or drilling loudly. Wear a dust mask to keep wood dust out. Work in a well-lit area to see clearly. Keep a first aid kit nearby for emergencies.
Take breaks to avoid tiredness. Stay alert at all times. Safety helps finish your castle bunk bed without injury.
Building The Frame
Building the frame is the first big step in making your castle bunk bed strong and safe. The frame holds everything together. It needs to be solid and steady. Focus on each part carefully. Taking time here will help the whole bed last longer and be safe for kids.
Constructing The Base
Start with the base. Use thick wood planks for strength. Cut them to the size of the bed. Join the planks with screws or nails. Make sure the base is flat and even. This part will hold the mattress and support weight.
Adding Support Beams
Support beams keep the bed stable. Place them under the base and along the sides. Use strong wood for these beams. Attach them tightly to the base and the legs. Check that the beams do not wobble or move.
Creating The Bunk Structure
Next, build the bunk frame on top of the base. Use tall, sturdy posts for the corners. Connect the posts with horizontal beams. These beams hold the upper bed. Double-check all joints and screws for safety. A well-built frame means a safe, fun castle bunk bed.
Designing Castle Features
Designing castle features makes the bunk bed fun and unique. It brings imagination to life. Kids will feel like royalty in their special space. Simple shapes and details create a magical look. Each part adds to the castle feel. Focus on classic elements like turrets, battlements, and windows. These details turn a bed into a castle.
Crafting Turrets And Towers
Turrets and towers give the castle its height and charm. Use wooden posts or boxes for the base. Paint them in soft colors like gray or cream. Add cone-shaped tops with cardboard or foam. Secure the pieces well for safety. Small flags on the turret tops add a nice touch. These shapes make the bed look tall and grand.
Adding Battlements And Walls
Battlements give the castle a strong, classic look. Cut notches in wooden planks to create the battlement shape. Attach these along the edges of the bed frame. Paint them to match the turrets and towers. Use flat boards for the castle walls around the bed. Decorate the walls with bricks or stone patterns. This makes the bed look sturdy and real.
Incorporating Windows And Doors
Windows and doors add detail and make the bed fun. Cut out simple shapes from wood or cardboard. Paint window frames and door panels in bright colors. Use curtains or fabric to cover windows for privacy. Add small handles or knobs to doors for realism. These features invite play and make the castle cozy.
Painting And Decorating
Painting and decorating your castle bunk bed brings the project to life. It turns simple wood into a fun, magical space. This step lets you add personality and charm. Choose colors and decorations that match the room and your child’s taste. A well-painted bed can inspire play and sweet dreams.
Choosing Colors And Themes
Pick colors that fit the room’s style and mood. Soft pastels create calm, while bright colors add energy. Think about favorite colors or storybook themes. A castle can look like a fairy tale or a knight’s fortress. Keep the palette simple for a clean look. Use two or three main colors for balance.
Applying Paint And Finishes
Start with a primer to protect the wood. It helps the paint stick and last longer. Use water-based paint for easy clean-up and less smell. Apply thin, even coats with a brush or roller. Let each coat dry fully before the next. Finish with a clear sealant for extra durability and shine.
Adding Decorative Elements
Add fun details to make the castle unique. Use stencils for shapes like stars or crowns. Attach small wooden signs or knobs as handles. Fabric curtains or flags add softness and movement. Use safe, child-friendly materials for all decorations. These touches create a playful, inviting bed space.

Credit: makezine.com
Ensuring Safety And Stability
Building a castle bunk bed is exciting but safety must come first. A strong and stable bed protects your child from falls and injuries. This section explains how to keep the bunk bed safe. Follow these simple steps for secure rails, ladders, and lasting stability.
Securing Rails And Ladders
Attach rails tightly to the bed frame. Loose rails can cause accidents. Use strong screws and bolts for firm hold. Check the ladder for secure steps and steady grip. Fix any shaky parts immediately. A safe ladder prevents slips and falls.
Checking Weight Limits
Know the maximum weight the bed can hold. Exceeding limits risks breaking the frame. Consider both children and any heavy items on the bed. Use strong materials to support the weight. Regularly remind children to avoid jumping on the bed.
Regular Maintenance Tips
Inspect the bed every month for loose bolts or cracks. Tighten screws as needed to keep the bed firm. Clean the bed to avoid dust build-up that can hide damage. Replace any worn or broken parts quickly. Ongoing care ensures the bed stays safe and stable.
Personalizing The Castle Bunk Bed
Personalizing the castle bunk bed makes it unique and special. It turns a simple bed into a fun, magical space. Small changes can make a big difference. Kids love seeing their ideas come to life. Personal touches add comfort and style. This section explores easy ways to customize the bed.
Adding Lighting Features
Lighting creates a cozy and inviting atmosphere. Soft LED strips along the edges work well. Fairy lights add a touch of magic. Choose warm colors to make the space relaxing. Battery-operated lights are safe and easy to install. Lights can also help at bedtime or reading time.
Incorporating Storage Solutions
Storage keeps the room tidy and organized. Built-in drawers under the bed save space. Shelves attached to the sides hold books and toys. Use baskets or bins for quick cleanups. Storage helps kids find their things easily. Make sure storage is easy to reach for kids.
Customizing With Fabrics And Accessories
Fabrics bring color and softness to the bed. Curtains create a private castle feel. Use themed bedding to match the castle design. Pillows in fun shapes add comfort and charm. Wall decals or flags enhance the castle look. Simple accessories personalize the space without much effort.
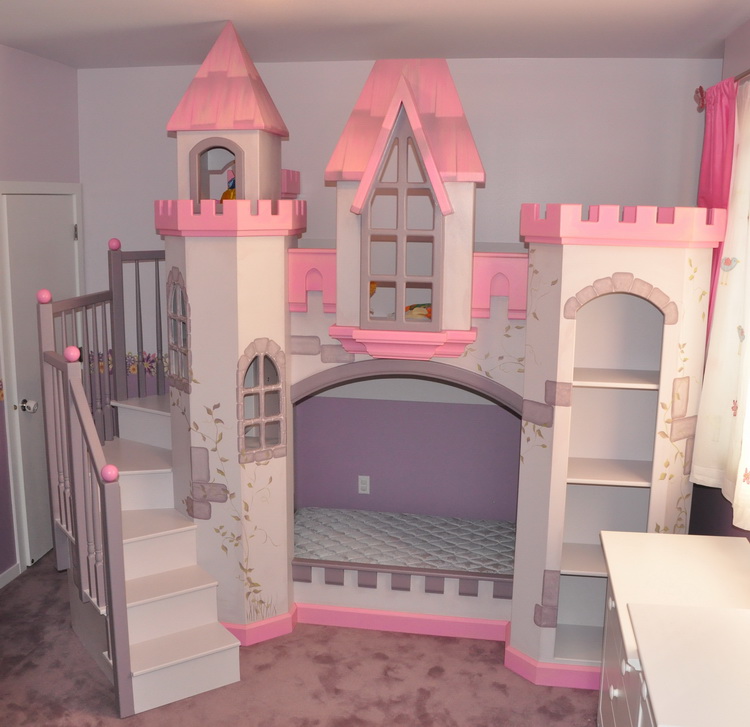
Credit: playhousedesigns.com
Budget-friendly Tips
Building a castle bunk bed can be fun and affordable. Saving money does not mean cutting corners. Smart choices help you create a safe and beautiful bed without spending too much. Focus on good planning and clever ideas.
Sourcing Affordable Materials
Check local hardware stores for sales and discounts. Buy wood scraps or offcuts for smaller parts. Use plywood sheets instead of expensive solid wood. Compare prices online to find the best deals. Avoid specialty materials that raise costs.
Repurposing Household Items
Look around your home for unused furniture parts. Old doors can become castle walls or railings. Use wooden crates for storage or decorative features. Paint old bed frames to match your castle theme. Repurposing saves money and adds charm.
Diy Vs. Professional Help
Doing it yourself cuts labor costs. Simple tools and basic skills are enough for many parts. Watch tutorial videos to learn key steps. Hire professionals only for complex tasks like electrical work. Balance your budget with safety and quality needs.
Frequently Asked Questions
How Long Does It Take To Build A Castle Bunk Bed?
Building a castle bunk bed typically takes 1 to 3 days. Time depends on skill level and tools available. Planning and preparation speed up the process. Following step-by-step instructions ensures efficiency and safety.
What Materials Are Needed For A Castle Bunk Bed?
Common materials include plywood, wood screws, sandpaper, paint, and wood glue. Additional items like safety rails and ladders improve functionality. Choose durable, non-toxic materials for safety. Proper tools include saws, drills, and measuring tape.
Is Building A Castle Bunk Bed Safe For Kids?
Yes, if you follow safety guidelines during construction. Use sturdy materials and secure all parts tightly. Add guardrails and ensure the ladder is stable. Regularly inspect the bed to maintain safety standards. Adult supervision during use is recommended.
Can I Customize The Design Of My Castle Bunk Bed?
Absolutely! Customize paint colors, decorations, and theme elements. Add windows, turrets, or personalized engravings for a unique look. Customization allows matching the bed to your child’s room style. It enhances creativity and personal connection to the bed.
Conclusion
Building a castle bunk bed brings fun and function together. It creates a cozy space for children to sleep and play. Follow clear steps and use safe materials for best results. Take your time to measure and assemble each part carefully.
This project adds charm and saves space in any bedroom. Enjoy the process and watch your child’s imagination grow. A homemade castle bed makes bedtime more exciting and special. Try this project and see the joy it brings to your home.
