Are you ready to add a unique touch to your home with a beautiful curved bookshelf? Imagine a piece that not only holds your favorite books but also becomes a stunning focal point in any room.
Building a curved bookshelf may seem challenging, but with the right steps, you can create something truly special. In this guide, you’ll discover simple techniques and clear instructions that make the process easy and enjoyable. Keep reading to unlock the secrets to crafting your own stylish curved bookshelf that fits perfectly in your space.
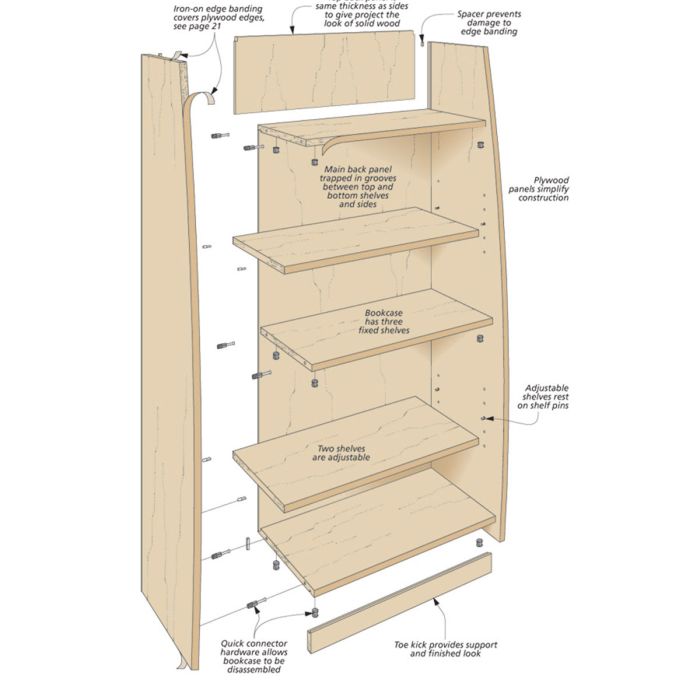
Credit: www.woodpeck.com
Materials And Tools Needed
Building a curved bookshelf requires specific materials and tools for the best results. Choosing the right items makes the project easier and more successful. This section explains the key materials and tools needed.
Choosing The Right Wood
Select wood that bends easily without cracking. Plywood is a popular choice because it is strong and flexible. Thin layers of plywood, called veneer, help create smooth curves. Oak and maple are good hardwood options for durability. Avoid softwoods that may warp or break.
Essential Tools For The Project
Use a jigsaw to cut curved shapes precisely. A power drill helps make clean holes for screws. Sandpaper or a power sander smooths rough edges. Clamps hold pieces firmly while glue dries. A measuring tape and pencil ensure accurate markings.
Additional Supplies
Wood glue provides strong joints that last. Screws and nails secure the structure. Wood filler hides small gaps and holes. A clear finish or paint protects the wood and improves appearance. Safety gear like gloves and goggles keeps you safe.

Credit: www.youtube.com
Designing Your Curved Bookshelf
Designing your curved bookshelf is the first step to a beautiful project. This stage shapes the whole process and affects the final look. It helps you picture the curve and size clearly. Careful design saves time and materials. The plan guides each cut and assembly perfectly.
Start by thinking about the curve’s style and size. Sketch ideas on paper or use simple software. Visualize how it fits your space and holds your books. Keep the design simple and practical for easy building.
Planning The Curve Shape
Choose the type of curve: gentle or tight. Gentle curves give a soft look. Tight curves create a bold statement. Use a compass or string to draw smooth arcs. Test different radii until the curve feels right. Balance beauty with strength for durability.
Measuring And Marking Dimensions
Measure the height, width, and depth carefully. Mark these on your wood pieces with a pencil. Use a ruler or measuring tape for accuracy. Mark the curve line clearly. Double-check all measurements before cutting. Precise marks ensure parts fit well later.
Creating A Template
Make a full-size template of the curve on cardboard or plywood. This template guides your cuts for consistent shapes. Cut the template smoothly, following the marked curve line. Use it to trace curves on your wood pieces. A good template saves mistakes and material waste.
Preparing The Wood
Preparing the wood is the first step to build a curved bookshelf. It sets the foundation for a sturdy and beautiful piece. Taking time to prepare the wood properly will make the rest of the project easier and the results better.
The process includes cutting the wood to the right size, smoothing the edges, and bending the wood carefully. Each step requires attention and patience. Let’s explore these steps in detail.
Cutting Wood To Size
Start by measuring the wood pieces according to your bookshelf design. Use a pencil to mark the exact lengths. A saw will help you cut the wood straight and clean. Cut slowly to avoid splinters or mistakes. Accurate cuts make the assembly easier and the shelf more stable.
Sanding And Smoothing Edges
After cutting, the wood edges may be rough. Use sandpaper or a sanding block to smooth all surfaces. Sand in the direction of the wood grain for the best finish. Smooth edges prevent splinters and give the shelf a neat look. Take your time to make the wood feel soft to touch.
Bending Techniques
Bending wood needs care to avoid cracks. Soak thin plywood sheets in water for about an hour. This makes the wood flexible. Slowly bend the wood around a curved form or mold. Use clamps to hold the wood in shape while it dries. Patience here ensures a smooth, even curve for your bookshelf.
Assembling The Frame
Building a curved bookshelf begins with assembling the frame. This step sets the shape and strength of your shelf. A strong frame ensures your bookshelf holds weight and looks great. Focus on joining the curved pieces carefully and securing the entire frame. Take time to check the stability before moving forward.
Joining Curved Pieces
Start by aligning the curved wood pieces. Use clamps to hold them in place. Apply wood glue along the edges for a firm bond. Drill pilot holes to avoid splitting the wood. Secure the pieces with screws for extra strength. Make sure the curves match exactly. This step shapes the base of your bookshelf.
Securing The Frame Structure
Add support beams between the curves. Attach horizontal braces to keep the frame rigid. Use screws and glue on all joints. Check that every connection is tight. Reinforce corners with metal brackets if needed. This prevents wobbling and keeps the frame square. A solid frame holds shelves and books safely.
Checking For Stability
Place the frame on a flat surface. Press on different areas to test for movement. Adjust screws or braces if the frame shifts. Use a level to ensure it stands straight. Stability means your bookshelf will last longer. Take your time here to avoid problems later.
Adding Shelves
Adding shelves is a key step in building a curved bookshelf. Shelves hold your books and decorations. They need to fit well and be strong. Careful measuring and attaching will make the shelves stable. This part shapes the final look and function of your bookshelf.
Measuring Shelf Placement
Start by deciding how many shelves you want. Measure the height inside the bookshelf frame. Mark equal spaces for each shelf. Use a pencil to draw light lines on the frame. Double-check the measurements for accuracy. Even spacing makes the bookshelf look neat and balanced.
Attaching Shelves To Frame
Cut shelves to match the curved shape of the frame. Use wood glue on the edges for extra hold. Secure shelves with screws or brackets. Drill pilot holes to avoid splitting the wood. Attach each shelf firmly to the frame. This keeps the shelves from moving or sagging.
Ensuring Level And Support
Use a level tool to check each shelf. Adjust screws or brackets if needed. Add extra support under shelves for heavy books. Small wooden blocks or metal brackets work well. Good support prevents shelves from bending or breaking. A level, strong shelf holds your items safely.

Credit: www.etsy.com
Finishing Touches
Maintaining your curved bookshelf keeps it looking great and lasting longer. Regular care prevents damage and preserves its shape. Simple actions can protect your investment and keep your space neat.
Cleaning Your Bookshelf
Use a soft, dry cloth to dust the shelves weekly. Avoid wet cloths that may warp the wood. Clean spills quickly with a slightly damp cloth. Do not use harsh chemicals or abrasive cleaners. These can ruin the finish and wood.
Preventing Damage
Place the bookshelf away from direct sunlight and heat sources. Sunlight fades the wood and heat dries it out. Use coasters or mats under heavy objects to avoid dents. Keep sharp items away to prevent scratches. Avoid overloading the shelves to stop bending or breaking.
Repairing Minor Issues
Fix small scratches with a wood touch-up marker or wax stick. For loose screws, tighten them carefully without forcing. Use wood glue for minor cracks and clamp until dry. Sand rough spots lightly to smooth the surface. Regular checks catch problems before they grow worse.
Frequently Asked Questions
What Materials Are Needed For A Curved Bookshelf?
You need plywood, wood glue, clamps, nails, sandpaper, and finishing paint. Flexible plywood is ideal for curves. Quality tools ensure smooth curves and durability.
How Do You Bend Wood For A Curved Shelf?
Soak plywood in water, then clamp it to a curved form. Let it dry completely to hold the shape. Use steam bending for hardwoods if preferred.
What Tools Are Essential For Building Curved Bookshelves?
You need a jigsaw, drill, clamps, sander, measuring tape, and safety gear. These tools help cut, shape, and assemble the curved pieces accurately.
How Do You Ensure Stability In A Curved Bookshelf?
Use strong joints like dowels or screws and reinforce corners. Secure the bookshelf to the wall for added safety and support.
Conclusion
Building a curved bookshelf adds charm to any room. It takes some patience and simple tools. Follow the steps carefully to create strong shelves. Choose good wood to ensure it lasts long. Take your time shaping the curves right. This project suits both beginners and hobbyists.
Enjoy the process and watch your bookshelf take form. Soon, your books will have a unique place to rest. A curved bookshelf blends style with function. Try this project and bring a new look to your space.
