Are you looking to add a warm, cozy touch to your home? Building a farmhouse style bookshelf might be just what you need.
Imagine having a beautiful, rustic piece that not only holds your favorite books but also brings charm to your living space. In this guide, you’ll discover simple steps to create your own farmhouse bookshelf, even if you’re new to woodworking.
By the end, you’ll have a unique, handcrafted shelf that feels like it was made just for your home. Ready to transform your space and impress your guests? Let’s get started!
Materials And Tools
Building a farmhouse style bookshelf starts with the right materials and tools. Choosing quality wood and hardware affects the shelf’s strength and look. Having the correct tools makes the process easier and safer. This section covers the essential wood types, hardware, and tools for your project.
Essential Wood Types
Pine is a popular choice for farmhouse shelves. It is affordable and easy to work with. Cedar offers a rustic look and resists moisture. Oak is strong and has a beautiful grain pattern. Choose wood that fits your style and budget. Avoid soft woods that may dent or warp easily.
Required Hardware
Use wood screws to join pieces securely. Nails help fasten trim or backing boards. Wood glue adds extra strength to joints. Sandpaper smooths rough edges for a clean finish. Consider brackets for extra shelf support. Select hardware that matches the farmhouse style.
Tools Checklist
A cordless drill speeds up drilling and screwing. A saw cuts wood to the right size and shape. A measuring tape ensures accurate dimensions. A carpenter’s square helps keep corners straight. A hammer drives nails quickly and safely. Sanding blocks or an electric sander smooth surfaces. Clamps hold pieces firmly while glue dries.
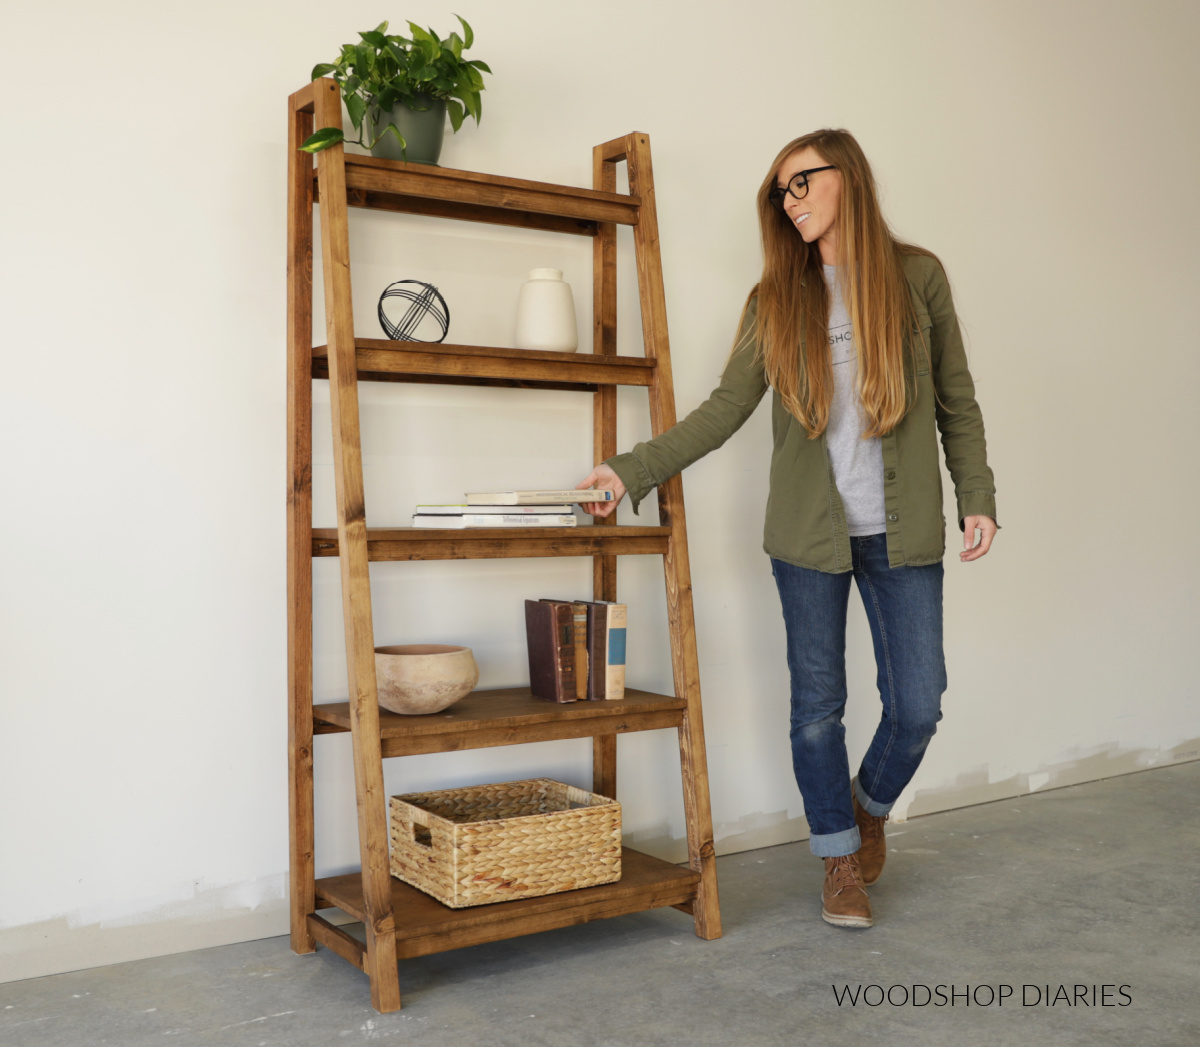
Credit: www.woodshopdiaries.com
Design And Measurements
Design and measurements are the first steps to building a farmhouse style bookshelf. Good planning saves time and materials. Accurate measurements ensure the shelf fits your space perfectly. The design sets the tone for the whole project. Take your time to think about size, shape, and style. This section covers how to choose the right size, sketch your plan, and adjust for space.
Choosing The Right Size
Start by measuring the wall space where the bookshelf will go. Note the width, height, and depth available. Consider the items you want to store. Large books need deeper shelves. Small decor pieces fit well on shallow shelves. Balance size with room flow. A too-big shelf can crowd the room. A too-small one may not hold enough items.
Sketching Your Plan
Draw a simple sketch of your bookshelf design. Include all dimensions clearly. Mark shelf heights and widths. Show spacing between shelves. Use a ruler or graph paper for accuracy. This helps visualize the final product. Change details on paper before cutting wood. A clear plan reduces mistakes during building.
Adjusting For Space
Check your space again before finalizing measurements. Leave room for baseboards or molding. Think about doorways and furniture nearby. Allow a few inches for air circulation. Shelves should not block windows or vents. Adjust shelf height to suit your needs. Small tweaks improve fit and function.
Cutting The Wood
Cutting the wood is a key step in building your farmhouse style bookshelf. This part sets the foundation for the entire project. Accurate cuts ensure all pieces fit well together. Take your time and focus on precision. Use the right tools and techniques to make clean, straight cuts. Proper preparation helps avoid mistakes and wasted wood. Safety should always be your top priority during this process.
Measuring And Marking
Start by measuring the wood carefully. Use a tape measure for accuracy. Mark the cut lines clearly with a pencil. Double-check all measurements before cutting. Mark both sides of the wood to guide your saw. Use a square tool to draw straight lines. Clear marks help keep cuts straight and precise.
Safe Cutting Techniques
Wear safety glasses and ear protection. Keep your hands away from the saw blade. Use clamps to hold the wood steady. Cut slowly and steadily to avoid slips. Follow the marked lines closely without rushing. Choose the right saw for each cut type. Stop if the blade binds or the wood shifts.
Preparing The Pieces
After cutting, check all pieces for accuracy. Sand the edges to remove rough spots. Label each piece to match your plan. Organize the pieces in order for assembly. This step makes building faster and easier. Clean the workspace before moving to the next phase.
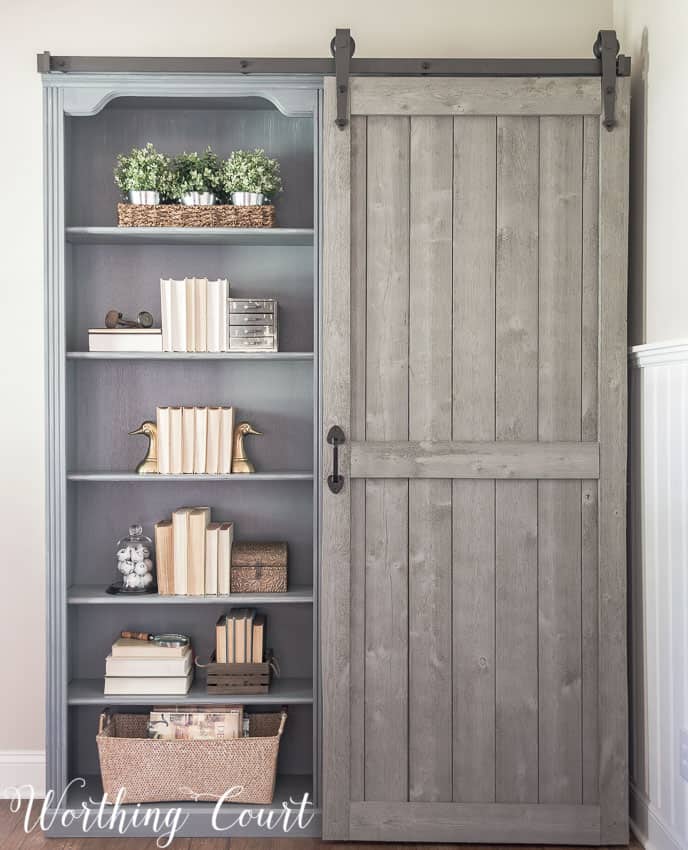
Credit: www.worthingcourtblog.com
Assembling The Frame
Building the frame is the first big step in making your farmhouse style bookshelf. This part gives the shelf its shape and strength. Careful work here sets the stage for a sturdy and good-looking finished piece.
Focus on putting parts together correctly. Take your time to follow each step carefully. A strong frame holds everything else and keeps the shelf steady for years.
Joining Techniques
Use simple joints like butt joints or pocket holes to connect wood pieces. Butt joints are easy and fast. Pocket holes hide screws and make the frame look neat. Wood glue adds strength to every joint. Clamp the pieces tight until the glue dries. This keeps the frame solid and reliable.
Securing The Structure
After joining, add screws or nails to keep the frame firm. Use screws for stronger holds. Nail guns speed up the process but be careful not to split the wood. Check each connection point to make sure nothing moves. A secure frame won’t wobble or break over time.
Checking For Squareness
Measure the frame’s corners with a carpenter’s square. The corners must be exactly 90 degrees. Adjust pieces before the glue dries or screws go in. A square frame ensures shelves fit well and the bookshelf stands straight. This step is key to a professional look and lasting durability.
Adding Shelves
Adding shelves is a key step in building your farmhouse style bookshelf. Shelves hold your books and decorations. They need to be strong and spaced well. Proper shelf installation gives your bookshelf a clean, sturdy look. Follow simple steps to place and secure shelves correctly.
Spacing The Shelves
Measure the height of the bookshelf interior. Decide how many shelves you want. Mark even spaces on the side panels. Leave enough room for tall books or decor. Use a pencil to draw lines for shelf placement. Check that spacing matches your needs before drilling.
Attaching Supports
Choose strong shelf supports or brackets. Position them on the marked lines inside the bookshelf. Use a level tool to keep supports straight. Drill pilot holes for screws to avoid wood splitting. Screw the supports tightly to hold the shelves firmly. Supports should be flush with the side panels.
Installing Shelf Boards
Cut shelf boards to fit inside the frame. Sand edges for a smooth finish. Place each board on the supports carefully. Check that shelves sit level and do not wobble. Secure boards with small screws or nails if needed. Clean dust off the shelves before use.
Finishing Touches
Finishing touches bring your farmhouse style bookshelf to life. These final steps make your project look clean and polished. They also protect the wood and add character. Take your time with each step for the best results.
Sanding For Smoothness
Start by sanding all surfaces with fine-grit sandpaper. This removes rough spots and splinters. Sand along the wood grain to avoid scratches. Wipe off dust with a dry cloth before moving on. Smooth wood feels better and helps paint or stain stick well.
Painting And Staining Tips
Choose paint or stain that matches your farmhouse style. Use thin, even coats to avoid drips. Let each coat dry completely before adding another. Light sanding between coats creates a smooth finish. For a rustic look, consider a distressed paint technique.
Adding Decorative Elements
Decorative details enhance the farmhouse charm. Add simple knobs or handles for a vintage feel. Consider attaching wooden trim or molding to edges. Use stencils or decals for subtle patterns. Keep decorations minimal to maintain a clean, cozy look.
Maintenance And Care
Maintaining your farmhouse style bookshelf keeps it looking fresh and sturdy. Proper care helps the wood stay strong and beautiful for years. Small efforts can prevent bigger problems later.
Follow simple steps to clean and fix your bookshelf. Protecting it well extends its life. This guide shares easy tips for cleaning, repairing, and lasting care.
Cleaning Advice
Dust your bookshelf often using a soft cloth or duster. Avoid wet cloths that can damage the wood. Use mild soap and water for sticky spots. Dry the surface immediately to prevent moisture harm.
Polish the wood occasionally with a wood-friendly product. This keeps the finish smooth and shines nicely. Avoid harsh chemicals that strip the wood’s natural oils.
Repairing Minor Damage
Fix scratches by rubbing a matching wood marker or crayon. Small dents can be raised by applying a damp cloth and heat with an iron. Tighten loose screws or nails promptly to keep the shelf stable.
Replace broken parts with similar wood pieces. Use wood glue for cracks and hold pieces together until dry. Check joints regularly to catch damage early.
Extending Shelf Life
Place your bookshelf away from direct sunlight to avoid fading. Keep it in a dry room to prevent warping or mold. Use coasters under heavy items to stop dents and scratches.
Rotate the items on shelves to spread weight evenly. Avoid overloading shelves beyond their strength. Regular care and gentle use make your farmhouse bookshelf last long and look great.
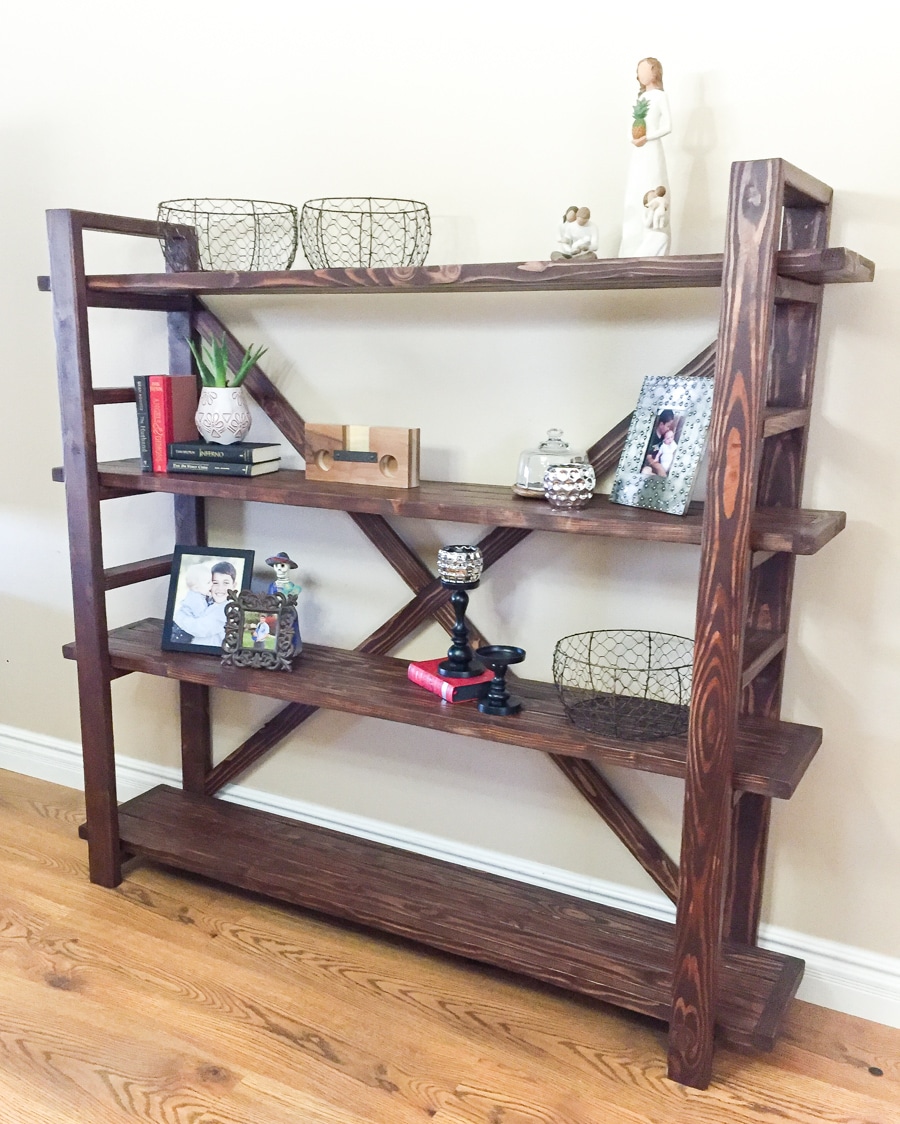
Credit: jenwoodhouse.com
Frequently Asked Questions
What Materials Are Best For A Farmhouse Style Bookshelf?
Wood is ideal for farmhouse style bookshelves. Pine, oak, and reclaimed wood offer durability and rustic charm. These materials highlight natural textures and complement farmhouse aesthetics. Choose wood with natural grains for authenticity and long-lasting quality.
How Do I Achieve A Rustic Finish On The Bookshelf?
To get a rustic finish, sand the wood lightly and apply a matte stain. Distress edges with sandpaper or a hammer for character. Use a clear matte sealant to protect the surface while maintaining the rustic look.
What Tools Are Needed To Build This Bookshelf?
Essential tools include a saw, drill, measuring tape, screwdriver, and clamps. Sandpaper and paintbrushes are also necessary for finishing. These basic tools help ensure accurate cuts and a sturdy, polished bookshelf.
How Much Time Does Building This Bookshelf Take?
Building a farmhouse bookshelf typically takes 4 to 6 hours. This depends on skill level and drying times for paint or stain. Planning and preparation can speed up the process significantly.
Conclusion
Building a farmhouse style bookshelf brings charm to any room. It adds both style and function to your space. You can customize it to fit your needs and taste. The process is simple and rewarding, even for beginners. Enjoy the satisfaction of creating something with your hands.
This bookshelf will hold your favorite books and decor. Start your project today and see the difference it makes. A farmhouse bookshelf is a timeless piece that lasts.