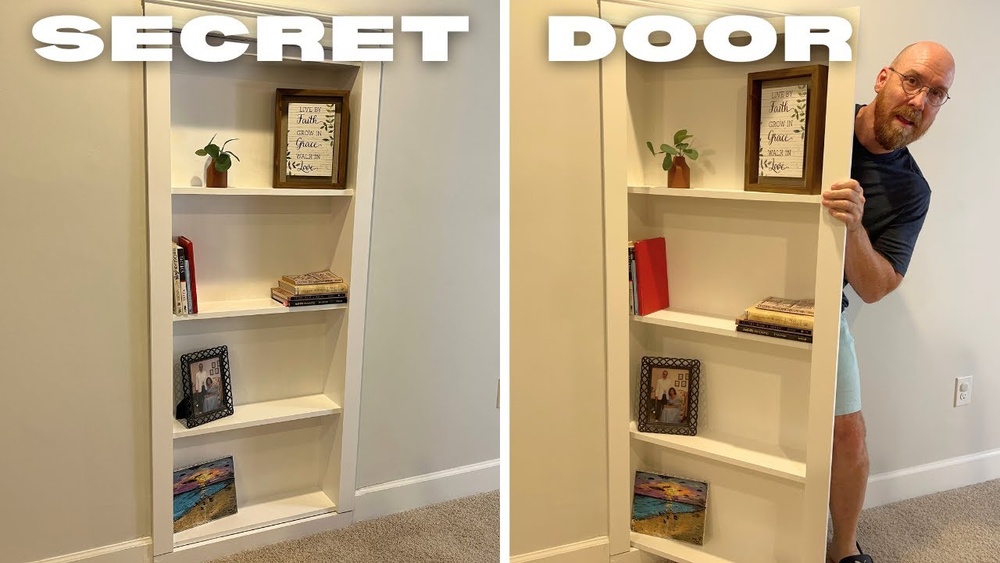
Imagine having a secret door right in your own home—a bookshelf that hides a hidden room or a special storage space. You might think it’s complicated or expensive, but what if you could build one yourself?
In this guide, you’ll learn exactly how to make a bookshelf door that looks great and works perfectly. Whether you want to add a touch of mystery or just save space, this project is easier than you think. Keep reading, and by the end, you’ll have all the steps you need to create your own hidden bookshelf door.
Ready to surprise yourself? Let’s get started!

Credit: www.reddit.com
Choosing Materials
Choosing the right materials is a key step in making a bookshelf door. The materials affect the door’s strength, look, and how long it lasts. Picking good materials helps the door fit well and work smoothly.
This section covers the main materials you need. It explains how to select wood, hardware, and tools for your project. Simple choices can make your bookshelf door better and easier to build.
Selecting The Wood
Wood is the main part of your bookshelf door. Choose wood that is strong but not too heavy. Pine is soft and easy to cut. Oak is harder and lasts longer. Plywood is good for a smooth, flat surface. Check the wood for cracks or knots. These can weaken the door. Pick wood that matches your room’s style and color.
Picking The Hardware
Hardware includes hinges, handles, and screws. Use strong hinges that can hold the door’s weight. Concealed hinges look neat and keep the door flush with the shelf. Choose handles that are easy to grip and fit your door’s style. Use screws made for wood. They hold parts tightly and last long.
Tools You’ll Need
Good tools make building faster and safer. A saw is needed to cut wood to size. A drill helps make holes for screws and hardware. A screwdriver or drill bit tightens screws. Sandpaper smooths rough edges. A level keeps the door straight. Have a tape measure to check your work. Using the right tools ensures a clean, strong bookshelf door.

Credit: www.instructables.com
Measuring And Planning
Measuring and planning are the first steps to build a bookshelf door. These steps help avoid mistakes and save time. Careful measurement and a clear plan make the project easier and the result better.
Taking Accurate Measurements
Start by measuring the door opening. Measure the width at the top, middle, and bottom. Use the smallest number for the width. Measure the height on both sides and the middle. Use the smallest height. Write down all measurements clearly. Double-check to avoid errors.
Designing The Door Frame
Choose a frame style that fits your space and style. Decide on the material and thickness. Plan for space between the door and the frame. This space allows the door to open and close smoothly. Sketch the frame design on paper. Include all dimensions to guide your cutting and assembly.
Planning The Bookshelf Layout
Think about how many shelves you want. Decide the height of each shelf based on the books you have. Leave space for taller books or decorations. Mark shelf positions on your plan. Make sure shelves fit inside the door frame. Check that the door will close without hitting shelves.
Cutting And Preparing Wood
Cutting and preparing wood is the first key step to make a sturdy bookshelf door. It shapes the wood pieces and gets them ready for fitting. Precise cuts ensure the door fits well and looks neat. Proper preparation also helps the wood last longer and look better.
Cutting Panels And Frames
Start by measuring the door size carefully. Use a saw to cut the panels and frames to exact dimensions. Make straight cuts to avoid gaps later. Cut the panels slightly thinner than the frames. This allows the panels to fit inside the frame securely. Mark each piece clearly to keep track.
Sanding And Smoothing
After cutting, sand all edges and surfaces. Use medium-grit sandpaper first to remove rough spots. Then switch to fine-grit for a smooth finish. Sanding prevents splinters and helps paint or stain stick well. Smooth wood also improves the door’s look and feel.
Prepping For Assembly
Check all pieces for correct size and fit. Adjust any parts that do not align perfectly. Arrange the wood pieces in the order you will assemble them. Drill pilot holes where screws or nails will go. This avoids splitting the wood during assembly. Clean the wood dust off before moving on.
Assembling The Door
Assembling the bookshelf door is a key step in your project. This part shapes the door and makes it strong. You will join the frame pieces, add the panels, and then reinforce the whole structure. Each task needs care and attention for a good result.
Joining The Frame Pieces
Start by arranging the frame parts on a flat surface. Make sure edges fit tightly together. Use wood glue on the joints for a firm bond. Clamp the pieces to hold them in place. Let the glue dry fully before moving forward. This creates a solid frame to hold the panels.
Attaching The Panels
Next, position the panels inside the frame carefully. They should fit snugly without gaps. Use small nails or screws to fix the panels to the frame. Drive them gently to avoid splitting the wood. This step adds the door’s surface and gives it a finished look.
Reinforcing The Structure
Add corner braces or metal brackets inside the frame. This strengthens the door and keeps it from warping. Secure the braces with screws for extra support. Check the door for any loose parts. Tighten all screws and clamps to ensure durability.
Installing Hinges And Hardware
Installing hinges and hardware is a key step in making a bookshelf door. It lets the door open and close smoothly. Proper hinge placement and secure hardware keep the door steady and functional. This section guides you through marking, attaching, and adding handles or locks.
Marking Hinge Placement
Start by choosing where to place the hinges on the door and frame. Measure about 7 inches from the top and bottom edges. Mark these spots clearly with a pencil. Make sure the marks line up on both the door and the frame. Accurate marking helps the door hang evenly and work well.
Attaching Hinges To Door And Frame
Hold the hinge on the marked spot on the door. Use a drill or screwdriver to fix the screws tightly. Next, align the door with the frame and attach the other side of the hinges. Check that the door swings open and closes without sticking. Tight screws and straight hinges ensure smooth movement.
Adding Handles And Locks
Pick a handle style that fits your door size and use. Mark the handle position on the door edge. Drill holes carefully for the screws. Attach the handle firmly so it feels secure. For extra security, add a lock. Mark and fix the lock parts so they align well. Handles and locks make the bookshelf door easy to use and safe.

Credit: www.youtube.com
Mounting The Door
Mounting the door is a key step in building your bookshelf door. This process ensures the door fits well and opens smoothly. Taking time to mount the door correctly saves effort later. Follow these clear steps to get it right.
Aligning The Door On The Bookshelf
Place the door against the bookshelf frame. Check that it sits evenly and straight. Use a level tool to confirm it is not tilted. Leave a small gap between the door and frame for easy opening. Mark the hinge positions on both the door and frame clearly.
Securing Hinges To The Bookshelf
Attach the hinges to the door first using screws. Use a drill to make pilot holes for easy screwing. Next, fix the other side of the hinges to the bookshelf frame. Keep the door steady while tightening screws. Make sure the hinges are flush and secure.
Testing Door Movement
Open and close the door slowly. Listen for any rubbing or sticking sounds. Check if the door swings smoothly without resistance. Adjust hinge screws slightly if the door does not align well. Repeat testing until the door moves freely and fits perfectly.
Finishing Touches
Finishing touches bring your bookshelf door to life. They protect the wood and add style. Simple steps can make a big difference in the final look. Taking time to finish well ensures your door looks great and lasts long.
Painting Or Staining
Choose paint or stain to match your room’s style. Paint covers the wood fully and offers many color choices. Stain shows the wood grain and adds warmth. Use a brush or cloth for smooth, even coats. Let each layer dry before the next. This step protects the wood from damage and moisture.
Adding Decorative Elements
Decorative elements add personality to your bookshelf door. Try adding trim, molding, or stencils for a unique look. Hardware like knobs or handles can also enhance style and function. Keep decorations simple and balanced. They should complement the room, not overpower it.
Maintaining Your Bookshelf Door
Keep your bookshelf door clean and in good shape. Dust it regularly with a soft cloth. Avoid harsh cleaners that can damage the finish. Check hinges and handles often. Tighten or replace parts if needed. Proper care helps your door stay beautiful and work well for years.
Frequently Asked Questions
How Do You Build A Bookshelf Door?
Start by measuring the bookshelf opening precisely. Cut wood panels to size. Attach hinges on one side and a handle on the other. Sand and finish the door for a smooth look. Finally, mount the door onto the bookshelf frame carefully.
What Tools Are Needed For A Bookshelf Door?
Essential tools include a saw, drill, screwdriver, measuring tape, level, and sander. You’ll also need hinges, screws, wood panels, and a door handle. These tools help ensure precise cuts and secure assembly for a functional bookshelf door.
Can A Bookshelf Door Hide A Secret Room?
Yes, bookshelf doors can conceal secret rooms. They act as hidden entrances when installed with sturdy hinges and secure locks. This adds privacy and intrigue, making your space both functional and mysterious.
How To Choose The Right Wood For A Bookshelf Door?
Select wood that matches your bookshelf style and room decor. Popular options include pine, oak, or plywood. Choose wood that’s sturdy, easy to work with, and can be painted or stained for a finished look.
Conclusion
Building a bookshelf door adds style and function to any room. The steps are clear and easy to follow. You only need basic tools and some patience. This project saves space and hides your books neatly. Try it yourself and enjoy the new look.
Small changes like this can make a big difference. Keep your space tidy and unique with a bookshelf door. Start your project today and see the result!
