Are you looking for a stylish and functional piece of furniture that you can proudly call your own? Building a flip top console table is a perfect project for you.
Not only will it add charm to your space, but it also offers clever storage and versatility. Imagine having a table that transforms with a simple flip, adapting to your needs in an instant. You’ll discover easy-to-follow steps and practical tips that make building your own flip top console table a rewarding experience.
Ready to create something unique that fits your style and space? Let’s get started!
Materials And Tools Needed
Gathering the right materials and tools is the first step to build a flip top console table. Having everything ready makes the process smooth and efficient. This section lists all essentials needed for this project.
Wood Materials
Choose solid wood or plywood for the table structure. Use hardwood like oak or maple for durability. Plywood works well for the tabletop and shelves. Pick wood with smooth surfaces for easy finishing.
Hardware
Buy hinges to allow the table top to flip open. Select strong metal hinges for stability. You will also need screws and bolts for assembly. Use wood glue to strengthen joints.
Tools
Use a saw to cut wood pieces accurately. A drill helps to make holes for screws and bolts. Sandpaper or a power sander smooths rough edges. A screwdriver is necessary for tightening screws.
Finishing Supplies
Pick paint or wood stain to finish the table. Use brushes or rags for applying finish. Choose a clear coat to protect the surface. Clean cloths help to wipe off dust before finishing.

Credit: hookerfurnishings.com
Choosing The Right Wood
Choosing the right wood is a key step in building a flip top console table. Wood affects the table’s look, strength, and how easy it is to work with. Picking the best wood helps the project last long and look great in any room.
Different woods offer different benefits. Some woods are hard and strong, while others are soft and easy to cut. The wood’s color and grain also change the table’s style. Understanding the options makes building the table easier and more fun.
Hardwood Vs Softwood
Hardwoods come from trees that lose leaves each year, like oak and maple. They are strong and last a long time. Hardwoods also have a nice grain pattern that looks good on furniture.
Softwoods come from evergreen trees, such as pine and cedar. These woods are lighter and easier to shape. Softwoods are usually less expensive but not as durable as hardwoods.
Popular Wood Choices For Console Tables
Oak is a top choice for its strength and attractive grain. It holds up well to daily use. Maple is smooth and resists dents. Cherry wood darkens over time, adding warmth to the table.
Pine is soft and easy to work with, perfect for beginners. It has a light color that takes paint well. Walnut is rich and dark, giving a classy look to the table.
Consider Wood Finish And Maintenance
Some woods need more care to keep their look. Oak and maple usually need sealing to protect against stains. Pine can scratch easily and may require more touch-ups.
Choosing wood that fits your skill and time helps keep the table looking nice. Think about how much work you want to put into sanding and finishing the wood.
Preparing The Wood Pieces
Preparing the wood pieces is the first important step in building a flip top console table. Proper preparation ensures the table will be strong and look good. It helps the parts fit together perfectly. This section covers measuring, cutting, sanding, and smoothing the wood.
Measuring And Cutting
Start by measuring all wood pieces carefully. Use a tape measure and mark lines clearly with a pencil. Double-check measurements to avoid mistakes.
Cut the wood along the marked lines using a saw. A circular saw or handsaw works well. Cut slowly to keep edges straight and smooth. Always cut in a safe, stable place.
Sanding And Smoothing
After cutting, sand all wood pieces to remove rough edges. Use medium-grit sandpaper first, then fine-grit for smoothness. Sand along the wood grain to prevent scratches.
Smooth wood helps paint or finish stick better. It also prevents splinters and gives a clean look. Take time to sand corners and edges well.
Credit: www.ana-white.com
Constructing The Table Frame
Constructing the table frame is the foundation of your flip top console table. It shapes the overall strength and look. A solid frame keeps the table steady and supports the flip top mechanism.
Start by carefully following each step. Precision helps avoid gaps or loose joints. The frame must be balanced to hold the weight evenly.
Assembling The Legs
Begin with the legs. Cut four pieces of wood to your desired height. Sand each leg to smooth rough edges. Attach the legs to the tabletop base with screws. Use clamps to hold them tight while screwing. Check that all legs are straight and even. This step ensures the table stands firmly without wobbling.
Building The Support Structure
Next, build the support structure between the legs. Use horizontal beams to connect the legs on each side. These beams add strength and prevent the legs from shifting. Secure the beams with wood glue and screws for a strong bond. Measure carefully to keep all sides equal. A sturdy support frame stops the table from shaking during use.
Creating The Flip Top Mechanism
Creating the flip top mechanism is the key step in building a flip top console table. This mechanism lets the top panel open and close easily. It needs to be sturdy and smooth for daily use. Proper installation and adjustment make the table functional and safe.
Focus on the hinges and movement to ensure the flip top works well. Using the right tools and following clear steps will help you build a reliable mechanism.
Installing Hinges
Choose strong hinges that fit the table’s style and weight. Position the hinges evenly along the edge of the top panel. Mark the screw holes with a pencil before drilling. Drill pilot holes to avoid wood splitting. Attach the hinges securely using screws. Check the alignment by opening and closing the top slowly. Adjust if the top does not sit flat or moves unevenly.
Ensuring Smooth Movement
Test the flip top for any stiffness or resistance. Add lubricant like silicone spray to the hinge joints. Avoid using heavy grease that can attract dust. Tighten or loosen screws to balance the movement. Use small rubber bumpers to soften the closing impact. Confirm the top stays in place when open. Smooth movement improves the table’s usability and lifespan.
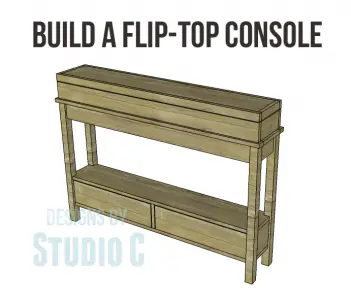
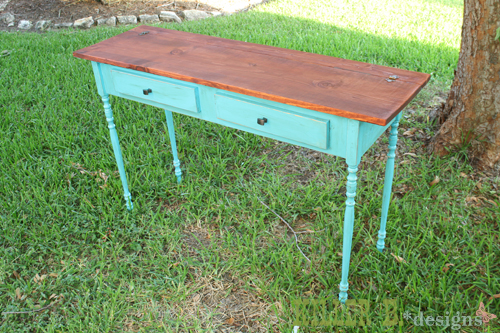
Credit: designsbystudioc.com
Attaching The Tabletop
Attaching the tabletop is a key step in building your flip top console table. This part gives your table its main surface. It needs to be secure and level. A well-attached tabletop ensures the table stays sturdy and functional.
Take your time with this step. A careful attachment helps avoid wobbling or damage. Use the right tools and follow each step closely for best results.
Preparing The Tabletop And Base
Start by checking the tabletop for any rough edges. Sand them smooth to avoid splinters. Make sure the base is clean and free from dust. This helps the adhesive and screws hold better.
Aligning The Tabletop Correctly
Place the tabletop on the base gently. Align it so the edges match perfectly. Use clamps to hold the tabletop steady. This keeps the surface from moving during attachment.
Securing The Tabletop With Hinges
Choose strong hinges that support the flip top feature. Attach hinges to the back of the tabletop and the base. Use screws that fit tightly. Test the flip motion to ensure smooth movement.
Checking Stability And Final Adjustments
After attaching, check if the tabletop is level. Adjust the hinges if the top tilts. Tighten all screws firmly. Test the flip action multiple times to confirm stability.
Finishing Touches
Finishing touches make your flip top console table look complete and polished. These final steps protect the wood and highlight its beauty. Taking time here ensures your table lasts longer and stands out in any room.
Painting Or Staining
Choose paint or stain based on your style and the wood type. Paint covers the wood fully and adds color. Stain enhances the natural grain and texture. Apply thin, even coats for the best finish. Let each coat dry fully before adding another. Light sanding between coats can create a smooth surface.
Adding Protective Coating
Protective coatings shield your table from scratches and spills. Use clear varnish, polyurethane, or wax. These coatings keep the surface strong and easy to clean. Apply with a brush or cloth in thin layers. Allow each layer to dry well before the next. This step extends your table’s life and keeps it looking fresh.
Tips For Maintenance And Care
Maintaining your flip top console table keeps it looking fresh and lasting longer. Proper care protects the wood and keeps the hinges working smoothly.
Regular upkeep is simple and prevents damage. Small efforts make a big difference over time.
Cleaning Your Flip Top Console Table
Dust the table often with a soft cloth. Avoid rough materials that can scratch the surface. Use a damp cloth for sticky spots. Dry the surface immediately to stop water damage.
Protecting The Wood Surface
Apply a wood polish or wax to keep the finish smooth. Use products made for wood furniture only. Avoid placing hot or wet items directly on the table. Use coasters or mats to protect the top.
Maintaining The Hinges
Check the hinges regularly for rust or stiffness. Apply a small amount of lubricant to keep them moving well. Tighten loose screws to keep the flip top stable. Replace damaged hardware to avoid accidents.
Preventing Damage From Sunlight And Moisture
Keep the table away from direct sunlight to avoid fading. Avoid placing it near heaters or air conditioners. Maintain a stable humidity level in the room. Use a humidifier or dehumidifier if needed.
Frequently Asked Questions
What Materials Are Needed To Build A Flip Top Console Table?
You need wood panels, hinges, screws, wood glue, sandpaper, paint or stain, and a measuring tape. Quality materials ensure durability and a polished finish.
How Long Does It Take To Build A Flip Top Console Table?
Building typically takes 4 to 6 hours, depending on skill level. Allow time for drying paint or stain for best results.
Can Beginners Build A Flip Top Console Table?
Yes, beginners can build it by following step-by-step instructions carefully. Basic woodworking skills and patience are essential for success.
What Tools Are Required For This Woodworking Project?
Common tools include a saw, drill, screwdriver, clamps, and sander. These tools help cut, assemble, and finish the table efficiently.
Conclusion
Building a flip top console table is a fun and useful project. It adds style and storage to any room. With basic tools and clear steps, anyone can create this piece. Take your time and follow the instructions carefully. Enjoy the process and the final result.
A handmade table brings charm and function to your home. Try making one and see how it fits your space. Simple projects like this boost your confidence in woodworking. Keep practicing and building new pieces. Your home will feel more personal and cozy.

