Are you looking for a stylish way to display your favorite books without taking up too much space? Building a floating bookshelf might be just what you need.
Imagine a sleek shelf that seems to hover on your wall, adding charm and function at the same time. In this guide, you’ll discover simple steps to create your own floating bookshelf, even if you’re new to DIY projects. By the end, you’ll have a unique piece that not only holds your books but also makes your room look amazing.
Ready to get started? Let’s dive in!
Materials And Tools Needed
Building a floating bookshelf requires some specific materials and tools. Having the right items makes the project easier and safer. This section lists everything needed to start your build.
Materials Needed
Choose a sturdy wood board for the shelf. Pine, oak, or plywood works well. You will also need strong wall anchors or brackets to hold the shelf. Screws are necessary to fix the shelf to the wall. Sandpaper helps smooth the wood surface. Optionally, paint or varnish can finish the shelf for a nice look.
Tools Required
A drill is essential for making holes in the wall and wood. A screwdriver helps secure screws tightly. A level ensures the shelf stays straight. A tape measure measures the right length and height. A pencil marks where to drill. A stud finder locates strong wall studs for support.
Choosing The Right Location
Choosing the right location for your floating bookshelf is important. The place you pick affects both the look and the safety of the shelf. A good spot will hold your books well and make your room look neat.
Think about where you want to see your books. A floating shelf can be a nice decoration or a useful storage space. Pick a wall that has enough space and fits your style.
Consider Wall Strength And Material
Check the wall before you start. Drywall alone may not hold heavy books. Look for studs or solid wood behind the wall. These provide strong support for your shelf.
Choose A Visible And Accessible Spot
Place the shelf where you can easily reach your books. Avoid high or narrow walls that make access hard. A spot near your reading chair or desk works well.
Avoid Areas With Direct Sunlight Or Moisture
Sunlight can fade book covers and damage wood. Moisture from kitchens or bathrooms may cause warping. Pick a dry, shaded wall to keep your shelf safe and lasting longer.
Selecting The Shelf Design
Choosing the right design for your floating bookshelf is key. It affects how your shelf looks and works in your space.
Think about the style you want. The shelf should fit your room’s decor and your personal taste. A good design makes your books easy to reach and keeps the shelf strong.
Selecting The Right Shape
Simple shapes like rectangles suit most rooms. They hold many books and look clean. Curved or irregular shapes add flair. They work well in creative spaces or as art pieces.
Choosing The Material
Wood is popular for its warmth and strength. It matches many styles. Metal offers a modern, sleek look. It is very sturdy but can feel cold. Glass shelves look light and open. They need careful handling and less weight.
Deciding On Shelf Size
Measure your wall space before choosing size. Small shelves fit tiny spaces or corners. Large shelves hold many books and decor items. Pick a size that fits your needs and room size.
Considering Mounting Style
Hidden brackets create a floating effect. They look neat and clean. Visible brackets add character and support. Choose one that matches your shelf design and wall type.

Credit: www.freeandunfettered.com
Preparing The Wood
Preparing the wood is a key step in building a floating bookshelf. Proper preparation ensures the shelf looks good and lasts long. This step involves measuring, cutting, sanding, and finishing the wood. Each task requires care and attention to detail. Let’s explore how to prepare your wood perfectly.
Measuring And Cutting
Start by measuring the wood to fit your space. Use a tape measure and mark the exact length. Double-check your measurements to avoid mistakes. Use a saw to cut the wood along the marks. A straight, clean cut is important for stability and appearance. Cut slowly and carefully for the best results.
Sanding And Finishing
After cutting, smooth the wood surface with sandpaper. Sand all edges and surfaces to remove rough spots. Smooth wood prevents splinters and looks more polished. Choose fine-grit sandpaper for the final sanding. Once smooth, apply a finish like paint, stain, or sealant. This protects the wood and enhances its look. Let the finish dry completely before moving on.
Installing The Brackets
Installing the brackets is a key step in building a floating bookshelf. It holds the shelf firmly and keeps it stable. Proper bracket installation ensures your shelf can carry books safely without sagging or falling.
Take your time to place and secure the brackets correctly. The right placement and strong mounting make a big difference in the shelf’s durability.
Finding Wall Studs
Start by locating the wall studs. Studs are the wooden beams behind the drywall. They give strong support for your brackets. Use a stud finder tool to scan the wall surface. Mark the edges and center of each stud with a pencil. Make sure the marks are level and spaced for your shelf size. Avoid mounting brackets on drywall alone. Drywall can’t hold heavy weight and may cause the shelf to fall.
Mounting Brackets Securely
Align the brackets with the stud marks on the wall. Hold each bracket flat against the wall. Use a level to check they are perfectly horizontal. Drill pilot holes through the bracket holes into the studs. Use screws long enough to reach deep inside the studs. Screw the brackets tightly but avoid over-tightening. Over-tightening can strip the screws or damage the wall. Double-check the brackets for firmness by gently pulling on them. Secure brackets make sure your floating shelf stays steady and safe.

Credit: www.uglyducklinghouse.com
Attaching The Shelf
Attaching the shelf is a key step in building a floating bookshelf. It gives the shelf strength and keeps it stable on the wall. Proper attachment stops the shelf from falling or tilting.
This part needs care and the right tools. Follow the steps to fix the shelf securely.
Preparing The Wall And Shelf
Find the right spot on the wall for your shelf. Use a level to mark a straight line. This line will guide you during installation.
Check the wall for studs. Studs are strong and hold weight better than drywall. Use a stud finder to locate them.
Mark the studs on the wall. This helps place screws in strong spots. Measure the shelf brackets to match these marks.
Mounting The Brackets
Hold the shelf brackets against the wall. Align them with the stud marks and level line. Mark the screw holes on the wall.
Drill pilot holes at the marks. Pilot holes make screwing easier and prevent wall damage.
Use strong screws to fix the brackets to the wall. Tighten screws fully to ensure stability.
Securing The Shelf On The Brackets
Place the shelf on the mounted brackets carefully. Make sure it sits flush and straight.
Use screws or nails to attach the shelf to the brackets. This stops the shelf from moving or sliding off.
Double-check the level of the shelf. Adjust if needed before final tightening.
Styling Your Floating Bookshelf
Styling your floating bookshelf makes it more than just storage. It turns into a focal point in your room. A well-styled shelf shows your personality and taste. It also keeps your space neat and inviting.
Simple steps can make your shelf look beautiful and organized. Balance is key. Mixing books and decorations creates interest without clutter.
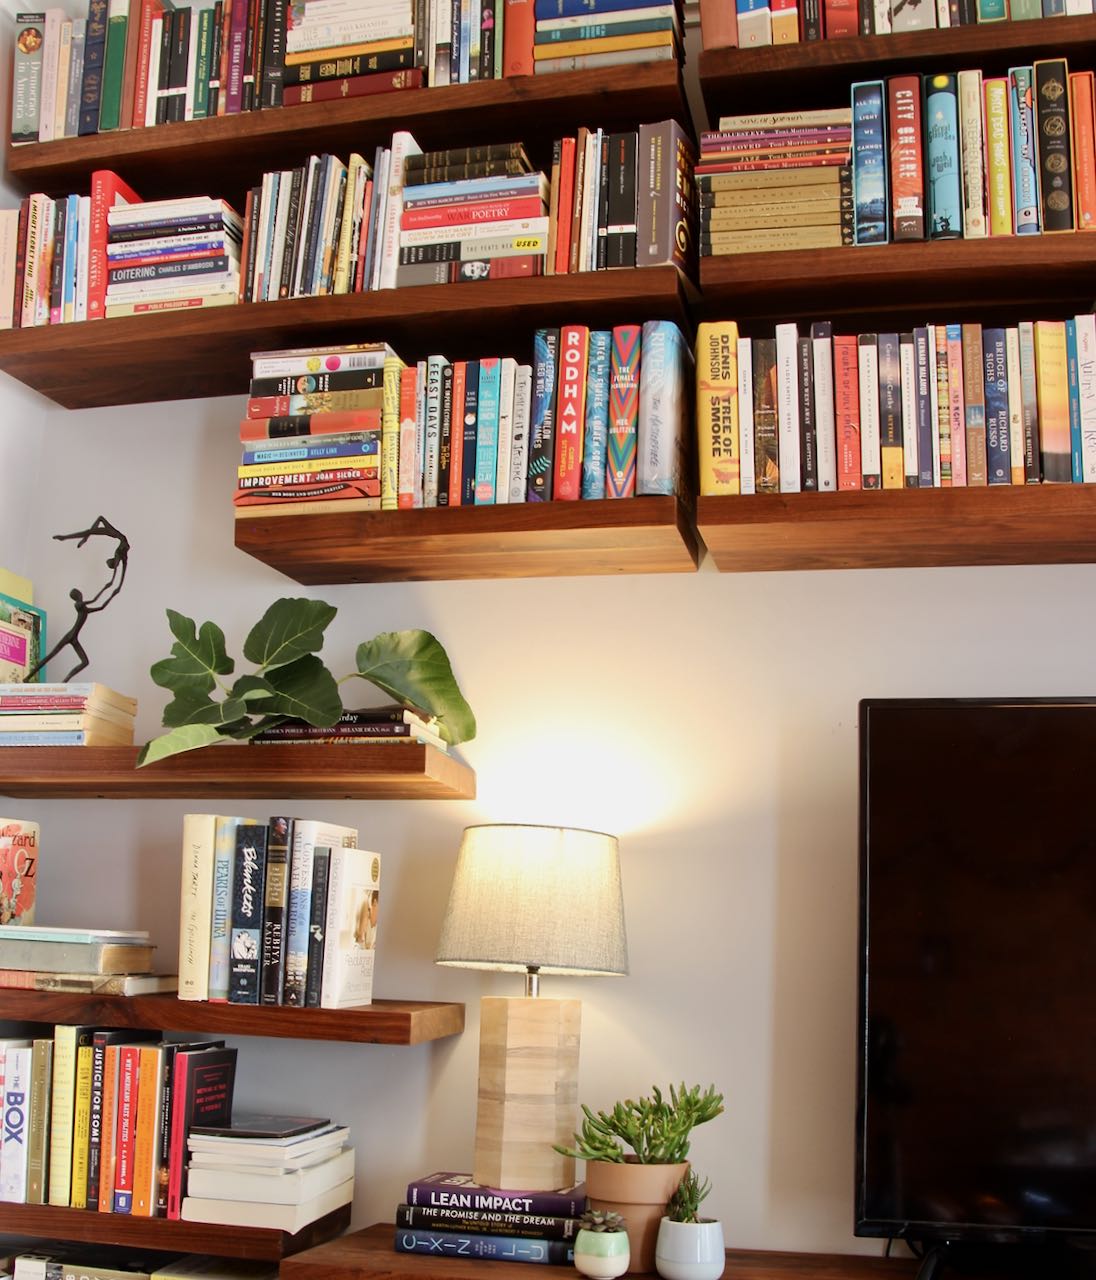
Arranging Books
Place books both vertically and horizontally. Stack some books flat and lean others upright. This breaks the monotony and adds texture. Group books by size or color for a clean look. Leave some space between stacks for airiness. Use bookends to keep books tidy and upright.
Adding Decorative Items
Mix small plants, candles, or photo frames with books. Choose items that match your room’s style. Keep decorations small to avoid overcrowding. Place objects in odd numbers for a natural look. Use different heights and shapes to add depth. Change decorations seasonally to refresh the shelf’s look.
Credit: southhousedesigns.com
Maintenance Tips
Maintaining your floating bookshelf keeps it strong and looking great. Regular care stops damage and wear. Follow these simple tips to extend your shelf’s life and beauty.
Cleaning The Shelf Surface
Dust your shelf weekly using a soft cloth. Avoid harsh cleaners that can damage the finish. Use mild soap with water for sticky spots. Dry the surface thoroughly after cleaning.
Checking For Loose Screws
Inspect screws and brackets every few months. Tighten any loose screws to keep the shelf secure. Loose parts can cause the shelf to fall and damage walls.
Avoiding Overloading
Know your shelf’s weight limit and stick to it. Too much weight can bend or break the shelf. Distribute books evenly to prevent pressure points.
Protecting Against Moisture
Keep the shelf away from damp areas. Moisture can warp wood and weaken brackets. Use a dehumidifier in humid rooms to protect your shelf.
Frequently Asked Questions
What Materials Are Needed To Build A Floating Bookshelf?
You need wooden boards, brackets or hidden supports, screws, wall anchors, a drill, level, and sandpaper. Quality wood and strong supports ensure durability and safety for your floating bookshelf.
How Do You Securely Mount A Floating Bookshelf?
Locate wall studs using a stud finder. Drill pilot holes into studs, then attach brackets or supports firmly. This ensures the shelf holds weight without risk of falling.
Can A Floating Bookshelf Hold Heavy Books?
Yes, if properly installed using sturdy brackets and wall anchors. Use strong wood and secure mounting to support the weight of heavy books safely.
How Do You Finish A Floating Bookshelf For A Polished Look?
Sand the wood smooth, then apply paint, stain, or sealant. This protects the shelf and enhances its appearance, matching your room’s decor.
Conclusion
Building a floating bookshelf is a fun and useful project. It saves space and looks clean on any wall. You only need a few tools and simple steps. Take your time to measure and mount carefully. Enjoy arranging your books and decorations once done.
This project adds style and function to your room. Try making one yourself and see how it changes your space. Small efforts can bring big improvements. Keep your walls neat and your books close. Easy, practical, and stylish—a perfect addition for any home.
