Are you looking to add a stylish and practical piece of furniture to your home without taking up too much space? A fold out console table might be exactly what you need.
It’s perfect for small rooms, entryways, or any spot where you want extra surface area that can easily disappear when not in use. In this guide, you’ll discover simple steps to build your own fold out console table, even if you’re new to woodworking.
By the end, you’ll have a unique, functional table that fits your space and style perfectly. Keep reading to find out how you can create this clever piece yourself!
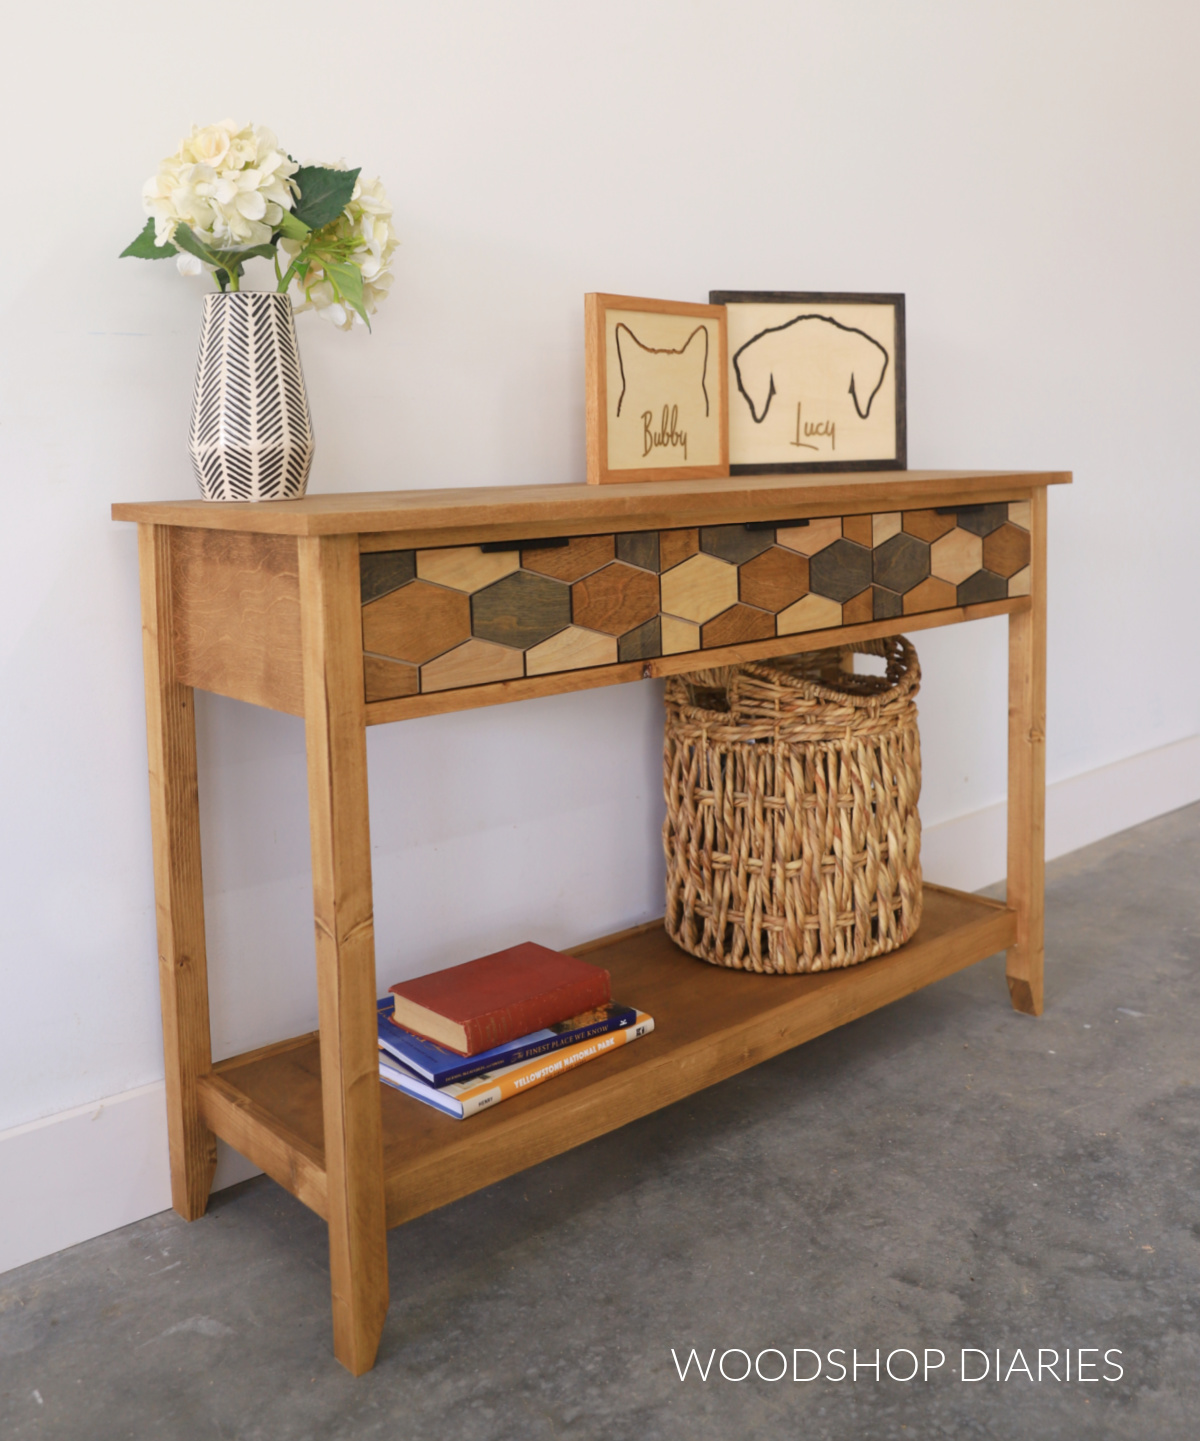
Credit: www.woodshopdiaries.com
Materials And Tools Needed
Gathering the right materials and tools is the first step to build a fold out console table. Using quality supplies ensures a sturdy and beautiful final product. Prepare everything before starting for a smooth building process.
Selecting The Right Wood
Choose wood that is strong and easy to work with. Pine, oak, or birch are great options. Pine is affordable and lightweight. Oak offers durability and a nice finish. Birch is smooth and easy to sand. Avoid soft woods that may bend or break.
Pick wood with a smooth surface. This reduces sanding time later. Make sure boards are straight and free of cracks. The right wood makes your table last longer.
Essential Tools For The Project
Use a saw to cut wood pieces to size. A circular saw or handsaw works well. A drill is needed for making holes and inserting screws. Screwdrivers help tighten screws firmly. A measuring tape ensures precise cuts. A level keeps the table balanced. Sandpaper or an electric sander smooths rough edges.
Clamps hold pieces steady while assembling. A pencil marks measurements clearly. Having these tools ready saves time and effort.
Additional Supplies
Wood screws are essential to join parts securely. Use hinges to enable the fold out feature. Choose strong, durable hinges for safety. Wood glue adds extra strength to joints. Finish with paint or varnish for protection and style. Apply brushes or rags to spread finish evenly.
Prepare safety gear like gloves and goggles. Protect your hands and eyes during work. These supplies help make your project safe and successful.
Design And Measurements
Design and measurements form the foundation of a fold out console table. Getting these right ensures the table is both functional and stylish. Proper planning helps avoid mistakes during construction. It also saves time and materials. Understanding the space where the table will go is key. This section guides you through choosing dimensions, planning the fold out mechanism, and sketching your design.
Choosing The Table Dimensions
Start by measuring the wall space for the console table. Consider the height, width, and depth you want. The table should fit comfortably without crowding the room. A standard console height is around 30 to 36 inches. Depth usually ranges from 12 to 18 inches. The width depends on your space and use. Keep in mind the table will fold out, so allow extra room for expansion. Write down these measurements clearly.
Planning The Fold Out Mechanism
The fold out mechanism must be smooth and sturdy. Decide how many panels the table will have. Two or three panels are common choices. Think about how the panels will fold and lock in place. Choose hinges that support weight and movement. Consider adding supports or brackets for stability. Visualize the table both folded and fully extended. This helps prevent design flaws. Plan for easy folding so anyone can use it.
Sketching The Design
Draw a simple sketch of your fold out console table. Include all dimensions and parts. Label the panels and hinge positions clearly. Use straight lines to show folds and joints. A good sketch guides your build step by step. It also helps communicate your idea if you seek help. Review your drawing to spot any issues. Make changes before starting the build. Keep the sketch handy during construction for reference.
Preparing The Wood
Preparing the wood is an important step in building a fold out console table. Good preparation ensures strong joints and a smooth finish. It helps the table look neat and last longer.
Start by choosing the right wood. Use wood that is sturdy and straight. Avoid wood with cracks or knots. This makes cutting and assembly easier and improves the final result.
Cutting The Pieces
Measure all parts carefully. Use a tape measure and pencil for accuracy. Cut the wood pieces to exact sizes using a saw. Keep cuts straight and clean. This step sets the base for a stable table.
Sanding And Smoothing
Sand every piece after cutting. Use medium-grit sandpaper first, then fine-grit for a smooth finish. Sand all edges and surfaces. This removes splinters and rough spots. Smooth wood helps paint or stain stick better.
Marking For Assembly
Mark each piece clearly before joining. Use a pencil to note where screws or hinges will go. Label parts to avoid confusion later. Clear marks speed up assembly and reduce mistakes.
Assembling The Frame
Assembling the frame is a key step in building your fold out console table. It shapes the table’s structure and ensures it is sturdy. Careful assembly here makes the table strong and functional. Follow the steps closely to get a perfect frame.
Joining The Tabletop Sections
Start by aligning the tabletop sections side by side. Use wood glue along the edges to hold them together. Clamp the sections tightly until the glue dries. Reinforce the join with screws from underneath. This creates a smooth, flat tabletop surface.
Constructing The Legs
Cut the legs to the correct length and shape. Sand the edges to make them smooth and safe. Attach braces between the legs for extra strength. Use screws to fasten the legs firmly to the tabletop frame. Check that all legs stand evenly.
Attaching Support Brackets
Support brackets keep the fold out parts stable. Position brackets under the tabletop where folding will happen. Secure brackets with screws so they do not move. Test the folding action to ensure smooth operation. Adjust brackets if the table feels loose.
Installing The Fold Out Mechanism
Installing the fold out mechanism is a key step in building your console table. It allows the table to expand and fold easily. This step requires careful attention to detail for a strong, smooth result.
Choosing the right hinges and attaching them correctly helps your table last longer. Proper installation ensures that the fold out action works without any trouble or noise. Follow the steps below to get it right.
Choosing The Right Hinges
Select hinges that support weight and movement well. Piano hinges or continuous hinges are great for fold out tables. They spread the stress evenly along the fold. Avoid small or weak hinges that might bend or break.
Look for hinges made of sturdy metal, like stainless steel or brass. These materials resist rust and wear. Check the hinge length to match your tabletop size. A longer hinge gives better stability and smoother folding.
Attaching Hinges To The Tabletop
Mark hinge positions on both the tabletop and the base carefully. Use a pencil and ruler for straight lines. Drill small pilot holes to avoid wood splitting. Attach hinges with screws that fit snugly but do not strip the wood.
Secure the hinges tightly but do not overtighten. This can damage the screw holes. Check that the hinge aligns perfectly with the edge of the tabletop. Misalignment causes uneven folding and stress on the mechanism.
Ensuring Smooth Folding Action
Test the folding motion several times during installation. The tabletop should open and close without catching or sticking. Lubricate the hinges with a small amount of oil for quiet, smooth movement.
Adjust screws if the fold feels too tight or too loose. The tabletop must stay firm when open and fold flat when closed. A smooth action adds to the table’s durability and ease of use.
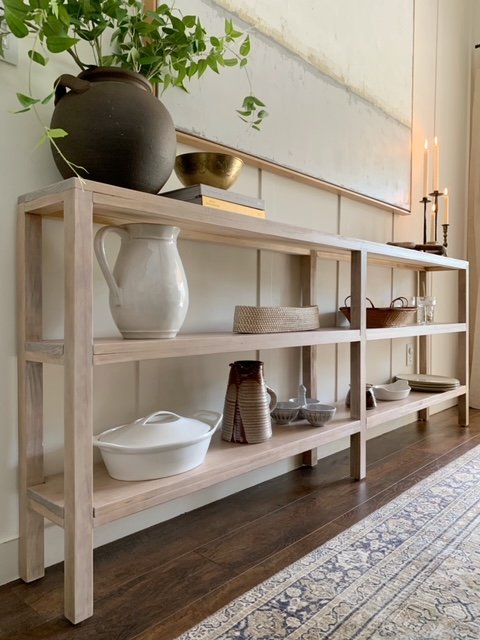
Credit: www.hartleyhomedesign.com
Finishing Touches
Finishing touches are the final steps that bring your fold out console table to life. These details protect your work and add style. Taking time here makes your table last longer and look great.
Applying Paint Or Stain
Choose paint or stain based on the look you want. Paint hides wood grain but offers many colors. Stain shows the wood texture and gives a natural feel. Use a brush or cloth to apply evenly. Let it dry fully between coats. Two or three coats work best for good coverage.
Sealing The Surface
Sealing protects your table from water and scratches. Use a clear polyurethane or varnish. Apply thin layers with a brush. Allow each coat to dry before adding the next. Sand lightly between coats for a smooth finish. Sealing keeps the surface strong and easy to clean.
Adding Decorative Elements
Decorative details make your table unique. Add knobs, handles, or metal accents for style. Use stencils or decals for patterns on the surface. Small touches like these enhance the table’s charm. Keep decorations simple for a clean, elegant look.
Testing And Adjustments
Testing and making adjustments is a crucial step in building a fold out console table. This stage ensures your table works smoothly and stays safe to use. Small fixes can improve the table’s function and durability.
Careful testing helps spot issues early. It saves time and effort later. Focus on stability, hinge movement, and overall fit.
Checking Stability
Place the table on a flat surface. Press gently on the top and sides. Watch for any wobbling or shaking. A stable table feels solid and firm. If it moves, tighten the screws or add support. Stability is key for safety and daily use.
Adjusting Hinges
Open and close the fold out parts slowly. Listen for squeaks or catch points. Hinges should move smoothly without force. Tighten or loosen screws on the hinges as needed. Adjust until the folding action feels easy and natural.
Final Inspection
Look over the entire table carefully. Check for loose screws, rough edges, or gaps. Make sure all parts align perfectly. Test the fold out mechanism multiple times. Fix any problems before using the table regularly. A thorough final check guarantees a quality build.

Credit: www.spryinterior.com
Frequently Asked Questions
What Materials Are Needed To Build A Fold Out Console Table?
You need wood panels, hinges, screws, wood glue, sandpaper, and paint or stain. Choose durable wood like oak or pine for strength and appearance. Hinges should be sturdy to support the fold-out mechanism smoothly.
How Do You Install Hinges On A Fold Out Console Table?
Align the hinges evenly on the tabletop and folding panels. Pre-drill screw holes to prevent wood splitting. Secure hinges with screws tightly but avoid over-tightening to allow smooth folding action.
What Tools Are Essential For Building A Fold Out Console Table?
Basic tools include a saw, drill, screwdriver, measuring tape, and clamps. Sandpaper or an electric sander is needed for smoothing edges. Optional tools are a wood planer and a level for precision.
How Can I Make The Fold Out Console Table Sturdy?
Use strong wood and high-quality hinges. Reinforce joints with wood glue and corner brackets. Ensure all screws are tightly fastened and check stability before finishing with paint or stain.
Conclusion
Building a fold out console table saves space and adds style. You only need basic tools and a clear plan. Take your time and follow each step carefully. This project suits small rooms or tight spaces well. Enjoy the feeling of making something useful with your hands.
Your new table will fold easily and look great. Try customizing it with your favorite colors or handles. Simple projects like this bring pride and practical benefits. Start today and see how fun woodworking can be.