Are you looking for a simple way to organize your child’s growing collection of books? Building a kids bookshelf might be easier than you think.
Imagine having a special spot that not only keeps books tidy but also encourages your little one to read more. In this guide, you’ll discover step-by-step tips to create a sturdy, colorful bookshelf that fits perfectly in your child’s room.
Ready to turn a few basic materials into a fun and functional piece? Keep reading, and you’ll have your own kids bookshelf built in no time.
Credit: angelamariemade.com
Choosing The Right Materials
Choosing the right materials is an important step in building a kids bookshelf. The materials must be safe, durable, and easy to work with. This ensures the bookshelf lasts long and stays safe for children. Selecting the proper wood, finishes, and tools makes the project easier and more enjoyable.
Selecting Safe Wood Types
Choose wood that is strong but light. Pine, poplar, and birch are good options. These woods are easy to cut and sand. Avoid woods with strong smells or toxic resins. Make sure the wood has no splinters or cracks. Sand the wood smooth to protect little hands.
Picking Kid-friendly Finishes
Use finishes that are non-toxic and water-based. These finishes are safe for children. They protect the wood and make it easy to clean. Avoid finishes with strong chemicals or fumes. Choose finishes that dry quickly and do not peel. Bright colors or clear finishes work well for kids’ rooms.
Gathering Necessary Tools
Prepare simple tools for the project. A saw, drill, screwdriver, measuring tape, and sandpaper are needed. Use clamps to hold pieces steady. Safety gear like goggles and gloves protect you during work. Keep tools organized for easy access. Using the right tools helps the project go smoothly.
Designing The Bookshelf
Designing a kids bookshelf is an exciting first step in building a special place for books. It sets the foundation for a functional and fun piece. Thoughtful design makes the bookshelf safe and enjoyable for children. Planning well ensures the shelf fits the room and holds the right amount of books.
Consider the child’s needs and the room’s space carefully. The design should invite kids to explore books and keep their space tidy. Small details make a big difference in how the shelf looks and works.
Deciding On Size And Shape
Choose a size that fits the room and the child’s height. A low bookshelf helps kids reach books safely. Think about the shape. Simple rectangular shelves work well. Curved or angled designs can add interest but keep them stable. Avoid tall or narrow shapes that may tip over.
Incorporating Fun Elements
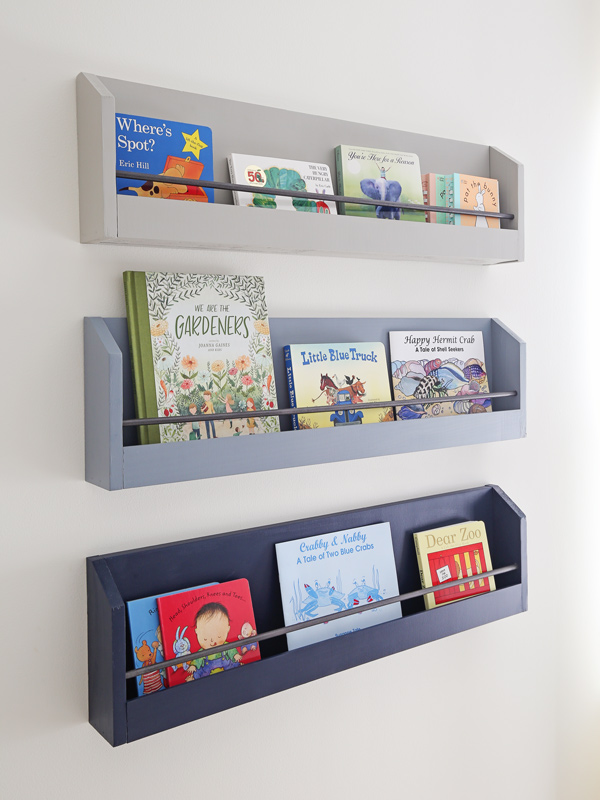
Add playful features to make the shelf inviting. Bright colors or themed paint create a cheerful look. Shapes like stars or animals on the sides add charm. Open shelves let kids see book covers easily. Adding a small seat or steps can make reading cozy and fun.
Planning Storage Spaces
Divide the shelf into different sections. Use large spaces for picture books and smaller ones for paperbacks. Include bins or baskets for toys and supplies. A mix of open and closed storage keeps things neat. Make sure shelves are sturdy and easy to clean.
Preparing The Workspace
Preparing the workspace is the first step in building a kids bookshelf. A clean and organized area helps you work faster. It also keeps the project safe and smooth. Taking time to set up your space makes a big difference.
Setting Up A Safe Area
Choose a flat surface with plenty of room. Make sure the area has good light. Keep children and pets away while working. Clear away any objects that may cause trips or falls. Safety gear, like gloves and goggles, should be easy to reach. A safe space reduces accidents and stress.
Organizing Tools And Materials
Gather all tools before starting. Place screws, nails, and small parts in a container. Keep your hammer, screwdriver, and measuring tape nearby. Organize wood pieces by size and shape. This saves time and avoids frustration. An orderly workspace helps the project flow smoothly.
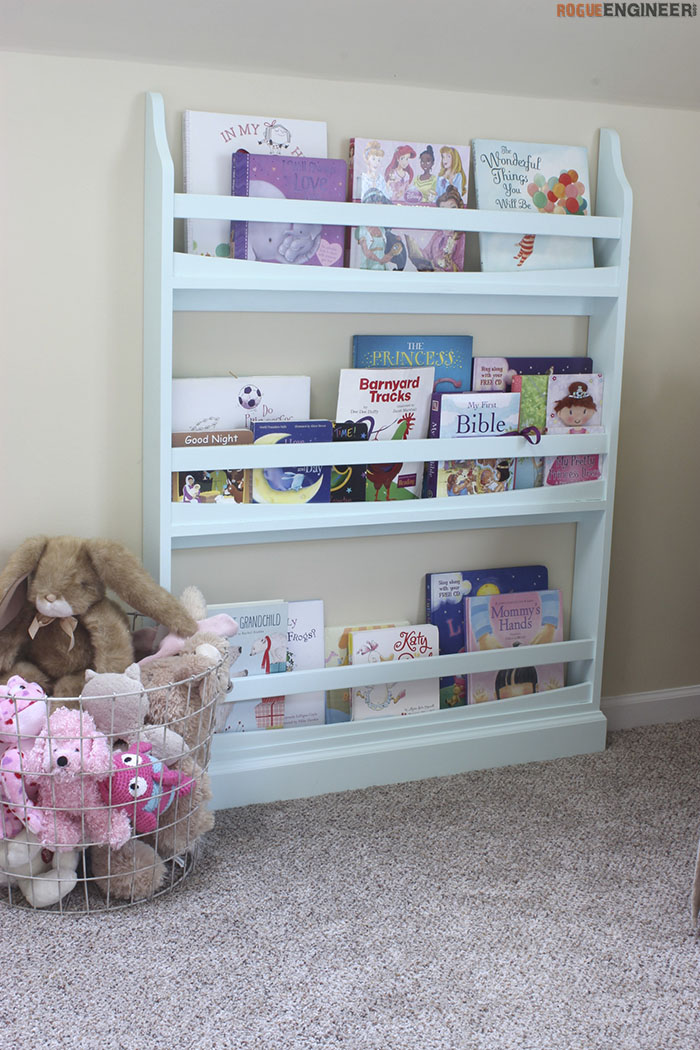
Credit: rogueengineer.com
Cutting And Assembling Parts
Building a kids bookshelf starts with cutting and assembling its parts carefully. This step shapes the wood pieces that will fit together to form a sturdy shelf. Taking your time here ensures the bookshelf looks good and lasts long. Follow these simple steps to get the job done right.
Measuring And Cutting Wood
Measure each piece of wood precisely. Use a tape measure and mark the wood with a pencil. Double-check your marks before cutting. Cut the wood using a saw, following your measurements closely. Straight cuts make assembly easier and safer.
Sanding Edges Smooth
Sand every edge after cutting. Use sandpaper to remove rough spots and splinters. Smooth edges prevent injuries and give a clean finish. Spend extra time on corners to make them safe for kids.
Nailing And Gluing Components
Apply wood glue to join parts firmly. Press pieces together and wipe off extra glue. Use nails or screws to secure the joints. This combination keeps the shelf strong and stable. Check each connection before moving to the next.
Painting And Decorating
Painting and decorating a kids bookshelf turns a simple project into a fun activity. It adds color and personality to the bookshelf. Children love seeing bright colors and playful designs. This step makes the bookshelf more inviting and special for them. It also protects the wood and keeps the bookshelf looking new for a long time.
Choosing Kid-friendly Paints
Pick paints that are safe for children. Use non-toxic, water-based paints. These paints have less smell and dry faster. They are gentle on kids’ health and the environment. Choose colors that match the room or your child’s favorite shades. Bright colors like blue, red, and yellow work well.
Adding Creative Designs
Decorate with simple shapes and patterns. Use stencils or stickers for easy designs. Let your child help with painting dots, stripes, or stars. This makes the bookshelf unique and personal. You can also paint favorite animals or cartoon characters. Keep designs clear and not too crowded.
Sealing For Durability
Seal the paint with a clear, child-safe finish. This protects the colors from scratches and spills. Use water-based polyurethane or acrylic sealers. Apply two or three thin coats for best results. Make sure the sealant is dry before using the bookshelf. This step keeps the bookshelf looking great for years.

Credit: www.thehandymansdaughter.com
Safety Tips And Final Touches
Building a kids bookshelf is fun, but safety is key. The final touches make the shelf both safe and attractive. Kids love a tidy space that feels cozy and secure. Follow simple safety tips to keep the bookshelf steady and safe for children.
Checking Stability
Test the bookshelf on a flat surface. Make sure it does not wobble or lean. Press gently on the top and sides. If it moves, tighten screws or add support. Stability prevents accidents from tipping over. A stable shelf protects curious kids and their books.
Securing To Walls
Attach the bookshelf to the wall using brackets or straps. Use anchors if you have drywall. This stops the shelf from tipping forward. Wall attachment is important for tall or heavy shelves. Secure shelves reduce risks and keep kids safe during play.
Encouraging Kids To Organize
Teach children to put books back neatly. Use labels or colorful bins to help sorting. Organizing makes the shelf look nice and easy to use. It also builds good habits and respect for books. A neat shelf invites kids to read and enjoy their space.
Frequently Asked Questions
What Materials Are Best For Building A Kids Bookshelf?
Wood like pine or plywood is ideal for kids bookshelves. These materials are sturdy, safe, and easy to work with. Avoid toxic finishes and choose non-toxic paint for child safety. Lightweight materials also make the bookshelf easy to move and adjust.
How To Design A Safe Bookshelf For Children?
Ensure the bookshelf has rounded edges and no sharp corners. Use non-toxic finishes and secure it to the wall to prevent tipping. Keep shelves low and stable for easy access. Avoid heavy decor or items that can fall and harm kids.
What Tools Do I Need To Build A Kids Bookshelf?
Basic tools include a saw, drill, screwdriver, measuring tape, and sandpaper. You may also need clamps and a level for precision. Choose tools that you are comfortable using to ensure safety and accuracy during the build process.
How Much Time Does Building A Kids Bookshelf Take?
Building a simple kids bookshelf usually takes 2 to 4 hours. Time depends on your skill level and design complexity. Proper planning and preparation can speed up the process. Allow extra time for painting and drying.
Conclusion
Building a kids bookshelf brings fun and order together. It keeps books neat and easy to find. Kids learn to care for their own space. You can choose colors and shapes they like. This project grows with your child’s needs.
A simple bookshelf helps create a love for reading. Try making one today and enjoy the process. Little steps lead to big smiles and happy reading.
