Are you tired of cluttered laundry rooms and messy closets? Imagine having a beautiful linen cabinet that keeps your towels and sheets neat, paired with a clothes hamper that hides away dirty laundry effortlessly.
Building your own linen cabinet and clothes hamper can save you money and give you exactly what you need for your space. In this guide, you’ll discover simple, step-by-step instructions to create both pieces with ease—even if you’re new to woodworking.
Ready to transform your storage and bring order to your home? Keep reading, and you’ll learn how to build these must-have storage solutions yourself.
Materials And Tools Needed
Building a linen cabinet and clothes hamper requires the right materials and tools. Choosing the correct wood, tools, and hardware ensures a strong and useful piece. This section covers everything needed to start your project with confidence.
Wood Types And Selection
Choose wood that is sturdy and easy to work with. Pine and plywood are popular choices for beginners. Pine is affordable and has a nice grain. Plywood is strong and less likely to warp. Avoid soft woods that may dent easily. Also, consider the wood’s finish and color for your room’s style.
Essential Tools For The Project
You need basic tools to build the cabinet and hamper. A saw will cut the wood to size. A drill helps make holes and drive screws. Sandpaper smooths rough edges. A measuring tape ensures accurate cuts. A screwdriver tightens screws. Clamps hold parts together while gluing. Safety gear like goggles and gloves protects you during work.
Hardware And Accessories
Hardware holds the project together and adds function. Use wood screws for strong joints. Hinges are necessary for cabinet doors. Handles or knobs make opening easy. Consider small wheels if you want a movable hamper. Use nails or brads for extra support. Choose hardware that matches your wood’s style and color.

Credit: www.blesserhouse.com
Planning Your Linen Cabinet
Planning your linen cabinet is the first step for a successful project. It helps organize your space and keeps your linens tidy. Careful planning makes building easier and ensures the cabinet fits your needs.
Choosing The Right Dimensions
Measure the area where you want to place the cabinet. Consider the height, width, and depth carefully. The cabinet should fit comfortably without blocking walkways. Think about the size of your linens and how much storage you need. A well-sized cabinet keeps everything neat and accessible.
Designing Shelves And Compartments
Plan shelves to hold different types of linens. Use adjustable shelves for flexibility. Include smaller compartments for items like pillowcases and towels. Open shelves make it easy to see your linens. Closed compartments protect delicate fabrics from dust. Organize by size or type to save time when searching.
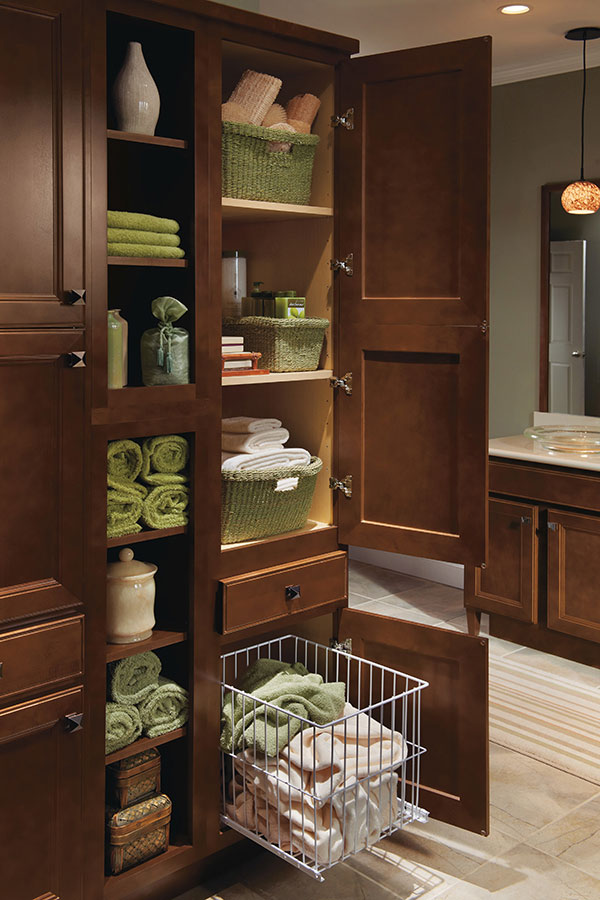
Incorporating The Clothes Hamper
Decide where to place the clothes hamper in the cabinet. It should be easy to reach but not in the way. Use a pull-out hamper for convenience. Choose a hamper size that fits your laundry needs. Ventilation is important to keep clothes fresh. A well-placed hamper adds function without clutter.
Cutting And Preparing Wood Pieces
Cutting and preparing wood pieces is the first step in building your linen cabinet and clothes hamper. Accurate cuts ensure the pieces fit well and the project looks neat. Proper preparation helps avoid mistakes and saves time during assembly. Follow these steps carefully for best results.
Measuring And Marking
Measure each wood piece twice for accuracy. Use a tape measure and pencil for clear marks. Mark straight lines with a ruler or square tool. Double-check your measurements before cutting. Precise marking guides your saw and prevents errors.
Safe Cutting Techniques
Use a sharp saw for clean cuts. Hold the wood steady with clamps or a workbench. Cut slowly and follow your marked lines. Always wear safety goggles and gloves. Keep your fingers away from the blade. A steady hand and safety gear protect you and improve results.
Sanding And Smoothing Edges
After cutting, sand all edges with fine-grit sandpaper. Smooth edges prevent splinters and give a polished look. Sand in the direction of the wood grain. Check for rough spots and sand them again. Clean dust before moving to assembly for a better finish.
Assembling The Cabinet Frame
Building a linen cabinet and clothes hamper starts with assembling the cabinet frame. This part creates the basic shape and structure. A strong frame ensures your cabinet stays stable and lasts long. Focus on fitting pieces tightly and securing them well. Take your time to align everything properly. This will make later steps easier and improve the cabinet’s look.
Joining Side Panels And Base
Start by attaching the side panels to the base. Use wood glue on the edges for a firm bond. Then, screw the panels into the base from inside. Make sure the panels stand straight and do not tilt. Check corners with a square tool to keep angles perfect. Tight joints prevent wobbling later.
Securing Shelves In Place
Next, place the shelves inside the frame. Mark shelf positions evenly for balanced storage. Attach shelves with screws or shelf pins depending on your design. Use a level to keep shelves flat and straight. Shelves must hold weight without bending or shifting.
Adding Support Structures
Support structures boost cabinet strength. Add horizontal braces behind shelves or at the back panel. Use corner brackets or wooden cleats for extra firmness. Screw these supports tightly into frame parts. This step prevents frame sagging and adds durability.
Constructing The Clothes Hamper
Constructing the clothes hamper is a key step in your linen cabinet project. This part holds all dirty clothes neatly and keeps your space tidy. A well-built hamper fits perfectly inside the cabinet and lasts for years. Follow these steps to build a strong and useful clothes hamper.
Building The Hamper Box
Start by cutting four wooden panels for the hamper sides. Use sturdy wood like pine or plywood for strength. Join the panels with wood glue and screws at the edges. Make sure corners are square and secure. The bottom panel fits inside the box frame. Attach it firmly with screws to hold weight well.
Attaching A Hinged Lid Or Door
Choose between a lid or a door for easy access. For a lid, fix two small hinges on one side of the top panel. Attach the other side of hinges to the hamper box top edge. For a door, use hinges on one vertical side. Check the lid or door moves smoothly. Add a simple handle for easy opening.
Installing A Removable Bag Or Basket
Place a fabric bag or basket inside the hamper for easy laundry handling. Attach hooks or Velcro strips inside the box to hold the bag. Make sure the bag fits well and removes easily. Choose a washable fabric for the bag to keep it clean. This setup makes laundry chores faster and neater.

Credit: www.diamondatlowes.com
Finishing Touches
Finishing touches bring your linen cabinet and clothes hamper to life. These final steps protect the wood and improve the look. Small details make the piece both useful and beautiful. Focus on paint or stain, hardware, and ventilation. Each choice adds style and function.
Applying Paint Or Stain
Choose paint or stain that fits your room’s style. Paint gives a smooth, colorful finish. Stain shows the wood’s natural grain. Apply a primer or wood conditioner first. This helps the color stick better. Use thin, even coats for a clean look. Let each coat dry fully before the next. Seal with a clear topcoat to protect the surface.
Installing Handles And Knobs
Select handles or knobs that match your cabinet’s style. Measure and mark where to place them. Use a drill to make holes carefully. Attach the hardware securely with screws. Handles add grip; knobs add charm. Choose metal for durability or wood for a soft touch. Proper installation makes opening doors easy and smooth.
Adding Ventilation For The Hamper
Ventilation prevents damp smells inside the hamper. Cut small holes or slots in the hamper sides or back. Use a drill or jigsaw with care. Cover openings with mesh to keep bugs out. Good airflow dries clothes faster and keeps the space fresh. Ventilation adds a practical feature without ruining the look.
Maintenance Tips For Longevity
Proper care extends the life of your linen cabinet and clothes hamper. Regular maintenance keeps them looking fresh and working well. Small efforts prevent big problems later.
Cleaning And Care
Dust your cabinet and hamper often. Use a soft cloth to avoid scratches. Wipe spills right away to stop stains. Mild soap and water work best. Avoid harsh chemicals that damage the wood or fabric.
Repairing Minor Damages
Check for loose screws or hinges regularly. Tighten them to keep the structure stable. Fill small scratches with wood filler or marker. Replace torn fabric or broken parts quickly. Fixing early prevents bigger damage later.
Upgrading Features Over Time
Add new handles or knobs for a fresh look. Install liners inside drawers for easy cleaning. Use baskets or dividers to organize better. Upgrade wheels or feet to protect floors. Small upgrades improve function and style.
Credit: www.homecrestcabinetry.com
Frequently Asked Questions
What Materials Are Needed To Build A Linen Cabinet?
You need plywood, wood glue, screws, hinges, knobs, and paint. Quality wood ensures durability. Tools like saws and drills are essential for assembly and finishing.
How Do I Design A Clothes Hamper Inside The Cabinet?
Plan a removable or built-in hamper with ventilation. Use lightweight baskets or fabric liners. Ensure easy access and enough space to separate laundry types.
What Is The Best Finish For A Linen Cabinet?
Use water-based polyurethane or paint for durability and moisture resistance. Choose a finish that matches your room décor and protects the wood from wear.
How Long Does Building A Linen Cabinet And Hamper Take?
A basic project typically takes 1-3 days. Time varies with design complexity and skill level. Proper planning and materials speed up the process.
Conclusion
Building a linen cabinet and clothes hamper can be simple and fun. Start with a clear plan and basic tools. Take your time to measure and cut carefully. Use quality materials to make your project last longer. Adding these pieces helps keep your space neat and organized.
You will enjoy having a custom storage solution made by yourself. Try this project to improve your home’s look and function. Small steps lead to great results. Keep practicing, and your skills will grow.


