Are you looking to save space and create a stylish, functional room? Building a loft bunk bed with a desk underneath might be the perfect solution for you.
Imagine having a cozy bed up high and a practical workspace right below it, all in one compact design. This setup not only maximizes your room but also keeps everything organized and within reach. In this guide, you’ll discover simple, step-by-step instructions to build your own loft bunk bed with a desk.
By the end, you’ll have a unique piece of furniture tailored to your needs. Ready to transform your space and boost your productivity? Let’s dive in!
Planning Your Loft Bunk Bed
Planning your loft bunk bed is the first step toward a practical and stylish space. Thoughtful planning saves time and money. It helps avoid mistakes during building. Consider the room’s size, the bed’s design, and your needs. A well-planned loft bed with a desk fits perfectly and looks great.
Choosing The Right Design
Select a design that suits the room’s shape and size. Decide if you want a single or double bed. Think about the desk’s position—underneath or beside the bed. Designs can be simple or include shelves and drawers. Choose one that matches your style and needs.
Measuring Your Space
Measure the room carefully before buying materials. Check the ceiling height to ensure enough headroom. Measure the floor area where the bed will go. Leave space for moving around and for the desk chair. Accurate measurements help create a comfortable setup.
Selecting Materials And Tools
Pick strong and safe materials like solid wood or metal. Choose wood that resists warping and is easy to work with. Get screws, brackets, and bolts for secure assembly. Prepare tools such as a drill, saw, measuring tape, and screwdriver. Good materials and tools make building easier and safer.
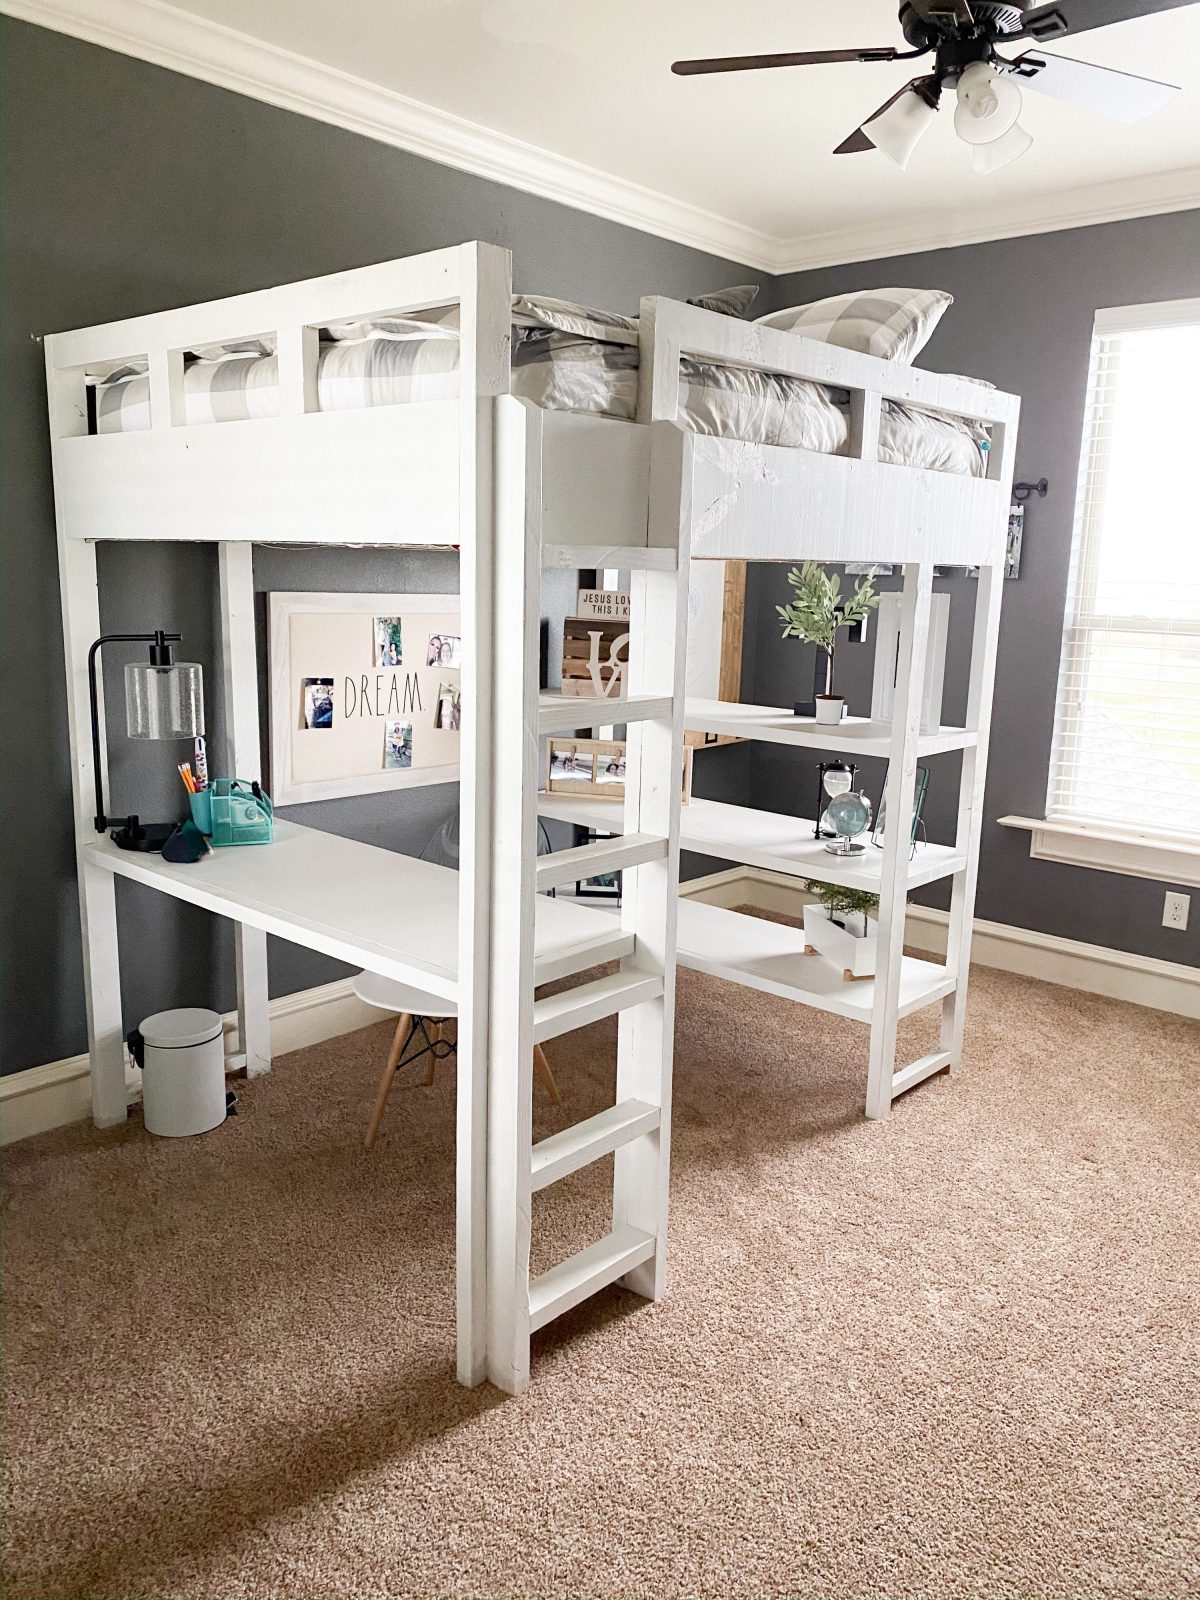
Credit: www.shanty-2-chic.com
Preparing The Workspace
Preparing your workspace is the first step in building a loft bunk bed with a desk. A clean and organized area helps you work faster and safer. It also prevents mistakes and injuries. Take time to set up your space before you start cutting or assembling.
Clearing And Organizing
Remove any clutter from the room. Clear the floor and surfaces where you will work. Group all your tools and materials in one place. Keep screws, nails, and small parts in labeled containers. This saves time searching for items. Make sure there is enough light in the workspace. Good lighting helps you see measurements and details clearly.
Safety Precautions
Wear safety glasses to protect your eyes from dust and splinters. Use gloves to avoid cuts and splinters on your hands. Keep a first aid kit nearby for minor injuries. Ensure your power tools have safety guards and work properly. Avoid loose clothing or jewelry that can get caught. Make sure the area is well ventilated to reduce dust and fumes. Always follow the tool manufacturer’s safety instructions.
Cutting And Assembling The Frame
Cutting and assembling the frame is the first big step in building your loft bunk bed with desk. This part shapes the entire bed’s structure. It needs careful measuring and steady hands. Safety is key, so always wear protective gear while cutting wood.
Start by preparing your tools. A saw, measuring tape, pencil, and clamps will help a lot. Precise cuts make the frame strong and stable. Take your time to avoid mistakes.
Cutting Lumber To Size
Measure each piece of lumber twice before cutting. Mark clear lines to guide your saw. Use a straight edge to keep cuts clean. Cut all pieces according to your bed’s design plan. Smooth rough edges with sandpaper after cutting.
Building The Bed Frame
Lay out the cut pieces on a flat surface. Start by assembling the side rails and end panels. Use wood screws or bolts to join the parts securely. Check that corners form right angles. Tight joints create a sturdy frame that lasts.
Adding Support Beams
Support beams hold the mattress and desk weight. Position them evenly between the side rails. Attach beams firmly using screws or brackets. Double-check their placement for balance. Proper support prevents sagging and keeps the bed safe.
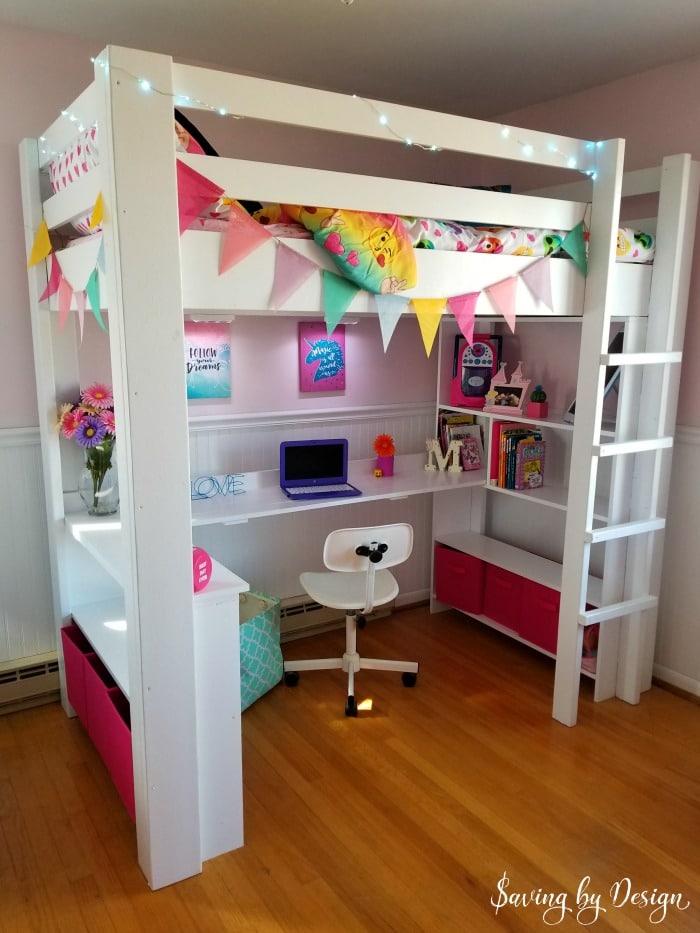
Credit: savingbydesign.com
Constructing The Desk Area
Constructing the desk area under your loft bunk bed adds great value. It creates a practical workspace without taking extra room. This section guides you through designing, assembling, and attaching the desk. Follow the steps carefully to build a sturdy and functional desk.
Designing The Desk Layout
Start by measuring the space under the loft bed. Decide the desk width and depth for comfort. Plan enough room for a chair and leg space. Consider adding shelves or drawers for extra storage. Use simple shapes to keep the design strong and easy to build. Sketch the layout on paper for clear guidance.
Assembling The Desk Surface
Choose a smooth, durable wood board for the desk surface. Sand the edges to avoid splinters. Cut the board to match your design dimensions. Attach support beams underneath for stability. Use screws and wood glue to secure all parts firmly. Check the surface for evenness and smoothness before moving on.
Attaching Desk To Bed Frame
Align the desk surface with the loft bed frame carefully. Use brackets or metal braces to connect the desk to the frame. Secure the desk with screws, ensuring no wobble. Double-check the attachment points for safety. Test the desk by applying gentle pressure. Make sure it holds steady before use.
Installing Ladder And Guardrails
Installing the ladder and guardrails is a key step in building your loft bunk bed with desk. These parts keep the bed safe and easy to use. A strong ladder makes climbing safe and simple. Guardrails stop falls during sleep or play. Take care to fit both well.
Building A Sturdy Ladder
Start by choosing strong wood for the ladder. Use thick, smooth boards to avoid splinters. Cut the side rails to the bed height. Attach wide steps evenly between the rails. Secure each step with screws or bolts for strength. Check the ladder fits tight against the bed frame. Test the ladder by putting weight on it. It should not wobble or shift. Sand all edges smooth to prevent injuries.
Fitting Safety Guardrails
Measure the bed’s open sides to fit guardrails properly. Use wood pieces at least 3 inches thick for safety. Attach guardrails along the bed edges with strong screws. Make sure the rails stand at least 5 inches above the mattress. Leave no gaps where a child could slip through. Fix the rails firmly to avoid any movement. Check for sharp corners and sand them smooth. Guardrails add peace of mind during night sleep.
Finishing Touches
Finishing touches bring your loft bunk bed with desk to life. These steps protect the wood and improve the look. They also make the bed safer and more comfortable. Spend time on these details for a polished, lasting result.
Sanding And Smoothing
Start by sanding all surfaces. Use medium-grit sandpaper first. This removes rough spots and splinters. Then, switch to fine-grit for a smooth finish. Sand edges and corners carefully. This step prevents scratches and makes painting easier.
Painting Or Staining
Choose paint or stain to match your room style. Paint hides wood grain and offers many colors. Stain shows the wood’s natural beauty. Apply thin, even coats with a brush. Let each coat dry fully before the next. This protects the wood and adds charm.
Adding Accessories
Add shelves, hooks, or lighting for extra function. A small lamp on the desk helps with homework. Hooks on the side hold bags or jackets. Soft cushions or a mattress topper increase comfort. Accessories make the bed more useful and cozy.
Maintenance And Safety Tips
Maintaining and ensuring safety for your loft bunk bed with a desk is very important. It keeps the bed strong and safe to use. Regular care helps avoid accidents. It also makes your bed last longer. Follow these tips to keep your loft bed secure and tidy.
Regular Checks
Check the bed frame often for loose screws or bolts. Tighten any parts that feel wobbly. Look for cracks or damage in the wood or metal. Make sure the ladder is steady and secure. Test the desk area to ensure it stays firm. Fix any problems as soon as you find them. This stops accidents before they happen.
Keeping The Area Organized
Keep the space under and around the bed clean. Avoid clutter that can cause trips or falls. Store books and supplies neatly on shelves or in bins. Use cable ties to manage desk wires and cords. This prevents tangling and tripping hazards. A tidy area makes the loft bed safer and more comfortable to use.

Credit: www.youtube.com
Frequently Asked Questions
What Materials Are Needed To Build A Loft Bunk Bed With Desk?
You need wood boards, screws, brackets, a drill, sandpaper, paint, and measuring tools. Choose sturdy, high-quality wood for safety and durability. Also, buy hardware like brackets and screws suitable for weight support.
How Long Does It Take To Build A Loft Bunk Bed?
Building a loft bunk bed with a desk usually takes 1-3 days. Time varies by skill level, tools, and design complexity. Planning and preparation speed up the process and ensure accuracy.
What Safety Tips Should I Follow When Building A Loft Bed?
Ensure all joints are secure and use strong screws. Sand surfaces to avoid splinters. Install guardrails and a sturdy ladder. Double-check weight limits and stability before use, especially for children.
Can I Customize The Desk Size Under The Loft Bed?
Yes, you can customize the desk size to fit your space. Measure your room carefully and adjust desk dimensions accordingly. Custom designs improve comfort and functionality for studying or working.
Conclusion
Building a loft bunk bed with a desk saves space and adds style. Follow clear steps and use safe materials for the best results. Measure carefully and take your time during assembly. This project creates a cozy, functional area for work and rest.
Enjoy the extra room and the satisfaction of your handiwork. A simple plan and patience make the task easier. Try it yourself and see how useful this design can be.