Are you looking to add a personal touch to your space with a small wood bookshelf? Building one yourself is easier than you might think.
Imagine having a custom shelf that perfectly fits your room and holds your favorite books or treasures. This guide will walk you through simple steps to create a sturdy, beautiful bookshelf. By the end, you’ll have not just a piece of furniture, but something you built with your own hands.
Ready to get started? Let’s dive in!
Materials And Tools Needed
Building a small wood bookshelf requires careful planning. Choosing the right materials and tools sets the foundation. This section covers everything needed before starting your project. Knowing what to prepare saves time and frustration. Gather your supplies and get ready to build with confidence.
Choosing The Right Wood
Select wood that is strong and easy to work with. Pine, oak, or plywood work well for bookshelves. Pine is affordable and light. Oak is sturdy but heavier. Plywood offers smooth surfaces and resists warping. Avoid softwoods that bend or break easily. Check wood for cracks or knots before buying.
Essential Tools Checklist
Use tools that help cut, measure, and assemble the bookshelf. A saw is necessary to cut wood pieces. A drill makes holes and drives screws. A measuring tape ensures accurate dimensions. Sandpaper smooths rough edges. Clamps hold wood pieces together while gluing or screwing. A screwdriver and wood glue complete the list.
Safety Gear
Protect yourself while working with wood and tools. Wear safety goggles to shield your eyes from dust and debris. Use gloves to protect your hands from splinters. A dust mask keeps you from breathing sawdust. Wear closed-toe shoes to guard your feet from dropped tools. Always work in a well-lit, ventilated area.
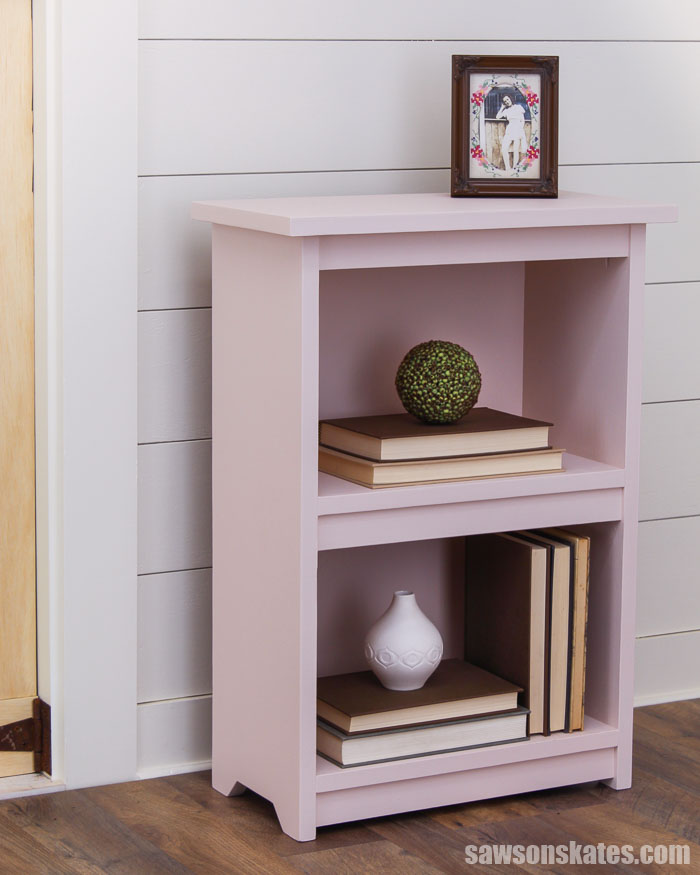
Credit: sawsonskates.com
Planning Your Bookshelf
Planning your bookshelf is the first step to making a great project. A good plan saves time and makes sure the shelf fits your space. It helps you decide on the size, shape, and style before cutting any wood. Careful planning leads to a sturdy and useful bookshelf.
Determining Shelf Size
Think about where you want to place the bookshelf. Measure the wall or corner space carefully. Decide how tall and wide the shelf should be. Consider the height of your books or items you want to store. Leave some extra space for bigger books or decorations.
Sketching Your Design
Draw a simple picture of your bookshelf on paper. Show the number of shelves and their spacing. Add details like the thickness of the wood and the back panel. This sketch helps you see the final look. It also guides you during the building process.
Measuring And Marking
Use a tape measure and pencil for accurate marks on the wood. Mark the length and width of each piece clearly. Double-check all measurements before cutting. Mark lines straight and easy to follow. Good measuring helps avoid mistakes and wasted materials.
Cutting The Wood
Cutting the wood is the first big step in building your small bookshelf. It shapes the pieces you will put together. Precise cuts make your bookshelf strong and neat.
Marking Cut Lines
Start by measuring the wood carefully. Use a pencil to draw clear lines where you will cut. Double-check the measurements. Marking helps you cut straight and avoid mistakes.
Using A Saw Safely
Choose the right saw for your wood type. Keep your hands away from the blade. Cut slowly and follow the lines closely. Wear safety glasses to protect your eyes.
Sanding Edges
After cutting, the edges might be rough. Use sandpaper to smooth them out. Sanding makes the wood safe to touch and helps paint or stain stick better.
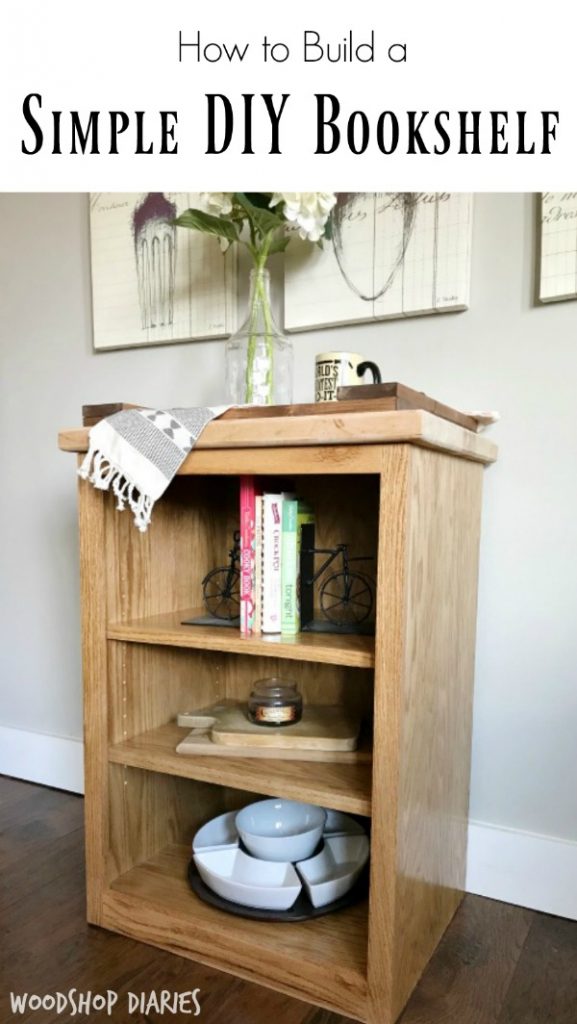
Credit: www.woodshopdiaries.com
Assembling The Frame
Assembling the frame is the key step in building a small wood bookshelf. This part brings all the pieces together. It sets the shape and strength of your shelf. Take your time to align panels and shelves correctly. A well-assembled frame supports weight and lasts longer.
Joining Side Panels And Shelves
Start by placing the side panels upright. Position the shelves between these panels. Make sure shelves fit into the grooves or marks. Use wood glue on the edges for better hold. Press panels and shelves firmly to bond.
Using Screws And Nails
Use screws to secure the shelves to side panels. Screws provide a strong and lasting hold. Drill pilot holes first to avoid wood splitting. Nails can help for quick fastening but use fewer nails. Screws work best for heavy loads.
Ensuring Stability
Check the frame for any wobble or movement. Tighten all screws and add more if needed. Use corner braces for extra support at joints. Place the frame on a flat surface to test balance. A stable frame keeps your books safe and shelf steady.
Finishing Touches
Finishing touches bring your small wood bookshelf to life. They improve its look and protect the wood. Taking time on these steps makes your project look neat and last longer. Let’s explore the key finishing steps for your bookshelf.
Filling Gaps And Holes
Wood filler hides small gaps and nail holes. Choose a filler that matches your wood color. Use a putty knife to press filler into cracks. Let it dry fully before sanding. Sand smooth for an even surface. This step creates a clean base for paint or stain.
Applying Paint Or Stain
Paint or stain changes the wood’s color and style. Stain shows the wood grain while paint covers it. Use a brush or cloth to apply evenly. Work in thin coats to avoid drips. Let each coat dry completely before adding more. This step adds beauty and personality to your shelf.
Adding Protective Coating
Protective coating seals paint or stain. It guards against scratches and water damage. Polyurethane is a common choice for shelves. Apply with a clean brush in thin layers. Allow drying time between coats. This finish keeps your bookshelf strong and looking good for years.
Tips For Maintaining Your Bookshelf
Maintaining your small wood bookshelf helps it last longer and look great. Simple care keeps the wood strong and prevents damage. Follow these tips to protect your bookshelf and enjoy it for years.
Regular Cleaning
Dust the shelves often with a soft cloth. Use a dry or slightly damp cloth for best results. Avoid harsh cleaners that can damage the wood finish. Clean spills quickly to prevent stains or warping.
Avoiding Overloading
Do not put too many books or heavy items on one shelf. Too much weight can cause shelves to bend or break. Spread your books evenly across all shelves. Use brackets or supports for extra strength if needed.
Repairing Minor Damages
Fix small scratches with a wood touch-up pen or wax stick. Tighten loose screws or nails to keep the bookshelf steady. Fill small cracks with wood filler and sand it smooth. Early repairs stop bigger problems later.

Credit: www.youtube.com
Frequently Asked Questions
What Tools Are Needed To Build A Small Wood Bookshelf?
You need basic tools like a saw, drill, screwdriver, measuring tape, and clamps. Sandpaper and wood glue also help for smooth finishing and sturdy joints.
How Much Wood Is Required For A Small Bookshelf?
Typically, one or two wooden boards measuring around 1”x12”x6’ are enough. The exact amount depends on your bookshelf’s size and design.
How Do I Ensure The Bookshelf Is Sturdy?
Use quality wood, strong screws, and wood glue at joints. Clamp the pieces tightly while the glue dries for extra stability.
Can I Customize The Bookshelf Size Easily?
Yes, adjust the length and height measurements before cutting. Custom sizes allow fitting your space perfectly and meeting storage needs.
Conclusion
Building a small wood bookshelf can be simple and rewarding. Follow the steps carefully and take your time. You will create a useful piece for your home. Enjoy the process and learn from each step. This project helps improve your skills and confidence.
Now, you have a sturdy bookshelf to hold your favorite books. Try customizing it with paint or stains later. Keep practicing woodworking to build more furniture easily.