Looking to add a sturdy, safe ladder to your bunk bed? Building your own wooden ladder is easier than you might think, and it gives you full control over the size, style, and strength.
Imagine having a ladder that fits perfectly, looks great, and saves you money. In this guide, you’ll find simple, step-by-step instructions to create a ladder that meets your needs. Keep reading, and you’ll be climbing up and down with confidence in no time.
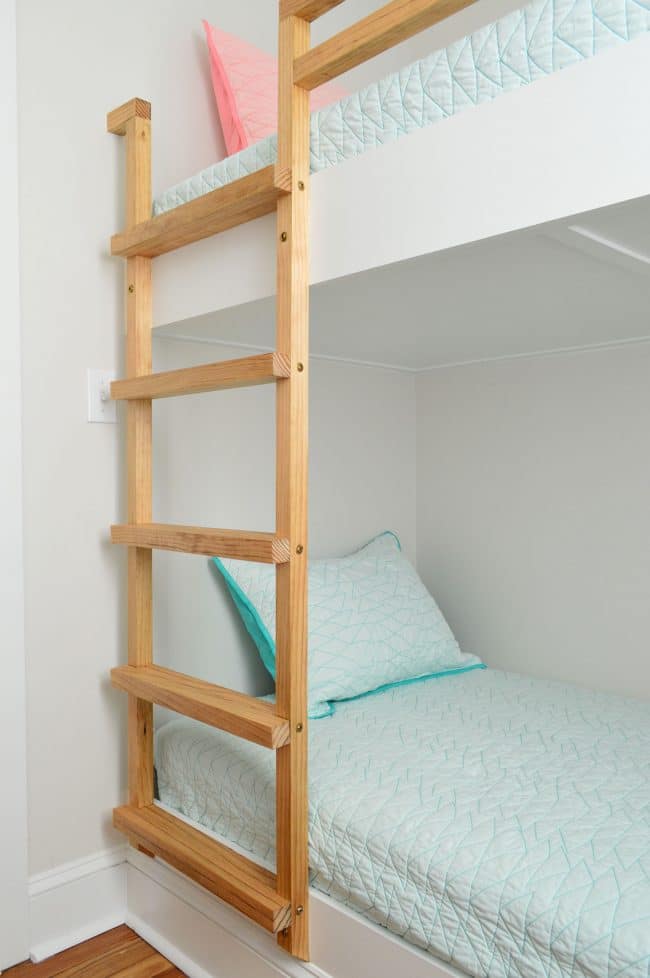
Credit: www.younghouselove.com
Materials And Tools Needed
Building a wooden ladder for a bunk bed needs the right materials and tools. Choosing good supplies helps make a strong and safe ladder. Preparing your workspace and gathering what you need keeps the project smooth and quick.
Selecting The Right Wood
Use sturdy wood like pine or oak for the ladder. These woods hold weight well and last long. Avoid soft or weak wood that can break easily. Make sure the wood is smooth and free of cracks. Cut the wood into straight, even pieces for better safety.
Essential Tools For The Project
Have these tools ready before starting. A saw to cut wood to size. A drill to make holes for screws. Sandpaper to smooth sharp edges. Measuring tape to get exact lengths. A screwdriver or drill bit to fasten screws. A square tool to keep corners right angled.
Safety Gear To Use
Protect yourself during work. Wear safety glasses to shield your eyes. Use gloves to guard hands from splinters. Put on a dust mask to avoid inhaling wood dust. Wear closed shoes to protect feet from falling wood. Keep your clothes tight to avoid catching on tools.

Credit: yellowbrickhome.com
Measuring And Planning
Measuring and planning are the first steps in building a wooden ladder for a bunk bed. Careful measurements ensure the ladder fits safely and looks good. Planning helps avoid mistakes and saves time during construction.
Determining Ladder Height
Measure the distance from the floor to the top bunk. Use a tape measure for accuracy. Add a few extra inches for the ladder to rest securely on the floor. This height guides the length of your ladder pieces.
Choosing Ladder Width
Choose a ladder width that fits the space beside the bunk bed. A width of 12 to 16 inches works well for most kids. Make sure the ladder is wide enough for easy climbing but not too wide to block room space.
Designing Step Placement
Place the steps evenly along the ladder height. Space steps about 10 to 12 inches apart for comfortable climbing. Mark each step position clearly before cutting. Proper step placement keeps the ladder safe and easy to use.
Cutting The Wood
Cutting the wood is a key step in building a sturdy ladder for a bunk bed. It shapes the main parts: the side rails and the steps. Careful measuring and cutting ensure the ladder fits well and supports weight safely. Using the right tools and techniques keeps the wood strong and smooth.
Preparing The Side Rails
Start by selecting strong, straight wood pieces for the side rails. Measure the height of the bunk bed to cut the rails to the right length. Mark the wood clearly with a pencil for precise cuts. Use a saw to cut along the marks, keeping the cuts straight and clean. The side rails must be identical in size for balance and safety.
Cutting The Steps
Next, cut the steps that connect the side rails. Measure the width between the rails to find the correct step length. Mark each step piece carefully before cutting. Use the saw to make smooth, even cuts. Make sure all steps have the same size for a neat look and safe climbing.
Sanding For Smoothness
After cutting, sand all wood pieces to remove rough edges. Use medium-grit sandpaper first to smooth the surfaces. Then, switch to fine-grit sandpaper for a soft finish. Sanding prevents splinters and makes the ladder safe to use. Check every edge and corner to ensure they feel smooth to the touch.
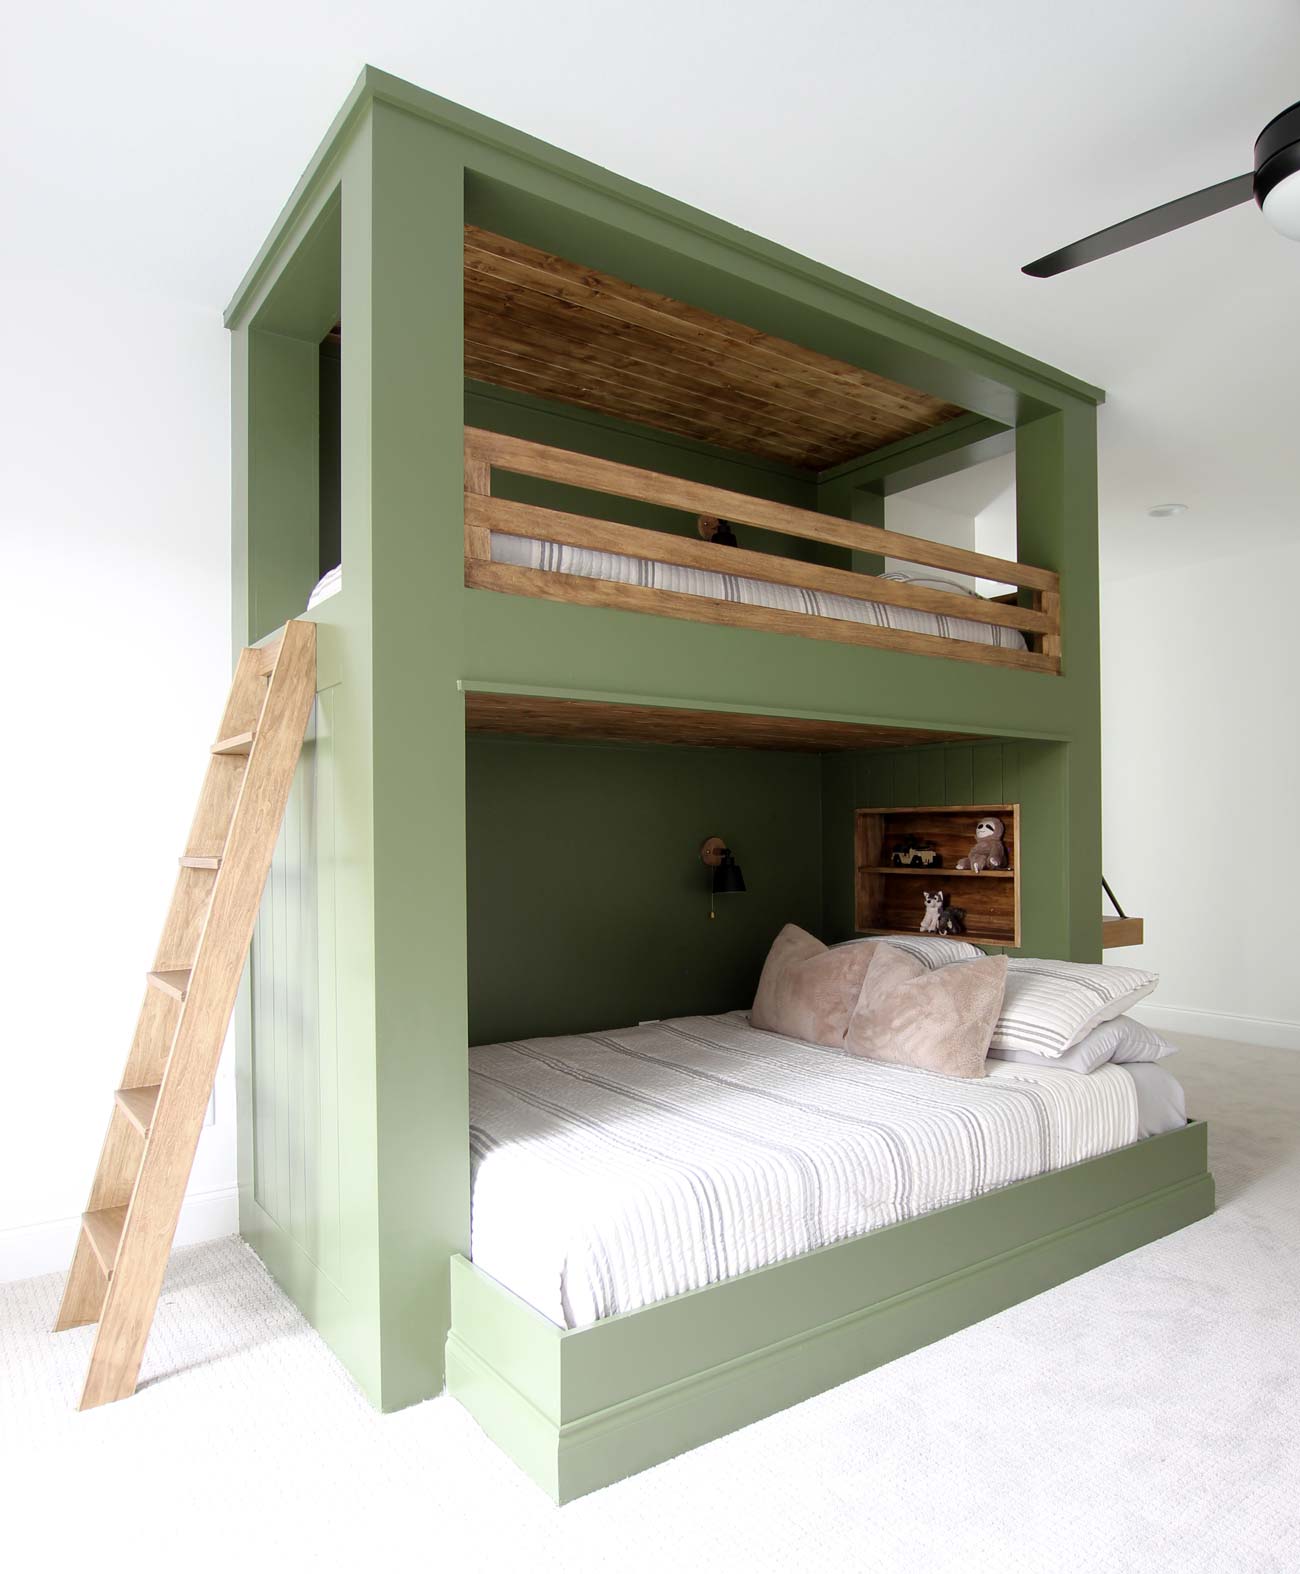
Credit: plankandpillow.com
Assembling The Ladder
Assembling the ladder is the key step in building a wooden ladder for a bunk bed. This process involves careful measuring, attaching, and testing. Each step must be secure to ensure safe climbing. Follow these simple steps for a strong, safe ladder.
Marking Step Positions
Start by measuring the length of the ladder rails. Decide how many steps you want. Mark equal spaces on both rails with a pencil. Use a ruler to keep the marks even. Double-check the marks before moving on. This ensures the steps will be level and aligned.
Attaching Steps To Rails
Place each step on the marks you made. Hold the step steady and drill pilot holes through the rails and into the step ends. Use screws to attach the steps firmly to the rails. Make sure screws are tight but not overdriven. This keeps the wood strong and prevents splitting.
Checking For Stability
Once all steps are attached, test the ladder carefully. Press on each step to check for wobble or movement. Tighten any loose screws. Shake the ladder gently to confirm it feels solid. A stable ladder is safe for daily use and lasts longer.
Finishing Touches
Finishing touches are important for a wooden ladder on a bunk bed. They make the ladder safe, strong, and nice to look at. This step protects the wood and keeps the ladder steady. Let’s explore simple ways to complete your ladder project.
Applying Wood Finish Or Paint
Choose a finish or paint that protects the wood from wear. Use a brush to apply thin, even coats. Let each coat dry fully before adding the next one. This process stops the wood from cracking or getting dirty. Pick a color that matches the room or keeps the natural look.
Adding Non-slip Features
Safety is key for a bunk bed ladder. Attach non-slip strips or pads on each step. These prevent slipping during use. You can find these strips at hardware stores. Make sure they stick well and cover enough space on each step.
Installing The Ladder Safely
Fix the ladder firmly to the bunk bed frame. Use strong screws or bolts for secure attachment. Check that the ladder does not wobble or move. Test the ladder by climbing carefully before regular use. This step ensures the ladder is safe for children and adults.
Maintenance Tips
Maintaining your wooden ladder is key to keeping it safe and lasting long. Small actions can prevent big problems. Regular care helps avoid accidents and keeps the wood strong.
Regular Safety Inspections
Check the ladder often for loose screws or nails. Look for cracks or splits in the wood. Make sure the steps are steady and not wobbly. Tighten any loose parts right away. Watch for signs of wear that could cause falls.
Cleaning And Upkeep
Dust and dirt can make the ladder slippery. Wipe it with a dry or slightly damp cloth regularly. Avoid soaking the wood with water. Use mild soap if needed, then dry it well. Keep the ladder in a dry place to stop wood from rotting.
Repairing Damages
Fix small cracks with wood glue or filler. Replace broken steps immediately. Sand rough edges to prevent splinters. Use wood sealant or paint to protect against moisture. Always check repairs before use to ensure safety.
Frequently Asked Questions
How Do I Choose Wood For A Bunk Bed Ladder?
Select sturdy hardwood like oak or maple for safety. Avoid softwoods that may splinter or weaken under weight. Ensure wood is smooth and free from cracks to guarantee durability and a secure grip.
What Tools Are Needed To Build A Wooden Ladder?
You need a saw, drill, measuring tape, screws, sandpaper, and wood glue. These tools help cut, assemble, and finish the ladder properly for safe use.
How Do I Ensure Ladder Safety For Kids?
Use wide, evenly spaced steps and secure all joints tightly. Sand edges smooth to prevent splinters. Add non-slip pads or grip tape on steps for extra safety.
Can I Customize Ladder Height For My Bunk Bed?
Yes, measure the bed height precisely and add extra length for ground clearance. Adjust rung spacing to match user comfort and ensure safe climbing.
Conclusion
Building a wooden ladder for a bunk bed is simple and fun. Use the right wood and tools for safety. Measure carefully and follow each step with care. A strong ladder keeps kids safe and happy. Take your time and enjoy the process.
Soon, you will have a sturdy ladder ready to use. This project adds charm and function to any room. Try it yourself and see how easy it can be.