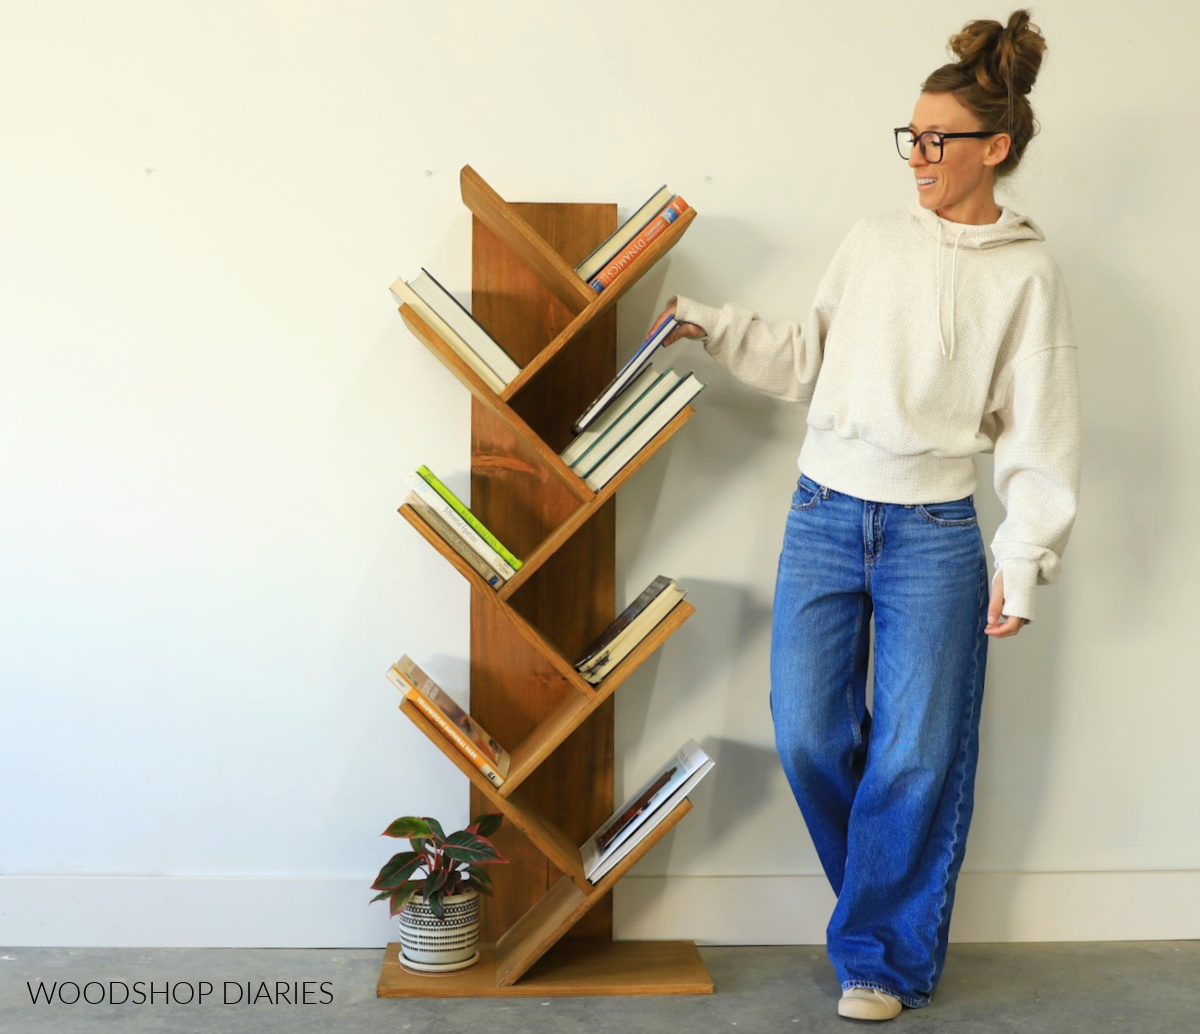
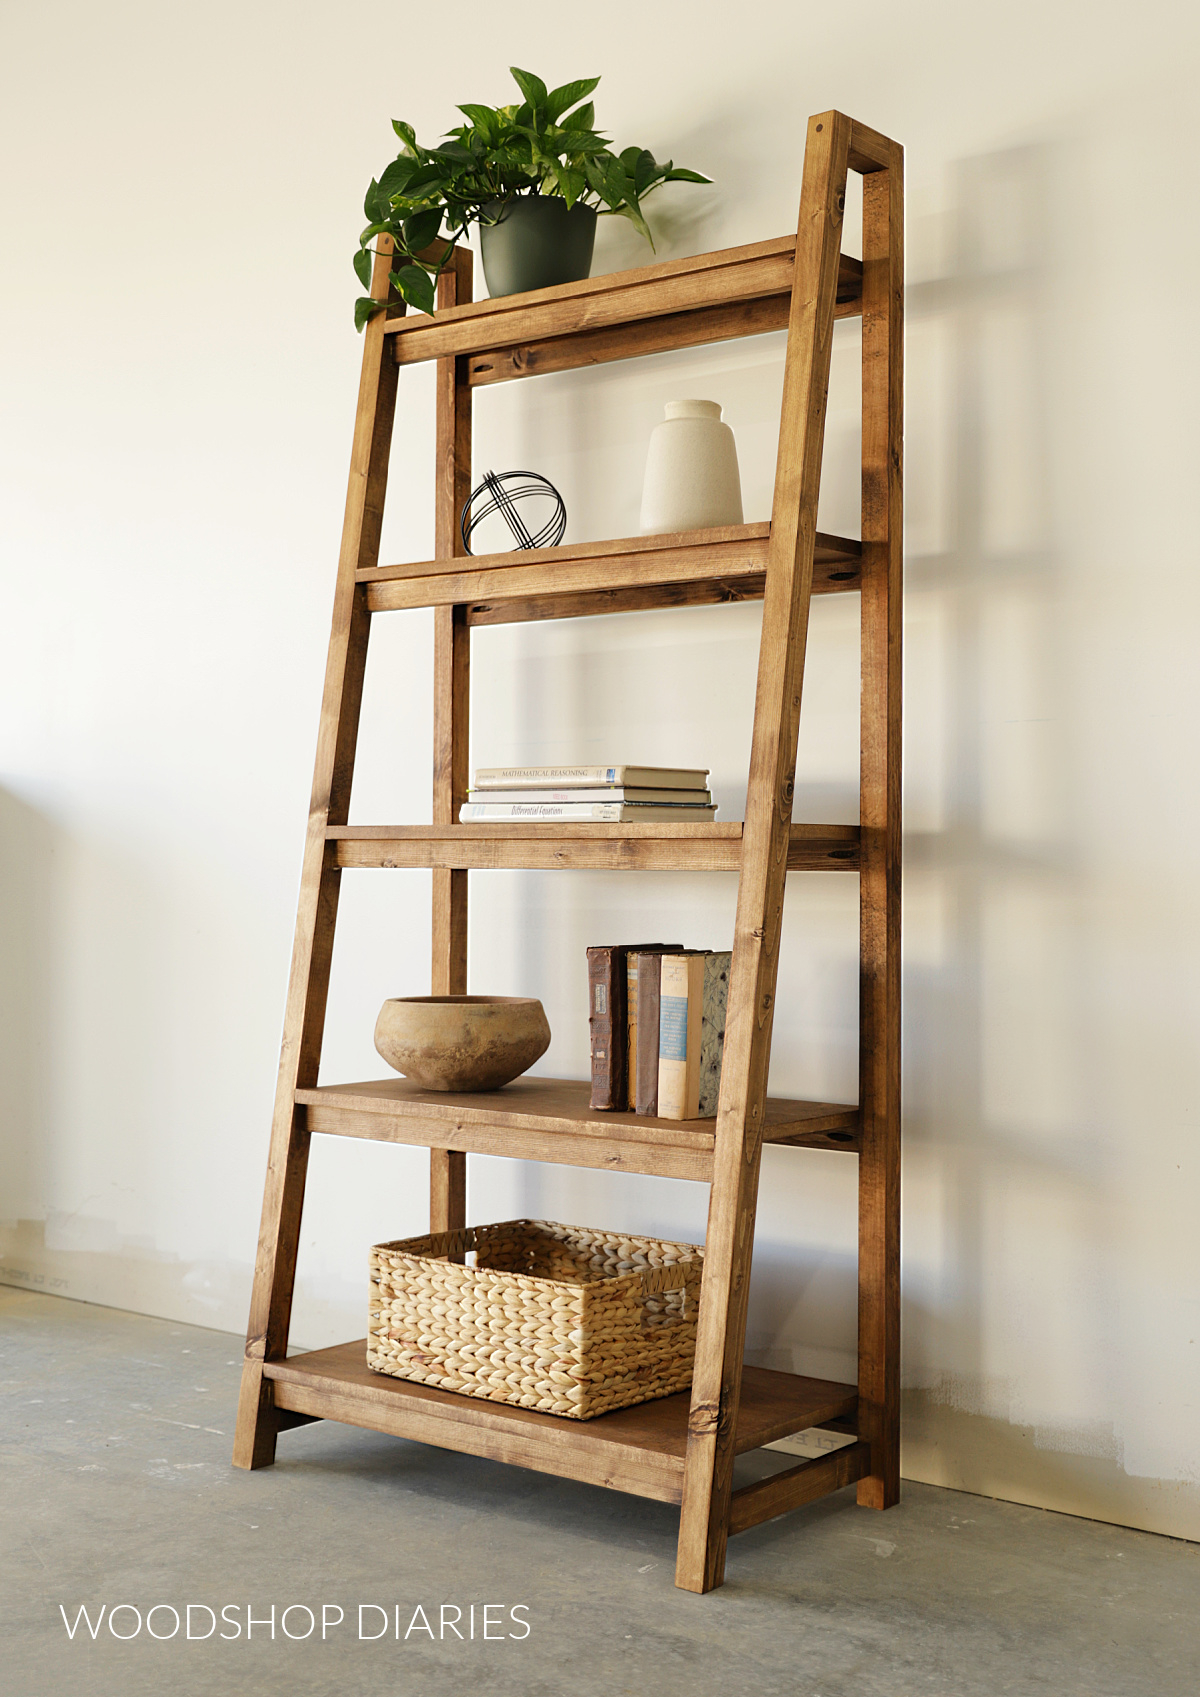
Are you looking to add a unique touch to your space while keeping your books organized? Building an angled bookshelf is a smart and stylish way to do just that.
Not only does it save space, but it also gives your room a modern edge that flat shelves just can’t match. In this guide, you’ll discover simple steps to create your own angled bookshelf, even if you’re new to DIY projects.
Imagine the satisfaction of seeing your books displayed in a way that’s both practical and eye-catching. Ready to transform your room with a bookshelf that stands out? Let’s dive in and make it happen together.
Choosing The Right Materials
Choosing the right materials is key to building a strong angled bookshelf. The right wood and tools make the project easier and the shelf durable. Spend time selecting materials that fit your budget and style. Quality materials help your shelf look great and last long.
Selecting Wood Types
Pick wood that is strong and easy to work with. Pine is a good choice for beginners. It is soft and affordable. Oak and maple are harder woods. They last longer but cost more. Choose wood with straight grains to avoid warping. Check for knots and cracks. Avoid wood that looks weak or damaged.
Gathering Tools And Supplies
Prepare all tools before starting the project. You need a saw to cut wood at angles. A drill helps with screws and holes. Sandpaper smooths rough edges. Get screws, wood glue, and brackets for support. A measuring tape and level keep your shelf even. Safety gear like gloves and goggles protects your hands and eyes.

Credit: www.youtube.com
Planning Your Bookshelf Design
Planning your angled bookshelf design is the first step to a successful build. It helps you make a strong and attractive shelf. Careful planning saves time, materials, and effort. It also ensures the shelf fits perfectly in your space and meets your needs.
Measuring Space And Dimensions
Start by measuring the wall or corner where the shelf will go. Write down the height, width, and depth available. Check for obstacles like light switches or vents. Measure twice to avoid mistakes. Accurate measurements help you avoid buying wrong materials. They also guide the size of each shelf and the overall structure.
Deciding On Angle And Shelf Size
Choose the angle that suits your room and style. Common angles are 30, 45, or 60 degrees. Smaller angles create a subtle slant. Larger angles give a bold look. Decide the size of each shelf based on what you want to store. Bigger shelves hold large books or decor. Smaller shelves work well for paperbacks or small items. Keep the angle and size balanced for a stable design.
Cutting And Preparing Wood
Cutting and preparing wood is a key step in building an angled bookshelf. It shapes the pieces to fit perfectly. Taking time to measure and cut accurately saves effort later. Proper preparation ensures strong joints and a neat finish.
Start by selecting good quality wood. Check for straight grain and no cracks. Use sandpaper to smooth rough edges before assembly. This helps the wood fit well and look clean.
Marking Angled Cuts
Marking angled cuts needs careful attention. Use a protractor or angle finder to measure the exact angle. Draw clear lines with a pencil on the wood surface. Double-check all measurements before cutting. Mark both edges of the board for better guidance. Accurate markings guide your saw and prevent mistakes.
Using Saws Safely
Using saws safely is important to avoid injuries. Wear safety goggles and gloves to protect eyes and hands. Keep your fingers away from the blade path. Use clamps to hold the wood steady during cutting. Choose the right saw for the job, like a miter saw for angled cuts. Cut slowly and follow the marked lines carefully. Turn off and unplug the saw before making any adjustments.
Credit: www.woodshopdiaries.com
Assembling The Frame
Assembling the frame is the key step in building your angled bookshelf. This step gives your shelf its shape and strength. Focus on making tight connections and keeping the angles precise. A strong frame supports the entire structure and holds the shelves steady.
Joining Pieces At Angles
Start by cutting your wood pieces to the right angle. Use a miter saw for clean, accurate cuts. Align the edges carefully before joining. Hold the pieces together at the correct angle. Clamps help keep the wood stable while you work. Check the angle with a protractor or angle finder. Make sure the joints fit tightly without gaps. Tight joints make the frame stronger and look neater.
Securing With Screws And Glue
Apply wood glue to the edges before joining. Glue adds strength and helps prevent movement. Use screws to secure the pieces firmly. Pre-drill holes to avoid splitting the wood. Countersink screws so they sit flush with the wood. Tighten screws evenly for a solid hold. Wipe away excess glue before it dries. Let the glue dry fully for a strong bond. This method ensures your frame stays sturdy and lasts long.
Installing Shelves
Installing shelves on an angled bookshelf requires care and precision. Proper installation ensures stability and a neat look. Follow simple steps to place and fix your shelves correctly.
Positioning And Spacing
Start by measuring the height between each shelf. Keep equal spacing to balance the look. Mark the spots on the side panels with a pencil. Check angles to keep shelves level despite the slope.
Consider the size of items you want to place. Leave enough space for books or decor. Adjust spacing based on your needs before fixing shelves.
Fixing Shelves Firmly
Use strong screws or brackets to hold shelves in place. Drill pilot holes to avoid wood splitting. Attach brackets securely at the marked points.
Press shelves firmly against the side panels. Tighten screws evenly to prevent wobbling. Double-check stability before placing items on the shelves.
Credit: www.woodshopdiaries.com
Finishing Touches
Finishing touches give your angled bookshelf a polished and professional look. They protect the wood and make the shelf last longer. These steps also highlight the natural beauty of the wood. Proper finishing can turn a simple project into a piece you will be proud to display.
Sanding And Smoothing
Start by sanding all surfaces with medium-grit sandpaper. This removes rough spots and splinters. Next, use fine-grit sandpaper for a smooth finish. Sand in the direction of the wood grain. Wipe dust away with a clean cloth after sanding. Smooth surfaces help paint or stain stick better.
Painting Or Staining
Choose paint or stain based on your style preference. Stain shows the wood grain and adds color. Paint covers the wood for a solid, vibrant look. Apply a thin coat evenly with a brush or cloth. Let it dry completely before applying a second coat. Finish with a clear sealant for extra protection. This step keeps your bookshelf looking fresh for years.
Tips For Maintenance And Styling
Proper care and styling keep your angled bookshelf looking fresh and attractive. Simple maintenance extends its life and enhances your room’s charm. Small styling choices make the shelves stand out beautifully.
Keeping Shelves Clean
Dust the shelves at least once a week. Use a soft cloth or a duster to avoid scratches. Wipe spills immediately with a damp cloth. Avoid harsh chemicals that can damage the wood or paint. Check the corners and edges where dust gathers most. Keep the shelves dry to prevent warping or mold. Regular cleaning keeps the bookshelf sturdy and inviting.
Decorating Ideas
Mix books with decorative items for a balanced look. Add small plants to bring a touch of nature. Use photo frames or art pieces to personalize the space. Place items of different heights to create visual interest. Keep some empty space to avoid a crowded feel. Change decorations seasonally for a fresh look. This simple styling makes your angled bookshelf a room highlight.
Frequently Asked Questions
What Tools Are Needed To Build An Angled Bookshelf?
You need a saw, drill, screws, measuring tape, level, and clamps. These tools help ensure accuracy and stability when building the angled bookshelf.
How Do You Measure Angles For The Bookshelf?
Use a protractor or angle finder to measure desired shelf angles. Mark precise angles on wood to ensure correct cuts and proper assembly.
What Type Of Wood Is Best For Angled Bookshelves?
Pine, oak, or plywood are ideal for durability and ease of cutting. Choose wood that supports your design and weight requirements for stability.
How Can I Ensure The Bookshelf Is Stable?
Secure shelves with screws and use a level during assembly. Adding brackets or anchors to the wall improves overall stability and safety.
Conclusion
Building an angled bookshelf adds style and function to any room. It takes some planning, measuring, and cutting. Follow each step carefully to avoid mistakes. Use the right tools for better results. Take your time assembling the pieces. Soon, you will have a unique shelf to display books and decor.
This project suits beginners and experienced builders alike. Enjoy the satisfaction of making something useful with your hands. Keep practicing to improve your skills. Try different designs next time to keep it fun.