Are you ready to transform your space with a stylish and functional bookshelf? Building the Havsta Bookshelf from Ikea might seem tricky at first, but with the right guidance, you’ll have it standing strong in no time.
Imagine having a beautiful piece that not only organizes your books but also adds charm to your room. This step-by-step guide will make the process simple and even enjoyable. Keep reading, and you’ll discover easy tips and tricks to build your Havsta Bookshelf quickly and confidently.
Your perfect bookshelf is just a few steps away!
Gathering Tools And Materials
Building the Havsta bookshelf from Ikea is easier with the right tools and materials. Gathering everything before you start saves time and reduces frustration. This step ensures a smooth building process. Prepare well to avoid interruptions later.
What You Need
Start by collecting all parts from the Havsta bookshelf kit. Check the instruction manual for a parts list. You will need screws, wooden panels, shelves, and backboards. Gather common tools like a screwdriver, hammer, and a drill if you have one. A tape measure helps to check alignment. Keep a cloth handy to clean dust or dirt.
Preparing Your Workspace
Choose a flat, clean area to build your bookshelf. Clear the space of obstacles and clutter. Lay down a soft blanket or cardboard to protect the panels from scratches. Good lighting is important to see small screws and parts clearly. Have a small container nearby to hold screws and tiny pieces. Organizing your workspace helps keep everything within reach and neat.

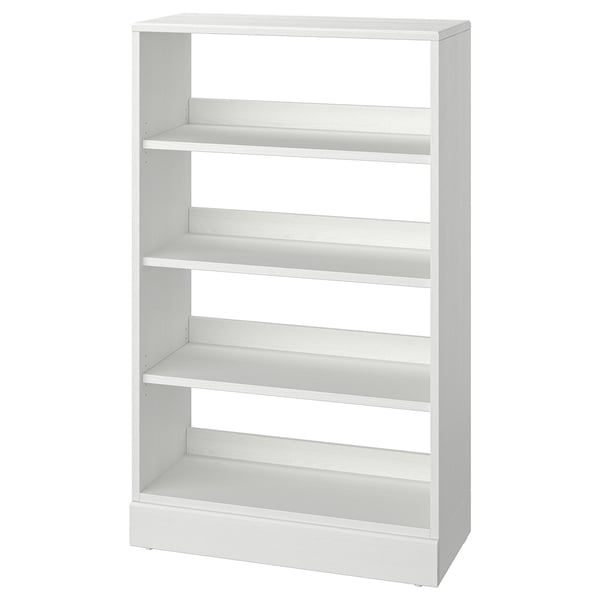
Credit: www.ikea.com
Unpacking And Organizing Parts
Starting your Havsta bookshelf assembly begins with unpacking and organizing parts. This step saves time and avoids confusion later. Take your time to prepare the workspace. Clear a large, flat surface to spread all pieces out. Lay down a soft cloth or cardboard to protect parts from scratches.
Checking The Inventory
Open the box carefully and take out all items. Use the instruction manual to check each piece. Confirm that all wooden panels are present. Count screws, nails, and other hardware parts. Make sure no pieces are missing or damaged. Missing parts can delay your project. If any parts are missing, contact Ikea before starting assembly.
Sorting Components
Group similar parts together for easy access. Place screws, bolts, and small pieces in separate containers. Organize wooden panels by size and shape. Keep tools nearby, like a screwdriver or hammer. Sorting parts helps you find items quickly during assembly. This simple step keeps your work neat and efficient.
Assembling The Frame
Building the Havsta bookshelf starts with assembling the frame. This step creates the strong base for the entire unit. Follow the instructions carefully to avoid mistakes. Take your time and prepare all parts before starting.
Connecting The Side Panels
Begin by placing the side panels upright on a flat surface. Align the edges and holes precisely. Use the provided screws and dowels to join the panels. Tighten the screws gently to keep the panels steady. Check that the panels stand straight and square. This ensures a solid frame for your bookshelf.
Attaching The Bottom Panel
Next, fit the bottom panel between the side panels. Match the pre-drilled holes on the bottom panel with the side panels. Insert the screws and secure the bottom panel firmly. Make sure it sits flush with the sides to prevent gaps. This panel supports the shelves and adds stability. Double-check all connections before moving forward.
Credit: www.ikea.com
Installing Shelves
Installing shelves in your Havsta bookshelf is an important step. It gives the unit its full function and looks tidy. Proper installation keeps shelves steady and safe to hold your books and decor.
Follow simple steps to position supports and secure shelves. This makes assembly easier and the bookshelf more durable.
Positioning Shelf Supports
Start by placing the shelf supports inside the bookshelf frame. Use the pre-drilled holes as guides. Insert the supports at the same height on both sides. Check that they are level to keep shelves straight.
Press the supports firmly to fit snugly. Avoid loose placement. This ensures shelves stay stable and do not tilt or fall.
Securing The Shelves
Next, slide the shelves onto the supports carefully. Align the shelf edges with the bookshelf frame. Press down gently but firmly to set the shelves in place.
Make sure shelves sit flat and do not wobble. Adjust supports if needed. Proper securing helps the shelves hold weight safely and last longer.
Adding The Back Panel
Adding the back panel is an important step in building the Havsta bookshelf. It gives the bookshelf strength and keeps the shelves stable. The back panel also helps the bookshelf stand straight and prevents it from wobbling.
This step needs careful attention to make sure the panel fits well. A well-attached back panel makes the whole bookshelf last longer. Use the right tools and follow each step to get the best result.
Aligning The Panel
Place the back panel flat against the frame. Make sure all edges match the sides of the bookshelf. The panel should sit flush with the top and bottom edges. Check that the panel covers the entire back evenly. Use clamps or ask someone to hold the panel steady. Proper alignment is key to a strong, neat finish.
Fixing With Nails Or Screws
Choose small nails or screws to attach the back panel. Start at one corner and work your way around. Drive nails or screws every few inches for good support. Be careful not to split the wood by pushing too hard. Use a hammer or screwdriver to secure the panel firmly. This keeps the panel tight and the bookshelf stable.
Final Adjustments And Safety
Final adjustments and safety checks are key steps in assembling the Havsta bookshelf. These steps ensure the shelf stands firm and stays secure over time. Taking a little extra time now prevents accidents later.
Focus on checking the stability first. Then secure the shelf to the wall for added safety. Both actions protect your books and your home.
Checking Stability
Place the bookshelf on a flat surface. Press gently on different sides. The shelf should not wobble or lean. Tighten any loose screws or bolts. Make sure all parts fit snugly together. A stable bookshelf holds your items safely.
Wall Mounting For Security
Attach the included wall brackets to the back of the bookshelf. Use a drill to fix the brackets into wall studs. This keeps the bookshelf from tipping over. Check that the brackets hold tightly. Wall mounting is vital, especially in homes with children or pets.
Maintenance Tips
Maintaining your Havsta Bookshelf from Ikea keeps it looking fresh and lasting longer. Small care steps help protect its wood and finish. Simple routines prevent damage and keep the shelf strong.
Cleaning The Bookshelf
Use a soft, dry cloth to dust the shelf regularly. Avoid wet cloths that can warp the wood. For sticky spots, use a damp cloth with mild soap. Dry the surface right after cleaning to stop moisture damage. Avoid harsh chemicals or abrasive cleaners that can scratch or fade the finish.
Handling Wear And Tear
Check the bookshelf for loose screws or parts every few months. Tighten any loose fittings to keep it stable. Use felt pads under items to prevent scratches on shelves. Avoid placing heavy objects that exceed weight limits. Repair small scratches with a wood touch-up marker to hide marks. Treat the wood gently to keep it strong and neat.
Credit: www.reddit.com
Frequently Asked Questions
How Long Does It Take To Build Havsta Bookshelf Ikea?
Building the Havsta bookshelf usually takes about 1 to 2 hours. It depends on your experience with Ikea furniture. Clear instructions and organized parts speed up the process. Having basic tools ready also helps complete assembly efficiently.
What Tools Are Needed For Havsta Bookshelf Assembly?
You will need a Phillips screwdriver, hammer, and possibly an Allen key. Ikea often includes the Allen key in the package. Having a drill can speed up the process but is not mandatory. These tools ensure proper and secure assembly.
Can I Assemble Havsta Bookshelf Alone?
Yes, assembling the Havsta bookshelf alone is possible. However, having a second person helps, especially when aligning large panels. Working alone requires patience and careful handling to avoid damage. The instructions are clear enough for solo assembly.
Is Havsta Bookshelf Suitable For Heavy Books?
Yes, the Havsta bookshelf is designed to hold heavy books. It features sturdy wood construction and strong shelves. Proper assembly ensures maximum weight support. Always distribute weight evenly to maintain stability and durability.
Conclusion
Building the Havsta bookshelf Ikea is simple with clear steps. Take your time and follow each instruction carefully. Use the right tools and keep parts organized. Soon, you will have a sturdy and stylish shelf. It fits well in any room and holds many items.
Enjoy the satisfaction of building furniture yourself. This project helps improve your skills and confidence. Keep your space neat and functional with this bookshelf. A little effort brings great results. You can do it!
