Are you looking for a fun and creative way to organize your books? Building a Lego bookshelf might be the perfect project for you.
Imagine a colorful, sturdy shelf made entirely from Lego bricks that shows off your personality and keeps your space neat. In this guide, you’ll discover simple steps to build your own Lego bookshelf, even if you’ve never built anything like this before.
Ready to turn your love for Lego into something useful and eye-catching? Let’s get started!
Credit: allurelakestorey.com
Materials Needed
Building a Lego bookshelf is a fun and creative project. Collecting the right materials makes the process smooth. Start with choosing the best Lego bricks. Then gather extra supplies and tools. Each item plays a key role in making a sturdy shelf.
Types Of Lego Bricks
Select bricks that fit well and support weight. Standard 2×4 and 2×2 bricks work great. Plates help create shelves and add stability. Larger baseplates form a strong foundation. Use flat tiles to smooth surfaces and edges.
Additional Supplies
Strong glue can secure bricks for extra strength. Clear tape helps hold parts temporarily. Cardboard or wood pieces add support inside shelves. Sandpaper smooths rough edges if needed. Paint or stickers personalize your bookshelf.
Tools Required
A brick separator makes taking apart pieces easy. A ruler or measuring tape ensures correct dimensions. A small screwdriver helps with any extra screws. Scissors cut tape or cardboard neatly. A pencil marks measurements clearly.
Planning Your Bookshelf
Planning your Lego bookshelf is the first step to a successful build. Taking time to plan helps avoid mistakes and saves effort later. This phase includes choosing the right size, designing a layout, and thinking about stability. Careful planning makes your project both useful and fun.
Choosing The Size
Decide how big your bookshelf should be. Measure the space where you want to place it. Consider how many books or items you want to store. A small shelf works for a few books. A larger shelf fits more but needs more Lego pieces. Keep your room size in mind.
Designing The Layout
Sketch a simple design on paper. Think about the number of shelves and their height. Use different shapes for a unique look. Plan for easy access to books. Keep shelves wide enough for most books. A well-planned layout makes building easier.
Weight And Stability Considerations
Lego bricks can hold weight but need support. Plan to use strong base pieces for stability. Avoid tall, narrow designs that may fall. Reinforce shelves with extra bricks underneath. Check that the bookshelf can carry your books without bending. Safety and durability matter most.
Building The Base
Building the base is the first step to creating a sturdy Lego bookshelf. It supports the entire structure. A strong base stops the shelf from wobbling or falling. Start by planning the size and shape of your base. Use enough bricks for a solid foundation.
Creating A Strong Foundation
Choose flat Lego plates for the base. Plates provide more stability than regular bricks. Lay them out evenly on a flat surface. Connect multiple plates to cover the bookshelf’s bottom area. Make sure the base is wide enough for balance. Avoid gaps between plates to prevent weak spots. A strong foundation keeps your shelf steady.
Connecting Bricks Securely
Use overlapping bricks to connect the plates. Press bricks tightly together to avoid gaps. Build layers by stacking bricks in a brickwork pattern. This pattern locks bricks in place. Check that no bricks stick out or are loose. Secure connections make the base last longer. Take time to press each piece firmly.
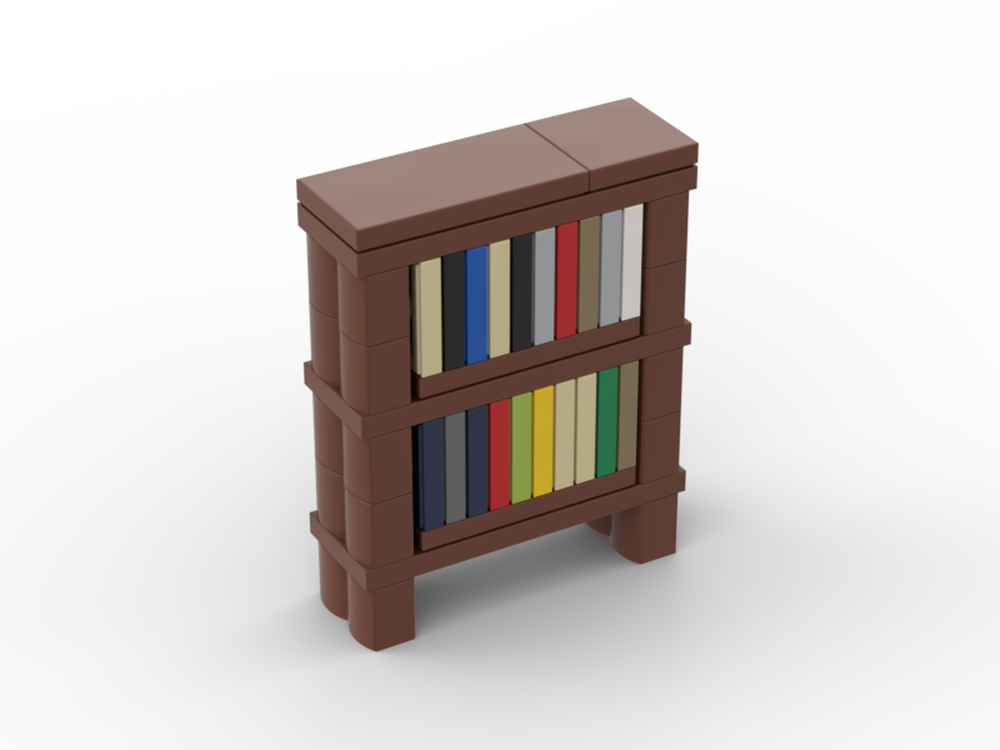
Constructing Shelves
Constructing shelves for your Lego bookshelf is a key step. It gives your bookshelf its shape and strength. Careful planning helps hold books safely. Using strong building techniques keeps shelves steady and long-lasting.
Focus on the way layers fit together. Make sure each shelf has enough space. This avoids crowding and lets you place books easily. A well-built shelf looks neat and holds items well.
Layering Techniques
Start with a solid base layer. Use large Lego bricks for stability. Add layers evenly on top. Connect bricks tightly to avoid gaps. Stagger bricks like a wall for strength. This method prevents shelves from bending or breaking.
Repeat layering until the shelf reaches the needed height. Use flat pieces to smooth the top. This creates a strong surface for books. Check each layer fits well before adding the next.
Ensuring Even Spacing
Measure the space between shelves carefully. Books need enough room to fit without pressure. Use Lego bricks as spacers to keep gaps equal. Adjust the height based on your book size.
Consistent spacing makes the shelf look balanced. It helps keep books upright and tidy. Double-check spacing before final assembly. Small mistakes can affect shelf use and appearance.
Adding Support And Reinforcement
Adding support and reinforcement is key to building a strong Lego bookshelf. Without proper support, the shelves may bend or break under weight. Solid reinforcement keeps the structure steady and safe for your books.
Focus on strengthening the joints and backing. Use extra Lego pieces to create braces and connectors. This spreads the load and stops weak spots from forming. A reinforced shelf lasts longer and holds more books.
Using Braces And Connectors
Braces and connectors join Lego parts firmly. Place them at corners and joints for extra strength. Use longer pieces across shelves to hold parts tight. Connectors help the bookshelf resist twisting and wobbling.
Try using angled pieces to support vertical and horizontal sections. Secure these braces well to avoid gaps. Strong connections reduce movement and keep the bookshelf steady.
Preventing Shelf Sagging
Shelf sagging happens when weight pulls the shelf down. Avoid this by adding support beams under each shelf. Use flat Lego plates or strong bricks beneath the surface.
Build extra columns or pillars inside the shelf. This spreads the weight evenly across the structure. Check the shelf level often and adjust if you see any sagging.

Credit: www.youtube.com
Customizing Your Bookshelf
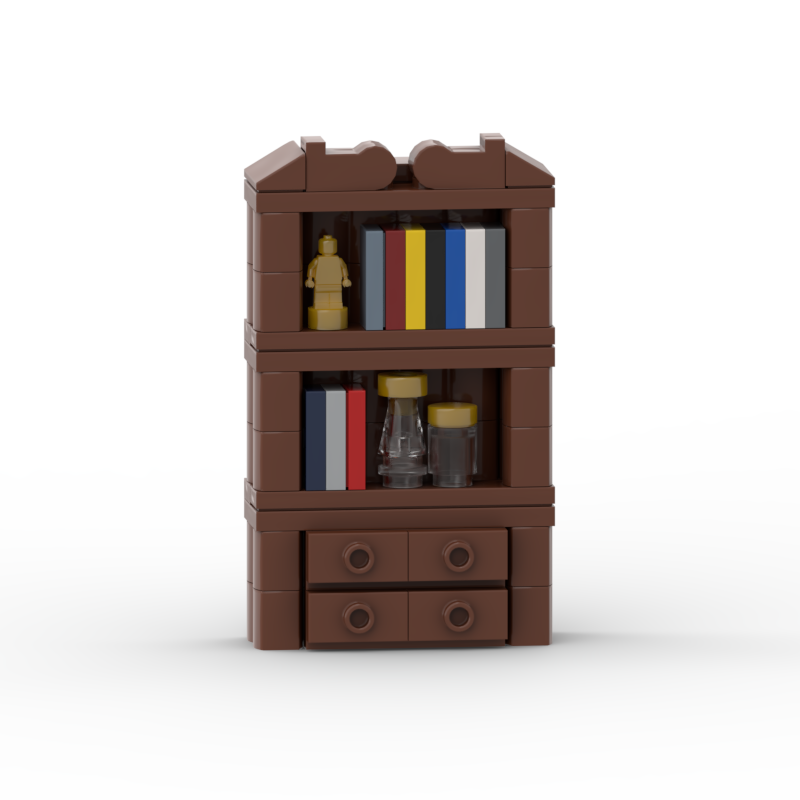
Customizing your Lego bookshelf lets you show your style and creativity. This step makes your project unique and fun. You can choose colors, patterns, and decorations to fit your room or personality. It also makes the bookshelf more than just a storage space. Let’s explore some easy ways to personalize your Lego bookshelf.
Color Patterns And Themes
Pick colors that match your room or favorite shades. Use bright or soft tones to create different moods. Try stripes, blocks, or checkerboard patterns with Lego bricks. Themes like ocean, space, or nature bring extra charm. Changing colors also helps highlight shelves or sections. Simple color choices make your bookshelf stand out and feel special.
Incorporating Decorative Elements
Add small Lego pieces as decorations on shelves or sides. Use mini figures, flowers, or custom shapes for fun details. Attach lights or stickers to brighten the look. Mix textures by combining smooth and bumpy Lego bricks. Decorative touches make the bookshelf more lively and personal. These details can show your hobbies or favorite things.
Final Assembly Tips
Final assembly is the most important step in building your Lego bookshelf. It brings all parts together and ensures the structure is strong. Careful attention now keeps the bookshelf stable and safe for use. Follow these tips to finish your project perfectly.
Securing The Bookshelf
Start by pressing all Lego pieces firmly. Loose connections can cause the shelf to wobble. Check each joint and click the bricks tightly. Use extra support bricks at corners for added strength. Place the bookshelf against a wall for extra stability. If possible, attach it with wall anchors or brackets. This prevents tipping, especially if children will use it.
Finishing Touches
Clean the surface of your Lego bookshelf with a soft cloth. Remove dust and fingerprints for a neat look. Add small decorative Lego pieces to personalize your shelf. Choose bright colors to make it more fun and lively. Avoid heavy items on top shelves to keep balance. Arrange books and objects evenly to prevent tipping. Your Lego bookshelf is now ready to use and enjoy.
Maintenance And Care
Keeping your Lego bookshelf in good shape needs regular care. Proper maintenance helps it last long and look neat. Small steps daily save big problems later.
Cleaning Lego Surfaces
Dust and dirt can make your Lego bookshelf look old. Use a soft brush or cloth to clean the surfaces. Avoid water on stickers or paper parts. For tough spots, a damp cloth works well. Dry the Lego pieces quickly to stop damage.
Handling Repairs
Check your Lego bookshelf often for loose or broken pieces. Fix loose bricks by pressing them firmly back in place. Replace broken parts with new or spare Lego bricks. Keep extra pieces ready for quick repairs. This keeps your bookshelf strong and safe.
Credit: rebrickable.com
Frequently Asked Questions
What Materials Are Needed To Build A Lego Bookshelf?
You need Lego bricks in various sizes, a baseplate, and a sturdy surface. Optional tools include a brick separator and design plans.
How Long Does It Take To Build A Lego Bookshelf?
Building time varies by size and complexity but typically ranges from 2 to 5 hours. Planning and sorting bricks can extend this.
Can A Lego Bookshelf Hold Heavy Books?
A well-built Lego bookshelf can support light to medium-weight books. For heavier items, reinforce with internal supports or place books evenly.
How Do I Design A Sturdy Lego Bookshelf?
Use large baseplates and interlock bricks tightly. Build a solid frame and add cross-bracing for extra strength and stability.
Conclusion
Building a Lego bookshelf is a fun and creative project. You only need basic Lego pieces and some patience. Step-by-step, you can create a sturdy, colorful shelf for your books. It adds a unique touch to any room. Plus, it gives you a chance to enjoy building with Lego bricks again.
Try different designs to fit your style and space. This project shows how simple materials can become useful items. Start building today and see what you can create!
