Are you looking for a simple way to organize your little one’s growing collection of books? Building a nursery bookshelf could be the perfect solution.
Not only will it keep your child’s favorite stories within easy reach, but it also adds a charming touch to the room. Imagine a sturdy, safe shelf tailored just for your nursery—one that you built yourself. You’ll discover easy steps to create a beautiful nursery bookshelf that fits your space and style.
Ready to make storytime even more special? Let’s get started!
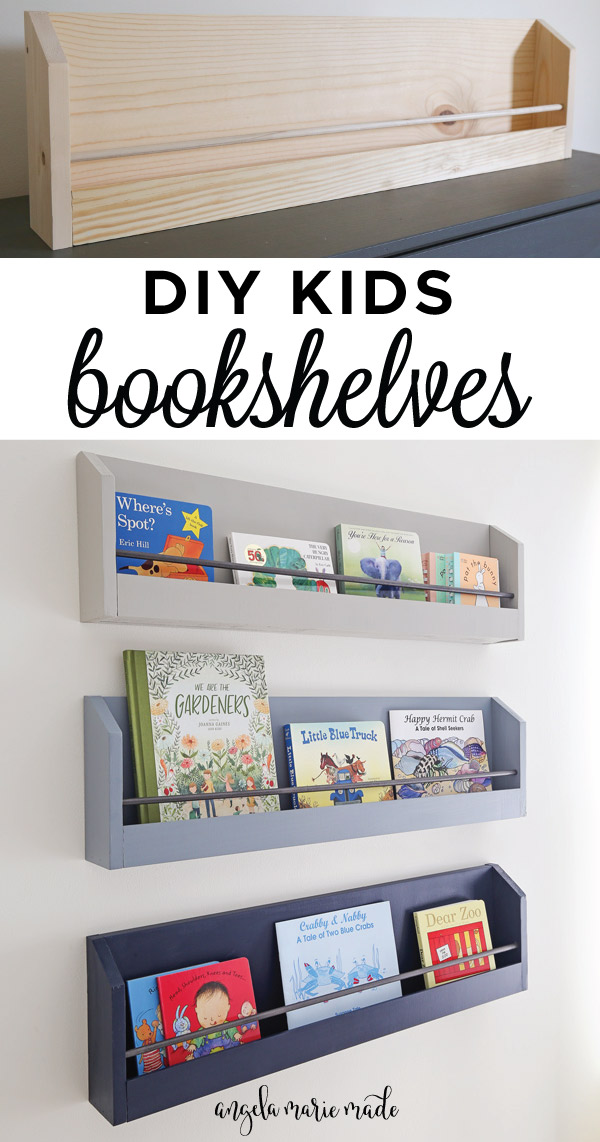
Credit: angelamariemade.com
Choosing The Right Materials
Choosing the right materials is key to building a sturdy nursery bookshelf. The materials affect safety, durability, and look. Picking good wood and safe finishes ensures the shelf lasts long and stays child-friendly. This part focuses on two main choices: wood types and paints or finishes.
Selecting Wood Types
Wood choice matters for strength and safety. Pine is soft, easy to work with, and affordable. It suits light use and simple designs. Oak and maple are hardwoods. They are strong and last longer but cost more. Birch is another good hardwood. It has a smooth finish and resists dents. Avoid plywood with many layers. It can split or release harmful glue. Solid wood is best for a safe nursery shelf.
Picking Safe Paints And Finishes
Paints and finishes protect wood and add color. Use non-toxic, water-based paints. They dry fast and have low fumes. Avoid paints with lead or strong chemicals. Look for labels that say “child-safe” or “non-toxic.” Natural oils like tung or linseed oil seal wood safely. They keep the wood smooth and clean. Let every coat dry fully before adding another layer. This keeps the shelf safe for children to use.
Planning Your Bookshelf Design
Planning your nursery bookshelf design sets the foundation for a perfect build. It helps you create a functional and safe space for your child’s books and toys. Careful planning saves time and materials during construction. It also ensures the bookshelf fits well in the nursery without overcrowding the room.
Measuring Space And Dimensions
Start by measuring the space where you want the bookshelf. Use a tape measure to get the height, width, and depth available. Note any obstacles like windows or heaters nearby. Keep enough room around the shelf for easy access and cleaning. Write down these numbers to guide your design choices. Accurate measurements prevent mistakes and fit issues later.
Deciding On Shelf Layout
Think about what items will go on the bookshelf. Books, toys, and decorative items need different shelf sizes. Plan shelves with varied heights to hold tall and short books. Add some wide shelves for bigger toys or bins. Leave space for items you may add later. A well-thought-out layout keeps the nursery organized and tidy.
Gathering Tools And Supplies
Gathering the right tools and supplies is the first step to building a nursery bookshelf. Having everything ready makes the project smoother and faster. It helps avoid mistakes and saves time. This section lists the essential tools and some optional accessories. You can decide which ones you need for your project.
Essential Tools List
- Measuring tape – for accurate measurements
- Pencil – to mark cutting lines
- Handsaw or power saw – to cut wood pieces
- Drill – for making holes and driving screws
- Screwdriver – to fasten screws tightly
- Sandpaper – to smooth rough edges
- Clamps – to hold pieces in place while assembling
- Wood screws – to join wood parts securely
- Wood glue – for extra strength in joints
- Level – to ensure shelves are straight
Optional Accessories
- Paintbrushes – for applying paint or finish
- Wood filler – to cover holes or gaps
- Safety glasses – to protect your eyes
- Work gloves – to protect your hands
- Drop cloth – to protect your work surface
- Corner brackets – for extra support on corners
- Sanding block – for easier sanding
Cutting And Preparing Wood
Cutting and preparing wood is the first step to build a sturdy nursery bookshelf. This process sets the foundation for a safe and neat piece of furniture. Taking time to measure and cut accurately ensures all parts fit perfectly. Careful preparation also helps avoid mistakes and wood waste.
Using the right tools and techniques makes cutting wood easier and safer. Every cut should be clear and smooth to create strong shelves. Let’s explore how to mark measurements and practice safe cutting methods.
Marking Measurements
Start by measuring the wood pieces precisely. Use a tape measure for accuracy. Mark each cut line with a pencil or chalk. Double-check the numbers before drawing lines. Clear markings guide your saw and keep cuts straight.
Use a square or ruler to make straight lines. Mark all pieces before cutting to save time. Label each piece to match your bookshelf plan. This step helps avoid confusion during assembly.
Safe Cutting Techniques
Wear safety goggles and gloves to protect yourself. Choose the right saw for your wood type and thickness. Hold the wood firmly on a stable surface or workbench. Cut slowly and follow your marked lines carefully.
Keep your fingers away from the saw blade at all times. Use clamps to hold small pieces steady. Take breaks if your hands feel tired. Clean your work area from wood dust and scraps regularly.
Assembling The Bookshelf Frame
Assembling the bookshelf frame is the key step in building your nursery bookshelf. This step creates the strong base that holds the shelves and books. Take your time to join each piece carefully. A well-built frame keeps the bookshelf steady and safe for your child’s room.
Joining Wood Pieces
Start by matching the wood pieces according to your plan. Lay them flat on a clean surface. Align the edges so the corners fit tightly. Use clamps to hold the wood in place. This keeps the pieces steady for the next steps. Check that all angles are square using a carpenter’s square. This ensures the frame will be even and balanced.
Securing With Screws And Glue
Apply wood glue to the edges before joining the pieces. This adds strong bonding between the wood surfaces. Use a brush or a small stick to spread glue evenly. Next, drill pilot holes for the screws to avoid splitting the wood. Insert screws into the holes and tighten them firmly. The screws hold the frame securely while the glue dries. Wipe off any extra glue to keep a clean finish.
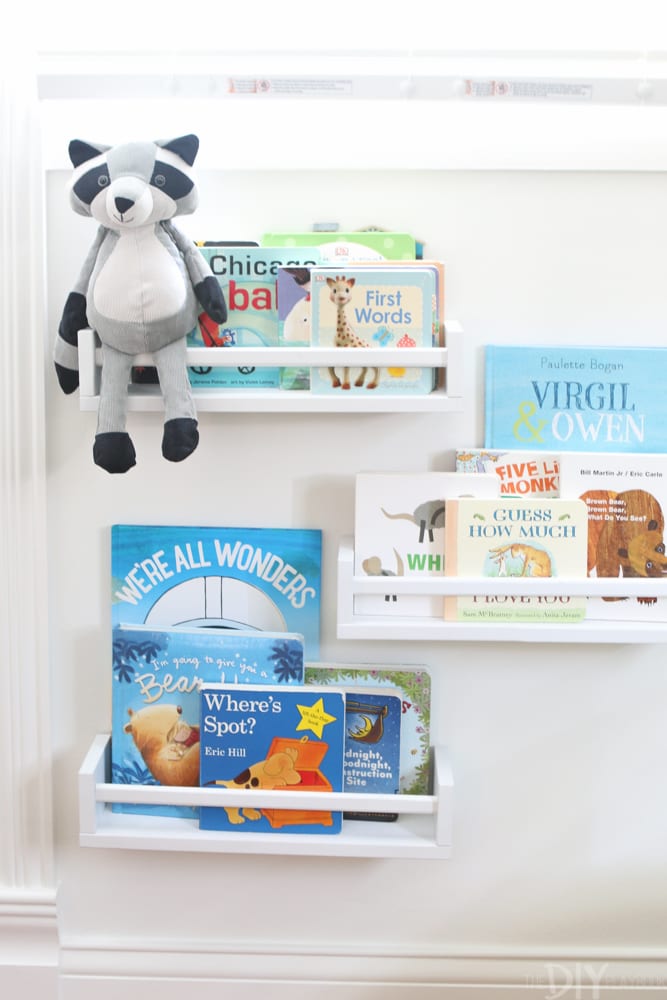
Credit: thediyplaybook.com
Adding Shelves And Supports
Adding shelves and supports is a key step in building a sturdy nursery bookshelf. Shelves hold the books and toys, so they must be strong and well placed. Proper supports keep the shelves steady and safe for children. Take time to plan the shelf spacing and bracket installation carefully. This will make your bookshelf functional and durable.
Spacing For Different Book Sizes
Books come in many sizes. Some are tall, others are small or wide. Plan the space between shelves to fit these sizes. Leave extra room for bigger picture books and storybooks. Smaller shelves work well for board books and toys. Adjust shelf height based on the items you want to store. This helps keep the shelf neat and easy to use.
Installing Shelf Brackets
Shelf brackets hold the shelves firmly in place. Choose brackets that can support the weight of books and toys. Use a level to align brackets evenly on each side. Secure brackets with screws into wall studs or solid wood. This prevents shelves from wobbling or falling. Double-check the brackets before placing shelves on them. Strong brackets make your nursery bookshelf safe and long-lasting.
Sanding And Finishing Touches
Sanding and finishing touches make your nursery bookshelf safe and beautiful. Smooth surfaces prevent splinters. A nice finish protects the wood and adds color. These steps help your project last longer. They also give the shelf a clean, polished look.
Smoothing Surfaces
Start by sanding all wooden parts with medium-grit sandpaper. This removes rough spots and sharp edges. Sand along the grain to avoid scratches. Use finer sandpaper for a softer finish. Wipe dust with a damp cloth before moving on. Smooth surfaces keep your shelf child-friendly and neat.
Applying Paint Or Stain
Choose non-toxic paint or stain safe for children. Apply a thin, even coat with a brush. Let the first layer dry completely. Lightly sand between coats for better adhesion. Add a second coat for full coverage. A finished look brightens the room and protects the wood.
Ensuring Safety And Stability
Building a nursery bookshelf is a fun project. Safety and stability are very important. The bookshelf must not tip over or cause harm. This section covers how to make your bookshelf safe and steady.
Anchoring To Walls
Anchoring the bookshelf to the wall stops it from tipping. Use strong brackets or straps made for furniture. Find wall studs with a stud finder. Attach anchors firmly to the studs. Avoid just screwing into drywall. Check the anchors often to ensure they stay tight.
Childproofing Tips
Cover sharp edges with soft guards. Use corner protectors on all corners. Make sure shelves do not have small gaps where fingers can get stuck. Keep heavy items on lower shelves. Avoid placing toys or objects that can be pulled down easily. Test the bookshelf’s stability by gently shaking it. Fix any loose parts immediately.
Styling And Organizing Bookshelf
Styling and organizing a nursery bookshelf makes the space look inviting and neat. It helps children find their favorite books and toys quickly. A well-arranged shelf also adds charm to the nursery room. Keeping things tidy supports early learning and creativity.
Adding Decorative Elements
Choose soft colors that match the nursery theme. Small plants or stuffed animals create a warm feel. Use baskets or boxes to hold tiny items. Picture frames with family photos add a personal touch. Keep decorations light to avoid clutter and maintain safety.
Arranging Books And Toys
Group books by size or theme for easy access. Place favorite books at child’s eye level. Mix books with toys to keep the shelf playful. Rotate toys often to keep interest fresh. Store puzzles and blocks in open bins for quick cleanup.
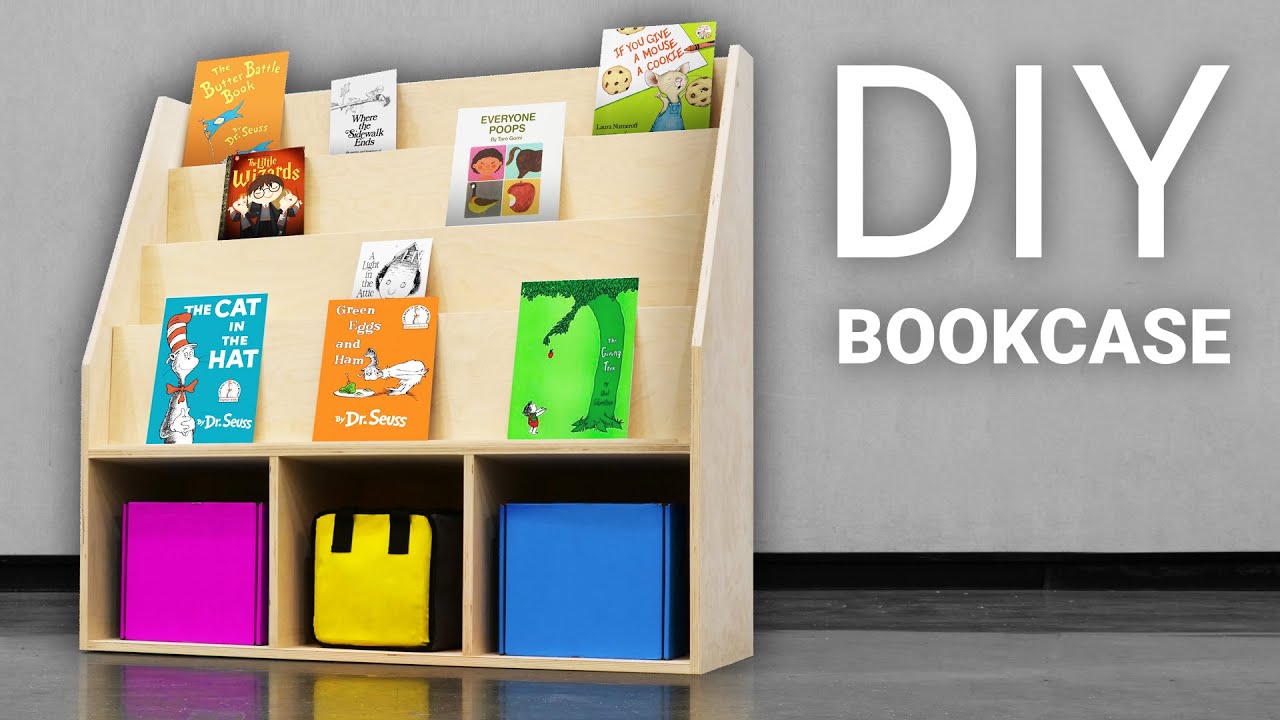
Credit: www.youtube.com
Frequently Asked Questions
What Materials Are Best For A Nursery Bookshelf?
Pine wood and plywood are ideal for nursery bookshelves. They are sturdy, lightweight, and safe for children. Use non-toxic paint or finish to keep the shelf baby-friendly and durable.
How Do I Ensure Nursery Bookshelf Safety?
Secure the bookshelf to the wall to prevent tipping. Sand all edges smooth and use child-safe finishes. Avoid small detachable parts to protect children from choking hazards.
What Size Is Ideal For A Nursery Bookshelf?
Choose a low-height shelf between 24 to 36 inches. This allows toddlers easy access to books and toys while ensuring stability and safety.
How Can I Organize Books On A Nursery Bookshelf?
Sort books by size or theme for easy access. Use baskets or bins on lower shelves to store toys and small items neatly.
Conclusion
Building a nursery bookshelf can be simple and fun. You need some basic tools and materials. Follow clear steps to cut, assemble, and paint the shelves. This project helps keep books organized and easy to reach. It also adds a personal touch to the nursery room.
Take your time and enjoy the process. Soon, you will have a sturdy shelf that fits your space perfectly. Creating your own bookshelf brings pride and joy. Try it yourself and see how rewarding it can be.