Are you struggling to find the perfect bookshelf that fits your tight spaces? Imagine having a long, narrow bookshelf that not only saves space but also adds style to your room.
Building one yourself might seem tricky, but what if you could create a sturdy, custom bookshelf tailored exactly to your needs? In this guide, you’ll discover simple, step-by-step instructions to build a long narrow bookshelf that looks great and holds all your favorite books.
Keep reading, and by the end, you’ll have the confidence to start your own project and transform your space.
Planning Your Bookshelf
Planning your bookshelf is the first step to a successful project. It helps you avoid mistakes and saves time. A clear plan guides you through each stage. Consider space, size, and style before starting.
Choosing The Right Dimensions
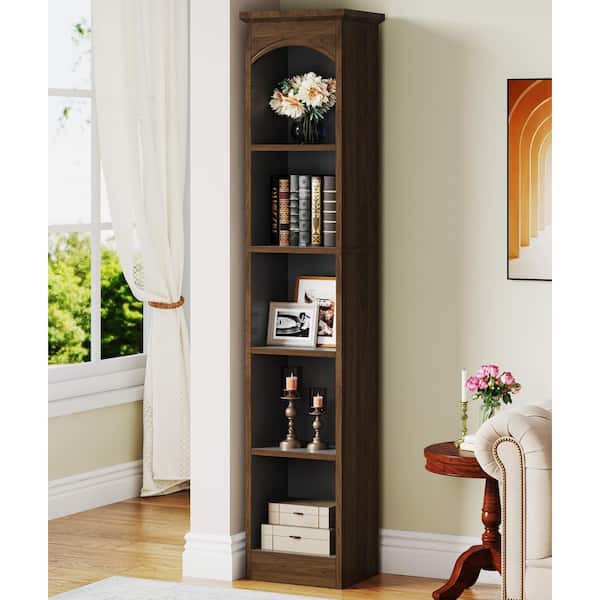
Measure the space where the bookshelf will stand. Note the height, width, and depth available. Think about the types of books and items you want to store. A long, narrow shelf fits well in tight spaces. Choose dimensions that balance storage and room flow. Keep shelves tall enough for large books but not too deep.
Selecting Materials
Pick wood that suits your budget and style. Plywood is affordable and strong. Solid wood looks great but costs more. Consider finishes like paint or stain for protection. Use sturdy materials to support heavy books. Avoid materials that may warp or break easily.
Tools You’ll Need
Gather basic tools before starting your build. You will need a saw to cut wood. A drill helps make holes for screws. Sandpaper smooths rough edges. A screwdriver or power driver secures screws tightly. A tape measure and pencil help with accurate marking. Having all tools ready speeds up the work.
Preparing The Workspace
Preparing the workspace is the first step in building a long narrow bookshelf. A clean and organized space helps you work safely and efficiently. It reduces mistakes and keeps tools within reach. Taking time to prepare saves time during the project.
Clearing The Area
Remove all items from the work area. Clear furniture, rugs, and decorations. This gives you enough room to move freely. A clutter-free space lowers the chance of accidents. Sweep the floor to get rid of dust and small debris. A clean floor makes handling wood and tools easier.
Setting Up Safety Measures
Wear protective gear such as gloves and safety glasses. Set up proper lighting to see your work clearly. Keep a first aid kit nearby for small injuries. Make sure electrical cords are out of the way to avoid trips. Use clamps to hold wood steady while cutting or drilling. Safety first for a smooth building process.
Cutting The Wood
Cutting the wood is a vital step in building your long narrow bookshelf. It shapes all the parts that will fit together. Precise cuts ensure the bookshelf is strong and looks neat. Take your time and follow safety steps carefully. A good cut makes assembly easier and the final product sturdy.
Measuring And Marking
Start by measuring each piece of wood carefully. Use a tape measure for accuracy. Mark the wood with a pencil. Draw straight lines where you will cut. Double-check your measurements before cutting. Clear marks help guide your saw and avoid mistakes.
Using A Saw Safely
Choose the right saw for your wood type and thickness. Hold the saw firmly and keep your hands away from the blade. Cut slowly along your marked lines. Wear safety glasses to protect your eyes. Work on a stable surface to avoid slips. Take breaks if you feel tired. Safety first keeps you injury-free.

Credit: www.amazon.com
Assembling The Frame
Assembling the frame is the first big step in building your long narrow bookshelf. It gives the structure its shape and strength. You need to join the sides and shelves carefully. This will keep the bookshelf steady and balanced. A strong frame means your books will stay safe and the shelf will last longer.
Using the right tools and materials helps the process go smoothly. Take your time to fit each piece together well. Follow the steps below to create a solid frame that holds everything firmly.
Joining The Sides And Shelves
Start by placing the side panels upright on a flat surface. Position the shelves between the sides at the spots you marked. Make sure the shelves are level and fit snugly. Use clamps to hold the pieces in place. Check the corners for right angles. This keeps the bookshelf straight and tidy.
Securing With Screws And Glue
Apply wood glue to the edges where shelves meet sides. The glue adds strong bonding and reduces wobbling. Next, drill pilot holes to avoid splitting the wood. Drive screws into these holes to lock the pieces. Use screws long enough to hold well but not too long to poke through. Wipe off extra glue before it dries for a clean finish.
Adding Support Features
Adding support features is key to building a strong long narrow bookshelf. These features keep the shelf stable and help it hold many books without bending. Without proper support, the shelf may wobble or break over time. Focus on two main supports: back panels and braces. Both improve the bookshelf’s durability and safety.
Installing Back Panels
Back panels add strength to the bookshelf frame. Use a thin plywood sheet cut to fit the back. Nail or screw it evenly along the edges. This panel stops the bookshelf from twisting or leaning sideways. It also keeps dust out of the wall gap. Choose a panel that matches the shelf size and shape.
Secure the panel tightly. Gaps reduce support and stability. Make sure the panel is flat and flush with the shelf edges. A solid back panel improves the shelf’s load capacity and lifespan.
Adding Braces For Stability
Braces support the shelves from underneath or at corners. Use metal or wooden braces to strengthen weak points. Attach braces where the shelf meets the sides and at the middle for long shelves. This prevents sagging and bending under heavy books.
Install braces with screws for a firm hold. Check that braces do not block shelf space or look uneven. Properly placed braces keep the bookshelf steady, even with full loads. They also help the shelf resist side-to-side movement.
Credit: www.homedepot.com
Finishing Touches
Finishing touches give your long narrow bookshelf a clean, polished look. They protect the wood and improve its durability. Taking time on these steps makes your project last longer and look better.
Sanding The Surface
Start by sanding the entire bookshelf surface. Use fine-grit sandpaper for a smooth finish. Sand along the grain of the wood to avoid scratches. Remove dust with a clean, dry cloth before the next step.
Painting Or Staining
Choose paint or stain based on your desired look. Paint covers the wood completely and adds color. Stain highlights the natural wood grain and gives warmth. Apply evenly with a brush or cloth, and let it dry fully.
Applying A Protective Coat
Protect the finish with a clear coat of varnish or polyurethane. This layer guards against scratches and moisture. Use a clean brush and apply thin, even coats. Allow each coat to dry before adding another for best results.
Positioning Your Bookshelf
Positioning your long narrow bookshelf is key for both safety and style. The right spot shows off your books and keeps the shelf steady. Careful placement helps avoid clutter and makes your room feel more open. Take a moment to think about where the shelf fits best.
Choosing The Best Spot
Pick a wall with enough space for your bookshelf’s length and height. Avoid areas where people walk often to stop bumps or accidents. Look for spots near natural light to make your books easy to see. Make sure the floor is level to keep the shelf balanced. Measure the space first to check the fit.
Securing The Bookshelf To The Wall
Attach the bookshelf to the wall to prevent tipping. Use strong brackets or wall anchors suitable for your wall type. Find wall studs with a stud finder for a secure hold. Screw the brackets into both the wall and the bookshelf firmly. Double-check stability before placing books on the shelf.
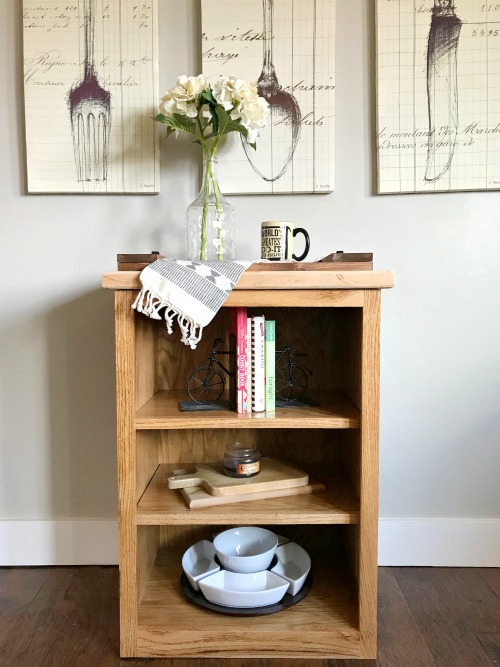
Credit: www.woodshopdiaries.com
Frequently Asked Questions
What Materials Are Best For A Long Narrow Bookshelf?
Use sturdy wood like pine or plywood for durability. Choose materials that are easy to cut and assemble. Avoid heavy or brittle materials that may compromise stability.
How Do I Measure Space For A Narrow Bookshelf?
Measure the wall length and height where the shelf will fit. Allow extra space for wall clearance and future adjustments. Accurate measurements ensure the bookshelf fits perfectly.
What Tools Are Needed To Build A Narrow Bookshelf?
Basic tools include a saw, drill, measuring tape, and screwdriver. Sandpaper and wood glue are also helpful. These tools help ensure precise cuts and strong assembly.
How Can I Ensure My Bookshelf Is Stable And Secure?
Use brackets or wall anchors to fix the shelf to the wall. Reinforce joints with wood glue and screws. Stability prevents tipping and protects your books.
Conclusion
Building a long narrow bookshelf takes patience and care. Follow each step slowly and check your work often. Use the right tools and materials for best results. A well-made shelf will hold your books safely and look good. Enjoy the pride of making something useful with your own hands.
Keep your workspace clean and stay safe while working. This project adds extra storage and style to any room. Try different finishes or decorations to match your space. Keep learning and improving with each project you do.