Have you ever opened your VitalSource Bookshelf and found your pages covered in so many highlights that it’s hard to focus? Those marks might have helped you once, but now they’re just cluttering your reading experience.
If you’re wondering how to quickly delete all highlights and start fresh, you’re in the right place. You’ll discover simple steps to clear every highlight in your VitalSource Bookshelf, so you can enjoy a clean, distraction-free book. Keep reading to take control of your digital notes and make your reading smoother than ever.

Credit: www.youtube.com
Accessing Your Highlights
Accessing your highlights in Vitalsource Bookshelf is simple. It helps you manage and review your notes easily. Knowing where your highlights are saves time. Follow these steps to find all your marked sections quickly.
Open Vitalsource Bookshelf
First, launch the Vitalsource Bookshelf app or visit the website. Sign in with your account details. Your library will appear with all your books. Select the book where you want to check highlights.
Locate Highlighted Sections
After opening the book, look for the highlight menu or icon. This shows all your highlighted parts in the book. You can scroll through or search for specific highlights. It makes reviewing notes easier and faster.
Credit: success.vitalsource.com
Deleting Highlights Manually
Deleting highlights manually in Vitalsource Bookshelf lets you control exactly what stays or goes. This method works well if you want to remove a few marks without affecting all your notes. The process is simple and takes only a few clicks.
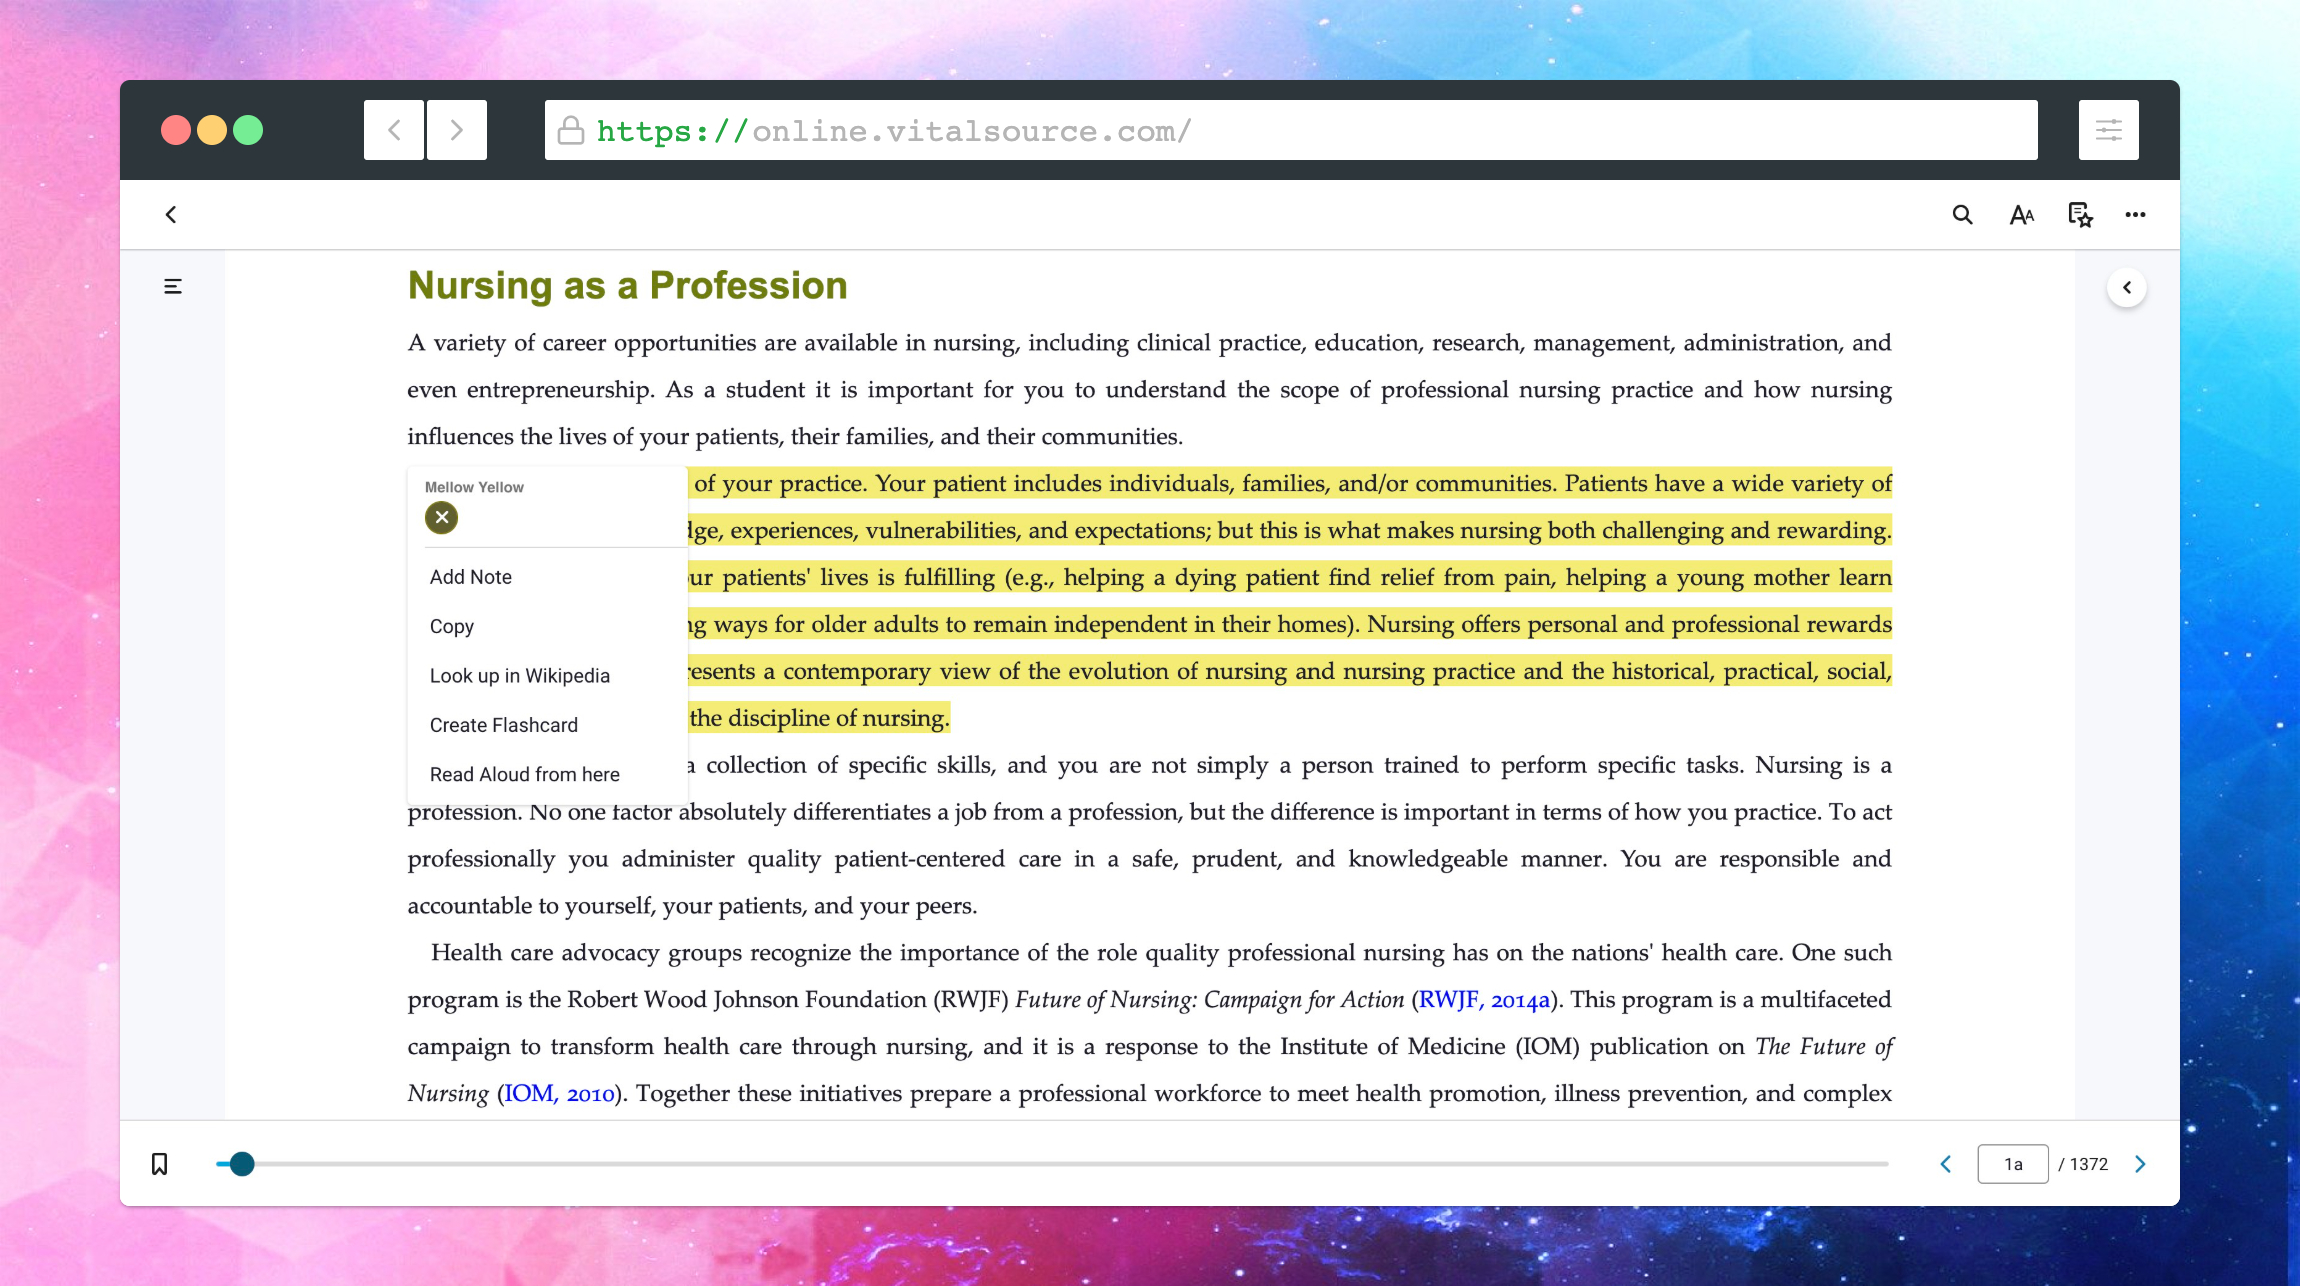
Select A Highlight
First, open your Vitalsource Bookshelf and go to the book with highlights. Scroll to the page where you want to delete a highlight. Click on the highlighted text you want to remove. This action selects the highlight and shows options for editing or deleting.
Remove Individual Highlights
After selecting the highlight, look for the delete or trash icon near it. Click this icon to remove the highlight from the text. The highlight disappears immediately, leaving the original text clear. Repeat this step for each highlight you want to delete.
Bulk Deletion Options
Managing highlights in VitalSource Bookshelf can be simple with bulk deletion options. These tools help save time and keep your notes organized. Instead of deleting highlights one by one, use bulk actions to clear many at once. This makes your reading experience cleaner and less cluttered.
Use Highlight Manager
The Highlight Manager is a built-in tool in VitalSource Bookshelf. It shows all your highlights in one place. You can browse, edit, or delete them quickly. To access, open the app and find the Highlight Manager in the menu. This tool lets you select multiple highlights at once. Then, you can delete them in bulk with a few clicks. It’s easy and fast.
Delete All Highlights At Once
Deleting all highlights at once saves time. In the Highlight Manager, look for the option to select all highlights. After selecting, click the delete button. Confirm your choice to remove all highlights from the book. This action cannot be undone, so be sure before deleting. Bulk deletion clears your book’s highlights instantly and keeps your notes fresh.
Credit: support.evantage.ca
Syncing Changes Across Devices
Syncing changes across devices ensures your highlights stay updated everywhere. When you delete highlights on one device, you want those changes on all your other devices. This process keeps your reading experience smooth and consistent.
Without syncing, deleted highlights might still appear on other devices. This can cause confusion and clutter in your notes. Syncing helps keep your digital bookshelf clean and organized.
Enable Cloud Sync
First, turn on cloud sync in your Vitalsource Bookshelf app. This option uploads your highlights and notes to the cloud. It allows all devices linked to your account to share the same data. Go to settings and look for the sync option. Make sure it is active before deleting any highlights.
Confirm Deletions On All Devices
After deleting highlights on one device, open Vitalsource Bookshelf on your other devices. Check if the highlights are removed there too. Sometimes syncing may take a few minutes. If changes do not appear, try refreshing or restarting the app. Confirming deletions keeps your highlights consistent everywhere.
Tips To Avoid Accidental Deletion
Deleting all highlights in VitalSource Bookshelf can be risky. You might lose important notes or ideas by mistake. Taking some simple steps helps keep your highlights safe. These tips help you avoid accidental deletion and protect your work.
It is smart to prepare before deleting. Careful actions save time and stress later. Follow these easy guidelines to keep control over your highlights.
Backup Highlights
Always save a copy of your highlights before deleting. VitalSource allows exporting notes and highlights. Use this feature to keep a backup file on your device. This file helps restore highlights if you delete them by accident. Backups give you peace of mind and extra security.
Exporting highlights regularly is a good habit. It prevents loss during app updates or device changes. Keep your backup files organized for quick access.
Use Caution With Bulk Actions
Bulk deletion removes many highlights at once. This action can cause big mistakes if done carelessly. Check your selections carefully before confirming deletion. Avoid selecting all highlights unless you are sure.
Take your time with bulk actions. Review the highlights you want to delete. When unsure, delete highlights one by one. Small steps reduce the chance of losing important notes.
Troubleshooting Highlight Issues
Sometimes, deleting highlights in Vitalsource Bookshelf does not work as expected. This can be frustrating, especially when you want a clean reading space. Troubleshooting highlight issues helps fix these problems quickly. Below are common problems and solutions to guide you through.
Highlights Not Deleting
Highlights may stay even after trying to delete them. This can happen due to app glitches or slow internet. Restart the app and try deleting again. Clear the app cache if possible. Check for app updates and install them. Sometimes, highlights sync slowly across devices. Wait a few minutes and check again.
Contacting Vitalsource Support
When highlights still do not delete, contact Vitalsource support. Visit their official help page to submit a ticket. Provide details like your device, app version, and problem description. Attach screenshots if possible. Support teams respond quickly to help fix technical issues. Keep your app updated while waiting for a response.
Frequently Asked Questions
How Do I Delete All Highlights In Vitalsource Bookshelf?
To delete all highlights in Vitalsource Bookshelf, open your book, go to the Highlights menu, select all highlights, and choose the delete option. This removes all your annotations quickly without affecting your notes or bookmarks.
Can I Recover Deleted Highlights In Vitalsource Bookshelf?
No, once highlights are deleted in Vitalsource Bookshelf, they cannot be recovered. Always double-check before deleting to avoid losing important information permanently.
Is There A Shortcut To Remove All Highlights At Once?
Vitalsource Bookshelf does not offer a shortcut to delete all highlights instantly. You must manually select and delete highlights from the Highlights panel.
Will Deleting Highlights Affect My Notes Or Bookmarks?
Deleting highlights in Vitalsource Bookshelf only removes the highlighted text. Your notes and bookmarks remain intact and are not affected by this action.
Conclusion
Deleting all highlights in Vitalsource Bookshelf is simple and quick. Just follow the steps carefully. This clears your notes and makes reading cleaner. You can manage your highlights anytime without trouble. Keep your digital bookshelf organized and easy to use.
Regularly removing old highlights helps focus on new information. Now, enjoy a fresh reading experience with less clutter. Stay in control of your study materials with ease.