Are you ready to take apart your bunk bed but don’t know where to start? Disassembling a bunk bed can feel tricky and overwhelming, especially if you want to keep all the parts safe and avoid damage.
But with the right steps and a little guidance, you can do it quickly and easily. You’ll discover simple, clear instructions that make the process smooth and stress-free. Keep reading, and you’ll have your bunk bed apart in no time—ready for moving, storage, or a fresh new setup.
Tools Needed
Disassembling a bunk bed needs the right tools. Using proper tools saves time and prevents damage. Prepare these items before starting to work. This helps the process go smoothly and safely.
Basic Tools List
Start with a screwdriver set. Both flathead and Phillips heads are useful. An adjustable wrench or socket set helps with bolts. A rubber mallet can loosen tight joints. Keep a small hammer for nails or pins. A flashlight or headlamp helps in dark corners. A box or container keeps screws and small parts safe. These tools cover most bunk bed types.
Safety Gear
Wear protective gloves to avoid splinters or cuts. Safety glasses protect your eyes from dust and debris. Use a dust mask if the bed is old or dusty. Wear closed-toe shoes to protect your feet. Avoid loose clothes that can get caught. Safety gear keeps you safe during the disassembly.
Prepare The Area
Clear enough space around the bunk bed to work safely and easily. Lay down a soft cloth or blanket to protect parts from scratches during disassembly. Gather tools nearby to avoid interruptions.
Preparing the area is the first step in disassembling a bunk bed. A clean, organized space helps you work safely and efficiently. It also prevents damage to the bed parts and your room. Take your time to get the room ready before you start.
Clear Surrounding Space
Remove all furniture near the bunk bed. This gives you enough room to move and work. Move toys, rugs, and other items away from the bed. Keep the area free of clutter to avoid tripping or losing small screws. Clear space makes the process smoother and faster.
Protect Flooring
Cover the floor with a soft cloth or old blanket. This stops scratches or dents from tools or bed parts. Use cardboard or foam sheets for extra protection. Protecting the floor saves you from extra cleaning or repairs later. It also keeps the bed parts safe from damage.
Remove Mattresses And Bedding
Removing mattresses and bedding is the first step in disassembling a bunk bed. Clearing the bed makes the process safer and easier. It also protects your bedding from dust and damage. Start by taking off all pillows, blankets, and sheets. Set these aside in a clean area.
Next, lift the mattress carefully. Bunk bed mattresses can be heavy and awkward to handle. Ask for help if needed. Place the mattress flat on the floor or a clean surface. This prevents it from bending or tearing.
Removing bedding and mattresses early also gives you more space to work. It makes the next steps smoother and quicker. Keep everything organized to avoid losing parts or making a mess.
Clear Pillows, Sheets, And Blankets
Take off all pillows from the top and bottom bunk. Remove sheets and blankets completely. Fold them neatly and store safely. This keeps bedding clean and ready to use later.
Lift And Remove The Mattresses
Hold the mattress firmly on both sides. Lift it straight up and away from the frame. Avoid bending or folding it. Place the mattress flat on a clean spot.
Store Bedding And Mattresses Safely
Put bedding in a dry, dust-free place. Roll or fold blankets and sheets carefully. Keep mattresses flat to avoid damage. This protects your items during disassembly and moving.

Credit: www.youtube.com
Take Down Guardrails
Taking down the guardrails is a key step in disassembling a bunk bed. Guardrails keep sleepers safe by preventing falls. Removing them carefully helps keep the bed parts intact and ready for reassembly or storage.
Guardrails often attach with screws or bolts. These fasteners hold the rails firmly to the bed frame. You will need basic tools like a screwdriver or an Allen wrench.
Locate The Fasteners Holding The Guardrails
Start by finding all screws or bolts securing the guardrails. Check both ends of each rail. Some beds hide fasteners under plastic covers or stickers. Removing these covers helps access screws easily.
Unscrew The Guardrails Carefully
Use the correct screwdriver or wrench to loosen each fastener. Turn screws counterclockwise to remove. Keep a steady hand to avoid stripping screws. Work slowly to prevent damage to the wood or metal.
Remove Guardrails And Store Safely
Once all screws are out, gently pull the guardrails away from the bed frame. Avoid forcing them to stop breakage. Place guardrails and screws in a labeled bag or box. This keeps parts organized for future use.
Detach Ladder
Detaching the ladder is a key step in taking apart a bunk bed. The ladder connects the top bunk to the floor, so removing it first makes the process easier and safer.
Most ladders are attached with screws or bolts. These hold the ladder firmly to the bed frame. Removing them carefully keeps the ladder and bed parts safe.
Gather Tools Needed For Ladder Removal
Prepare a screwdriver or wrench before starting. Check the type of screws or bolts used. Having the right tool saves time and effort.
Locate The Ladder Attachment Points
Find where the ladder connects to the bunk bed frame. Usually, these points are at the top and bottom of the ladder. Clear these spots to work smoothly.
Unscrew The Ladder From The Bed Frame
Turn screws or bolts counterclockwise to loosen them. Hold the ladder steady while unscrewing. Keep screws in a safe place for later use.
Carefully Remove The Ladder
Once all screws are out, gently pull the ladder away from the bed. Avoid forcing it to prevent damage. Set the ladder aside in a safe spot.
Unscrew Bed Frames
Unscrewing bed frames is a key step in taking apart a bunk bed. It makes the structure easier to handle and move. Use the right tools, such as a screwdriver or an electric drill with the right bit. Check the screws and bolts carefully before starting to avoid damage. Work slowly and keep all parts organized for easy reassembly or disposal.
Top Bunk Frame
Start with the top bunk frame. Locate all screws and bolts holding it in place. Usually, these connect the frame to the bedposts and guardrails. Remove each screw carefully, one at a time. Keep the screws in a small container to avoid losing them. Gently lift the frame off once all screws are removed. Set the top bunk frame aside in a safe spot.
Bottom Bunk Frame
Next, move to the bottom bunk frame. This frame is often connected to the same posts as the top bunk. Unscrew all bolts that hold the frame to the posts. Check for screws under the slats or support beams. Remove these carefully to avoid breaking the wood. Once all screws are out, lift the bottom frame off. Place it near the top frame to keep parts together.
Separate Bed Slats
Separating the bed slats is an important step in taking apart a bunk bed. Slats support the mattress and keep it steady. Removing them carefully helps protect the wood and makes the bed easier to move.
Slats are usually held by screws or resting on ledges. You need simple tools like a screwdriver or a wrench to remove them. Working slowly prevents damage to the slats and frame.
Locate The Bed Slats
Find each slat under the mattress frame. They run across the width of the bed. Check how they are fixed to the frame before starting.
Unscrew Or Lift The Slats
Use a screwdriver to remove screws holding the slats. Some slats may just rest on ledges. Lift those gently without forcing to avoid breaking.
Stack The Slats Neatly
Place removed slats in a pile. Keep them flat and aligned. This helps avoid warping and keeps them ready for reuse or storage.

Credit: removalsandstoragex.com
Organize And Store Parts
After disassembling your bunk bed, organizing and storing the parts is crucial. Proper storage keeps everything safe and easy to find later. It prevents lost pieces and saves time during reassembly.
Sorting parts right away makes the process smoother. Careful organization helps protect fragile pieces from damage. It also keeps small items from getting mixed up or misplaced.
Label Screws And Bolts
Group screws and bolts by size and type. Use small bags or containers for each group. Write clear labels on each bag to show what part it belongs to.
Labeling stops confusion and speeds up rebuilding. It helps you avoid mixing different screws or bolts. Always keep the labels visible and secure on the containers.
Pack Components Safely
Wrap wooden and metal parts in soft cloth or bubble wrap. This prevents scratches and dents during storage. Place larger parts flat to avoid warping or bending.
Use sturdy boxes for small components and keep them in a dry place. Store the packed parts in a safe area free from moisture. Safe packing protects your bunk bed parts for future use.
Safety Tips During Disassembly
Disassembling a bunk bed can be tricky without the right care. Safety is the top priority to avoid injuries and damage. Follow these simple tips to keep the process smooth and safe.
Wear Protective Gear
Put on gloves to protect your hands from splinters and sharp edges. Use safety glasses to shield your eyes from dust or small particles. Closed-toe shoes help protect your feet from falling parts.
Clear The Area
Remove all bedding and pillows before starting. Make sure the floor space is free of clutter. This prevents trips and falls during the disassembly.
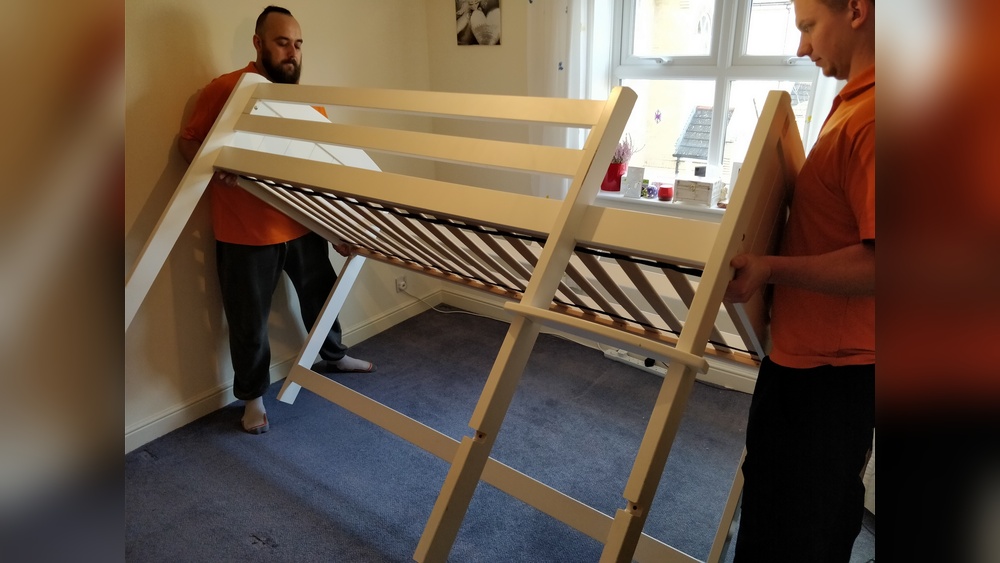
Work With A Partner
Having someone to help makes the job easier and safer. One person can hold parts steady while the other removes screws. Teamwork reduces the risk of dropping heavy pieces.
Use The Right Tools
Select tools that fit screws and bolts properly. Avoid using damaged or worn-out tools. Using the correct tools prevents slips and stripped screws.
Follow Instructions Carefully
Read the bed’s manual before starting. Follow the steps in order to avoid mistakes. Skipping steps can lead to unsafe conditions or broken parts.
Handle Parts Gently
Lift heavy parts with your legs, not your back. Move slowly to keep control of each piece. Dropping parts can cause injuries or damage the bed.
Credit: www.reddit.com
Frequently Asked Questions
How Do I Safely Disassemble A Bunk Bed?
Start by removing all bedding and mattresses. Use the correct tools to unscrew bolts and screws. Work from the top down, carefully detaching guardrails and ladder. Keep all hardware organized to avoid loss. Follow the manufacturer’s instructions for best results.
What Tools Are Needed To Disassemble A Bunk Bed?
You typically need a screwdriver, Allen wrench, and a wrench. A hammer may help with stubborn parts. Check your bed’s assembly manual for specific tools. Having a small container for screws and bolts is useful. Proper tools make disassembly easier and safer.
How Long Does It Take To Disassemble A Bunk Bed?
Disassembly time varies but usually takes 30 to 60 minutes. It depends on bed complexity and your experience. Taking time to organize parts speeds up reassembly. Rushing can cause damage or missing pieces. Planning helps complete the task efficiently.
Can I Disassemble A Bunk Bed Alone?
Yes, but it’s safer with two people. One person can hold parts steady while the other removes bolts. Larger beds or heavy components are harder to manage alone. Assistance reduces risk of injury and damage. Plan accordingly for the safest process.
Conclusion
Disassembling a bunk bed can be simple with clear steps. Take your time and keep all parts organized. Use the right tools to avoid damage or injury. Follow safety tips to protect yourself during the process. This guide helps you work confidently and efficiently.
Soon, your bunk bed will be ready for moving or storage. Trust yourself, and the task will feel easier than you think.