Are you ready to upgrade your bathroom or makeover your space with a new vanity base cabinet? Installing one might seem tricky, but with the right steps, you can do it yourself and save money.
Imagine the satisfaction of seeing your new cabinet perfectly in place, adding both style and function to your room. In this guide, you’ll find simple, clear instructions that make the process easy to follow, even if you’re not a pro.
Keep reading, and you’ll have your vanity base cabinet installed quickly and confidently.
Credit: www.youtube.com
Tools And Materials Needed
Installing a vanity base cabinet needs the right tools and materials. Having everything ready makes the job easier and faster.
This section lists essential items for a smooth installation. Each tool and material serves a clear purpose.
Measuring Tools
Accurate measurements are key for a perfect fit. Use a tape measure to check space dimensions. A level helps ensure the cabinet sits straight and even.
Cutting Tools
A saw is needed to trim cabinet parts or adjust plumbing holes. A utility knife can help with small cuts or opening packaging safely.
Fastening Tools
A drill speeds up screw driving and makes holes for anchors. Screwdrivers are needed to tighten screws securely. Wood screws and wall anchors keep the cabinet stable.
Safety Equipment
Protect your eyes with safety goggles. Gloves keep your hands safe from sharp edges and splinters. Use ear protection when cutting loud materials.
Materials For Installation
Besides the cabinet, gather shims to level the base. Silicone caulk seals gaps and prevents water damage. Painter’s tape helps mark positions without damage.
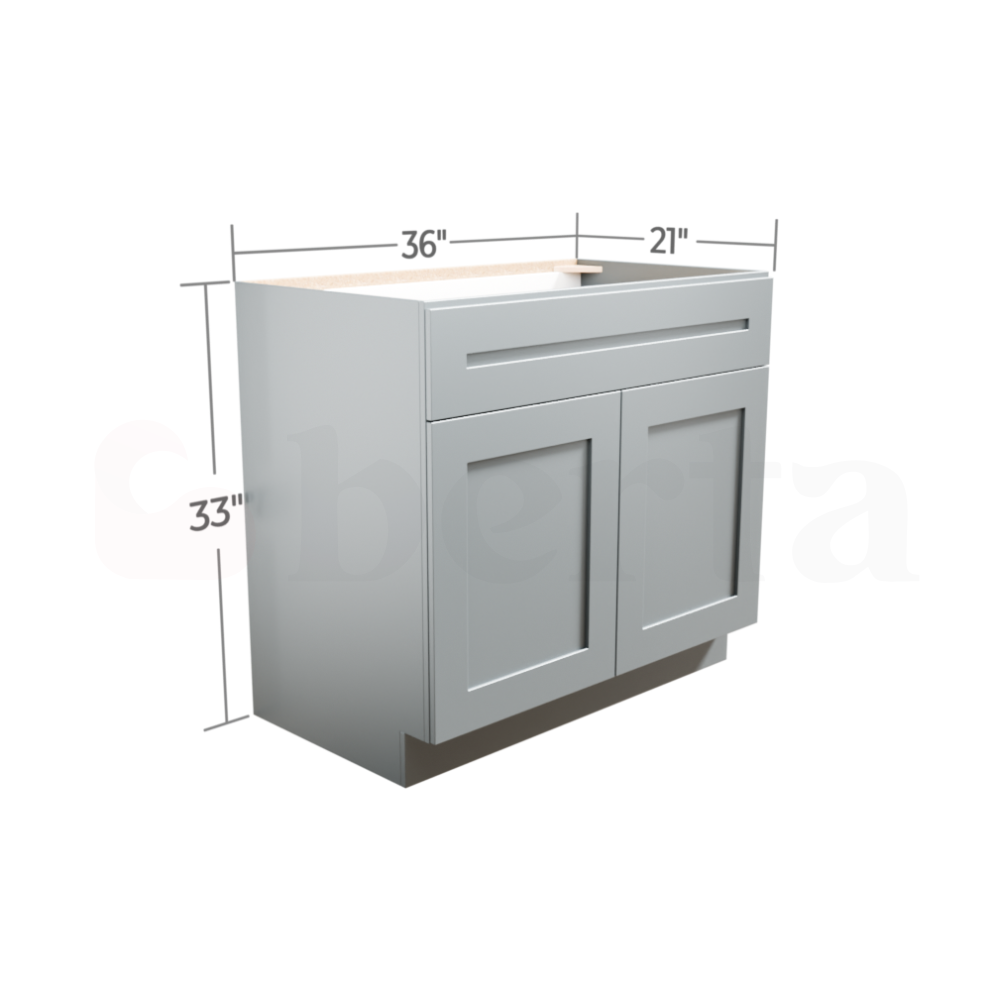
Credit: bertastore.com
Preparing The Installation Area
Preparing the installation area is a key step before setting up your vanity base cabinet. This stage ensures the cabinet fits well and stays secure. Proper preparation prevents future problems like uneven surfaces or poor alignment.
Take your time to prepare. A smooth start leads to a smooth install.
Clearing The Space
Remove all items around the installation spot. Clear away debris, old cabinets, or tools. The area should be empty and clean. This space lets you work easily and safely. It also helps you see the wall and floor clearly.
Checking Wall And Floor Level
Use a level tool to check the wall and floor. Walls may lean or have bumps. Floors can slope or have dips. Mark any uneven spots. You may need to fix these before installing. A level surface keeps the cabinet stable and straight.
Marking Cabinet Placement
Measure the space for the cabinet carefully. Mark the exact spots on the wall and floor. These marks show where the cabinet will go. Double-check your measurements. Correct marking saves time and avoids mistakes during installation.
Assembling The Vanity Base Cabinet
Assembling the vanity base cabinet is a key step in your bathroom upgrade. This process involves putting all parts together to create a strong, functional unit. Clear steps make assembly easier and faster. Take your time and follow instructions carefully for best results.
Unpacking And Inspecting Parts
Start by opening the box carefully. Check each piece for damage or missing parts. Lay everything out in a clean, flat space. Compare parts to the list in the instruction manual. This helps avoid problems during assembly.
Following Assembly Instructions
Read the manual before starting to build. Follow steps in the exact order given. Use the recommended tools for each task. Take your time to understand each step before moving on. This ensures the cabinet fits together correctly.
Securing Cabinet Components
Use screws and fasteners included in the kit. Tighten each connection firmly but avoid over-tightening. Check alignment as you go to keep the cabinet square. Secure corners and joints to ensure stability. Proper fastening makes the cabinet last longer.
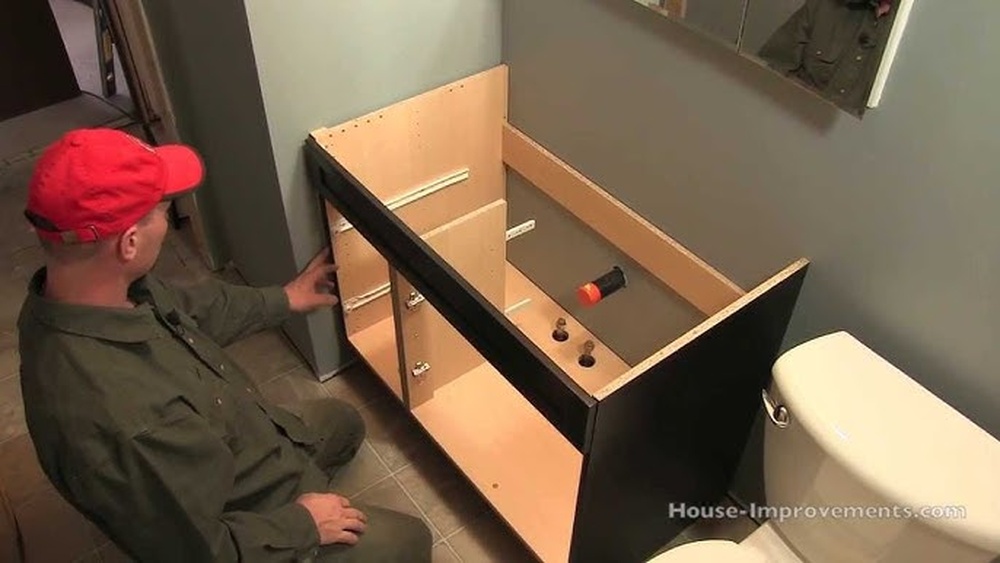
Positioning The Cabinet
Positioning the vanity base cabinet correctly is key to a smooth installation. It sets the stage for a sturdy, level, and functional bathroom setup. Taking time to place it right prevents problems later.
Aligning With Marked Spots
Start by lining up the cabinet with your wall markings. These marks show exactly where the cabinet should sit. Place the base so its edges match the marks on the floor and wall.
Check both sides carefully to avoid gaps or uneven spaces. Proper alignment helps the cabinet fit perfectly in your bathroom layout.
Leveling The Cabinet
Use a spirit level across the top of the cabinet to check if it is flat. Adjust the cabinet’s feet or add shims under the base to make it level. Small height changes make a big difference.
A level cabinet keeps your countertop even and prevents doors from swinging open or closed by themselves.
Adjusting For Plumbing And Electrical
Move the cabinet slightly if pipes or wires get in the way. Leave enough space for plumbing connections behind or inside the cabinet. Avoid squeezing or bending pipes.
Check for electrical outlets or wires near the cabinet. Make sure the cabinet does not block access or damage any wiring. Proper spacing keeps everything safe and functional.
Securing The Cabinet To The Wall
Securing the vanity base cabinet to the wall is a crucial step for safety and durability. A well-fixed cabinet will hold heavy items without shifting or tipping. This part requires careful attention to ensure the cabinet stays in place over time.
Locating Wall Studs
Find the wall studs behind the drywall first. Use a stud finder for accuracy. Mark the stud locations with a pencil. Studs provide strong support for the cabinet weight. Avoid attaching the cabinet only to drywall.
Using Appropriate Fasteners
Choose screws made for wood and wall studs. The screws should be long enough to reach deep into studs. Use at least 3-inch screws for a solid hold. Avoid nails or short screws that can pull out easily.
Ensuring Stability
Place the cabinet against the wall at the marked studs. Drill pilot holes through the cabinet frame into the studs. Drive screws tight but do not over-tighten. Check the cabinet for level and adjust if needed. The cabinet should feel secure with no movement.
Final Touches
Final touches bring your vanity base cabinet to life. This stage completes the installation. It ensures everything fits and works smoothly. Careful attention here makes your cabinet look polished and professional.
Installing The Countertop
Place the countertop gently on the cabinet frame. Check that it fits perfectly without gaps. Use silicone or adhesive to secure it firmly. Wipe away any excess glue immediately. Let the adhesive dry as per instructions.
Attaching Doors And Drawers
Align the doors with the cabinet openings. Attach hinges carefully, making sure doors open smoothly. For drawers, slide them into place along the tracks. Test each door and drawer for easy movement. Adjust hinges or slides if needed.
Adding Hardware
Choose handles or knobs that match your style. Mark holes evenly on doors and drawers. Drill small pilot holes to avoid splitting wood. Screw in the hardware tightly but without force. Step back and admire your finished cabinet.
Common Installation Issues
Installing a vanity base cabinet may seem simple, but many face common issues. These problems can slow down the process or affect the final look. Knowing how to handle these issues helps ensure a smooth installation and a sturdy cabinet.
Handling Uneven Floors
Uneven floors cause cabinets to wobble or tilt. Use shims under the cabinet base to level it. Check with a spirit level to confirm the cabinet is straight. Cut shims to fit tight spaces and prevent movement. Secure shims with adhesive or screws for stability.
Dealing With Misaligned Walls
Walls are not always perfectly straight or square. This can make the cabinet sit unevenly or leave gaps. Measure the wall angles carefully before installation. Use flexible filler or trim pieces to cover small gaps. For large misalignments, adjust cabinet placement or use custom shims.
Fixing Cabinet Gaps
Gaps between cabinets or walls look unfinished and collect dust. Fill small gaps with caulk or wood filler. For bigger gaps, install molding or trim strips to hide spaces. Align cabinets tightly during installation to reduce gaps. Double-check measurements before securing cabinets in place.
Maintenance Tips
Proper maintenance keeps your vanity base cabinet looking new. It also helps it last longer. Simple care routines prevent damage and costly repairs. Follow these easy tips to maintain your cabinet well.
Cleaning And Care
Wipe the cabinet with a soft, damp cloth regularly. Avoid harsh chemicals that can damage the finish. Use mild soap and water for tougher spots. Dry the surface fully to stop water marks. Clean spills quickly to prevent stains and warping.
Checking For Loose Fasteners
Check screws and bolts every few months. Tighten any loose fasteners to keep the cabinet stable. Loose parts can cause wobbling or damage over time. Use the right tools to avoid stripping screws. Regular checks ensure safety and durability.
Protecting Against Moisture
Keep the cabinet dry to avoid swelling or mold. Use mats or trays under sinks to catch leaks. Seal gaps where water can enter. Ventilate the bathroom to reduce humidity. Moisture protection helps maintain the cabinet’s strength and look.

Credit: www.youtube.com
Frequently Asked Questions
How Do I Prepare The Area Before Installing A Vanity Base Cabinet?
Clear the space and remove old fixtures. Check for plumbing and electrical access. Measure the area to ensure proper fit and make any necessary repairs to the floor or walls.
What Tools Are Needed To Install A Vanity Base Cabinet?
You will need a drill, level, tape measure, screwdriver, stud finder, shims, and screws. These tools help ensure accurate installation and secure mounting of the cabinet.
How Do I Secure The Vanity Base Cabinet To The Wall?
Locate wall studs using a stud finder. Align the cabinet and drill pilot holes. Use screws to attach the cabinet firmly to the studs for stability.
Can I Install A Vanity Base Cabinet Myself?
Yes, with basic carpentry skills and tools, you can install it. Follow instructions carefully, measure accurately, and take safety precautions for a successful DIY project.
Conclusion
Installing a vanity base cabinet can improve your bathroom’s look and function. Follow the steps carefully for a strong, level fit. Take your time measuring and securing the cabinet. Use the right tools and check for any mistakes. A well-installed cabinet lasts long and holds your items safely.
With patience and care, you can do this project yourself. Enjoy your new vanity and the fresh space it creates. Small effort, big change.