Are you looking to give your bathroom a fresh, stylish look without spending a fortune? Making a bathroom vanity out of a cabinet is a smart and creative way to do just that.
Imagine turning an ordinary cabinet into a beautiful, functional centerpiece that fits your space perfectly. In this guide, you’ll discover simple steps that anyone can follow, even if you’re new to DIY projects. Ready to transform your bathroom and impress your guests?
Keep reading to find out how you can make your own custom vanity with ease.
Choosing The Right Cabinet
Choosing the right cabinet is key to making a great bathroom vanity. The cabinet forms the base. It must fit the space well and match the style. Picking the right one saves time and effort during the project.
Materials To Consider
Cabinets come in many materials. Solid wood is strong and lasts long. Plywood is also good and cheaper. Avoid particleboard; it can swell with water. Look for water-resistant finishes. This protects the cabinet in the bathroom’s moist air.
Size And Dimensions
Measure your bathroom space first. The cabinet should fit comfortably without blocking doors. Check the height too. Standard vanity height is about 32 inches. Depth matters for sink and plumbing fit. Leave some space around for cleaning.
Style And Design
Match the cabinet style with your bathroom look. Simple cabinets suit modern bathrooms. Ornate ones fit classic styles. Consider door and drawer types. Flat panels give a clean look. Raised panels add texture. Choose colors that blend well with tiles and walls.
Gathering Necessary Tools And Materials
Gathering the right tools and materials is the first step to make a bathroom vanity from a cabinet. Having everything ready helps the work go smoothly. It saves time and avoids trips to the store. This section lists all you need before starting.
Essential Tools
You need a drill with drill bits for holes. A screwdriver, both flathead and Phillips, is important. A tape measure helps to get precise sizes. A level ensures your vanity is straight. A jigsaw or handsaw will cut the cabinet or countertop. Sandpaper or a power sander smooths rough edges. Clamps hold pieces in place while you work.
Additional Supplies
Buy wood screws and anchors for secure mounting. Wood glue strengthens joints. Caulk seals gaps and protects from water damage. Primer and paint or wood stain finish the vanity. A sink and faucet fit into the cabinet top. Plumbing supplies include pipes, washers, and plumber’s tape. A countertop material like plywood or MDF completes the surface.
Safety Gear
Wear safety goggles to protect your eyes from dust and debris. Use work gloves to keep hands safe from cuts and splinters. A dust mask prevents inhaling sawdust. Ear protection reduces noise from power tools. Dress in long sleeves and pants for extra protection.
Preparing The Cabinet
Preparing the cabinet is the first key step in making a bathroom vanity. This stage ensures the cabinet is clean, smooth, and ready for any changes. Taking time here makes the final product look neat and last longer.
Cleaning And Sanding
Start by wiping the cabinet to remove dust and dirt. Use a mild cleaner and a soft cloth. Let it dry completely before moving on.
Sand the cabinet surface lightly with fine-grit sandpaper. This helps remove old paint and rough spots. Sanding also helps new paint or finish stick better.
Removing Doors And Drawers
Take off all doors and drawers from the cabinet. Use a screwdriver to remove the hinges and handles carefully. Keep all screws and hardware in a safe place for later use.
Removing these parts makes it easier to work on the cabinet. It also gives a clean look and space for new fittings.
Repairing Damages
Check the cabinet for cracks, holes, or loose parts. Use wood filler to fill small holes or cracks. Let the filler dry and then sand it smooth.
Tighten any loose screws or hinges. Replace broken parts if needed. Fixing damages now prevents problems in the finished vanity.
Credit: www.nashuahomedesigncenter.com
Modifying The Cabinet For Plumbing
Modifying the cabinet for plumbing is a key step in making a bathroom vanity. The cabinet must fit the sink drain and water pipes properly. Careful adjustments ensure smooth installation and prevent leaks. This part takes patience and accuracy.
Measuring Plumbing Requirements
Start by measuring the space needed for pipes and drains. Check the size of the sink drain and water supply lines. Mark the cabinet where holes must be made. Use a tape measure and pencil for precise marks.
Cutting Openings
Use a drill or jigsaw to cut holes in the cabinet. Follow the marks exactly to avoid big gaps or tight fits. Smooth the edges with sandpaper to stop splinters. Make sure openings align well with plumbing parts.
Sealing And Reinforcing
Seal the edges of openings with waterproof silicone. This stops water damage inside the cabinet. Add wood glue or extra screws to reinforce cut areas. Strong support prevents cracks and keeps the cabinet sturdy.
Installing The Vanity Top
Installing the vanity top is an important step in making a bathroom vanity out of a cabinet. The top adds style and function. It also protects the cabinet from water damage. Choosing the right top, securing it well, and sealing the edges will ensure a strong, long-lasting vanity.
Choosing A Vanity Top
Pick a vanity top that fits your cabinet perfectly. Measure the cabinet width and depth carefully. Choose materials like wood, stone, or laminate based on your style and budget. Consider a top with a pre-cut hole for the sink to save time. Make sure the top complements your bathroom decor.
Securing The Top To The Cabinet
Place the vanity top on the cabinet. Check it fits well without gaps. Use construction adhesive or silicone caulk on the cabinet edges. Press the top down firmly to stick it in place. Add screws from inside the cabinet if extra strength is needed. Avoid over-tightening to prevent cracks.
Sealing Edges
Seal all edges where the top meets the cabinet. Use waterproof silicone sealant for best results. Smooth the sealant with a wet finger or tool. This step stops water from entering the cabinet. It also gives a clean, finished look. Let the sealant dry completely before use.
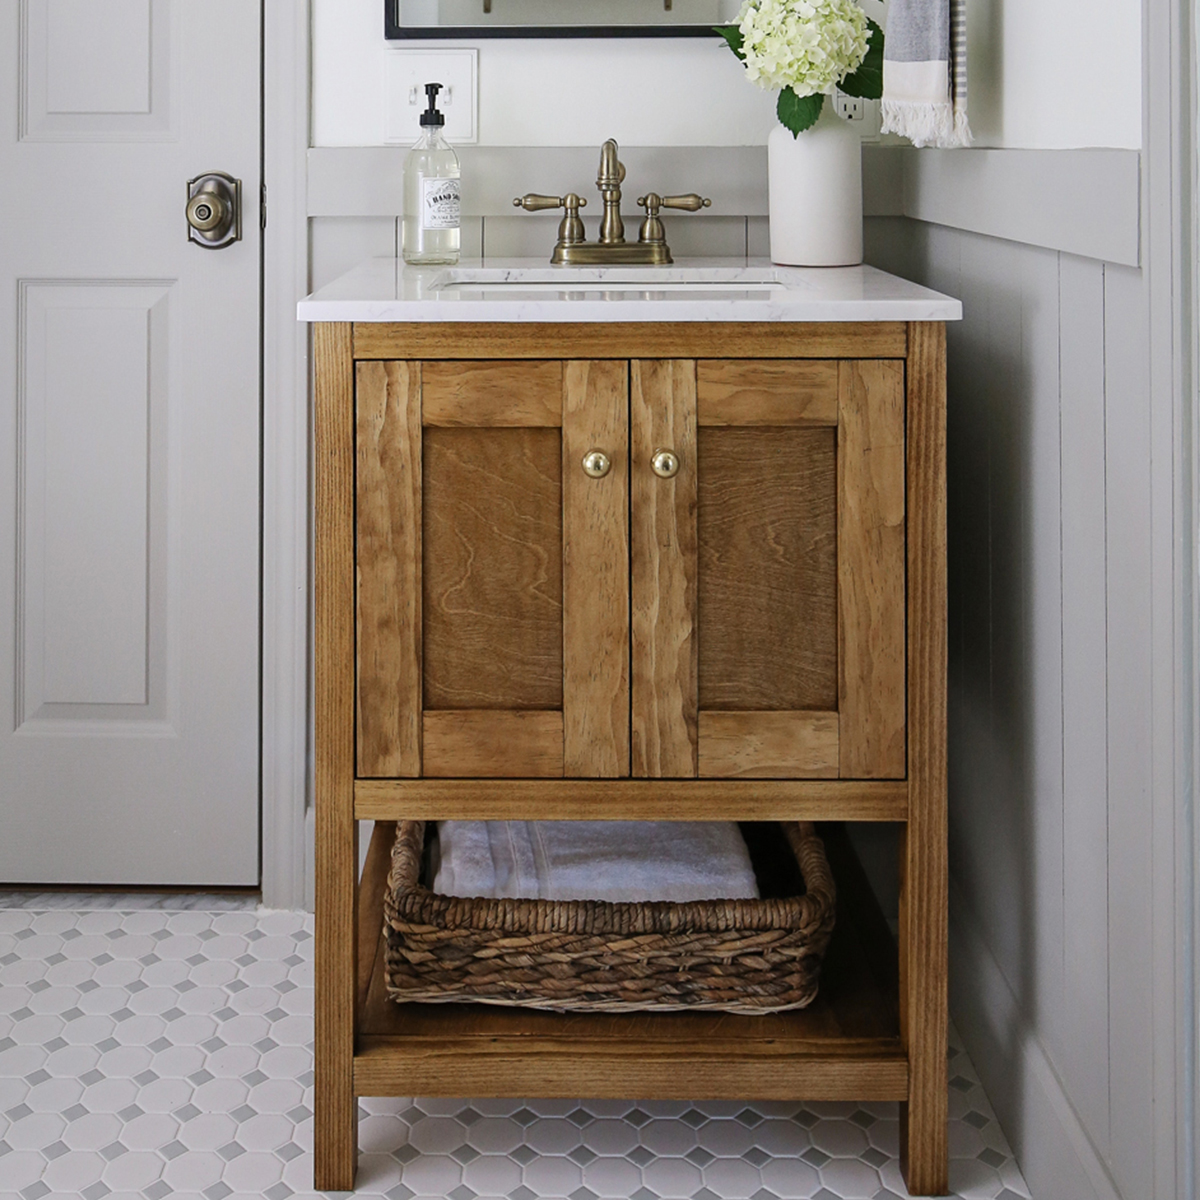
Credit: angelamariemade.com
Adding Fixtures And Hardware
Adding fixtures and hardware brings your bathroom vanity to life. These elements make your vanity functional and stylish. Proper installation ensures durability and ease of use. Focus on three key areas for best results.
Installing Sink And Faucet
Start by choosing a sink that fits your cabinet top. Cut the right size hole if needed. Secure the sink firmly to avoid leaks. Attach the faucet according to the manufacturer’s instructions. Tighten all connections to prevent water damage. Test the water flow and drainage before finishing.
Attaching Handles And Knobs
Select handles or knobs that match your bathroom style. Measure and mark holes on cabinet doors and drawers. Use a drill to make clean holes. Screw in the handles or knobs firmly. Check that they open and close smoothly. Small details like these improve usability and look.
Mounting Mirrors And Accessories
Choose a mirror size that suits your vanity and wall space. Use strong anchors to support the mirror weight. Position the mirror at eye level for convenience. Add accessories such as towel bars or soap holders nearby. Secure these fixtures tightly to the wall. These touches complete your vanity setup beautifully.
Finishing Touches
Finishing touches make your bathroom vanity look complete and polished. These small details bring out the beauty of your work. They also protect the cabinet and keep it lasting longer. Focus on painting or staining first, then apply a protective coating. Finally, add decorative elements to reflect your style.
Painting Or Staining
Choose paint or stain based on your desired look. Paint gives a smooth, solid color. Stain highlights the wood’s natural grain. Use paint or stain that resists moisture and wear. Apply thin, even coats for the best finish. Let each coat dry fully before adding the next.
Protective Coating
Seal the vanity with a clear protective coat. This layer guards against water damage and stains. Use a polyurethane or varnish designed for bathrooms. Apply it with a brush or spray in thin layers. Allow enough drying time between coats to avoid streaks.
Decorative Elements
Add hardware like knobs and handles to enhance style. Choose finishes like brushed nickel, bronze, or chrome. Consider adding trim or molding for extra detail. Small decorations can change the look completely. Keep elements simple to match the bathroom’s theme.
Maintenance Tips
Maintaining a bathroom vanity made from a cabinet keeps it looking fresh and lasting longer. Simple care prevents damage and costly repairs. Follow easy steps to protect your vanity daily.
Cleaning Techniques
Use a soft cloth and mild soap for cleaning. Avoid harsh chemicals that can ruin the finish. Wipe spills immediately to stop stains. Dry surfaces after cleaning to prevent water spots. Clean regularly to keep dirt and grime away.
Preventing Water Damage
Water can damage wood and cause swelling. Always wipe up water around the sink and faucets. Use a waterproof sealant on edges and corners. Check for leaks under the sink often. Place mats or trays to catch drips and spills.
Regular Inspections
Look over your vanity every few weeks. Check for loose screws, handles, or hinges. Watch for signs of mold or mildew. Fix small problems quickly to avoid bigger issues. Tighten fittings to keep doors and drawers working well.

Credit: www.youtube.com
Frequently Asked Questions
What Materials Are Needed To Make A Bathroom Vanity?
You need a cabinet, countertop, sink, faucet, plumbing tools, screws, and sealant. Choose water-resistant materials for durability. Proper tools ensure a smooth assembly and installation process.
How Do I Choose The Right Cabinet For A Vanity?
Pick a cabinet that fits your bathroom space and style. Ensure it has enough storage and is sturdy. Measure carefully to match sink and countertop dimensions for a perfect fit.
Can I Install A Vanity Myself Or Hire A Professional?
DIY installation is possible if you have basic plumbing and carpentry skills. For complex plumbing or electrical work, hiring a professional is safer. Proper installation avoids leaks and damage.
How Do I Waterproof A Cabinet For Bathroom Use?
Use waterproof sealant on all cabinet surfaces. Paint or coat with water-resistant finishes. Ensure edges and joints are sealed to prevent water damage and prolong vanity life.
Conclusion
Making a bathroom vanity from a cabinet is a smart idea. It saves money and adds a personal touch. You only need a few tools and steps to start. Choose a cabinet that fits your space well. Add a sink and make sure plumbing works right.
Painting or staining can change the look easily. This project helps you create a unique and useful vanity. Take your time and enjoy the process. Soon, your bathroom will look fresh and new. Simple changes can make a big difference.