Are you ready to bring your Roblox game to life with a cool, custom bookshelf? Making a bookshelf in Roblox Studio might sound tricky, but with the right steps, you can create one quickly and easily.
Imagine how your players will enjoy exploring a room filled with neat, detailed furniture that you built yourself. In this guide, you’ll learn exactly how to design, build, and customize your very own bookshelf. Stick with me, and by the end, you’ll have a unique piece that adds style and personality to your game world.
Let’s dive in and make your Roblox creations stand out!
Setting Up Roblox Studio
Setting up Roblox Studio is the first step to creating your bookshelf. It is a free program made for building games and objects in Roblox. The setup is simple and quick. This guide helps you start with no trouble.
Installing Roblox Studio
Go to the official Roblox website. Find the Roblox Studio download button. Click it to start downloading. Wait for the file to finish. Open the file to begin installation. Follow the steps shown on the screen. The program will install in a few minutes. After installation, launch Roblox Studio from your desktop or start menu.
Creating A New Project
Once Roblox Studio opens, you will see a welcome screen. Click on “New” to create a new project. Choose a template like “Baseplate” for a simple start. This gives you a clean space to build your bookshelf. Name your project something easy to remember. Save your project to avoid losing work. Now, you are ready to design your bookshelf in Roblox Studio.
Credit: devforum.roblox.com
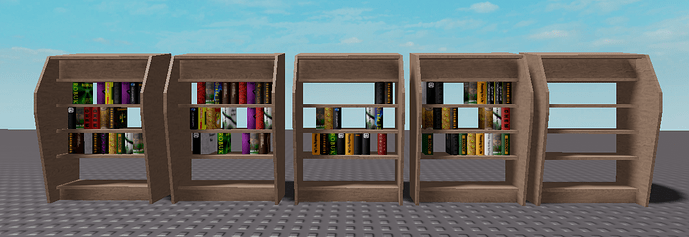
Designing The Bookshelf
Designing the bookshelf in Roblox Studio is a fun and creative step. It shapes how your bookshelf looks and fits into your game. Focus on the details to make it look real and neat. This part guides you through picking parts and placing them correctly.
Choosing The Right Parts
Select parts that match the style of a real bookshelf. Use simple blocks for shelves and sides. Thin, flat parts work well for shelves. Use thicker parts for the frame to make it strong. Avoid parts that are too big or too small. Keep shapes basic for easy editing. Colors matter too; pick wood-like shades or bright colors for variety.
Sizing And Positioning
Measure the size of your bookshelf before placing parts. Make sure shelves have enough space for books or items. Position shelves evenly to create balance. Align parts carefully to avoid gaps or overlaps. Use the grid and snap tools in Roblox Studio for accuracy. Adjust size to fit the room or area in your game. A well-sized bookshelf looks natural and inviting.
Building The Structure
Building the structure of your bookshelf in Roblox Studio is the first step. It creates the basic shape and holds everything together. A solid frame makes your bookshelf look real and stable. Start with simple blocks and shape them carefully. Take your time to measure and place each part correctly.
This process involves putting shelves and adding support beams. These parts work together to keep the bookshelf strong and neat. Follow the steps below for a clear and easy build.
Assembling The Shelves
Begin by creating flat rectangular parts for your shelves. Use the scale tool to adjust their length and width. Space the shelves evenly along the height of the bookshelf frame. Make sure each shelf is level and straight. Duplicate shelves for faster building and uniform size. Check their position in the 3D view to avoid overlap.
Adding Support Beams
Support beams hold the shelves firmly. Use thin, long blocks placed vertically or horizontally under each shelf. Attach beams at the edges or center for extra strength. Align them with the shelves to keep the design clean. Use the color tool to match the beams with the shelves. This step prevents shelves from looking like they are floating.

Credit: devforum.roblox.com
Adding Details
Adding details to your bookshelf in Roblox Studio makes it stand out. Small touches bring life and realism. It turns a simple object into a creative piece. Focus on decoration and color to enhance your design.
Decorating The Bookshelf
Start by placing small items on the shelves. Books, plants, or tiny objects work well. Use Roblox Studio’s toolbox or create your own models. Arrange items neatly to avoid clutter. Keep the sizes balanced for a natural look. This step makes the bookshelf feel lived-in and inviting.
Applying Textures And Colors
Choose textures that match the style you want. Wood grains add warmth, metal looks modern. Use simple colors for a clean design or bright ones for fun. Test different colors on parts before finalizing. Apply textures evenly to avoid patchy spots. This detail improves realism and visual appeal greatly.
Scripting Interactions
Scripting interactions in Roblox Studio brings your bookshelf to life. It allows players to interact with the bookshelf, making the experience fun and immersive. This section covers how to make the bookshelf functional and add book storage features using simple scripts.
Making The Bookshelf Functional
Start by creating a script inside the bookshelf model. Use Roblox Lua to detect player actions, like clicking the bookshelf. Add a ClickDetector to the bookshelf part to register clicks.
Write a script that opens or closes the bookshelf door. Use simple animation or change the door’s position. This gives players visual feedback when they interact.
Test the script often to make sure the actions work smoothly. Keep the code clear and easy to read for future changes.
Adding Book Storage Features
Create a system to store virtual books inside the bookshelf. Use tables or arrays in Lua to hold book data. Each book can have properties like title and author.
Add functions to let players add or remove books. Make sure these changes update visually on the bookshelf.
Display the stored books as clickable objects or text labels. This helps players see which books are inside the shelf.
Use simple scripts to save the book list so players keep their books after leaving the game.

Credit: www.youtube.com
Testing And Publishing
Testing and publishing your bookshelf project in Roblox Studio is essential. It helps ensure your creation works well before sharing it. This process also lets you fix errors and improve gameplay.
Follow these steps to run your game, solve common issues, and publish your work for others to enjoy.
Running The Game
Start by clicking the Play button in Roblox Studio. This runs your bookshelf project inside the editor. Check if the bookshelf looks right and works as expected. Test all parts, like opening doors or moving shelves. Watch for any glitches or missing pieces.
Fixing Common Issues
Errors may appear during testing. Look for broken scripts or objects that don’t move. Check the Output window for error messages. Fix coding mistakes or replace missing parts. Test again after each change to see if the problem is solved. Keep fixing until the game runs smoothly.
Publishing Your Project
When your bookshelf works well, publish it. Click File, then choose Publish to Roblox As. Name your project clearly so others find it easily. Set permissions to control who can play or edit the game. Save your work and share the bookshelf with the Roblox community.
Frequently Asked Questions
How Do I Start Making A Bookshelf In Roblox Studio?
Begin by opening Roblox Studio and creating a new place. Use basic parts like blocks to form the bookshelf shape. Customize colors and sizes to match your design. Group the parts to keep them organized for easy editing.
What Tools Are Essential For Building In Roblox Studio?
Key tools include the Move, Scale, and Rotate tools. They help position and shape parts accurately. Use the Explorer and Properties panels to manage parts and adjust settings. These tools streamline the building process for your bookshelf.
Can I Add Interactive Features To My Bookshelf?
Yes, you can add scripts for interactivity. Use Lua scripting to enable features like opening doors or storing items. This adds functionality and enhances user experience in your Roblox game.
How Do I Texture My Bookshelf Effectively?
Apply textures using the Material and Color properties in Roblox Studio. Choose wood or paint textures to make the bookshelf look realistic. Experiment with different finishes for a unique appearance.
Conclusion
Creating a bookshelf in Roblox Studio is simple and fun. Follow the steps carefully to build your design. Practice helps you improve your skills each time. Use the tools in Roblox Studio to customize your shelf. Share your creation with friends or in your games.
Building objects like this makes your Roblox world unique. Keep experimenting to learn more and enjoy the process. You can create many cool items with these basic skills. Start building now and see what you can make!
