
Are you looking to add charm and extra storage to your living space? Building a built-in bookshelf might be the perfect project for you.
Imagine having a custom bookshelf that fits your wall perfectly, showcasing your favorite books and decor just the way you want. It’s easier than you think, and you don’t need to be a professional carpenter. In this guide, you’ll discover simple, step-by-step instructions that anyone can follow.
By the end, you’ll have the skills to create a beautiful, sturdy built-in bookshelf that transforms your room and highlights your style. Ready to get started? Let’s dive in!
Credit: gagemadehome.com
Planning Your Bookshelf
Planning your built-in bookshelf is the first step to a successful project. Thoughtful planning saves time and money. It helps you avoid mistakes and ensures the bookshelf fits perfectly. This section guides you through key planning steps.
Choosing The Location
Pick a spot that suits your room’s style and use. Consider walls with enough space and no obstructions. Think about lighting to highlight your books and decor. Avoid places near heat or moisture. Choose a wall that can support the shelf weight.
Measuring Space Accurately
Use a tape measure for precise dimensions. Measure height, width, and depth of the chosen wall. Note any baseboards, trim, or outlets that might affect the shelf. Double-check your numbers to prevent errors. Accurate measurement ensures a perfect fit.
Selecting Materials
Choose strong, durable wood for long-lasting shelves. Pine is affordable; hardwoods like oak offer more strength. Select plywood for backing to keep shelves stable. Pick finishes that match your room’s style. Consider paint or stain for a polished look.
Designing The Bookshelf
Designing a built-in bookshelf is the first step in creating a beautiful and functional piece. Good design helps the bookshelf fit perfectly in your space. It also makes sure the shelf holds all your books and looks great.
Consider the room’s size and style before starting. Think about what you want to store and how you want the shelf to look. Planning well saves time and effort later.
Deciding On Size And Shape
Measure the wall space where the bookshelf will go. Think about the height, width, and depth you need. Make sure the shelf fits without crowding the room. Choose a shape that matches the wall and room layout. Rectangular shelves are common, but L-shapes or corner shelves can save space.
Incorporating Style Elements
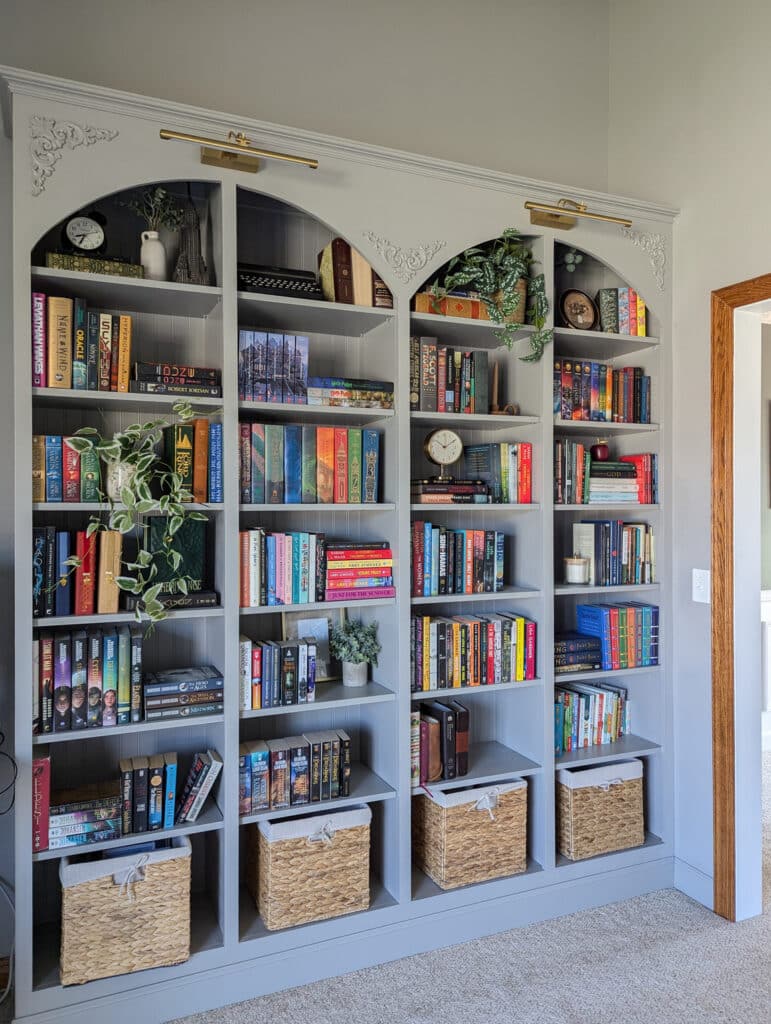
Pick a style that matches your home. Simple shelves suit modern rooms, while detailed woodwork fits traditional spaces. Add crown molding or trim for a polished look. Choose colors and finishes that blend with the walls and furniture. The shelf should feel like part of the room, not an extra piece.
Creating A Sketch Or Blueprint
Draw a sketch of your bookshelf design. Include all measurements and details. Use graph paper or a digital tool for accuracy. A clear blueprint helps avoid mistakes during construction. Share your plan with a carpenter if you hire one. A good plan makes building faster and easier.
Gathering Tools And Supplies
Before starting your built-in bookshelf project, gather all needed tools and supplies. Having everything ready helps the work go smoothly. It also saves time and avoids interruptions.
Organize your tools and materials in one place. Check each item to ensure it works well and is in good condition. This step makes building easier and more enjoyable.
Essential Tools List
- Measuring tape for accurate dimensions
- Level to keep shelves straight
- Power drill for drilling holes and screws
- Stud finder to locate wall studs
- Circular saw or handsaw to cut wood
- Screwdriver for securing screws
- Clamps to hold pieces in place
- Sandpaper or electric sander for smooth surfaces
- Pencil for marking measurements
Materials Checklist
- Wood boards for shelves and sides
- Plywood for backing
- Wood screws or nails
- Wood glue for strong joints
- Paint or stain for finishing
- Primer if painting
- Wood filler to cover holes
- Trim or molding for edges
Safety Equipment
- Safety glasses to protect eyes
- Ear protection from loud tools
- Dust mask to avoid inhaling sawdust
- Work gloves to protect hands
- Proper footwear for sturdy footing

Credit: southernyankeediy.com
Preparing The Space
Preparing the space is the first step to build a sturdy built-in bookshelf. This stage helps create a clean and safe work area. It also ensures the bookshelf fits perfectly and lasts long. Careful preparation saves time and avoids mistakes during installation.
Clearing The Area
Remove all furniture and items near the wall. Clear enough space to move freely and work easily. Cover the floor with a drop cloth or old sheets. This protects the floor from dust and paint. A clean area reduces accidents and helps you focus.
Wall Inspection And Repairs
Check the wall for holes, cracks, or damp spots. Use a flashlight to see small defects clearly. Fill holes and cracks with spackle or wall filler. Let the repairs dry completely before moving on. A smooth wall makes the bookshelf secure and neat.
Marking Measurements
Measure the height, width, and depth of the space carefully. Use a pencil and level to mark the bookshelf outline on the wall. Double-check all measurements to avoid errors. Clear, accurate marks guide the cutting and assembly steps. Marking well ensures the bookshelf fits perfectly.
Building The Frame
Building the frame is the first big step in making a built-in bookshelf. It forms the strong base that holds the shelves and books. A solid frame keeps the bookshelf steady and safe. Follow these steps to create a perfect frame for your project.
Cutting Wood Pieces
Start by measuring the space where the bookshelf will go. Cut the wood pieces to fit this space exactly. Use a saw to make clean, straight cuts. Cut the vertical sides, top, bottom, and shelf supports carefully. Label each piece to avoid confusion later.
Assembling The Frame
Lay the cut wood pieces flat on the floor. Join the vertical sides with the top and bottom pieces. Use wood glue and screws to hold them tightly. Check that the corners are square with a carpenter’s square. Add shelf supports inside the frame for strength.
Securing The Frame To The Wall
Place the frame in the chosen space. Find the wall studs with a stud finder. Drill pilot holes through the frame into the studs. Use long screws to attach the frame firmly to the wall. Make sure the frame is level and does not wobble.
Adding Shelves
Adding shelves is the key to creating a functional built-in bookshelf. Shelves hold your books and decor. Proper installation ensures strength and durability. Follow these steps to add shelves that fit perfectly and stay secure.
Measuring And Cutting Shelves
Start by measuring the width and depth of the bookshelf frame. Write down exact numbers for each shelf. Use a pencil and tape measure for accuracy. Choose wood that matches the frame. Cut each shelf piece to size using a saw. Smooth edges with sandpaper to avoid splinters. Double-check measurements before cutting to prevent mistakes.
Installing Shelf Supports
Shelf supports hold the shelves in place. Mark support locations inside the frame evenly. Use a level to keep supports straight. Drill pilot holes for screws to avoid splitting the wood. Attach supports with screws, making sure they are secure. Choose supports that match the shelf size and weight. Proper placement prevents shelves from sagging or falling.
Attaching Shelves
Place each shelf on the installed supports. Check that the shelf fits snugly without gaps. Secure shelves by screwing through the supports into the shelf bottom. Use screws that do not poke through the top. Tighten screws just enough to hold the shelf firmly. Test each shelf by pressing down gently. Firm shelves mean a sturdy, safe bookshelf ready to use.
Finishing Touches
Finishing touches make your built-in bookshelf look complete and polished. These final steps improve the shelf’s appearance and protect the wood. Take time to do each step carefully for the best results.
Sanding And Smoothing
Start by sanding all surfaces with fine-grit sandpaper. This removes rough spots and splinters. Sand edges and corners gently to avoid damage. Wipe away dust with a damp cloth before moving on. Smooth surfaces help paint or stain stick better.
Painting Or Staining
Choose paint or stain that matches your room’s style. Paint covers the wood completely, offering many color options. Stain shows the wood grain and adds warmth. Apply thin, even coats using a brush or roller. Let each coat dry fully before applying the next.
Adding Trim And Molding
Add trim or molding to give the bookshelf a custom look. Use simple styles for a clean, modern feel. Crown molding adds elegance at the top edge. Nail trim carefully and fill holes with wood filler. Paint or stain the trim to match the bookshelf.
:max_bytes(150000):strip_icc()/thriftydecorchick-e4f3bfb2a88140acb676263aad4edecd.jpg)
Credit: www.thespruce.com
Maintaining Your Bookshelf
Maintaining your built-in bookshelf keeps it looking great and lasting longer. Regular care prevents damage and keeps shelves sturdy. Simple steps help you enjoy your bookshelf every day.
Regular Cleaning Tips
Dust your bookshelf weekly with a soft cloth. Avoid wet cleaning to protect the wood finish. Use a small brush to clean corners and edges. Clear clutter to stop dust buildup. Keep books and items neat to make cleaning easy.
Handling Repairs
Check your bookshelf for loose screws or nails often. Tighten any loose parts with a screwdriver. Fix small scratches with wood filler or touch-up markers. Replace damaged shelves if needed to avoid accidents. Act fast on repairs to keep the shelf safe and strong.
Updating Shelf Layout
Change your shelf layout to fit new books or decorations. Move shelves up or down to match item size. Mix books with decor to create a fresh look. Keep heavier items on lower shelves for safety. Regular updates keep your bookshelf functional and stylish.
Frequently Asked Questions
What Materials Are Needed To Build A Built-in Bookshelf?
You need plywood, wood screws, wood glue, paint, sandpaper, a saw, and a drill. Measuring tape and a level are essential for accuracy. Choose quality wood for durability and aesthetics.
How Long Does It Take To Build A Built-in Bookshelf?
Typically, it takes 1 to 3 days depending on size and complexity. Preparation and drying time for paint or stain affect the total duration. Experience level also influences the speed of the project.
Can I Customize The Size Of A Built-in Bookshelf?
Yes, built-in bookshelves are highly customizable. You can adjust height, width, and depth to fit your space. Custom shelves accommodate different book sizes and decorative items, enhancing functionality and style.
How Do I Ensure My Built-in Bookshelf Is Sturdy?
Use quality wood and secure shelves with strong brackets or screws. Attach the bookshelf firmly to wall studs for added stability. Proper assembly and reinforcing joints prevent wobbling and sagging.
Conclusion
Building a built-in bookshelf adds charm and storage to any room. It takes some planning, but the process is simple. Measure your space carefully and choose the right materials. Step by step, you can create a sturdy and beautiful shelf.
This project saves money compared to buying ready-made units. Plus, it fits perfectly in your home. Enjoy organizing your books and decorations in style. Start your project today and see the difference it makes!