Do you want to give your dolls a cozy, fun place to sleep? Making a bunk bed for your dolls is easier than you think.
Imagine your dolls having their own little bunk bed, just like you do! In this guide, you’ll learn simple steps and clever tips to create a sturdy, stylish bunk bed that your dolls will love. Ready to make playtime even better?
Keep reading to find out how you can build this cool project yourself!
Materials Needed
Gathering the right materials is the first step in making a bunk bed for your dolls. Choosing proper wood, tools, and supplies ensures the bed will be sturdy and safe. Planning your materials helps avoid delays during the project. Below, find a clear list of what you need for this fun craft.
Wood Types And Sizes
Choose lightweight wood like pine or balsa. These woods are easy to cut and sand. Use wood pieces about 1 inch thick for strong support. Cut longer pieces for bed frames and shorter ones for slats. Smooth wood works best for doll furniture.
Tools Required
Prepare a small saw for cutting wood to size. A hammer helps with nailing parts together. Use a screwdriver if screws are part of your design. Sandpaper smooths rough edges. A ruler and pencil mark measurements clearly.
Additional Supplies
Get wood glue for extra strength between joints. Small nails or screws hold the frame tightly. Paint or wood stain adds color and style. Soft fabric or foam can create comfy doll mattresses. Clamps keep pieces steady while drying.
Planning Your Design
Planning your design is the first step to building a great bunk bed for your dolls. Careful planning saves time and materials. It also makes sure the bed fits your dolls perfectly. Take your time to think about size, shape, and style before starting.
Measuring Doll Dimensions
Measure your dolls carefully. Note their height, width, and length. Use a ruler or tape measure for accuracy. These numbers guide the size of the bed. Make sure the bed is a bit bigger than your dolls. This gives them room to lie comfortably.
Sketching The Frame
Draw a simple sketch of the bunk bed frame. Include the top and bottom bunks. Mark where the ladders and rails will go. Use your measurements to keep the sketch to scale. A clear sketch helps avoid mistakes during building.
Choosing A Style
Pick a style that matches your dolls and room. Classic, modern, or themed styles work well. Think about colors and shapes that look nice. Choose a design that is safe and sturdy. Style should balance looks and function.
Cutting The Wood
Cutting the wood is a key step in building a bunk bed for your dolls. This step shapes the pieces that will come together as the frame. Precise cutting ensures the bed is sturdy and fits well. Take your time to cut each piece carefully. The right tools and clear measurements make the process smoother.
Safety Tips
Wear safety goggles to protect your eyes from sawdust. Use gloves to keep your hands safe. Always cut on a stable surface. Keep your fingers away from the saw blade. Work slowly and focus on each cut to avoid accidents.
Marking Measurements
Measure the wood pieces with a tape measure or ruler. Use a pencil to mark where to cut. Double-check each mark before cutting. Clear and accurate marks help make straight cuts. Mark all pieces before starting to cut for better flow.
Making Precise Cuts
Use a saw that fits the size of your wood. Follow your pencil marks carefully while cutting. Keep the saw steady for clean edges. Cut one piece at a time for better control. Smooth rough edges with sandpaper after cutting for safety and neatness.

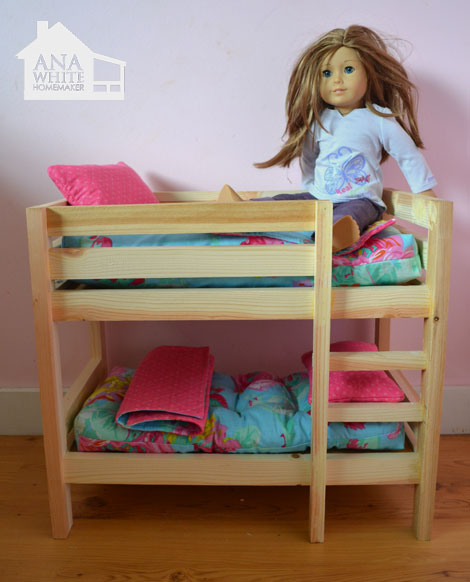
Credit: www.ana-white.com
Assembling The Frame
Assembling the frame is the key step in making a bunk bed for your dolls. This part gives the bed its shape and strength. A strong frame keeps the bed steady and safe for play. Follow each step carefully. Take your time to ensure all pieces fit well. A well-built frame makes the entire bed last longer.
Building The Base
Start by creating the base of the bunk bed. Use four sturdy wooden pieces for the corners. Join them to form a rectangle. Make sure the corners meet at right angles. Use wood glue and small nails or screws. Check that the base is flat and even. This base will hold the mattress and the whole bed.
Attaching The Side Rails
Next, attach the side rails to the base. These rails keep the mattress from falling out. Measure the length of the base sides carefully. Cut the rails to fit perfectly. Fix them to the base using screws or nails. Tighten all screws to keep the rails steady. The rails should be strong but not too high.
Adding Support Slats
Now, add support slats across the base. These slats hold the mattress and add strength. Cut thin wooden strips to fit inside the frame. Space them evenly from one side to the other. Nail or screw each slat firmly in place. Make sure the slats are secure and do not wobble. Good support slats help the bed hold weight without bending.
Creating The Ladder
Creating a ladder for your doll’s bunk bed is a fun and important step. The ladder helps your dolls climb safely. It also adds charm to the bed design. This section explains how to design, cut, and attach the ladder. Follow these simple steps to make a sturdy ladder.
Design Options
Choose a ladder style that fits your doll bed size. A straight ladder is easy to build and looks neat. You can also try a small step ladder for a unique look. Think about the ladder width. It should be wide enough for your doll’s feet. Decide the number of steps based on the bed height. Keep the design simple for easy assembly.
Cutting And Assembly
Use lightweight wood or sturdy cardboard for the ladder parts. Cut two long side rails to match the bed height. Cut small pieces for the steps. Make sure all steps are the same length. Sand the edges gently to avoid splinters. Attach each step evenly between the side rails. Use glue or small nails to fix the steps. Let the glue dry well before moving on.
Securing The Ladder
Attach the ladder firmly to the bunk bed frame. Use screws or strong glue for a secure hold. Place the ladder at an angle for easy climbing. Check the ladder stability by gently pressing on it. Add extra support if the ladder feels loose. Your doll’s safety depends on a well-secured ladder.
Sanding And Finishing
Sanding and finishing are key steps to make your doll’s bunk bed safe and beautiful. Sanding removes rough spots and splinters. Finishing protects the wood and adds color. These steps improve the look and feel of the bed. Follow each step carefully for the best results.
Smoothing Edges
Start by sanding all wood surfaces with fine-grit sandpaper. Focus on edges and corners to remove sharp bits. Sand along the grain to avoid scratches. Use a sanding block for flat areas. Wipe off dust with a dry cloth after sanding. Smooth edges keep the bed safe for play.
Painting And Staining
Choose paint or stain that is non-toxic and safe for children. Paint adds bright colors and fun styles. Stain shows the natural wood grain and adds warmth. Apply thin, even coats with a brush. Let each coat dry fully before adding the next. This helps the finish last longer.
Applying Protective Coats
Protective coats guard against wear and damage. Use clear varnish or sealant made for wood. Apply a thin coat with a clean brush. Allow it to dry completely before touching the bed. A second coat adds extra protection. This step keeps the bunk bed looking good for years.
Decorating The Bunk Bed
Decorating the bunk bed for your dolls is the fun part. It brings the bed to life and makes playtime special. Small details can make a big difference. Focus on comfort, style, and durability. Your dolls will feel right at home with the right touches.
Adding Mattresses And Bedding
Start by choosing soft mattresses that fit the bed perfectly. Use small pieces of foam or cotton wrapped in fabric. Pick bedding in bright colors or cute patterns. Tiny pillows and blankets add extra comfort. These details make the bed cozy and inviting.
Personalizing With Accessories
Accessories add personality to the bunk bed. Place small stuffed animals or dolls on the beds. Use miniature books or lamps for a realistic touch. Stickers or paint can decorate the bed frame. Small curtains or rugs bring warmth and style. Personal touches make the bed unique and fun.
Tips For Longevity
Choose strong glue or screws for better hold. Use fabrics that do not tear easily. Avoid heavy items that may break the bed. Store the bed in a dry, safe place. Regularly check for loose parts and fix them. These tips help the bunk bed last longer.
Credit: www.ana-white.com

Credit: www.youtube.com
Frequently Asked Questions
What Materials Are Needed To Make A Doll Bunk Bed?
You need small wooden planks, nails, glue, sandpaper, paint, and fabric for mattresses. These materials are easy to find and safe for crafting.
How Long Does It Take To Build A Doll Bunk Bed?
Building a doll bunk bed typically takes 2 to 4 hours. This depends on your skill level and drying time for glue and paint.
Can I Customize The Bunk Bed For Different Doll Sizes?
Yes, you can adjust dimensions to fit various doll sizes. Measure your dolls first and cut materials accordingly for a perfect fit.
What Tools Are Essential For Making A Doll Bunk Bed?
Basic tools like a small saw, hammer, paintbrush, and measuring tape are essential. These tools help ensure precise cuts and assembly.
Conclusion
Building a bunk bed for your dolls can be fun and simple. You only need a few materials and some patience. Follow the steps carefully, and your dolls will have a cozy new bed in no time. Making it yourself saves money and lets you customize the design.
Kids love playing with handmade doll furniture. Try it today and enjoy the creative process. A small project with a big reward.