Are you dreaming of adding extra sleeping space to your camper without spending a fortune? Building a bunk bed inside your camper is a smart and practical way to make room for family or friends.
Imagine having a cozy, space-saving bed ready whenever you need it—giving everyone a comfortable place to rest after a day of adventure. In this guide, you’ll discover simple steps to create a sturdy, safe bunk bed that fits perfectly in your camper.
Keep reading, and you’ll soon have a personalized bunk bed that transforms your camper into a more comfortable and inviting space.
Planning Your Bunk Bed
Planning your bunk bed in a camper is the first step to a successful build. Careful planning saves time and avoids mistakes. It helps you use space well and keeps the design safe and comfortable. Focus on three key areas: measuring camper space, choosing bed dimensions, and selecting materials.
Measuring Camper Space
Start by measuring the area where the bunk bed will go. Use a tape measure for accuracy. Measure length, width, and height. Note any windows, doors, or vents nearby. These details affect bed placement. Make a simple sketch with measurements. This helps visualize the space and plan the bed size.
Choosing Bed Dimensions
Pick bed dimensions that fit your camper space. Standard bunk beds are usually 75 inches long and 39 inches wide. Adjust size to fit your camper’s layout. Keep enough room for walking and storage. Also, consider the height between bunks to avoid head bumps. Make sure the bed size suits the users’ comfort and safety.
Selecting Materials
Choose materials that are light but strong. Wood like pine or plywood works well. It is easy to cut and fix. Avoid heavy metals that add weight to the camper. Look for moisture-resistant materials to prevent damage. Use screws and brackets for a sturdy build. Proper materials ensure the bed lasts long and stays safe.
Credit: www.rv.com
Gathering Tools And Supplies
Building a bunk bed in a camper needs careful planning. Gathering the right tools and supplies saves time and effort. It also ensures your bunk bed is safe and sturdy. This step is crucial before starting any cutting or assembling. Having everything ready helps the project go smoothly and reduces frustration.
Essential Tools List
Start with a good drill for screws and holes. A saw is needed to cut wood pieces to size. Use a measuring tape for accurate dimensions. A level helps keep the bed frame straight and balanced. Screwdrivers are important for tightening screws securely. Sandpaper smooths rough edges and prevents splinters. Clamps hold pieces steady while gluing or screwing. Safety gear like gloves and goggles protect your hands and eyes.
Material Preparation Tips
Choose wood that fits your camper’s size and style. Cut all pieces before assembling to save time later. Sand each piece well to avoid rough surfaces. Label pieces to remember where each one fits. Check all screws and nails to ensure they are the right size. Organize materials in one area for easy access. Clean your workspace to keep it safe and efficient.
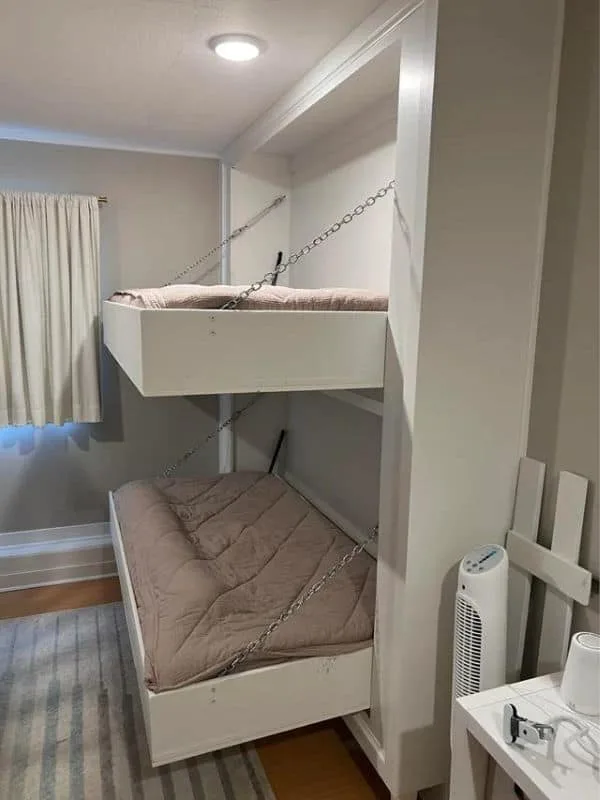
Building The Bed Frame
Building the bed frame is the first key step to make a bunk bed in your camper. A strong frame will hold the mattress safely and support weight well. You will need some basic tools and wood to create a simple but sturdy frame. Careful measuring and cutting ensure the frame fits your camper space perfectly.
Follow the steps below to cut, assemble, and secure the wood pieces. This process creates the main structure of your bunk bed.
Cutting Wood Pieces
Start by measuring the camper space for the bunk bed. Note the length, width, and height available. Use these measurements to mark the wood pieces. Cut the wood with a saw, keeping edges straight and smooth. Typical pieces include side rails, end rails, slats, and support beams. Label each piece to avoid confusion during assembly.
Assembling The Frame
Lay out all cut pieces on a flat surface. Begin by connecting the side rails to the end rails, forming a rectangle. Use wood screws or bolts for strong connections. Add support beams inside the frame for extra strength. Place slats evenly across the frame to hold the mattress. Check that the frame is square and all parts fit tightly together.
Securing Joints
Reinforce all joints with corner brackets or metal plates. This step prevents wobbling and adds durability. Tighten all screws firmly but avoid splitting the wood. Sand any rough edges near joints to avoid splinters. Test the frame by applying pressure to ensure it feels stable. Secure the frame to the camper walls if possible for extra safety.

Credit: thetouringcamper.com
Installing Safety Features
Installing safety features in a camper bunk bed is very important. Safety keeps everyone secure during travel and sleep. It helps prevent falls and injuries. Simple safety steps can make the bunk bed safe and strong.
Focus on three main parts: guardrails, ladder, and stability. Each part adds protection and support. Take time to do these well for a safe bunk bed.
Adding Guardrails
Guardrails stop sleepers from falling out. Use wood or metal rails that are strong and smooth. Fix rails on the sides of the top bunk. Make sure the rails cover the whole side. Leave no big gaps where a child could slip through. The guardrails should be at least 5 inches above the mattress.
Constructing Ladder
A sturdy ladder gives safe access to the top bunk. Use thick wood or metal for the ladder steps. Space the steps evenly for easy climbing. Attach the ladder securely to the bed frame. Check that the ladder does not move or wobble. Add non-slip tape or pads on the steps for extra grip.
Ensuring Stability
Stability keeps the bunk bed from shaking or tipping. Use strong screws and bolts to join all parts tightly. Add extra support beams under the bed frame. Place the bunk bed on a flat surface inside the camper. Test the bed by pushing and shaking gently. Fix any loose parts before use.
Finishing Touches
Finishing touches complete your camper bunk bed project. These small steps make it safe, comfy, and stylish. They also add personal charm to your space. Focus on smoothing surfaces, adding bedding, and creating storage.
Sanding And Painting
Sanding removes rough spots and splinters. Use fine-grit sandpaper for a smooth finish. Clean dust with a damp cloth. Choose paint or stain that suits your camper’s style. Paint adds color and protects the wood from moisture. Use non-toxic, low-odor paint for indoor safety. Apply two coats for lasting coverage. Let each coat dry fully before the next.
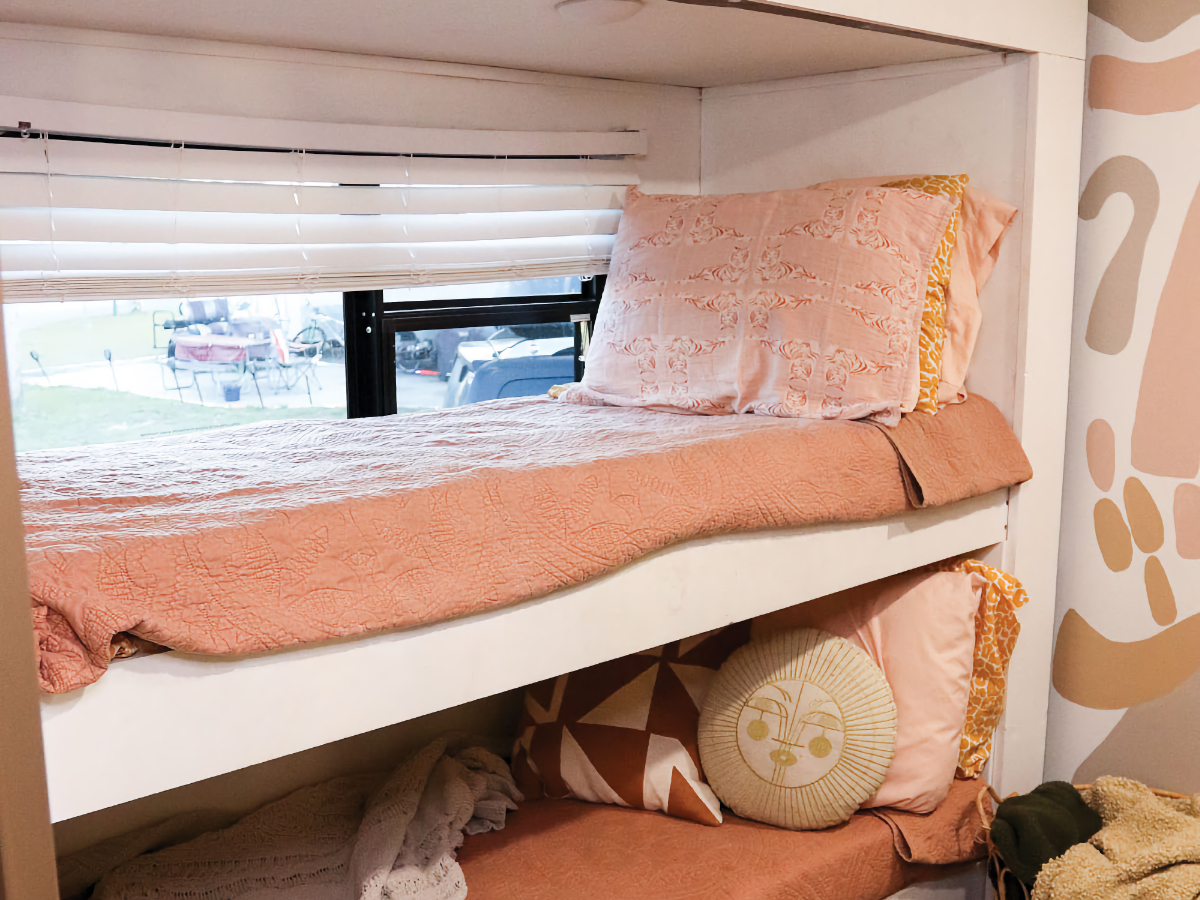
Adding Mattresses And Bedding
Choose mattresses that fit your bunk bed perfectly. Foam mattresses work well in small spaces. They are lightweight and comfortable. Add cozy bedding with washable covers. Pick bright colors or patterns to brighten your camper. Pillows and blankets make the space inviting. Keep bedding simple for easy cleaning on the road.
Maximizing Storage
Storage saves space in your camper. Use under-bed bins for clothes or gear. Install small shelves on walls near the bunk. Hooks are great for hanging bags or jackets. Use clear containers to see contents quickly. Label boxes for easy finding. Keep essentials close but organized to avoid clutter.
Credit: everywherewithclaire.com
Maintenance And Tips
Keeping your camper bunk bed in good shape makes your trips safer and more comfortable. Regular care helps avoid damage and keeps the bed sturdy. Small efforts save big repair costs later.
Regular Inspections
Check all screws and bolts often. Tighten any loose parts to keep the bed stable. Look for cracks or splinters in the wood. Fix or replace broken pieces quickly. Test the bed’s strength before each trip to avoid accidents.
Space-saving Hacks
Use storage bins under the bottom bunk for extra space. Hang small bags or nets on the bed frame for toys or books. Fold bedding and pillows during the day to free up room. Choose thin mattresses to increase headspace and comfort.
Adapting For Different Campers
Measure your camper’s space before building or adjusting the bunk bed. Customize the bed size to fit narrow or tall campers. Use lightweight materials for easy setup and travel. Make sure the bed fits doorways and storage areas easily.
Frequently Asked Questions
How Do I Build A Sturdy Bunk Bed In A Camper?
Use lightweight, durable wood like plywood or pine. Measure space carefully. Secure frames with metal brackets and screws. Add guardrails and strong supports for safety. Ensure the bed is firmly anchored to camper walls.
What Tools Are Needed To Make Camper Bunk Beds?
You’ll need a drill, saw, measuring tape, screwdriver, level, and sander. Safety gear like gloves and goggles is essential. These tools help cut, assemble, and secure the bunk bed frame accurately and safely.
How Can I Maximize Space With Camper Bunk Beds?
Build bunk beds along one wall to free floor space. Use vertical storage underneath or beside the beds. Opt for slim mattresses and foldable ladders. This design keeps the camper spacious and functional.
Are Camper Bunk Beds Safe For Children?
Yes, if built with sturdy materials and proper guardrails. Ensure mattress fits snugly to prevent gaps. Anchor beds securely to prevent tipping. Always supervise young children while using the bunk beds.
Conclusion
Building a bunk bed in your camper saves space and adds comfort. It makes traveling with family or friends easier and more fun. You can choose materials and sizes that fit your camper well. Simple tools and steps help you create a sturdy bed.
Take your time and measure carefully for safety. Enjoy the extra sleeping area on your next trip. This small project can make a big difference in your camper life. Ready to build? Start planning today!