Are you looking to save space and add a fun touch to your home? Making a bunk bed out of wood might be the perfect project for you.
Imagine creating a sturdy, stylish bed that fits your exact needs and style. It’s easier than you think, and you’ll get the satisfaction of building something with your own hands. In this guide, you’ll discover simple steps and helpful tips to turn raw wood into a cozy bunk bed your family will love.
Ready to transform your space and boost your DIY skills? Keep reading, and let’s get started!

Credit: www.simplyhandmadestudios.com
Materials And Tools Needed
Building a bunk bed from wood starts with gathering the right materials and tools. This step ensures your project is safe, sturdy, and looks great. Knowing what wood and tools to use saves time and effort.
Below are the key materials and tools needed to create a strong wooden bunk bed. Follow this list closely to get ready for your woodworking project.
Choosing The Right Wood
Select wood that is strong and durable. Pine, oak, and maple are good choices. Pine is affordable and easy to work with. Oak and maple are harder and last longer. Avoid soft woods that may bend or break easily. Use wood that is smooth or sand it well before building. Make sure the wood is dry to prevent warping.
Essential Tools List
You will need a saw to cut wood pieces. A drill helps to make holes and secure screws. Sandpaper or a sander smooths the surfaces. A measuring tape and square keep your cuts accurate. Clamps hold pieces tight while assembling. A screwdriver is needed for screws. A pencil and level help mark and check alignment.
Safety Gear
Protect yourself with safety gear during the build. Wear safety goggles to guard your eyes from dust and splinters. Use ear protection to reduce noise from power tools. Gloves protect your hands from cuts and splinters. A dust mask keeps sawdust out of your lungs. Work in a well-ventilated area to avoid breathing dust.
Designing Your Bunk Bed
Designing your bunk bed is the first step in building a sturdy, safe piece of furniture. Good design ensures the bed fits well in your space and meets your needs. Planning carefully saves time and materials later.
Think about the room size and how the bed will be used. Safety and comfort are important. A clear design helps you build with confidence.
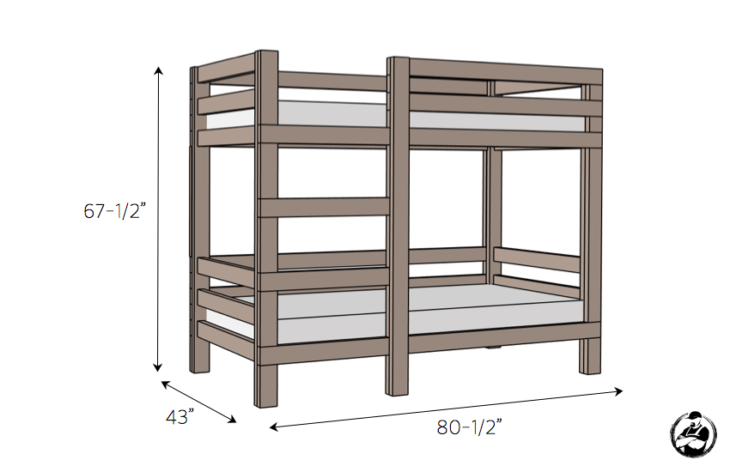
Measuring Space And Dimensions
Start by measuring the room where the bunk bed will go. Note the length, width, and height. Check for any obstacles like doors or windows nearby. Make sure there is enough space to move around the bed.
Decide on the mattress size, such as twin or full. This affects the bed’s overall size. Leave extra room for the frame and guardrails. Measure ceiling height to allow space above the top bunk for sitting up.
Basic Bunk Bed Plans
Look at simple bunk bed plans to understand the structure. Most designs include four posts, guardrails, and a ladder. The bottom bunk usually sits close to the floor. The top bunk needs secure rails for safety.
Use basic plans as a guide. They show how to join pieces and support weight. Clear plans help avoid mistakes and keep the build strong.
Customizing Your Design
Think about how to make the bunk bed your own. Add shelves or storage under the bed. Choose the wood type and finish to match your room.
Change the ladder style or add a slide for fun. Customize guardrails for extra safety or style. Small changes make a big difference in the final look and function.
Preparing The Wood
Preparing the wood is the first important step in making a bunk bed. It helps ensure the wood pieces fit well and are safe to use. Proper preparation makes the building process smooth and the final bed strong.
Start by cutting the wood to the right size. Next, smooth all surfaces carefully. Finally, pre-drill holes to avoid wood splitting during assembly.
Cutting To Size
Measure each piece carefully before cutting. Use a saw to cut wood according to your bunk bed plan. Make straight cuts to ensure the pieces fit together tightly. Check each cut piece against your measurements. Accurate cuts save time and reduce waste.
Sanding And Smoothing
Sand all cut edges and surfaces with sandpaper. This removes splinters and rough spots. Smooth wood feels better and is safer to touch. Use a sanding block or electric sander for even results. Wipe dust off after sanding to keep the surface clean.
Pre-drilling Holes
Mark where screws will go before drilling. Use a drill bit smaller than the screw size. Pre-drilling stops wood from cracking or splitting. It also makes screwing easier and faster. Drill straight holes to keep the pieces aligned.
Credit: rogueengineer.com
Building The Frame
Building the frame is the first big step in making a wooden bunk bed. The frame holds everything together and keeps the bed strong. It must be sturdy and safe for use. Start with clear plans and good wood. Measure twice, cut once.
Work carefully and take your time. A solid frame means a safe bunk bed. Let’s break down the frame building into simple parts.
Constructing The Bed Sides
Cut four long wooden boards for the sides. These boards form the length of the bed. Sand the edges smooth to avoid splinters. Attach two vertical posts at each end. These posts will support the bed’s height. Use screws and wood glue for strong joints.
Check that both sides are the same length. Keep the sides straight and flat.
Assembling The Head And Foot Boards
Next, prepare the head and foot boards. Cut shorter boards for these parts. They connect the two bed sides. Add vertical posts to match the bed’s height. Make sure the boards are sturdy to hold the mattress ends. Attach slats or panels for extra support and style.
Sand all surfaces to remove rough spots.
Joining Frame Components
Now join the bed sides with the head and foot boards. Align all corners carefully. Use screws and wood glue for secure joints. Add corner braces for extra strength. Double-check that the frame is square. Measure the diagonals; they should match.
Tighten all connections well. The frame must not wobble or shift.
Adding Safety Features
Safety is very important when building a wooden bunk bed. Adding safety features helps prevent accidents. It keeps children safe while they sleep or play. You want the bed to be strong and secure. Small steps can make a big difference in safety.
Installing Guardrails
Guardrails stop sleepers from falling off the top bunk. Use sturdy wood for the rails. The rails should be high enough to block any fall. Attach the guardrails tightly to the bed frame. Check the space between rails is small. This stops children from slipping through.
Securing The Ladder
The ladder must be firmly fixed to the bed. Loose ladders can cause falls and injuries. Use screws and brackets to hold it in place. Make sure the steps are wide and flat. This gives better grip when climbing up or down. Test the ladder’s strength before use.
Checking Stability
Check the whole bed for wobbling or movement. Push gently on different parts of the bed. Tighten all screws and bolts if you find any loose parts. The bed should not shake or rock. A stable bed is safer and lasts longer. Stability keeps everyone safe during sleep and play.
Finishing Touches
Finishing touches make your wooden bunk bed look complete and last longer. They protect the wood and add a nice style. This step is important for safety and comfort. Take your time to do it well.
Painting Or Staining
Choose paint or stain to change the color of your bunk bed. Paint covers the wood fully and hides marks. Stain shows the wood grain and gives a natural look. Use light coats and let each dry well before the next. Pick a color that fits the room’s style.
Sealing The Wood
Sealing protects the wood from water, dirt, and scratches. Use a clear sealant to keep the color bright. Apply with a brush or spray, covering all surfaces. Let it dry completely. This step helps the bed last many years and stay safe.
Adding Mattress And Bedding
Choose mattresses that fit the size of the bunk bed. Use firm mattresses for safety and comfort. Add soft bedding and pillows to make it cozy. Pick washable covers to keep the bed clean. Make the bed inviting for a good night’s sleep.
Maintenance Tips
Maintaining your wooden bunk bed keeps it safe and lasts longer. Regular care avoids damage and keeps the wood strong. Follow these simple tips to keep your bunk bed in good shape.
Regular Inspections
Check your bunk bed every few weeks. Look for cracks or splits in the wood. See if any parts feel loose or wobbly. Early spotting of problems prevents accidents. Inspect both the frame and the ladder carefully.
Tightening Screws
Screws and bolts can loosen over time. Use a screwdriver to tighten them regularly. Focus on joints where parts connect. Tight screws keep the bed stable and safe. Avoid over-tightening to prevent wood damage.
Cleaning Advice
Dust your bunk bed often with a soft cloth. Avoid using harsh chemicals or wet cloths. Use mild soap and water for sticky spots. Dry the wood fully after cleaning. Clean beds look good and avoid wood damage.
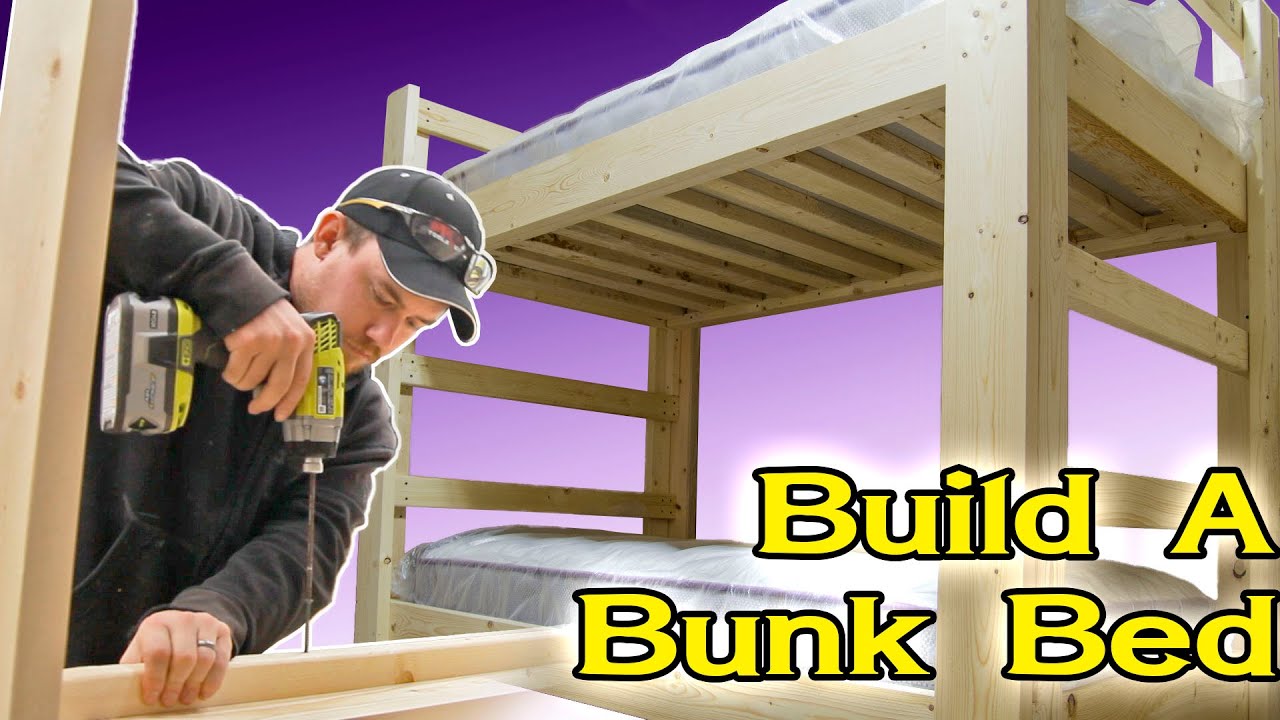
Credit: www.youtube.com
Frequently Asked Questions
What Wood Is Best For Building A Bunk Bed?
Pine and oak are popular for bunk beds. Pine is affordable and easy to work with. Oak offers strength and durability. Choose wood that supports weight safely and matches your room’s style.
How Do I Ensure Bunk Bed Safety?
Use sturdy wood and secure joints tightly. Add guardrails on the top bunk. Check weight limits and install a strong ladder. Regularly inspect for loose parts or damage to prevent accidents.
What Tools Are Needed To Build A Bunk Bed?
Essential tools include a saw, drill, measuring tape, screwdriver, and sander. Clamps and wood glue help with assembly. Having the right tools ensures accurate cuts and strong joints for a safe bunk bed.
How Long Does It Take To Build A Wooden Bunk Bed?
Building time varies by skill and design complexity. Generally, it takes 1-3 days for an average DIY project. Planning, cutting, assembling, and finishing all require careful time management for quality results.
Conclusion
Building a wooden bunk bed is a fun and useful project. You only need basic tools and some wood pieces. Follow each step carefully to stay safe and strong. Take your time to measure and cut right. Finish with sanding and painting for a smooth look.
This bunk bed saves space and adds charm to any room. Enjoy your new creation and the extra sleeping spots. Woodworking can be simple and rewarding. Try it yourself and see how much you can make.