Are you looking to save space and add a fun twist to your bedroom? Making a bunk bed using just one bed might sound tricky, but it’s easier than you think.
Imagine turning your single bed into a stylish, space-saving bunk that your kids will love or that gives your room a fresh new look. In this guide, you’ll discover simple steps and smart tips to create a bunk bed from your existing bed.
Keep reading, and by the end, you’ll have everything you need to build a cozy, practical bunk bed that fits perfectly in your space.
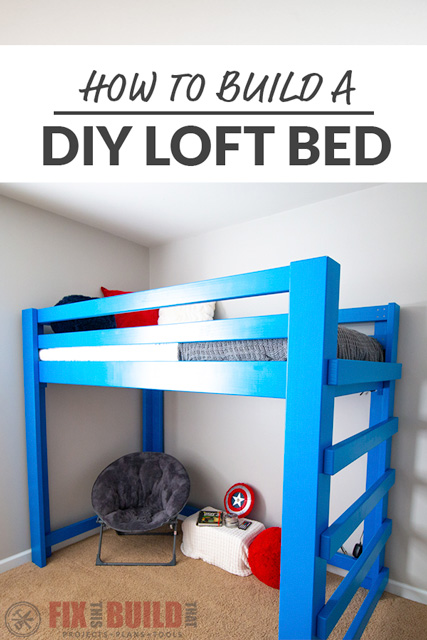
Credit: fixthisbuildthat.com
Materials And Tools Needed
Building a bunk bed with only one bed requires the right materials and tools. Choosing the correct wood and tools helps ensure a strong, safe, and lasting bed. Safety gear protects you during the building process.
This section covers the essential materials and tools to prepare before starting your project. Having everything ready makes the work smoother and faster.
Wood Types And Sizes
Select sturdy wood that can hold weight well. Pine is a common choice because it is strong and affordable. Oak or maple are harder woods but cost more.
Use 2x4s for the frame and supports. 1x4s can work for slats under the mattress. Cut wood pieces to fit the size of your bed.
Essential Tools
Gather tools to cut, join, and measure wood accurately. A saw is needed for cutting wood pieces. A drill helps make holes and insert screws.
Use a screwdriver or drill bit for driving screws. A tape measure and square ensure precise measurements. Sandpaper smooths rough edges.
Safety Gear
Wear safety glasses to protect your eyes from dust and wood chips. Use gloves to avoid splinters and cuts. A dust mask keeps you from breathing in sawdust.
Work in a clean, well-lit area to reduce accidents. Keep your tools organized to prevent trips or falls.

Credit: www.simplyhandmadestudios.com
Planning Your Bunk Bed Design
Planning your bunk bed design is the first step to create a safe and functional piece. It helps you use space well and build a bed that fits your needs. Good planning saves time and avoids mistakes during building.
Measuring Your Space
Start by measuring the room where the bunk bed will go. Measure the length, width, and height carefully. Note any obstacles like windows, doors, or heaters. Leave some space around the bed for easy movement. This helps you decide the best size for your bunk bed.
Choosing A Style
Think about the style that fits your room and needs. Do you want a simple design or something with storage? Some bunk beds have desks or shelves built in. Pick a style that matches the room’s look and your daily use. This makes the bed both useful and nice to see.
Sketching Your Plan
Draw a simple sketch of your bunk bed design on paper. Include measurements and details like ladder placement. This helps you visualize the final product. You can make changes on paper before starting to build. A clear plan makes building easier and faster.
Preparing The Bed Frame
Preparing the bed frame is the first step in making a bunk bed from one bed. This stage sets the base for a strong and safe bunk bed. It involves taking apart the current bed and checking each part carefully. Proper preparation helps avoid problems later and ensures the bed lasts long.
Disassembling The Existing Bed
Start by removing the mattress and bedding. Clear the area around the bed for easy movement. Use tools like a screwdriver or wrench to take the bed apart. Keep screws and bolts in a small container. Label parts to remember where they belong. Work slowly to prevent damage to the frame pieces.
Inspecting And Repairing Parts
Look over each piece of the frame carefully. Check for cracks, splits, or loose joints. Sand down rough edges to avoid splinters. Tighten any loose screws or bolts. Replace damaged parts to keep the bed strong. Clean the frame to remove dust and dirt before reassembling.

Credit: www.simplyhandmadestudios.com
Building The Frame Extension
Building the frame extension is a key step in making a bunk bed with one bed. This part creates the strong structure needed for safety and comfort. Start with careful planning and measuring to get perfect fits.
Use quality wood to ensure the frame lasts long. The frame has two parts: the lower frame and the upper frame. Both need precise work to hold the mattress and support weight.
Cutting Wood Pieces
Measure the bed size before cutting. Mark each piece clearly. Cut all wood pieces using a saw with smooth, even edges. Cut pieces for both lower and upper frames. Sand the edges to avoid splinters. Keep pieces organized by size and type.
Assembling The Lower Frame
Start by joining the side rails to the head and foot boards. Use screws and wood glue for strong joints. Check that the frame is square by measuring diagonally. Attach slats across the frame to hold the mattress. Ensure the slats are evenly spaced for good support.
Constructing The Upper Frame
Build the upper frame similar to the lower frame. Add extra support beams for safety. Make sure the frame fits securely on top of the lower one. Attach guardrails to prevent falls. Double-check all screws and joints before moving forward.
Adding Support And Safety Features
Adding support and safety features is important when making a bunk bed with one bed. These features help keep the bed strong and prevent accidents. Proper support makes the bed stable. Safety parts protect children from falls and injuries. Focus on guardrails, ladder security, and structure strength.
Installing Guardrails
Guardrails stop sleepers from falling off the top bunk. Use sturdy wood or metal for the rails. Attach them tightly to the bed frame. Make sure the rails are tall enough to protect but not block the view. Check for gaps where a child’s head or body could get stuck. Smooth all edges to avoid splinters or cuts.
Securing The Ladder
The ladder must be steady to prevent slips. Fix it firmly to the bed frame using screws or bolts. Test the ladder by applying weight before use. Choose wide steps with a rough surface for better grip. Position the ladder at a safe angle, not too steep or flat. This helps children climb up and down easily.
Reinforcing The Structure
Strong structure holds the bed safely in place. Use extra support beams under the mattress area. Connect all parts tightly with screws or brackets. Check corners and joints for strength. Add cross braces if the bed wobbles. Regularly inspect the bed for loose parts or damage.
Finishing Touches
Finishing touches make your bunk bed safe and beautiful. These steps help protect the wood and create a cozy space for sleeping. Take your time to complete each step carefully for the best results.
Sanding And Smoothing
Start by sanding all surfaces of the bunk bed. Use fine-grit sandpaper to smooth rough edges and corners. This prevents splinters and makes the bed safe for children. Wipe away dust with a clean cloth before moving to the next step.
Painting Or Staining
Choose paint or stain that fits your room style. Paint adds color and covers imperfections. Stain shows the natural wood grain and protects the surface. Apply thin, even coats and let each dry completely. This step helps the bed last longer and look better.
Adding Mattresses And Bedding
Select mattresses that fit your bunk bed size perfectly. Use comfortable and firm mattresses for safety. Add soft bedding and pillows to make the bed inviting. Keep bedding simple and easy to wash for convenience.
Maintenance Tips
Maintaining your bunk bed made from one bed is key to keeping it safe and durable. Regular care helps the bed last longer and stay sturdy. Small actions can prevent bigger problems later.
Regular Inspections
Check the bunk bed often for any damage or wear. Look at the frame, joints, and ladder closely. Find any cracks, bends, or loose parts early. Spotting problems early keeps the bed safe for use.
Tightening Screws
Loose screws can make the bed unstable. Use a screwdriver to tighten all screws every few weeks. Don’t forget the bolts and nuts too. Tight screws keep the bed strong and steady.
Cleaning Advice
Clean the bunk bed regularly to avoid dust buildup. Use a soft cloth and mild cleaner for wooden parts. Avoid harsh chemicals that can damage the finish. Clean beds look nice and last longer.
Frequently Asked Questions
How Do I Convert One Bed Into A Bunk Bed?
To convert one bed into a bunk bed, add a sturdy frame or platform above the existing bed. Use secure ladders and guardrails for safety. Ensure the upper bed is properly supported and stable.
What Materials Are Needed To Build A Bunk Bed?
You will need wood planks, screws, nails, a drill, saw, measuring tape, and safety gear. Choose strong, durable materials to ensure safety and longevity.
Is It Safe To Make A Bunk Bed From One Bed?
Yes, if built with proper support, safety rails, and a secure ladder. Always follow safety guidelines and check weight limits to prevent accidents.
How Much Space Do I Need For A Bunk Bed Setup?
You need enough vertical height to accommodate two beds safely. Measure ceiling height and leave at least 30 inches between beds for comfort.
Conclusion
Building a bunk bed from one bed saves space and adds fun. It takes some planning and basic tools to start. Follow the steps carefully for a safe and sturdy bed. You can customize the design to fit your room well.
This project helps you use your space smartly and creatively. Enjoy the new bed and the extra room it creates!